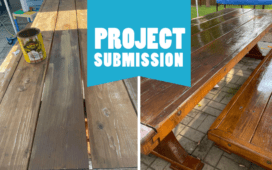
A Second Chance for Secondhand: A Guide to Giving Used Furniture a Complete Makeover (with Help from Valspar)
Buying used furniture is a bit of an art. It takes a practiced eye to know what’s well-built, has good lines, or simply isn’t worth your time and money. But it feels pretty awesome to find a diamond in the rough and turn it into a polished gem.
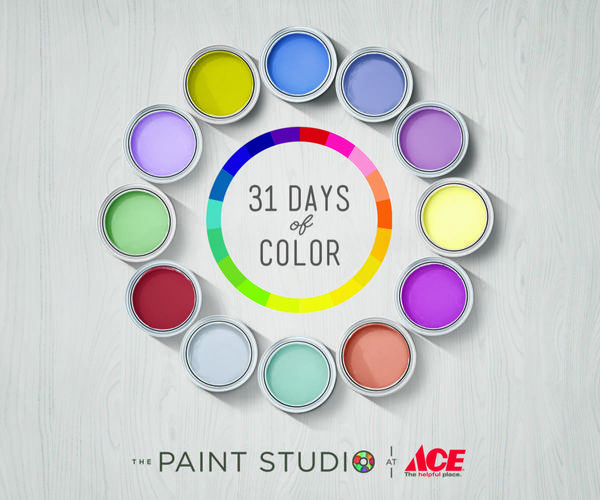
This month we got inspired by Ace Hardware’s 31 Days of Color and decided to bring you our Total Newbie’s Getting-Started Guide to Fixing Up Old Furniture. We’ll tell you what to look for in a used piece, how to spot something with great potential, and even walk you through the basics of a furniture makeover (including help choosing the right color).
About 31 Days of Color:
This March, Ace Hardware is encouraging homeowners to discover a new love for color through a month-long interactive paint experience called 31 Days of Color. Every day in March, Ace is unveiling a new “Color of the Day” selected from their exclusive Valspar and Clark + Kensington paint lines.
- Visit ThePaintStudio.com every day in March to uncover the Color of the Day from Ace’s exclusive Valspar® paint line, along with expert tips and inspiration.
- Plus, enter the 31 Days of Color Sweepstakes daily for a chance to win a $10,000 paint makeover and daily gift cards ranging up to $1000. NO PURCHASE NECESSARY. Ends 3/31/16. Official Rules.
Over and over again, we’ve found that a simple color change can drastically transform a room or piece of furniture. To show you what we mean; we went looking for a secondhand bench that just needed a fresh coat of carefully applied paint.
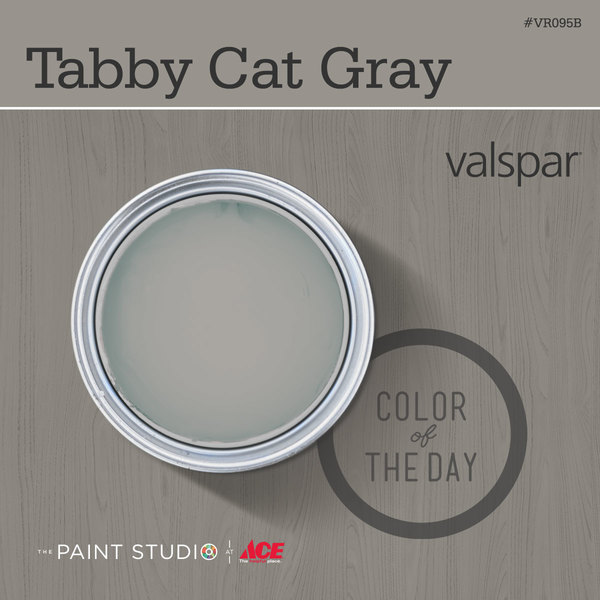
Our inspiration for this project was today’s Valspar color: Tabby Cat Gray. It’s a calm, subtle hue that we thought would bring a clean, modern touch to an old piece of neglected furniture.
What To Look For When Buying Secondhand Furniture
So, how do you know whether a piece of furniture is worth a bringing home? Use your five senses to assess the piece:
- Sight: First of, look at the color! Color is the most obvious characteristic, but it’s also an easy one to change. Sometimes a great piece will be hiding behind a really ugly color. Think about how a color change might affect the whole look (you can play around with color palette ideas at Valspar’s Paint Color Explorer)
Next, look at the condition of the surfaces. Are they deeply damaged, or just worn? Are there any details about who made it, and when? Look at the unfinished surfaces – undersides, backs, behind the drawers – to see if you can identify the manufacturer and year the piece was made.
- Touch: Assess the surfaces. What is the overall condition? If it’s beat up, can you determine what happened? Did a pet scratch the legs? Years of leaving glasses on the surface without coasters? Run your hands along the flat surfaces to discover any deep gouges, scratches, ripple patterns, etc.
Most importantly, what is the piece made of? Is it solid wood? Is it plywood? Is it real wood veneer over a substrate? If so, you can sand, paint, or refinish each of those. But if it’s a wood laminate, you probably want to skip it unless it’s a super good deal and looks really sharp. Those pieces won’t respond well to gluing, screwing, or painting.
- Hearing: Listening to the piece is one of the best ways to assess its condition. Grab the legs or the sides and put some force on the joints. Does it creak? Move or rack? Make a fist and pound the hard, flat surfaces with the side of your hand. Does it sounds like solid wood, or does it sound like particle board? Does it echo or reverberate?
- Smell: Seriously. This is going to go in your home, and that funky odor isn’t going to go away with a little sandpaper. Does it smell like stale smoke? Mildew or must? Cats? Can you live with bringing that smell in your house?
- Taste: Don’t lick it! But do think about how this piece will match your overall taste. Do you like it in the context where it is, or do you want it in your house? Can you simply appreciate the design, or do you also want to make it yours? Is it the right height for your style of furniture? Modern sofas and chairs tend to be much lower to the ground than traditional pieces. It’s it the right scale to fit with the pieces it will complement? If it’s a coffee table, is it both shorter than your couch cushions and less wide than your sofa? If it’s a dining table, will your chairs fit underneath?
How Much Should I Pay?
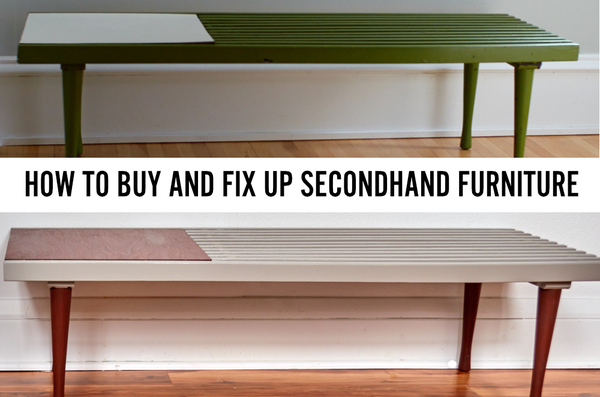
A Slat Bench Salvage
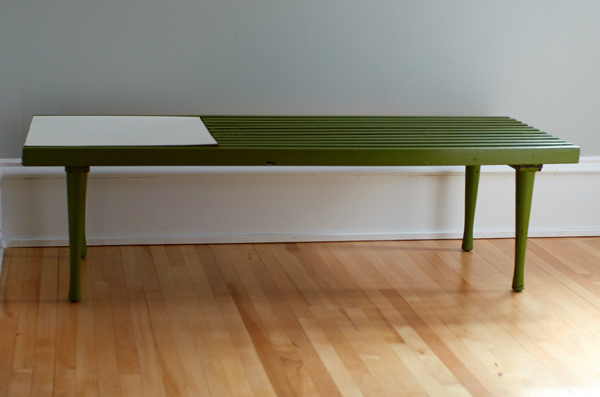
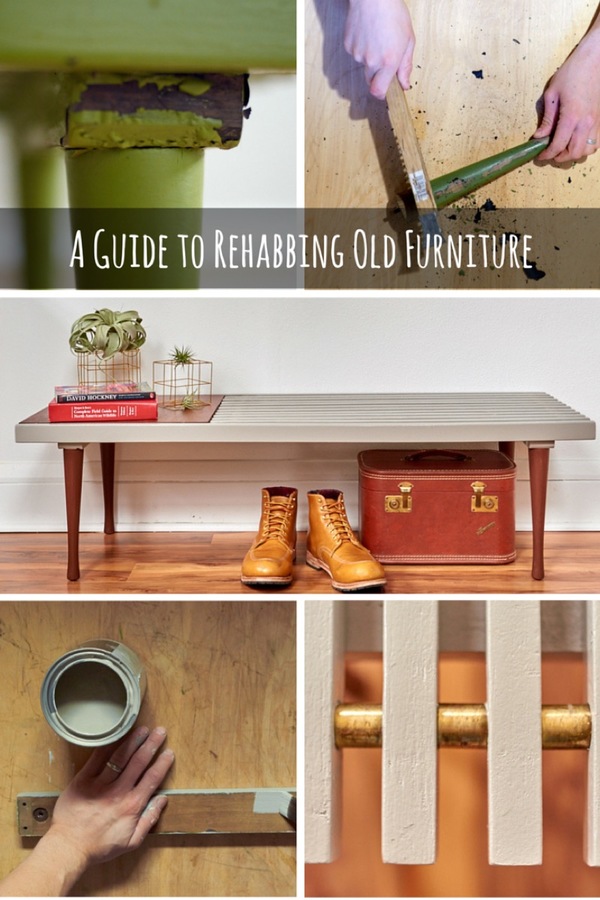
When I saw this mid-century inspired slat bench on Craigslist, I immediately knew it had potential. It has clean, simple lines (no weird frilly details or unnecessary pieces), but it’s obviously NOT a valuable, vintage piece. That’s good! I wasn’t looking for a priceless heirloom, just a nice-looking, easy-to-work-with piece of furniture that is in need of some TLC.
At $65, it was a decent price (if I hadn’t needed it for this blog post, I would’ve tried to talk them down to $40-ish, but in this case I didn’t want haggle). And the vintage shop selling it was just 15 minutes from my house, so I went to check it out. It was perfect; nasty green spray paint was literally crumbling off the thing. A nice candidate for a thoughtful re-do.
Doesn’t look that bad, right? Wrong:
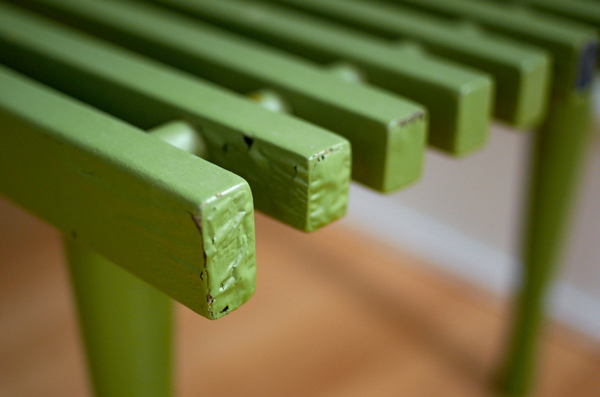
Whoever painted this thing green didn’t do a very good job; most likely they just took a can of spray paint and went nuts. But we can fix that!
But someone else’s green disaster is a great opportunity for me! Behind that ugly, hastily-applied coat of green there’s a pretty nice bench just waiting to come out. I chose Valspar’s Tabby Cat Gray for the job because I thought it would feel masculine, modern and understated, allowing the cool vintage lines of the bench to come alive.
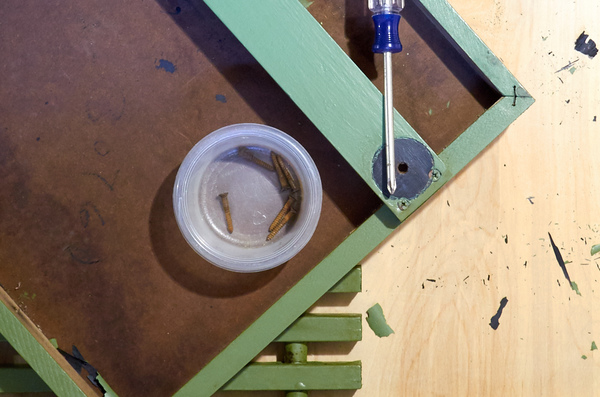
I started by disassembling the whole thing. Anything that could come apart, I took apart. Off with the legs, the side rail, that white square thingy. All of it.
When taking apart old furniture, use care. Don’t use a drill to unscrew things, always use a screwdriver. Old stuff is old! It’s fragile; screws will strip, wood will crack. Use a light touch.
Also: put those little screws and random parts in a dish. It’s tempting to think “Oh, I’ll just replace them with new hardware if I lose some,” but it’s not always that easy. Be smart, save time, and keep track of everything you take apart.
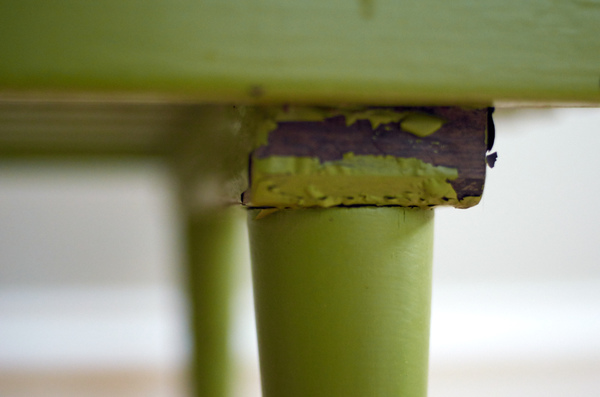
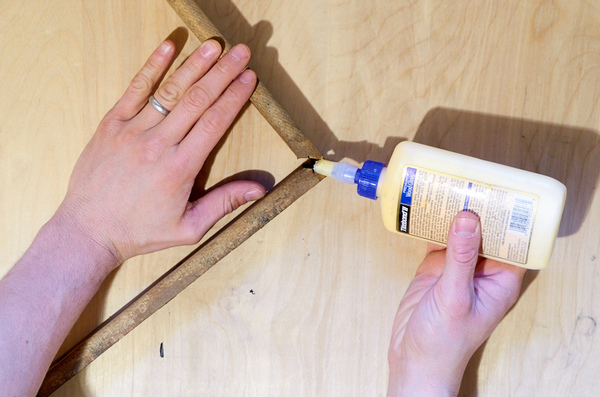
Once the piece is in pieces, you can attend to any damage. Hopefully, you chose something that was in pretty good structural shape. My piece had one miter joint that needed re-glueing.
Then I continued by scraping all the loose paint off with an old 2-inch spatula (a paint scraper works great too). A wire brush can also help to get the old residue loose. Use whatever tool seems to work best, but try to be careful not to gouge or damage the wood; that’ll be hard to hide later.
Ok, so I’m not gonna lie: stripping an old piece of furniture down to the wood ain’t easy. If you have time and patience, you’ll need both. But in most cases you can just get the loose stuff off and rough up the surface a little bit with a medium-grit sandpaper (hint: an orbital hand hander is pivotal here).
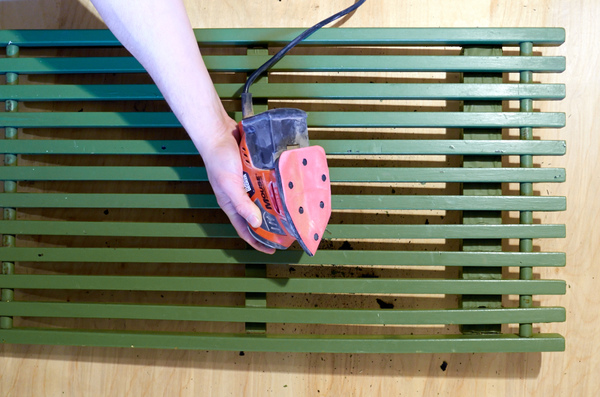
I went a little nutso with mine, and got almost all the paint off. I also stripped the little brass ring dowel-covers that are between each slat, ’cause I thought they’d look awesome. Just making more work for myself, I know, but hey …
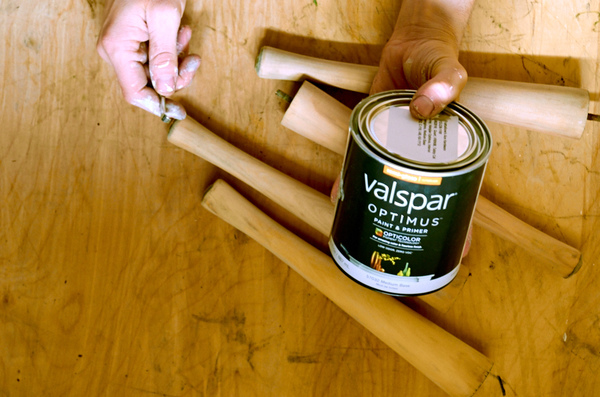
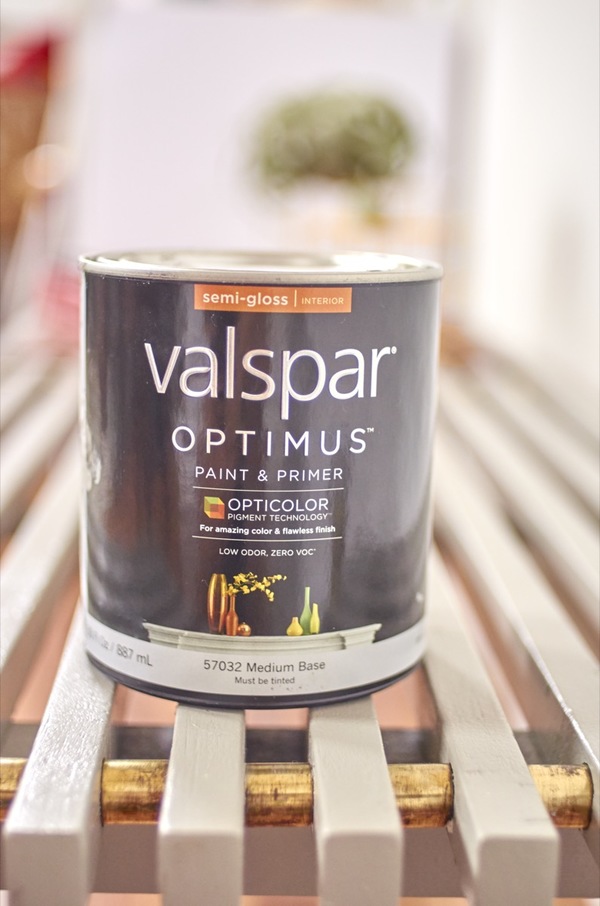
Here’s where choosing a really high-quality paint comes in; the better the paint, the more pigments and resin it contains, which means it covers better and adheres more easily to the surface. It’ll also last a lot longer under constant wear, which, for a bench, is pretty important.
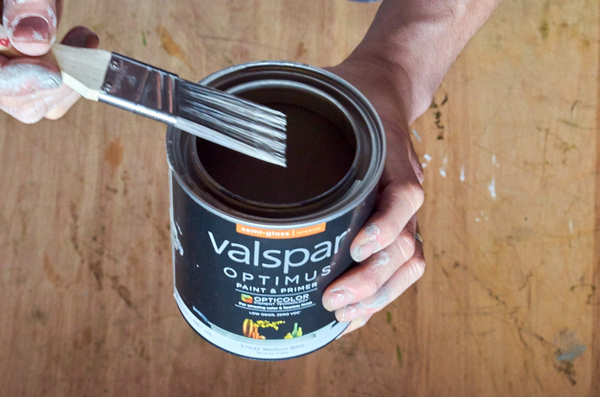
I went with Valspar’s Optimus Paint + Primer, available at Ace Hardware. It’s their best line of paint, and the built-in primer means one less step for me to worry about. It’s also zero VOC (volatile organic compounds), which is nice since I was painting this thing indoors.
Did you know?
Valspar is the only paint brand in the U.S. that guarantees you’ll love your color. With the Valspar Color Guarantee, if you don’t love your color, you can have another free.
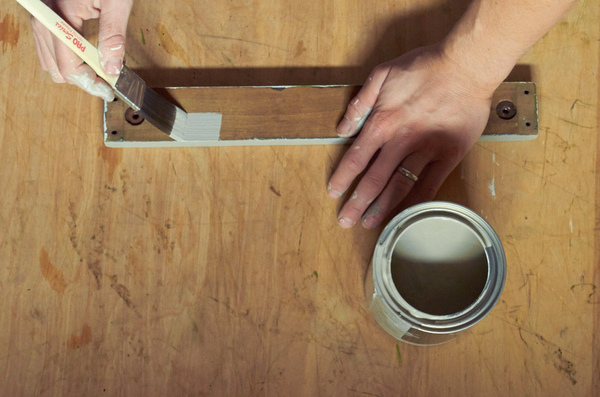
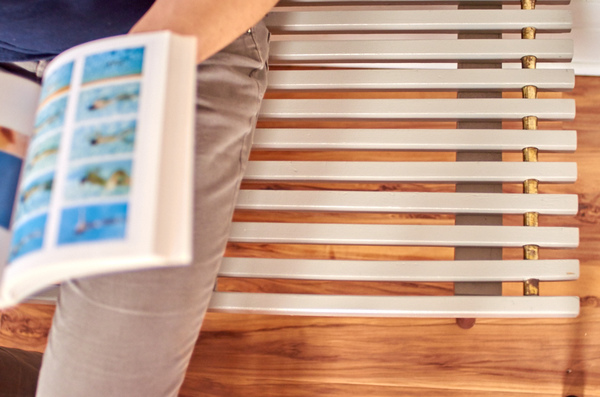
I used a brush to paint the pieces of the bench that were simple and flat. When brushing, you always want to try to keep a wet edge and work in long overlapping strokes. A latex paint extender can help increase the drying time of your paint, which makes it easier to even out brush strokes and avoid streaking. Also: don’t opt for the cheapest brush; get a high-quality brush and take care of it, and it’ll last forever and give you great results.
For the main, slatted area of my bench, I resorted to using a paint sprayer. I just happen to own one, but most people would have to look into renting. They’re usually available for about $30 per day, and once you get the hang of using one, they will drastically speed up your project. The other benefit of a paint sprayer is that, when used correctly, it yields a smoother, more even finish.
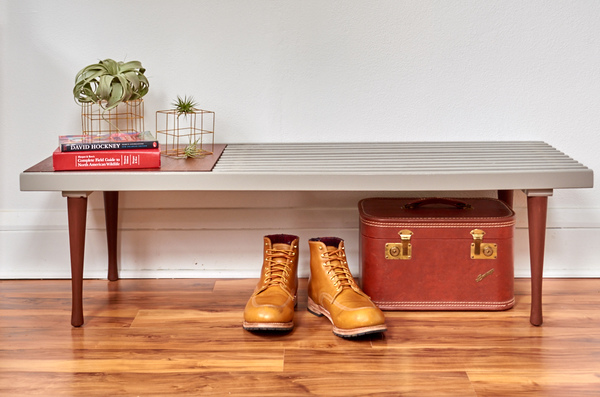
I let my bench pieces dry fully overnight before reassembling everything. Here’s how it looks now:
Remember where we started?
And now: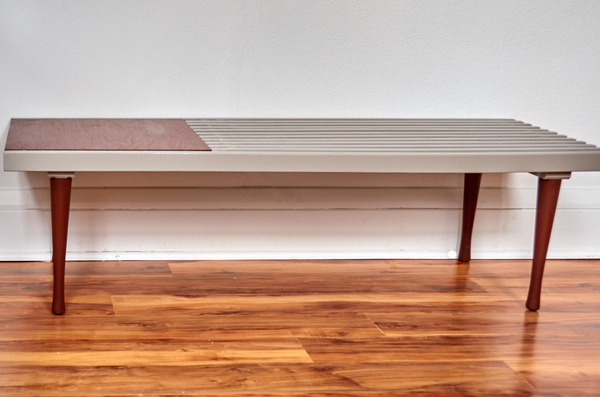
(I decided to do a contrasting stain for the legs and the plywood panel on the left)
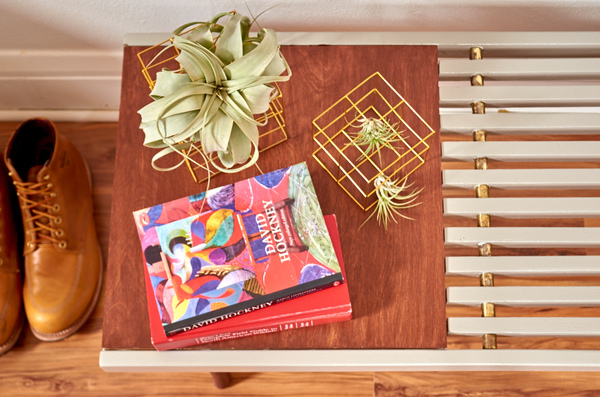
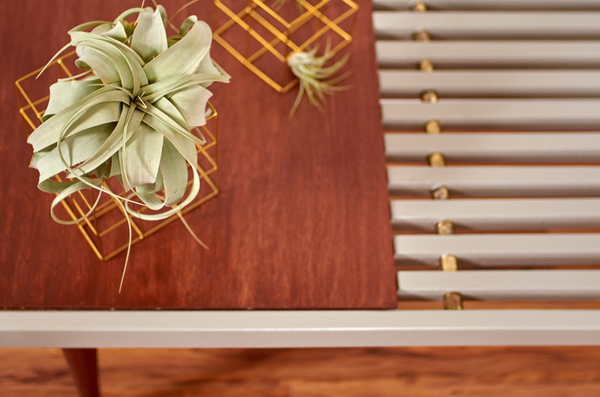
What a difference color makes!
The brass dividers turned out cool. They’re a little ‘rough’, but I kind of like the patina.
See? Good lines and solid construction, along with an afternoon of work and great materials, can help give a secondhand piece of furniture new life. Have you ever painted or updated a piece of furniture? Let us know how it turned out in the comments below.
If you liked this post, you can help us by sharing it on Pinterest!
This post was sponsored by Valspar. All opinions are mine alone. Thanks for supporting the brands that support ManMade.