Workshop Upgrades: Adding Extra Electrical Outlets to the Shop for about $50
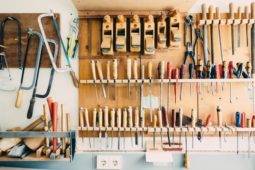
 Most of us have claimed a corner of the garage as our workshop, where only a single outlet supports the growing clutch of tools. Mid-project my shop floor becomes a tangle of cords stretching to far-flung tools and tripping me every step of the way. This dangerous situation just can’t exist in a safe shop. So I decided to add some outlets to make it a better place to work, and even added a switch-controlled plug to turn on my air compressor. The easiest way to add outlets to a finished wall is a surface-mount with conduit connected right to the wall. It was easier than I expected, and the results turned out great. This is part of my Shop Upgrade Series, as I get ready to build a new set of floor cabinets on the same wall.
First, we’ll mention it again – Electrical is dangerous and shouldn’t be DIY’d without a healthy understanding of how it all works. Don’t allow exposed wires, non-GFCI or ungrounded circuits, or loose connections. Building codes vary on how many plugs are allowed per circuit (although it’s pretty hard to narrow that down to an actual number).
While it’s pretty straightforward to install the conduit and boxes on the wall, a kit really simplifies the process and makes for a cleaner finished product. I used a kit from a company called Wiremold that features metal raceways (conduits), customizable boxes and switches, and an easy extension box to tie it into the current plug. Here are the steps I took:
1. Measure it out – The planning stage is a big part of the project. Spacing of the outlets should be between 4-6 feet apart, and should depend on the location of the tools and cabinets. I added two outlets at counter height for easy access, one outlet closer to the floor to feed my tool island, and a switch for the last outlet near my compressor system (with wall-mounted lines) to make controlling it easier. I loosely sketched out the dimensions on paper, but the exact locations aren’t essential.
ManMade Recommended: (numbers in parenthesis are how many I used)
- (1) Starter Box $6
- (1) Raceway Channel $8
- (3) Outlet Box $7
- (1) Switch Box $7
- (1) Support Brackets $6

2. Install starter box – The best way to start the project is from the existing plug out. Fastening the starter box involves taking off the existing cover and plug (make sure all electrical is turned off), then screwing on the included plate. This plate has special tabs that allow the channels to be fastened into them. I cut a 4′ channel and fastened it to the side of the plate. From there I installed the first flush-mount outlet plate (be sure the channel is level with a small bubble level).
3. Install remaining channels and plates – The rest of the installation is the same as the first, cut channels and install any corners or extensions as needed. The boxes have small tabs along the outside to open up and make room for the channels which makes it really a clean and customizable system. Once all the plates are in place, it’s time to run the power.
4. Run electrical wires – This is where we remind you to always be sure to know what you’re doing when working with electrical. With that in mind, I’ll leave this step simply to: run it right. I installed all wire and plugs, and completed the installation with covers and a test. It worked great and really cleaned up the shop.
The project cost me about $50 total, and was completed within a few hours at the most. So if you find yourself stepping over cords in your shop, take the time to make it right.