Stop Marring Your Wood: How to Make Leather Holdfast Pads for Woodworking
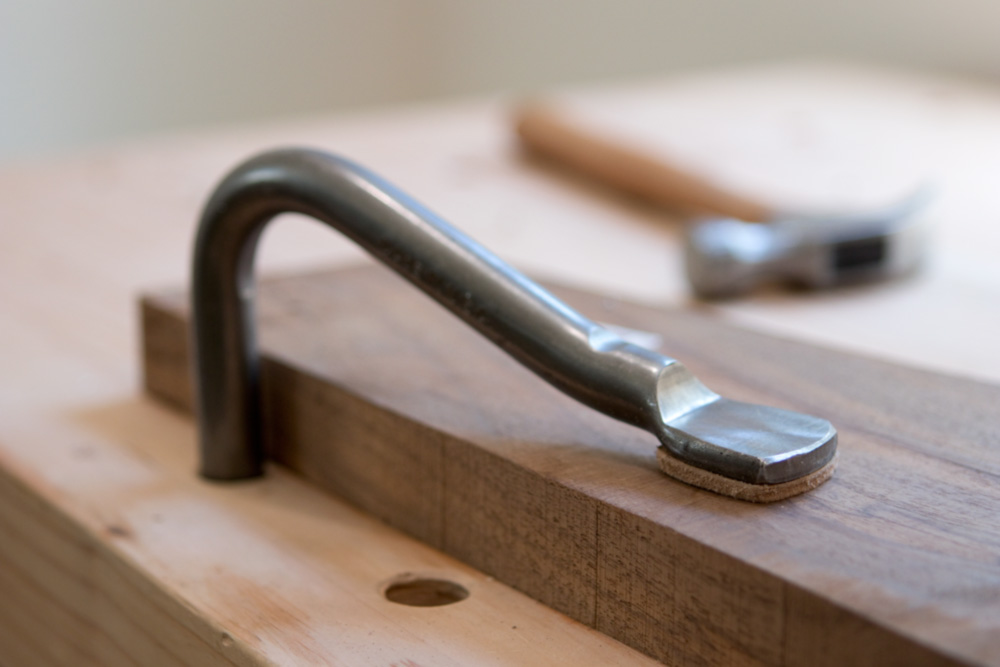 I'm a huge fan of having a few rows of dog holes in my workbench top. And, more than anything else, I use them to secure a holdfast – an ancient and genius piece of design that secures your work to the work surface with a simple tap from a hammer or mallet. When your ready to release it, just hit the back and it's free. Seriously – it's ten times fast than clamping, and you can fasten your work anywhere across the bench top. Brilliant.
To speed up the process even more, I wanted to come up with a permanent way to protect the wood from the force of the steel being banged into it. You can use a hardwood scrap between the holdfast and the workpiece, but I figured there's reason to spend twenty minutes once and protect my work forever. No digging around for scraps required.
Tools and Materials:
- Small piece of 8, 10, or 12 oz leather (at least 1/8″ thick. Raid the scrap bin)
- Craft knife
- 60- and 150-grit sandpaper
- wood glue
- Scrap wood
- Optional: self-healing cutting mat or plastic cutting board
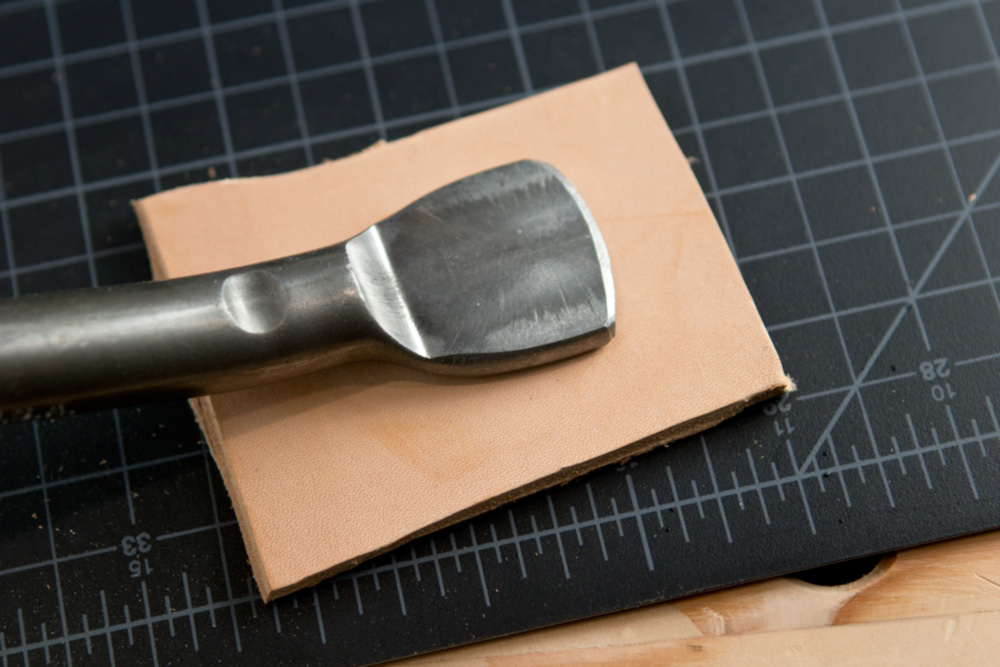
Step One: The design of the holdfast makes this super easy to pull off. You simply place a piece of leather on top of a cutting mat or piece of scrap wood, then use the holdfast to secure it down. It not only works as a clamp, but provides it's own template for cutting out the shape.
I'm using 10 oz veg tanned leather here. I got a 4×9″-ish random shape in the scrap bin of my local Tandy leather store for about $3. There's enough there to make a dozen of these. Whatever you find, just make sure its thick enough to stand up to abuse and absorb a mallet whack.
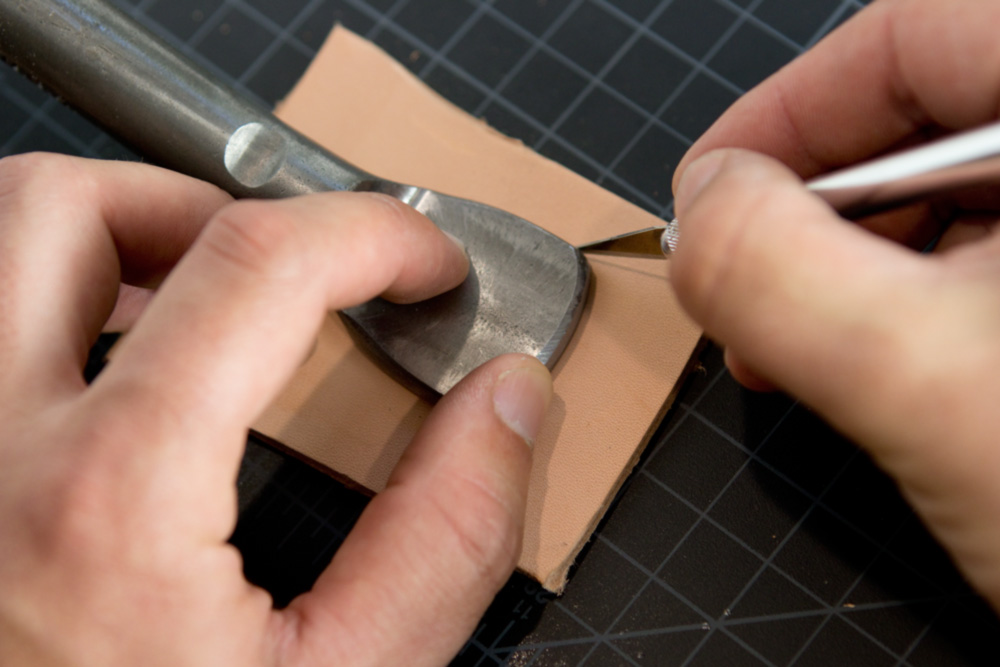
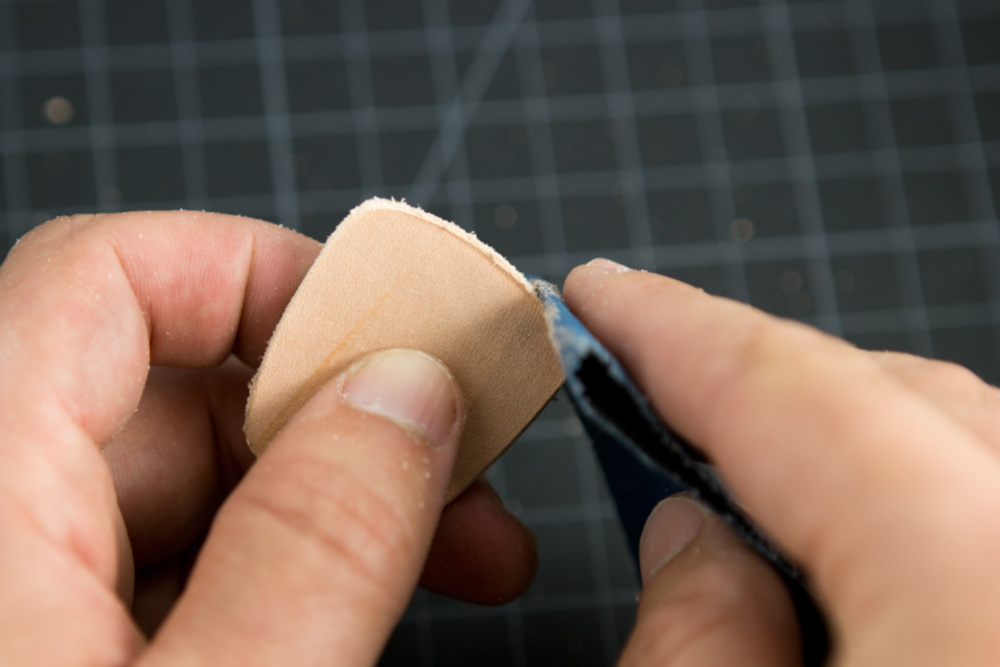
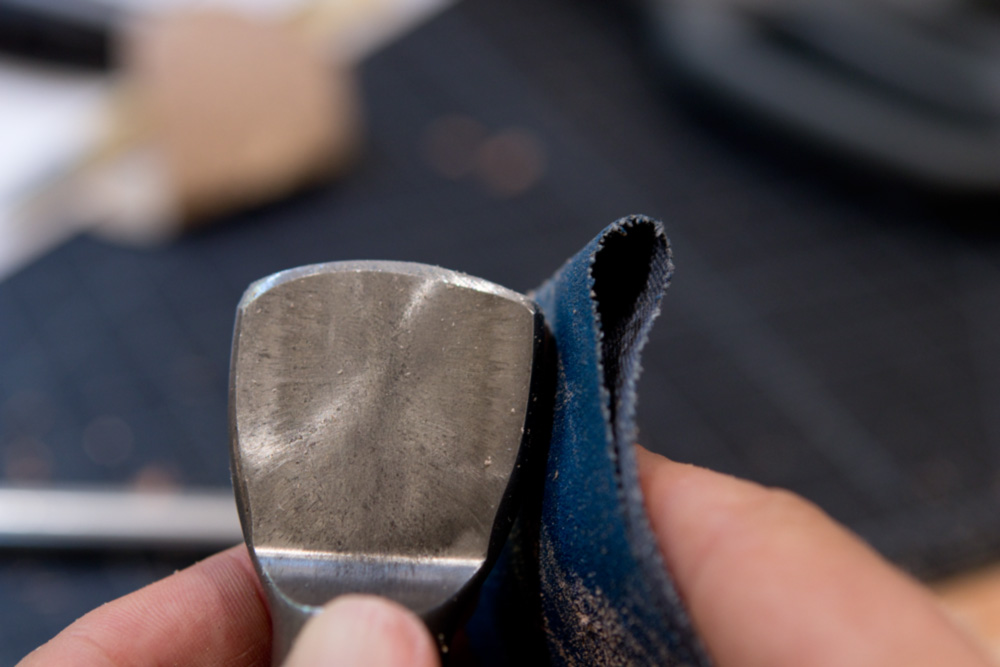
Step Two: Use the craft knife to slowly trace the head of the hold fast. You'll need to make multiple passes to cut through the thickness.
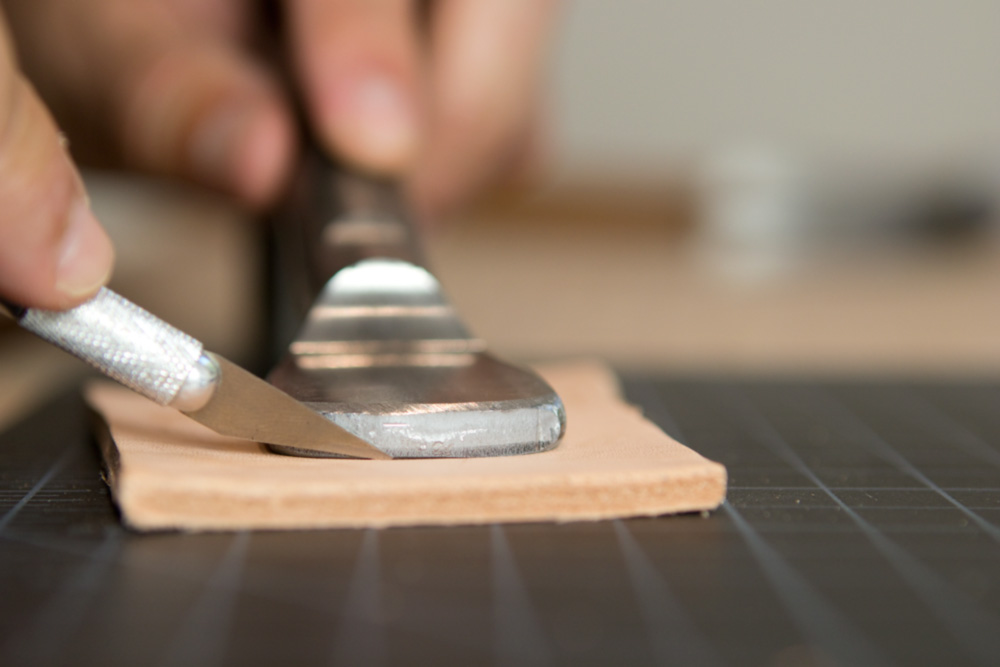 It's always easy to cut on the pull stroke with a craft knife, so make sure you approach the holdfast head so that you're always starting at the top of a side. Be sure to keep your knife at 90° — it will have a tendency to undercut and push in as you cut downwards.
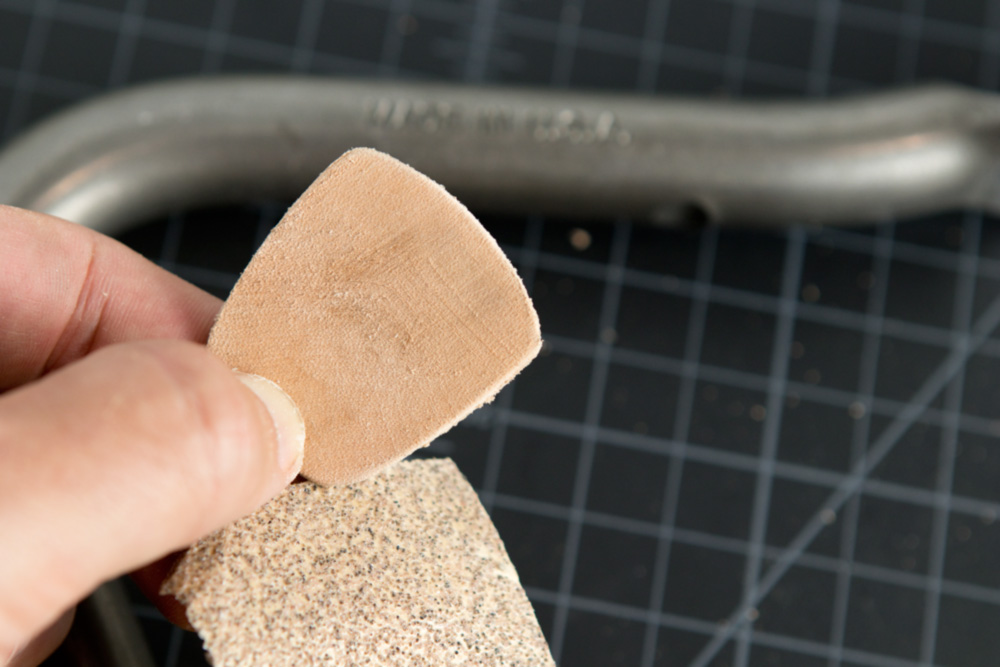
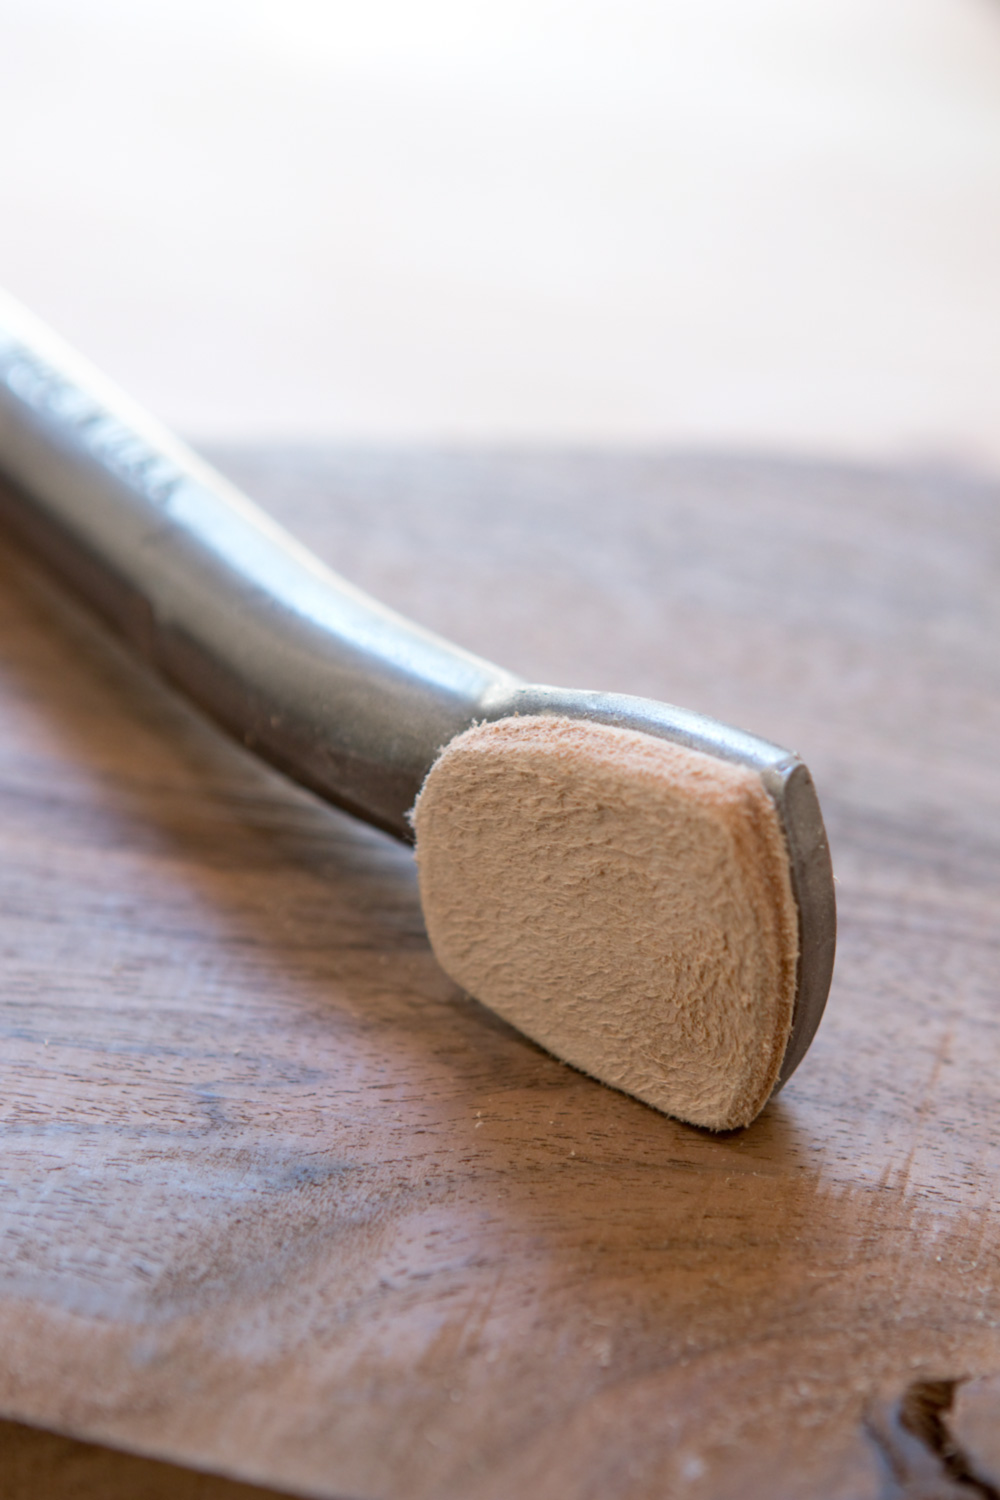
Step Three: The edges of fresh cut leather can be quite sharp, so use a bit of 150-grit sandpaper to smooth them over. This will also help round over your cut shape.
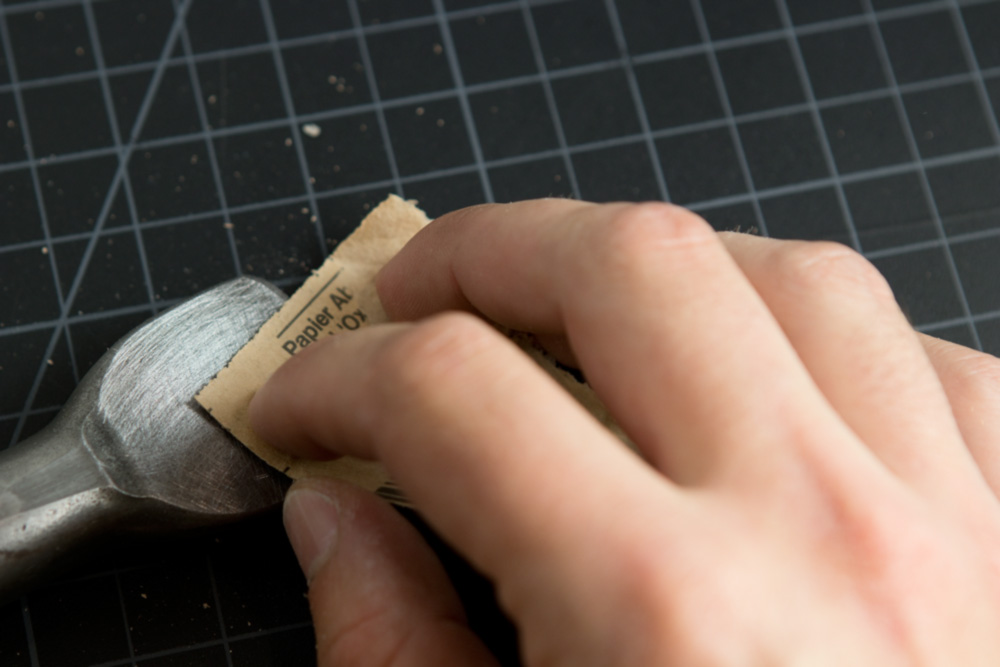
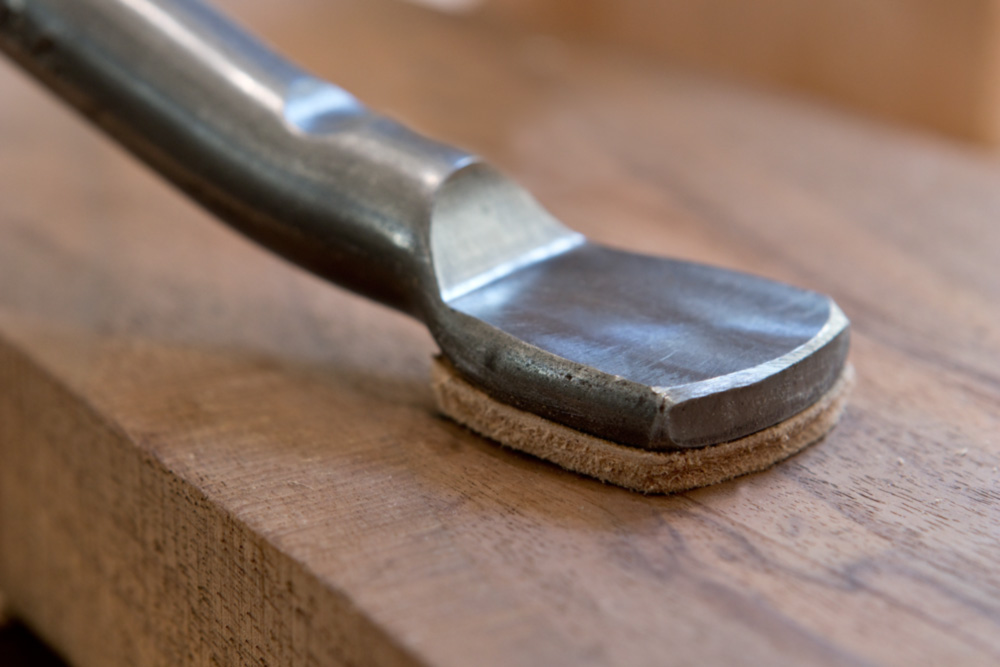
Step Four: Now, prep the surfaces for the glue. Grab some extra coarse sandpaper, like 40 or 60 grit, and scratch up the bottom face of the holdfast.
Do the same on the smooth side of the leather. You want to glue this so that the rough/shaggy side of the leather, the inside/suede of the hide, touches the wood for a better grip. So, smooth side gets glued to the steel.
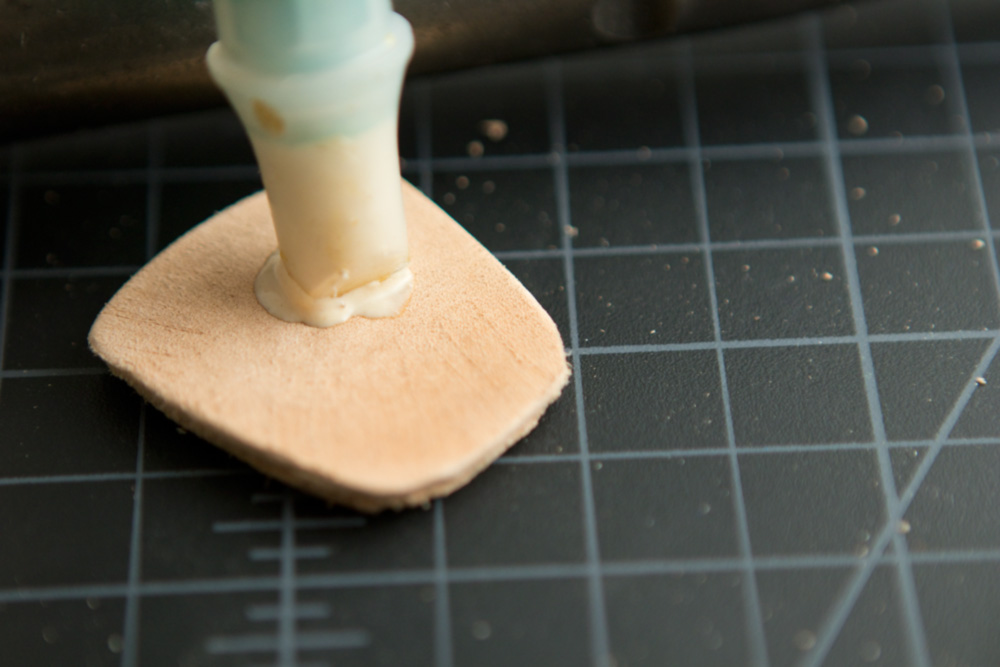
Step Five: Apply a thin layer of wood glue to both the roughed up leather and the holdfast. You could get fancy with two-part epoxies or other adhesives here, but wood glue works just fine. Plus, it's easy enough to remove and glue back in case you ever need to.
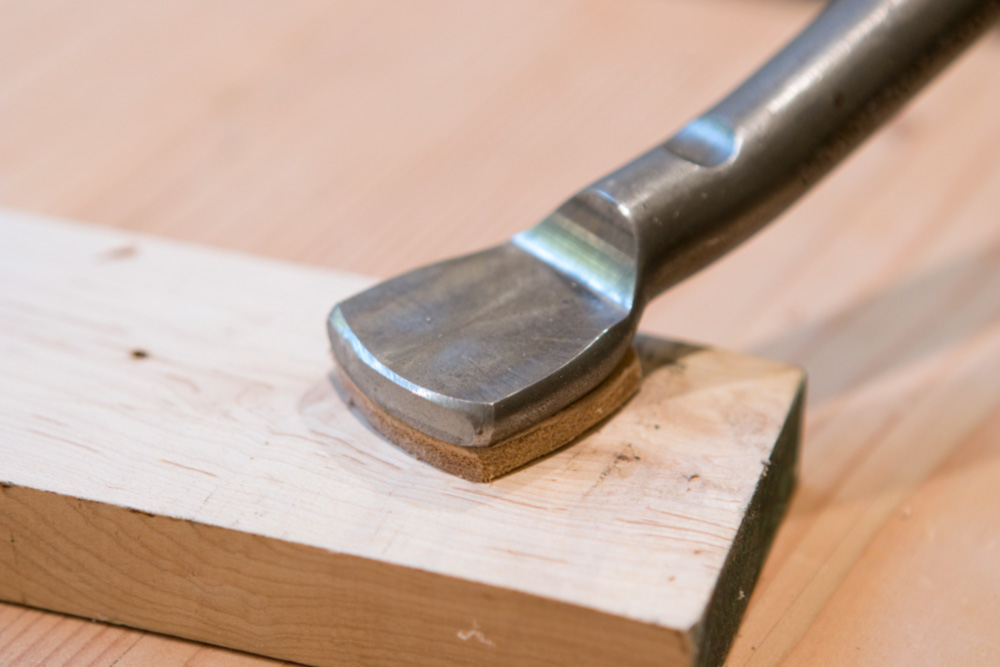
Again, use the design of the holdfast to your advantage: place it in a dog hole and put the rough side of the leather down on some scrap. Align the pad and the holdfast, and once you like the placement, give it a whack to secure it while it dries.
After the glue has set up, use the 150-grit paper to smooth up the edges and round over any irregularities. You can also bevel the bottom edges of the leather just a bit to guarantee they won't cut into softer wood.
Then, just use them to hold whatever you need to the benchtop. No cauls or scraps required!
If you don't have a pair already, I really recommend the Gramercy holdfasts from ToolsForWorkingWood.com. They're priced right, look great, and work perfectly.
And if you're ready to start drilling dog holes in your workbench, here's our guide for getting the process just right.