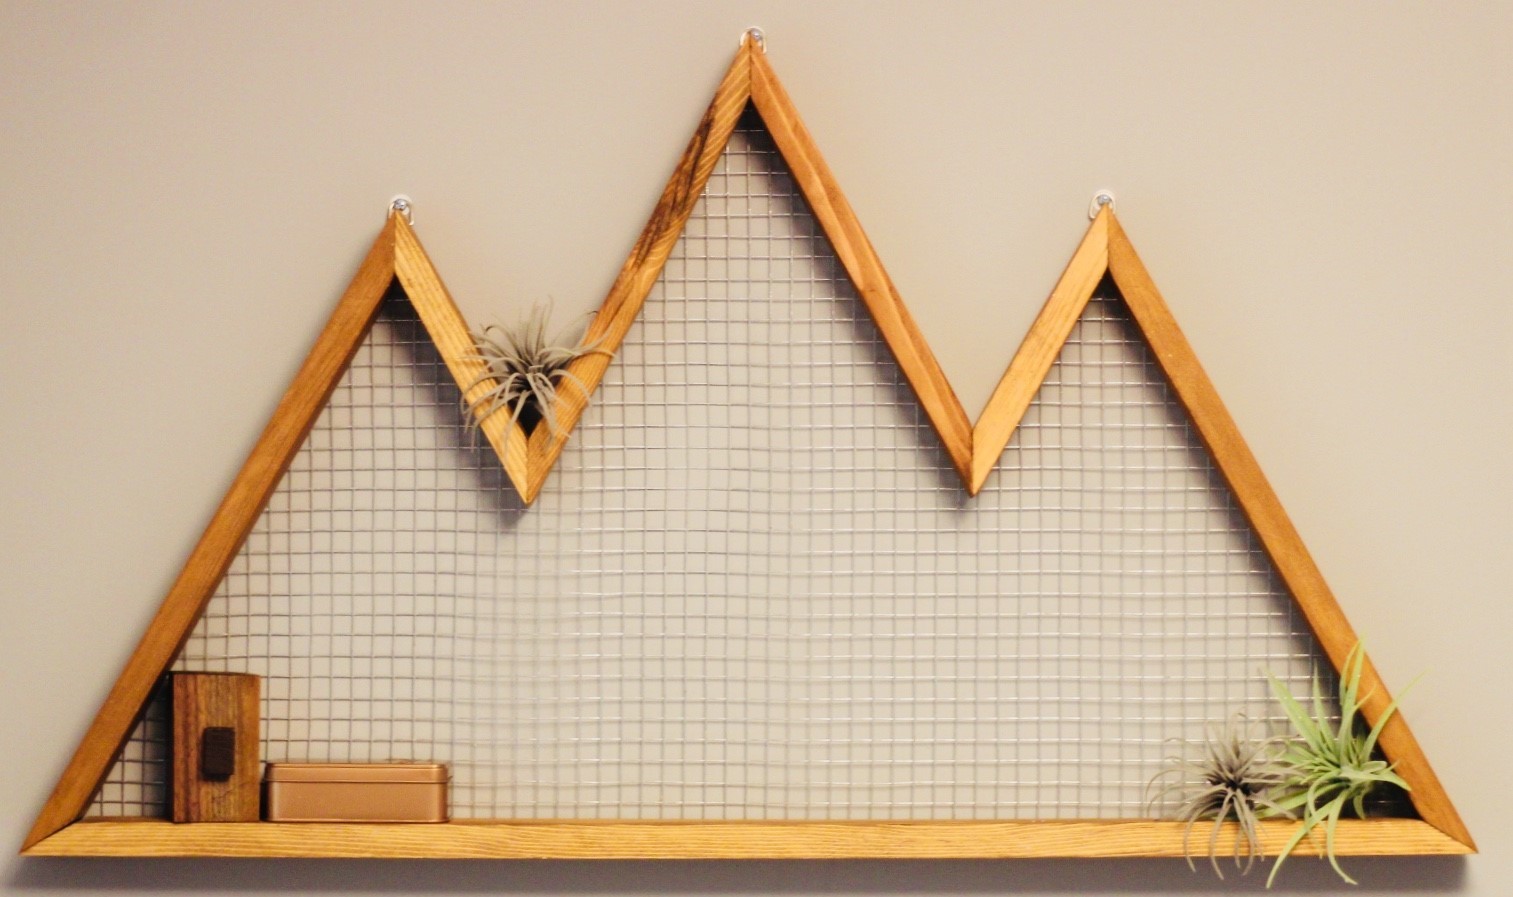
How to: Easy Wooden Mountain Wall Art
Several months ago, I moved offices at my job. I threw up a couple pictures of the family and brought all my documents into my new space. And that’s how it’s been since. Fast forward six months and my walls are still barren. I travel a little bit for work and I spend a lot of time at my client’s offices, so I don’t always notice how empty the walls look. Finally, my office administrator walked into my office and told me that it was time to hang something up to make my office look a little more personable.
Most of the people in my office have artwork that was bought online or a stock photo of a beautiful scenery, but that’s not really my style. I wasn’t sure what I wanted, but I knew I wanted to build it myself and make it unique. So, I searched Pinterest and finally found something that I thought had a nice professional but masculine look that fit my style.
My first challenge was deciding what angles I wanted to use. It comes in handy that my wife teaches geometry and she pointed out that the project is essentially three triangles put together. Knowing that every triangle needs to have a combined 180° with the three corners, I decided to use all 60° angles to make equilateral triangles. However, my I miter saw only goes to 45°. Slightly perplexed how to solve my cutting problem, I turned to Google, and learned how to make a 60° angle by cutting a stop block at 30° and then making a second cut at 30° using the stop block. The math is pretty simple… 30° + 30° = my desired 60°.
Once the math was done, I set out to find the wood I needed. Last summer, I built a table out of old barn wood and I had enough scrap pieces left over to complete this project, so I used them. They’re essentially 1x3s, which you can find at any home center or lumberyard.
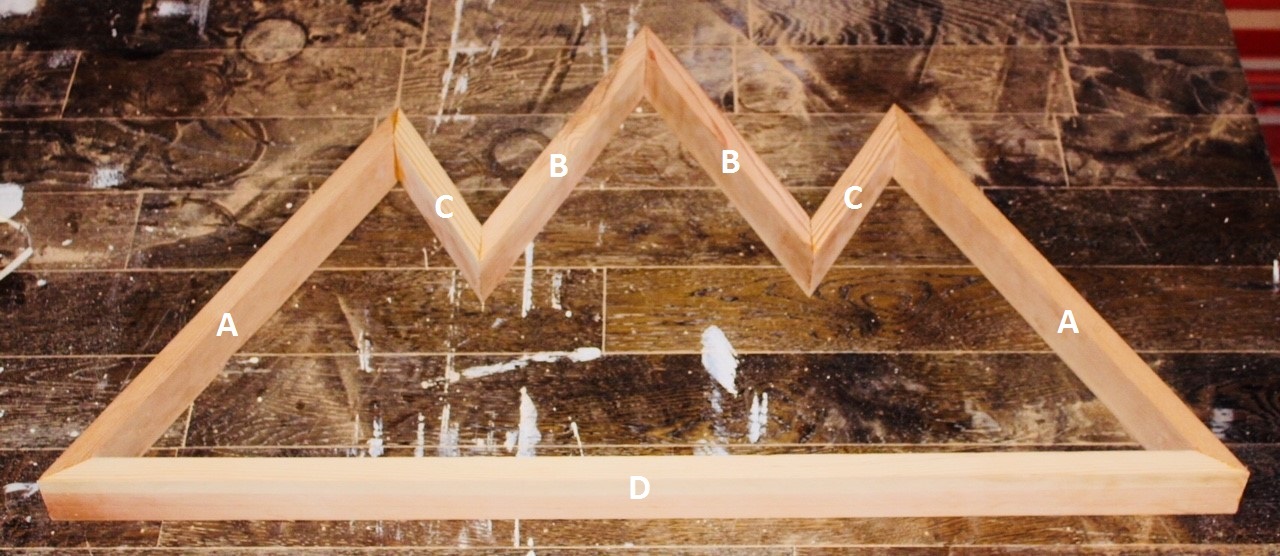
- Piece A is 17 9/16″ long and the 60° angles are cut in the same inward direction (x2)
- Piece B is 12 1/8″ long and the 60° angles are cut in opposite directions (x2)
- Piece C is 7 9/16″ long and the 60° angles are cut in opposite directions (x2)
- Piece D is 30 1/4″ long and the 60° angles are cut in same inward direction
- All pieces are 2 1/2″ in width
If you want to make a similar project on a smaller or larger scale, I would suggest cutting pieces A, B, and C to your desired length and then fitting in piece D at the end to fit. If you’re using 60° angles you don’t have to mess with resetting your miter saw for the different angles, which can be time consuming.
- Miter saw
- Table saw or circular saw to rip wood to desired width
- Wood of choice – about 2 1/2″ wide and 3/4″ thick
- Wood glue
- Painters tape
- Sander
- D-ring hangers
- Nail gun and air compressor (optional)
- Wood stain or finish of choice (optional)
- Mesh wire (optional)
- Galvanized staples (optional)
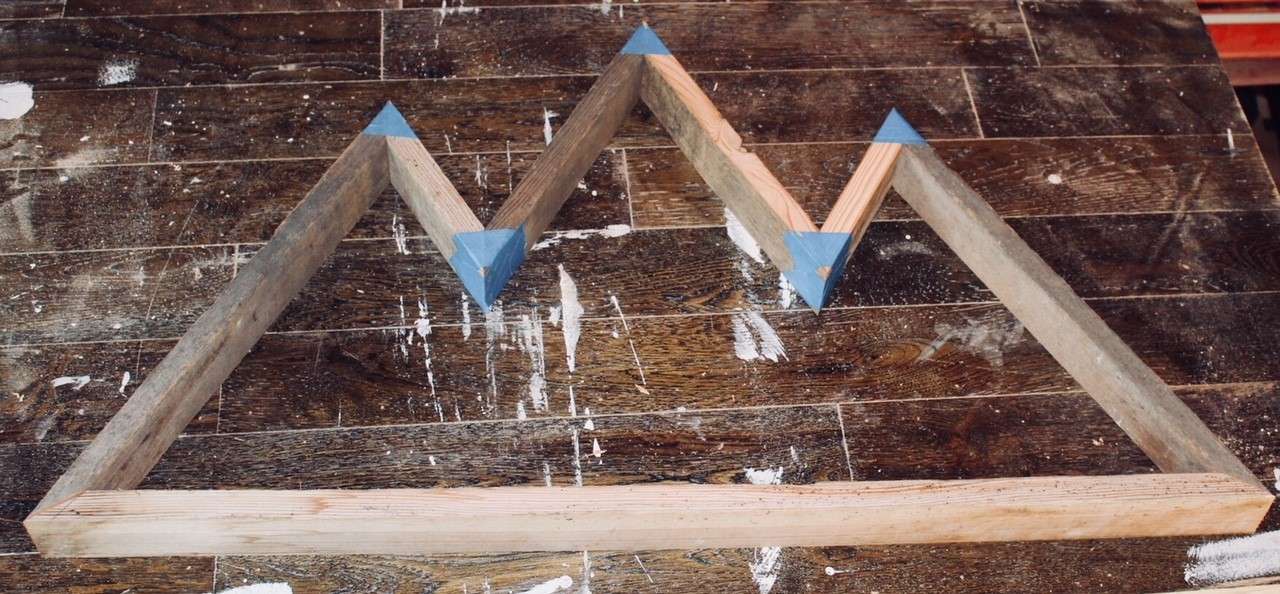
Once I had all the pieces cut, I did a dry fit using painter’s tape. This method works surprisingly well in cases where clamps would be cumbersome.
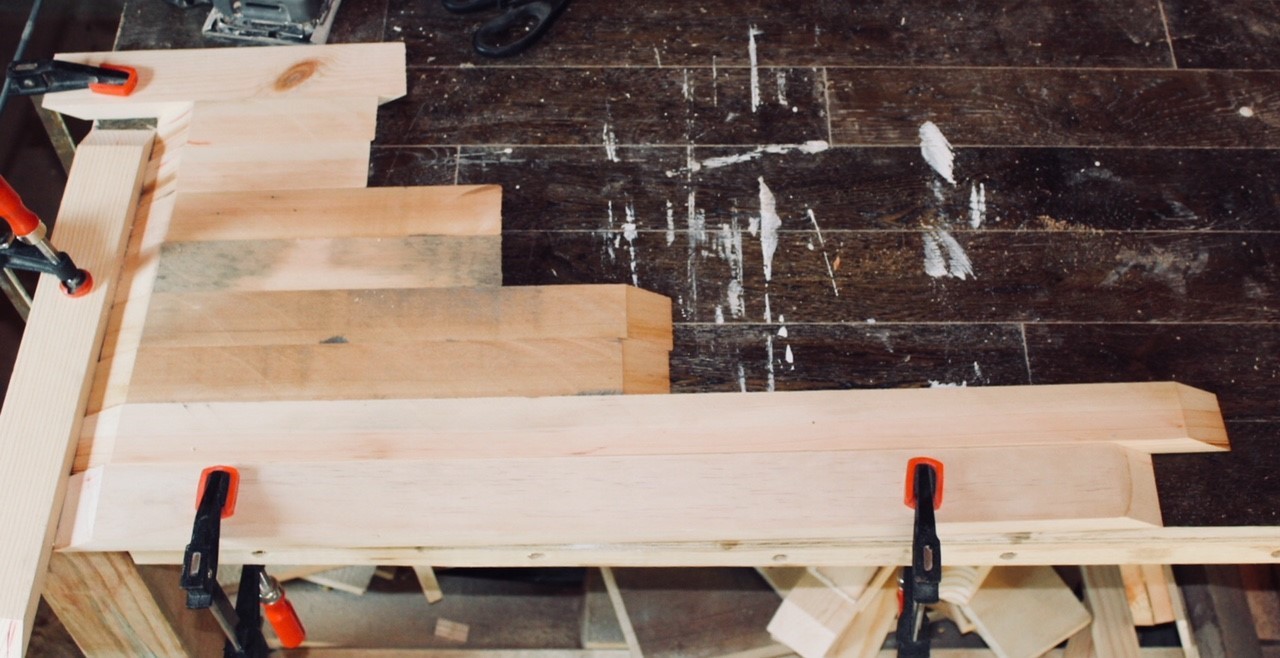
Once I was done dry fitting all the pieces, I disassembled everything and prepped for sanding. I was using wood from an old barn that was built by my great grandpa shortly after he returned home from WWI, so there was almost 100 years of build-up on each piece that needed to be sanded off. I setup stop blocks so the pieces wouldn’t move and used my orbital sander with 100 grit sandpaper to take away the years of dirt and weathering.
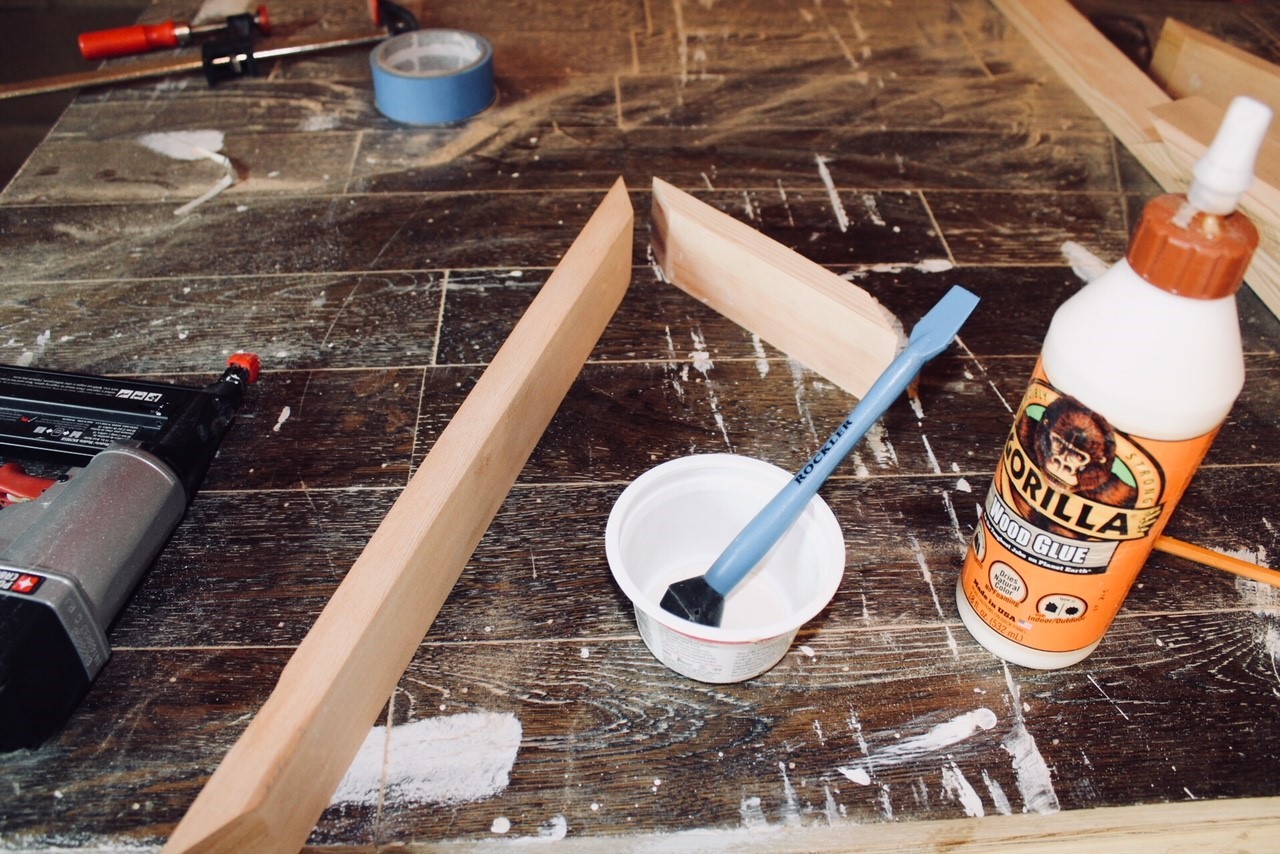
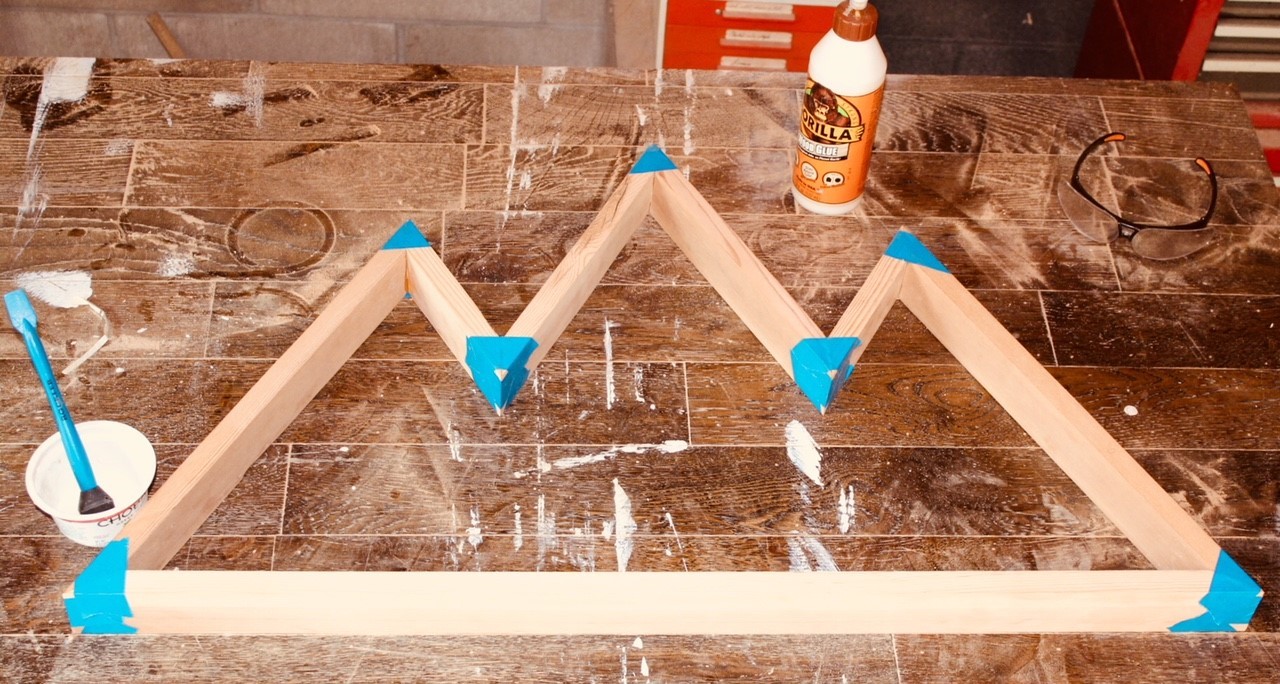
Next, I glued all the pieces together using Gorilla wood glue. Once again, I used painter’s tape to hold everything in place while the glue cured. I also shot in 18-gauge nails with my pneumatic nail gun. The nailer is optional and isn’t 100% necessary, but I like the extra strength and the 18-gauge nails are small enough that they aren’t noticeable unless a person is looking for them. I added glue to both sides of the joint, let it dry slightly so it became tacky, and then pressed the pieces together.
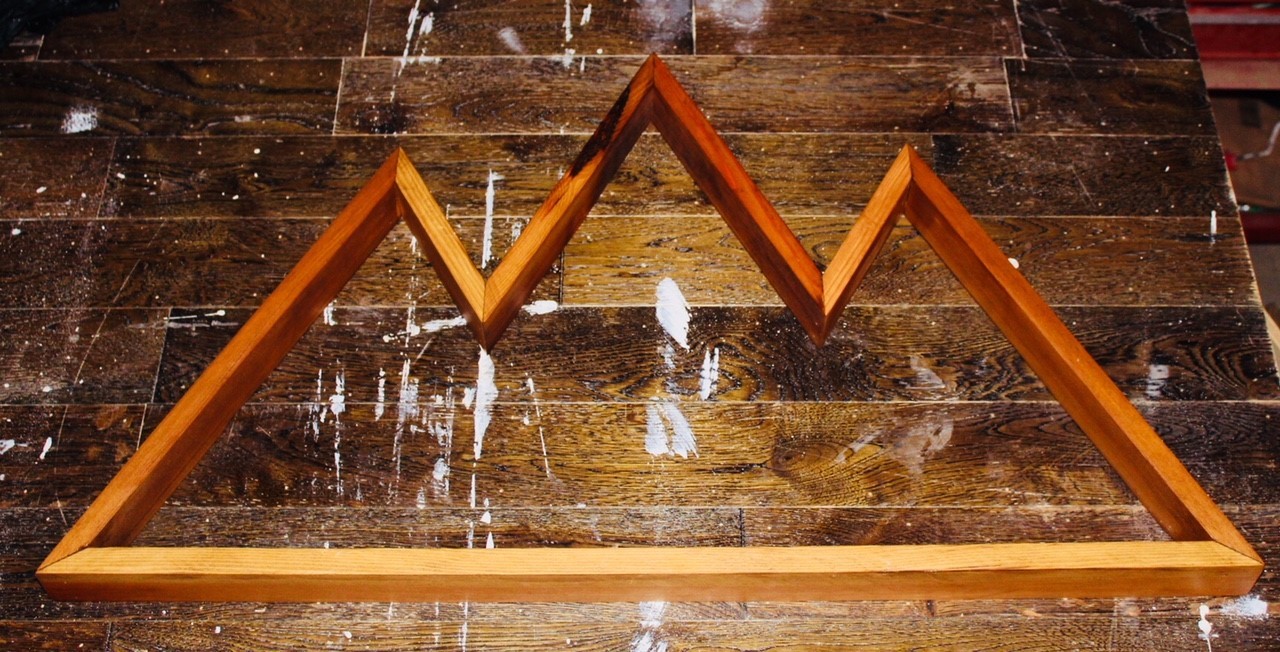
After the glue had cured, I prepped for staining by removing all the tape, removing any access glue and sanding the entire project by hand. I used Minwax Special Walnut stain on the entire project because I really like that color and it matched the other wood pieces in my office.
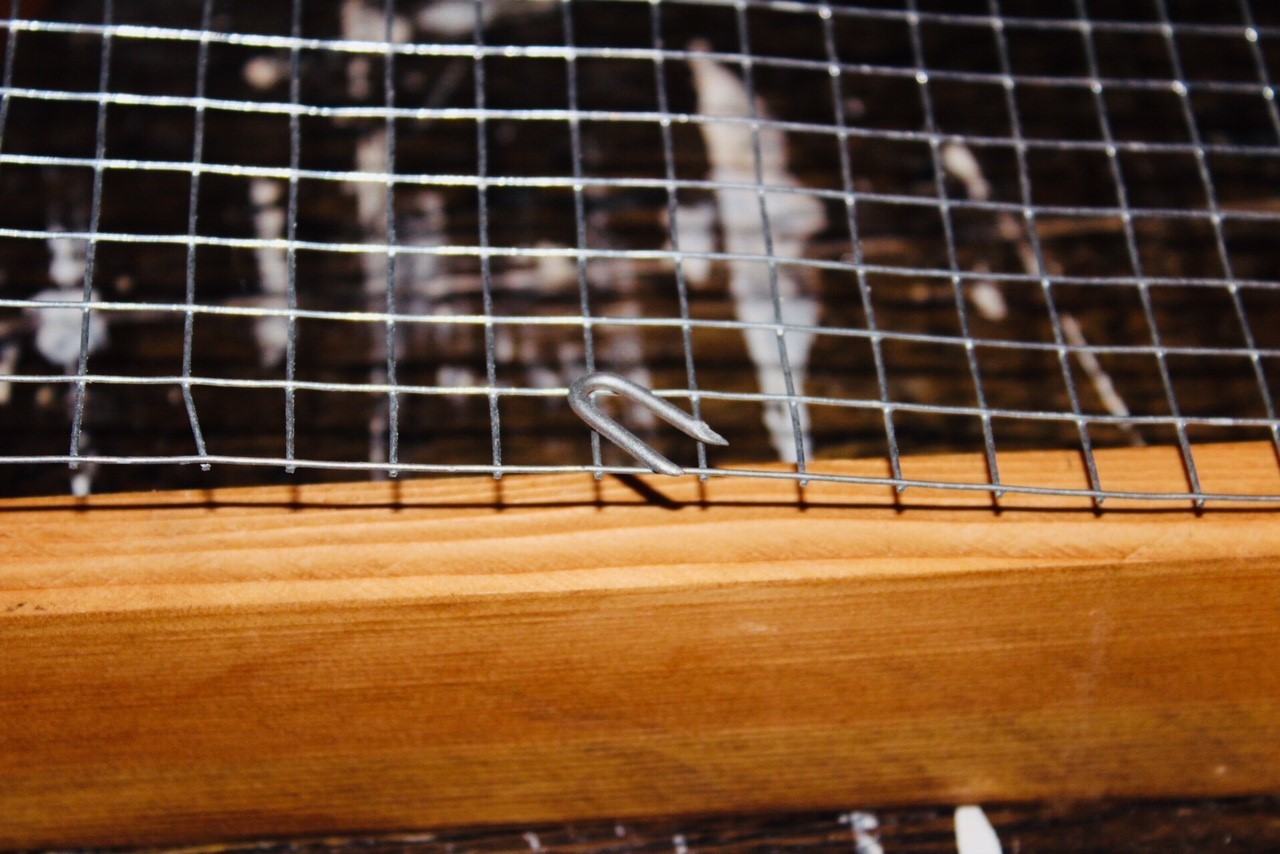
As a final piece, I added this mesh wire using galvanized staples to the back. This was added for a couple of reasons (1) I thought the combined look of the mesh wire and wood gave a cool industrial vibe and (2) it gives me the option of hanging additional objects from the mesh wire. Adding the mesh wire was more time consuming than I anticipated because I had to use a wire cutter for the entire outline of the project, but I really like the way it turned out.
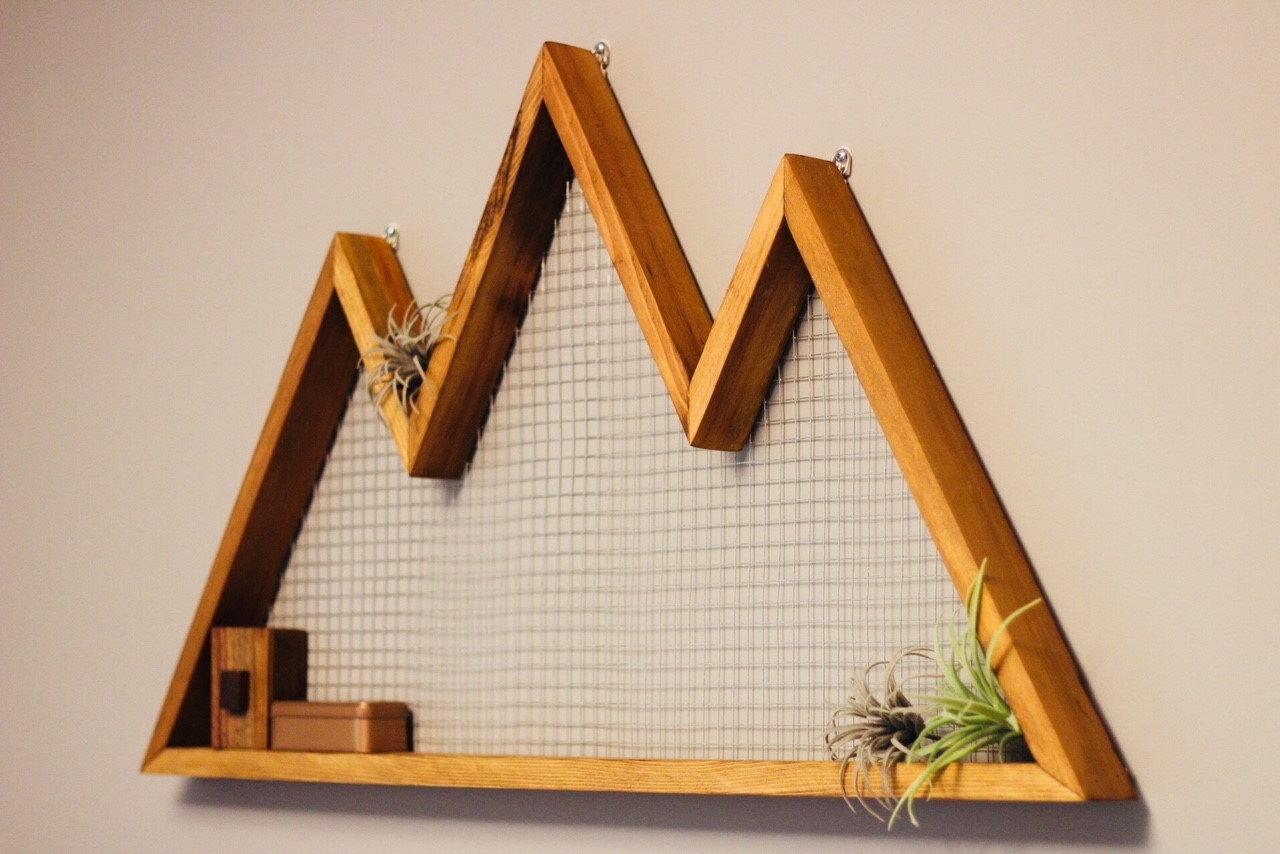
Lastly, I added 3 D-ring hangers to each of the peaks of the project in order to hang it on the wall.
This was a pretty simple project but it created a piece in my office that was unique, masculine and fit my personal style. It’s also a conversational piece that people notice when they walk into my office. Happy building!


