A Simple Woodworking Storage Project You Can Build This Weekend
I have a million e-mails. It's not actually a million, but it makes my soul feel that way. I know this feeling. It happens when I've been staring too long at a screen, clicking reply until I lose track of time and space and what name I'm supposed to sign in the sendoff. (It's Chris. My name is Chris.) The only way to fix it? Get away from the computer, turn on some music, and build something.
So let's go out to the shop and build a box that will never, ever have e-mails in it. Here's a simple woodworking project that can get you back to working with your hands, but isn't too fussy or complicated. And the cool part — it uses just a few basic tools and single board. When it's done, you'll have a stylish, versatile, stacking storage solution that will come in handy in any room in your house.
Tools & Materials
- Circular saw (Hint: we're giving this away! Scroll down for info)
- Cordless drill/driver (This too! Scroll down for info)
- Two 18″ clamps
- Tape measure
- Coping saw
- Wood glue
- 3/8″ diameter dowel rod
- 8' long 1×12″ wood board, one per box (we used select grade pine)
- Sandpaper (medium and fine)
- 1″ Forstner bit
- #6 Coutersink/counterbore bit
- Speed square
- Hammer and nail
- 2″ long #7 wood screws
I purchased all the tools and materials for this project at my local Orchard Supply Hardware store, and I loved the experience. As someone who spends a fair amount of time in lumber and hardware aisles, I was super pleased by the layout and availability of products and supplies. My local store – in the Hollywood neighborhood of Portland – featured the kinds of materials, fixtures, and goods for those living in an urban neighborhood, looking to repair and decorate older homes. The selections were conducive to the architectural style of the neighborhood – the Northwest bungalow – as well as general DIY and creative needs. The staff was just helpful and friendly. They welcomed me warmly and pointing me in the right direction, but left just enough space to let me figure out my design and specific needs. And if I had a question, they were right there to help.
We're excited to help Orchard kick off their #OrchardSimple campaign this month, which is all about helping you create simple, stylish projects and repairs to make your home a place you love to live.
This build uses only two power tools, one eight-foot-long pine board, and some basic hand tools. If you don't want to cut the lumber yourself, you can get it cut to size at The Workbench, an innovate customer service center at your local Orchard Supply Hardware store (they can cut rope, wire, chain and wood, make keys, and sharpen tools too).
Step 1
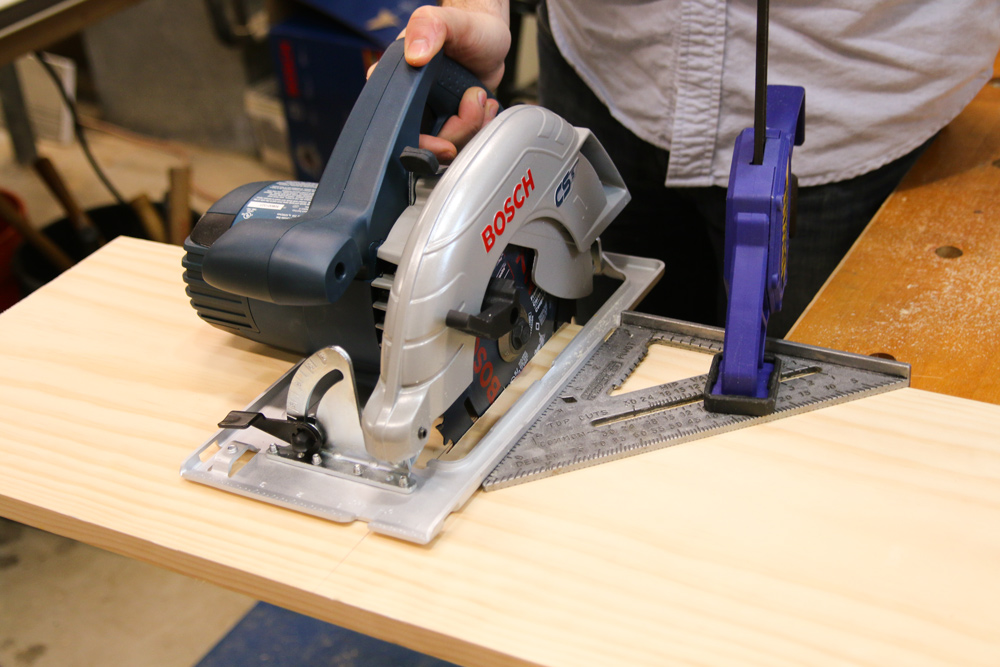
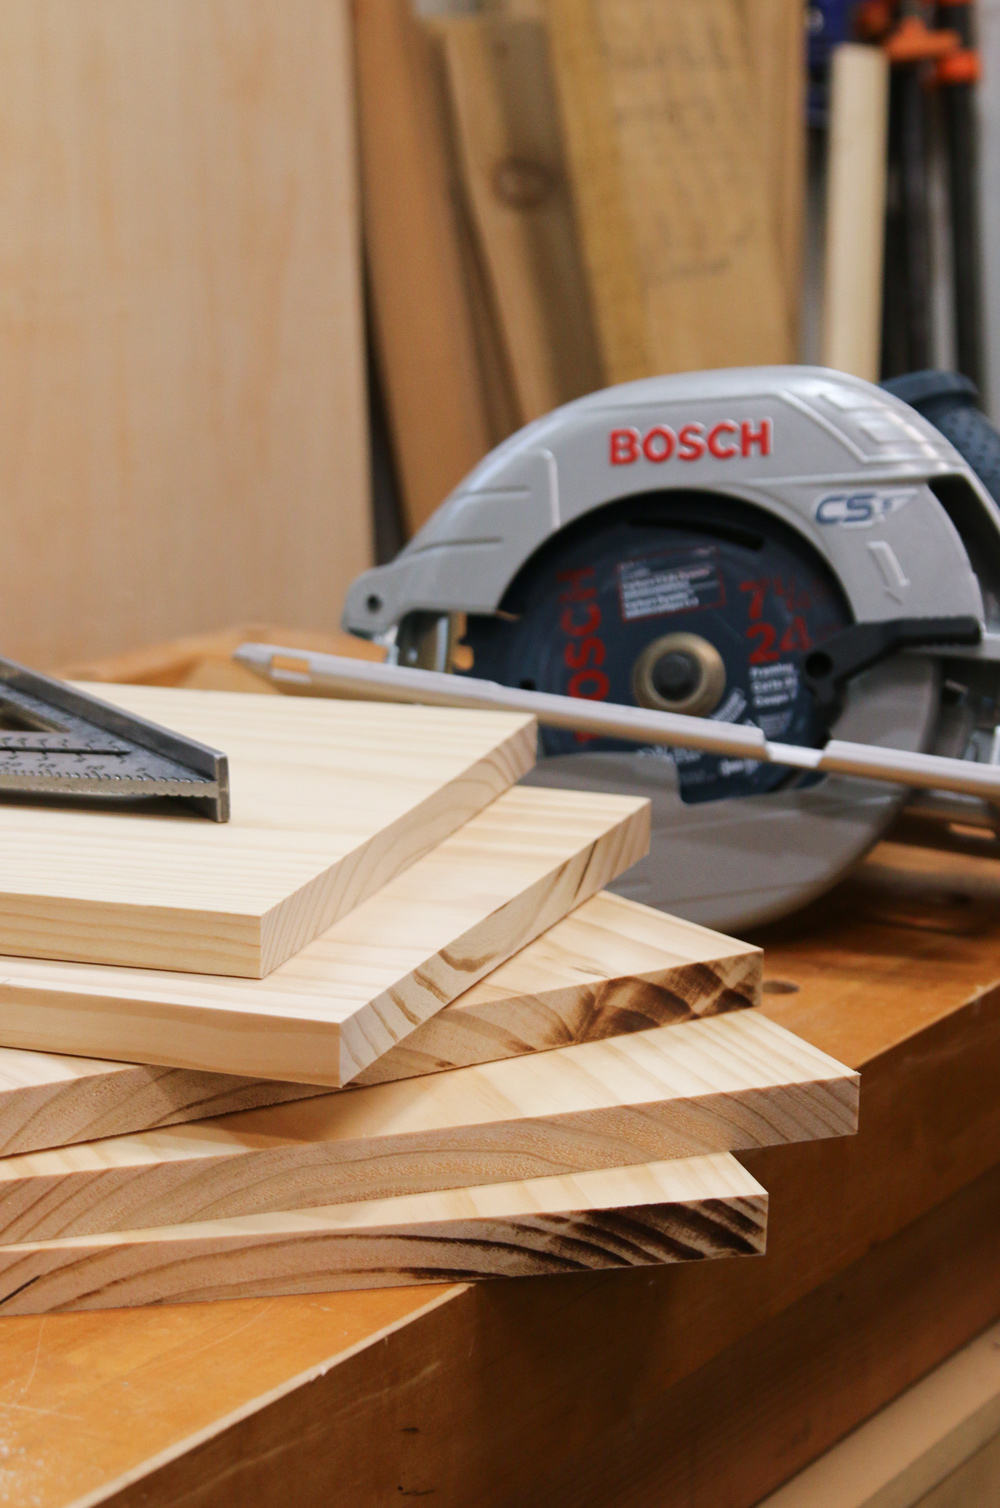
Begin by cutting your wood to size. One great way to get straight cuts with a circular saw is by using a speed square as a guide fence. Cut five pieces of wood to the following dimensions:
- Front and back: 14 3/4″ x 11 1/4″
- 2 sides: 11 1/4″ square
- Bottom: 13 1/4″ by 11 1/4″
Step 2
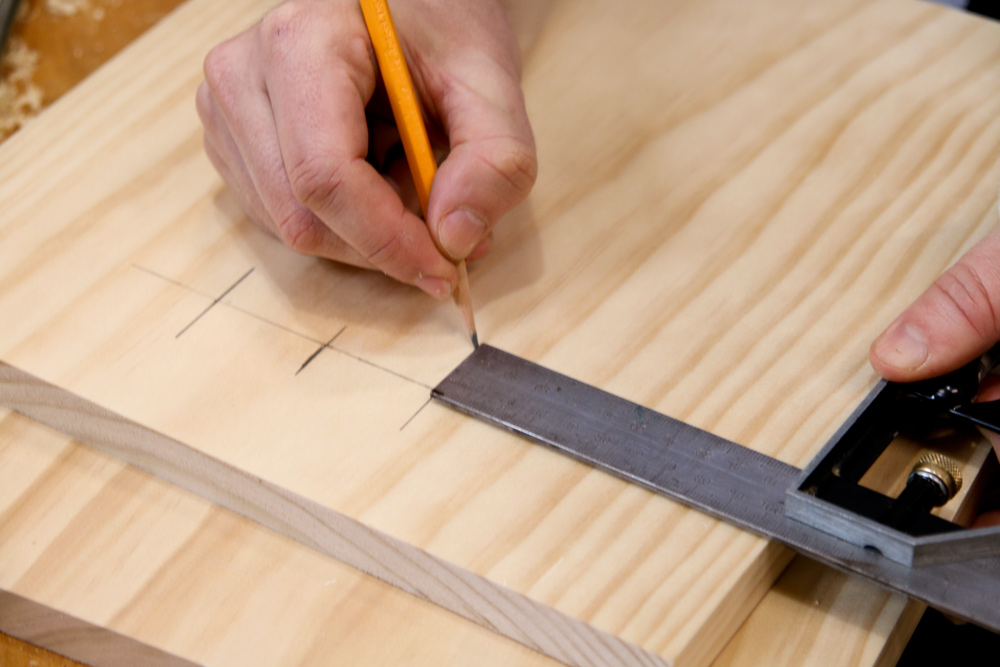
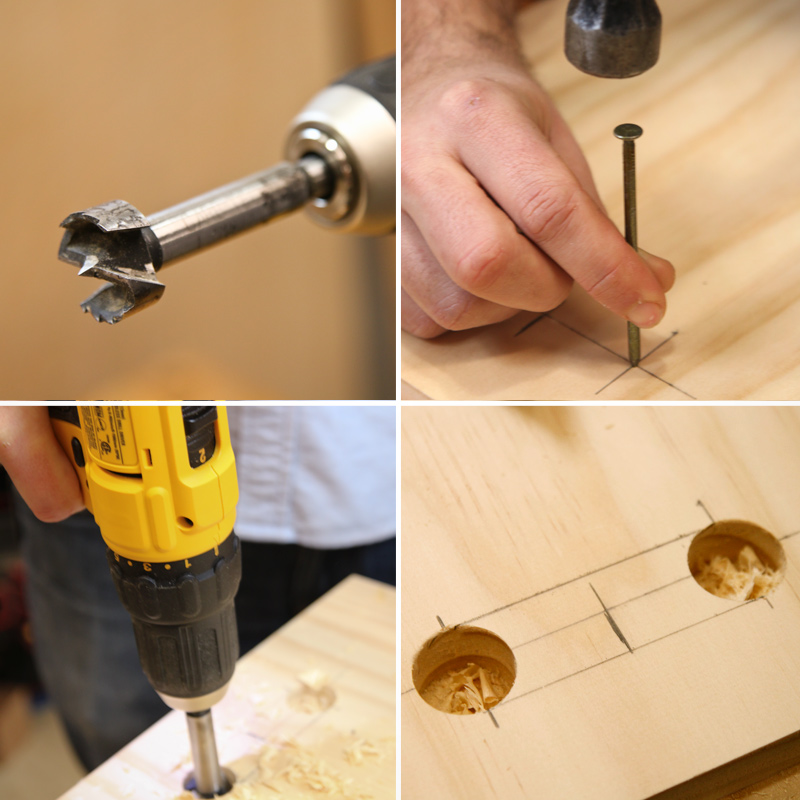
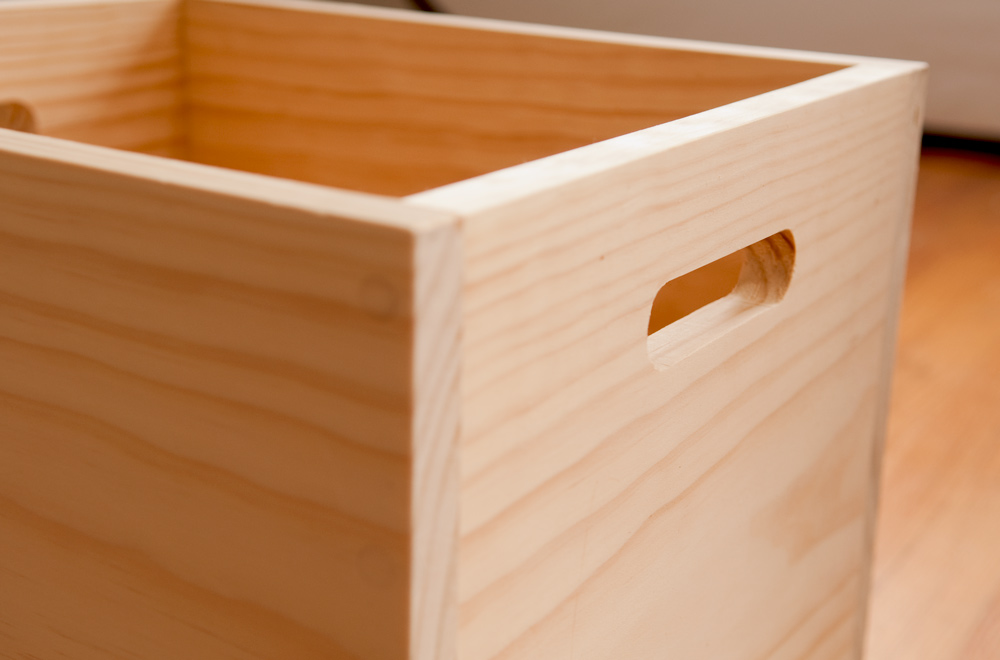
On each side panel, draw a horizontal line near the top (we placed ours 2″ from the top). Now find the center of the side, and mark. This will be the center of your box handle. Measure out 1.5″ to each side from this spot and make a mark. These crosshairs are the starting point (center) of your Forstner bit.
As shown below in the image below, make a starting divot for your 1″ Forstner bit using a hammer and nail. This prevents the bit from wandering when you start drilling, making for a cleaner hole. Next, drill down all the way through, keeping your bit as plumb as possible. Use some scrap wood underneath your work piece to prevent tearout. Repeat for both side panels of the box.
Step 3
Now, use a coping saw to cut out the waste between the two holes you just drilled. A coping saw is a great, affordable tool that allows you to make difficult cuts in tight spaces. It take a little practice to get the hang of it, so if you've never used one before, try a few cuts on some scrap wood first.

Step 4
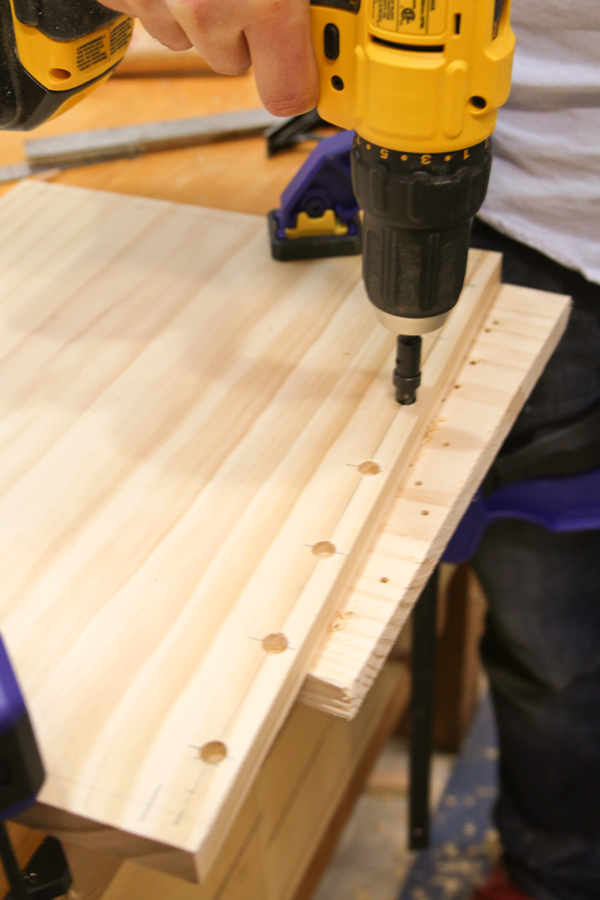
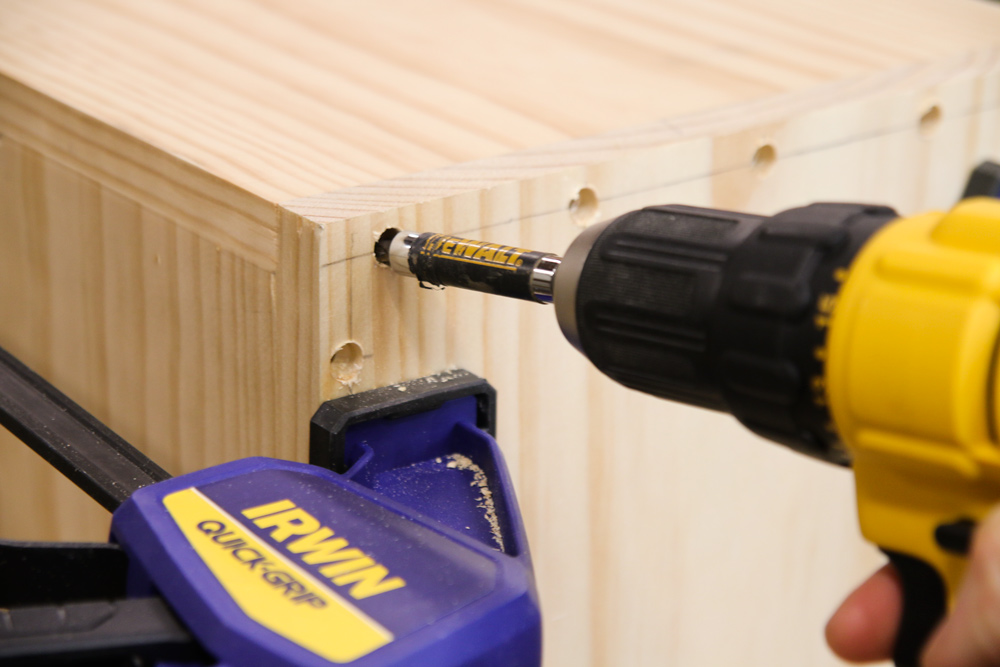
We're going to be joining our pieces together using counterbored screws. This allows us to sink the screw heads below the surface, and hide them under wooden plugs. It's also really strong; great for moving heavy objects around, and you'll never have to worry about dropping your precious record collection.
Lay out your drill points first by marking a line 3/8″ from the outside edges of the front and back boards. Your drill holes will run along both sides (across the grain) and the bottom of the front and back boards. I evenly spaced five holes along the sides, and six holes along the bottom. Once your points are marked, drill through (again, use scrap wood below) using your counter bore bit. Adjust the stop on the counter bore bit so that the tip of the counterbore will not blow the opposite side. Then drill each hole until the stop collar hits your work piece.
Step 5
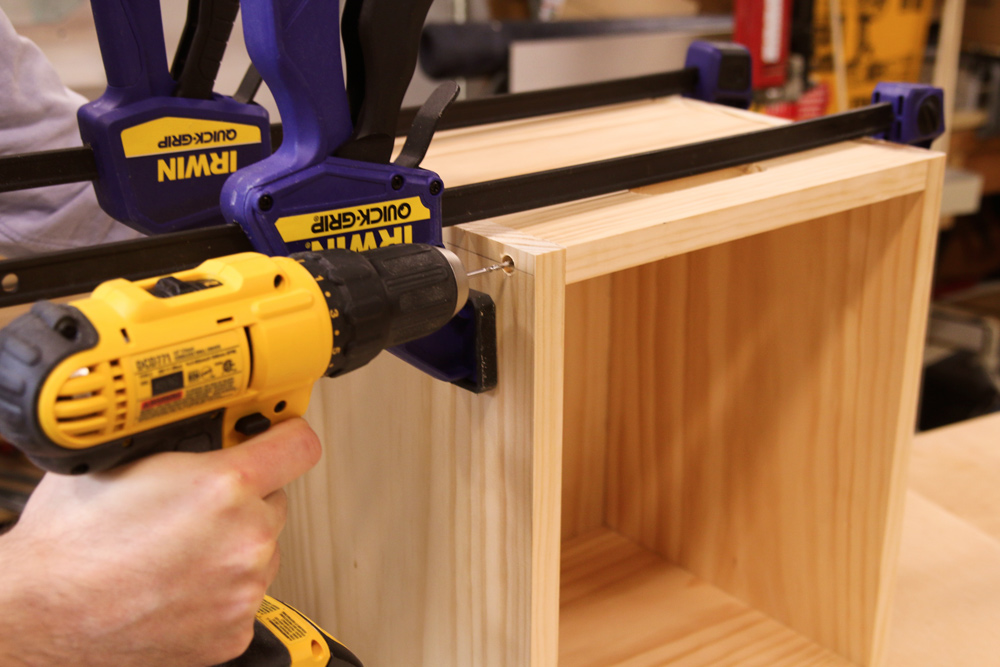
Now it's time to put everything together. Use your clamps to assemble the box, making sure your edges are flush. Insert the bottom piece to keep everything square.
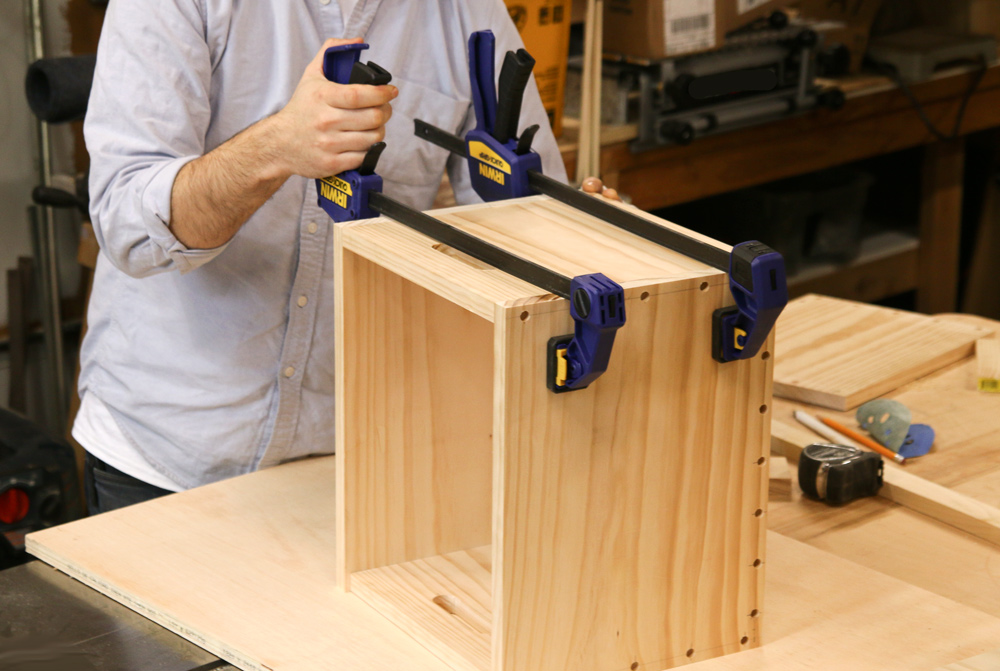
Now, using a 1/8″ drill bit, drill through the counterbores to make pilot holes in the side pieces. This will keep your screws from splitting the material.
Step 6
Use a driver bit to screw the pieces together. If you've done everything right, you can't really screw this up (no pun intended). Just make sure you slow the drill down toward the end so you don't strip the screws. You can also finish the job by hand with a #2 screwdriver.
Step 7
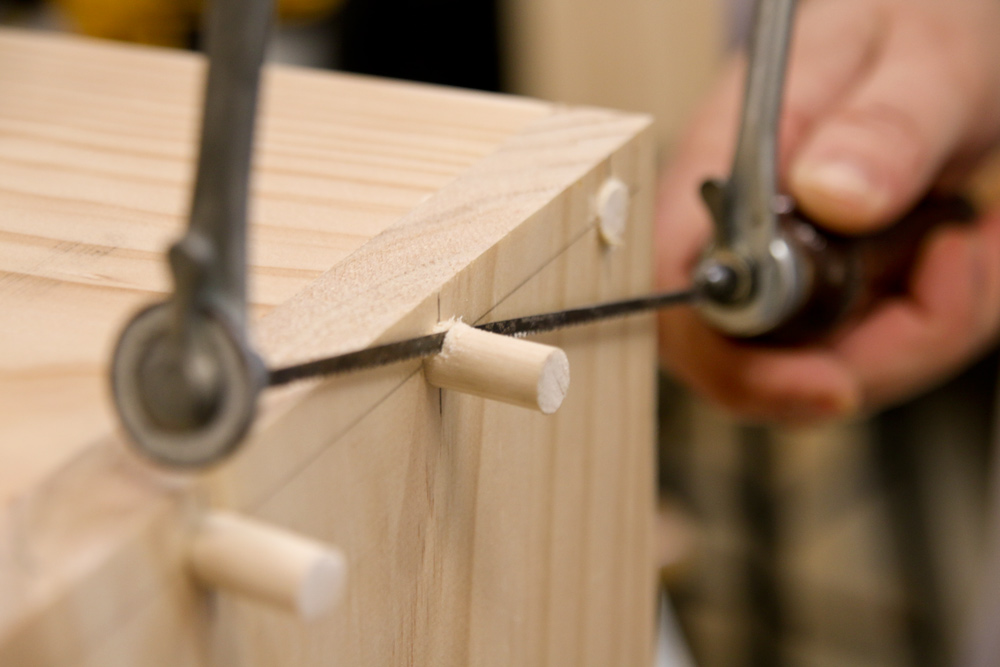
The counterbores are filled in with 3/8″ dowel rods. These aren't structural; they just hide the screw heads. Cut thirty-two 1″-long pieces out of your dowel rods. You can do this with a coping saw, like I did, or if you have another crosscut saw, like a miter saw, you can cut them that way. Just make sure you stay safe with the small size. (Check your local Orchard store; they may have pre-cut dowel rods for just this sort of thing. Look in the hardware aisle.)

Once cut, dip one end in glue and insert them into the counter bores, tapping them in gently with a hammer.
 Step 8
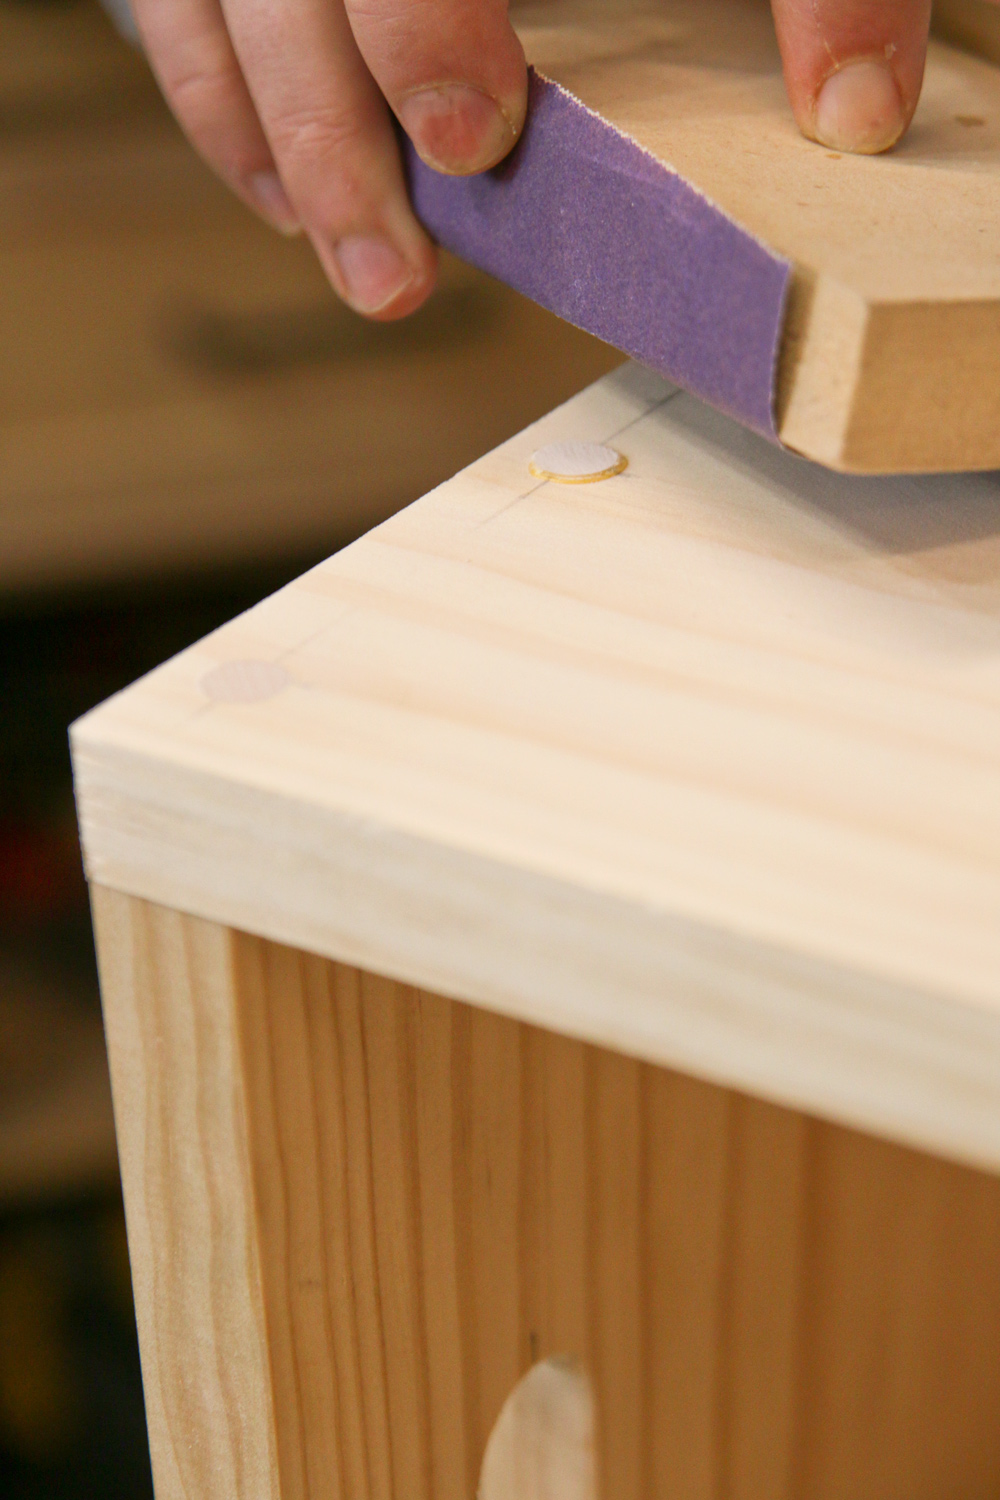
Wait about half an hour for the glue to set up, then use the coping saw to cut off the excess dowel rod material. Be careful not to mar the finished surfaces when you do this; it's better to leave a little too much than to cut too close.
 Step 9
Sand the remaining material down until it's flush with the surface. Use a scrap block of wood to back up the sandpaper so you don't round over the edges. Sand with the grain and don't use too much pressure.
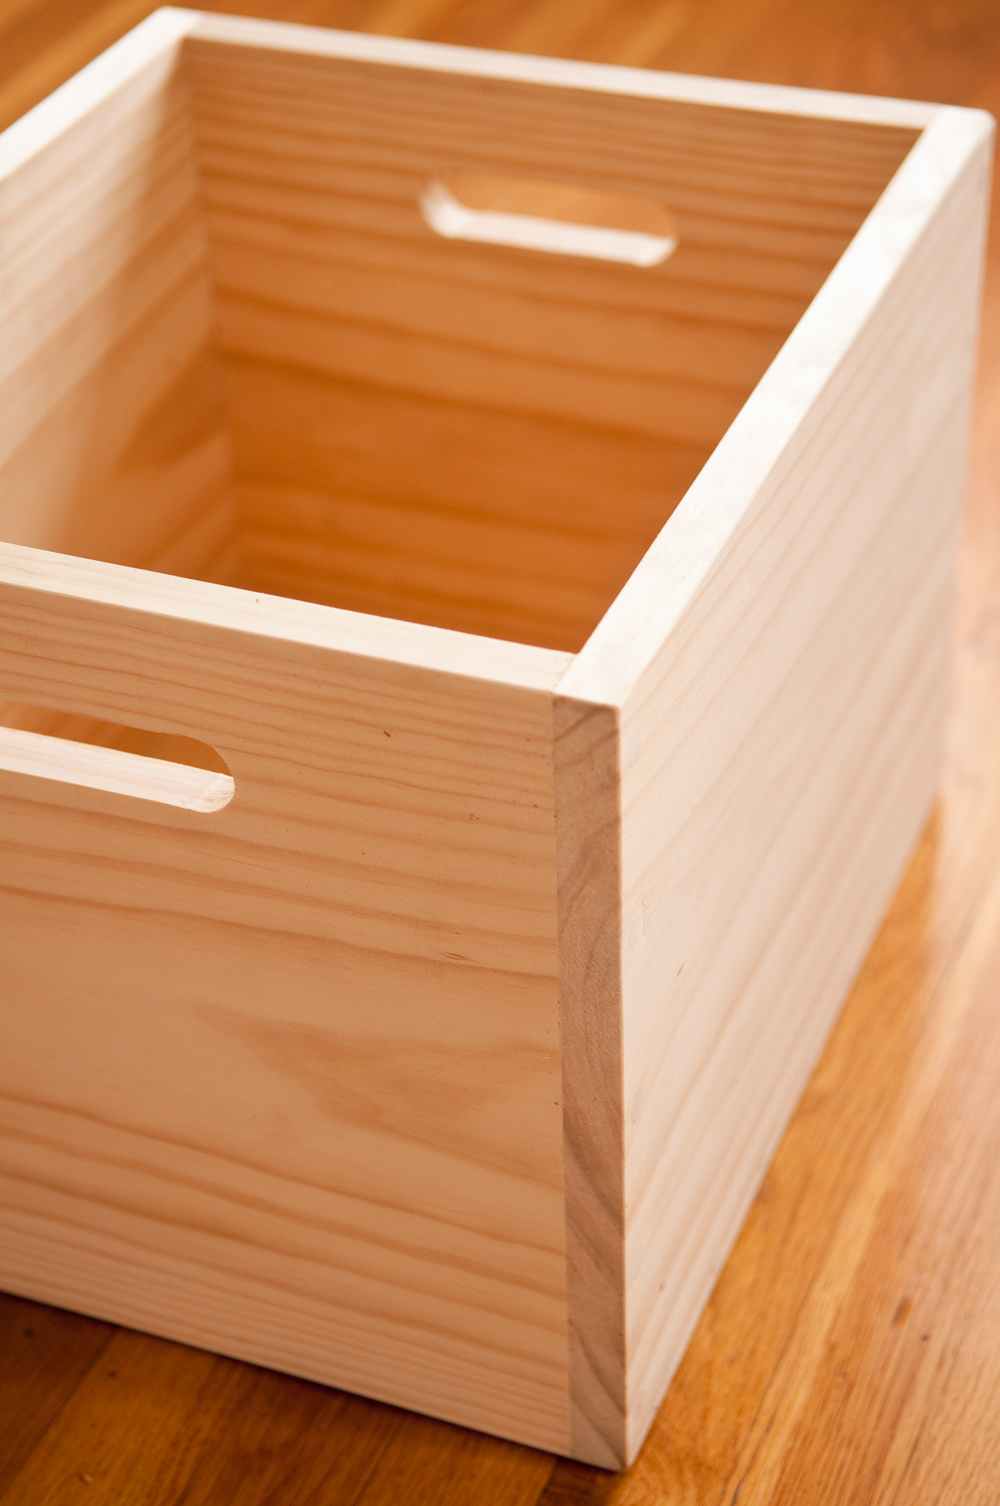
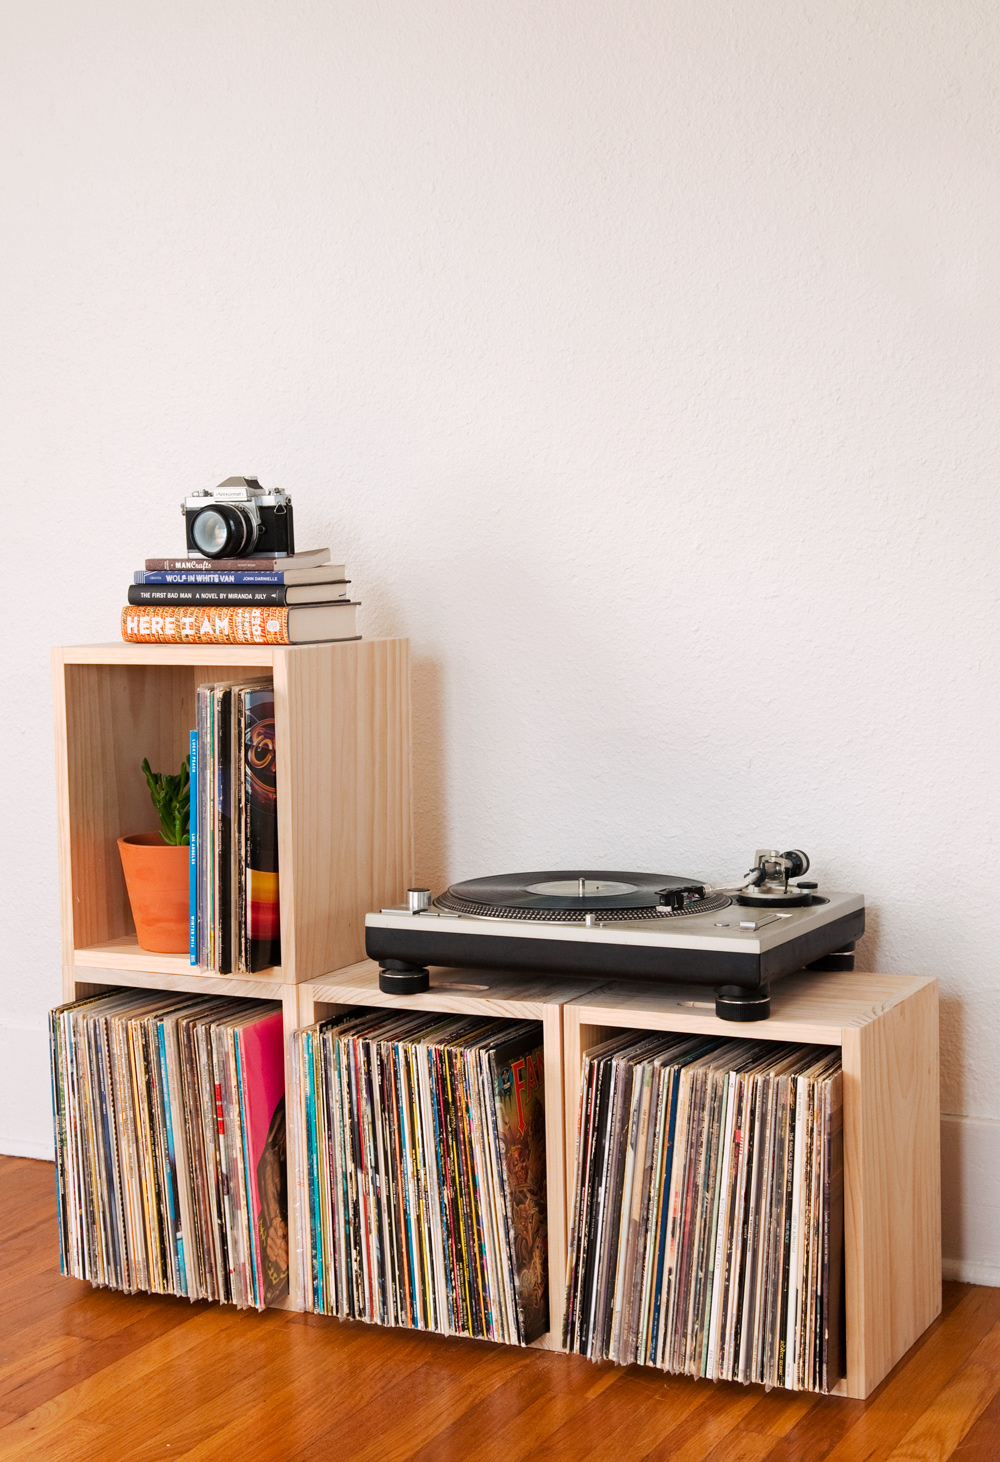
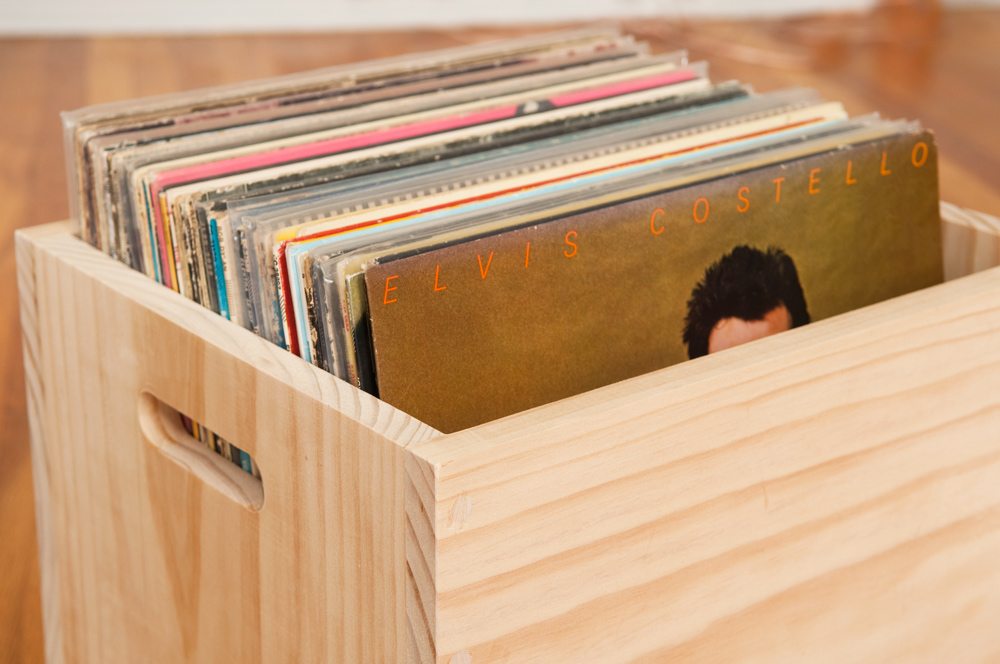
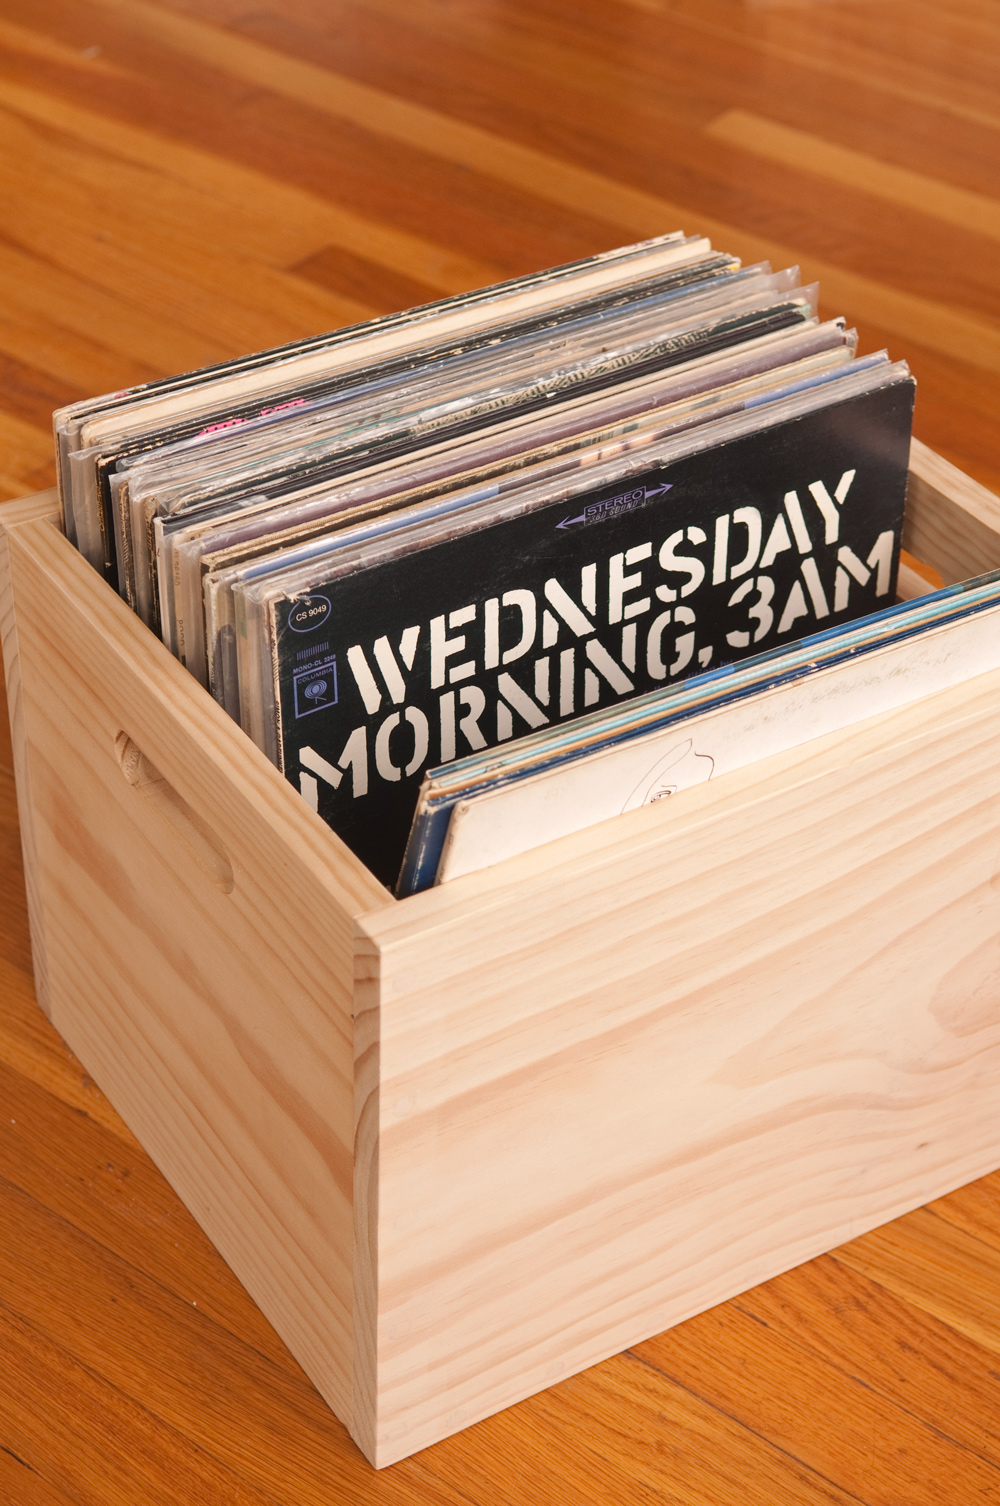
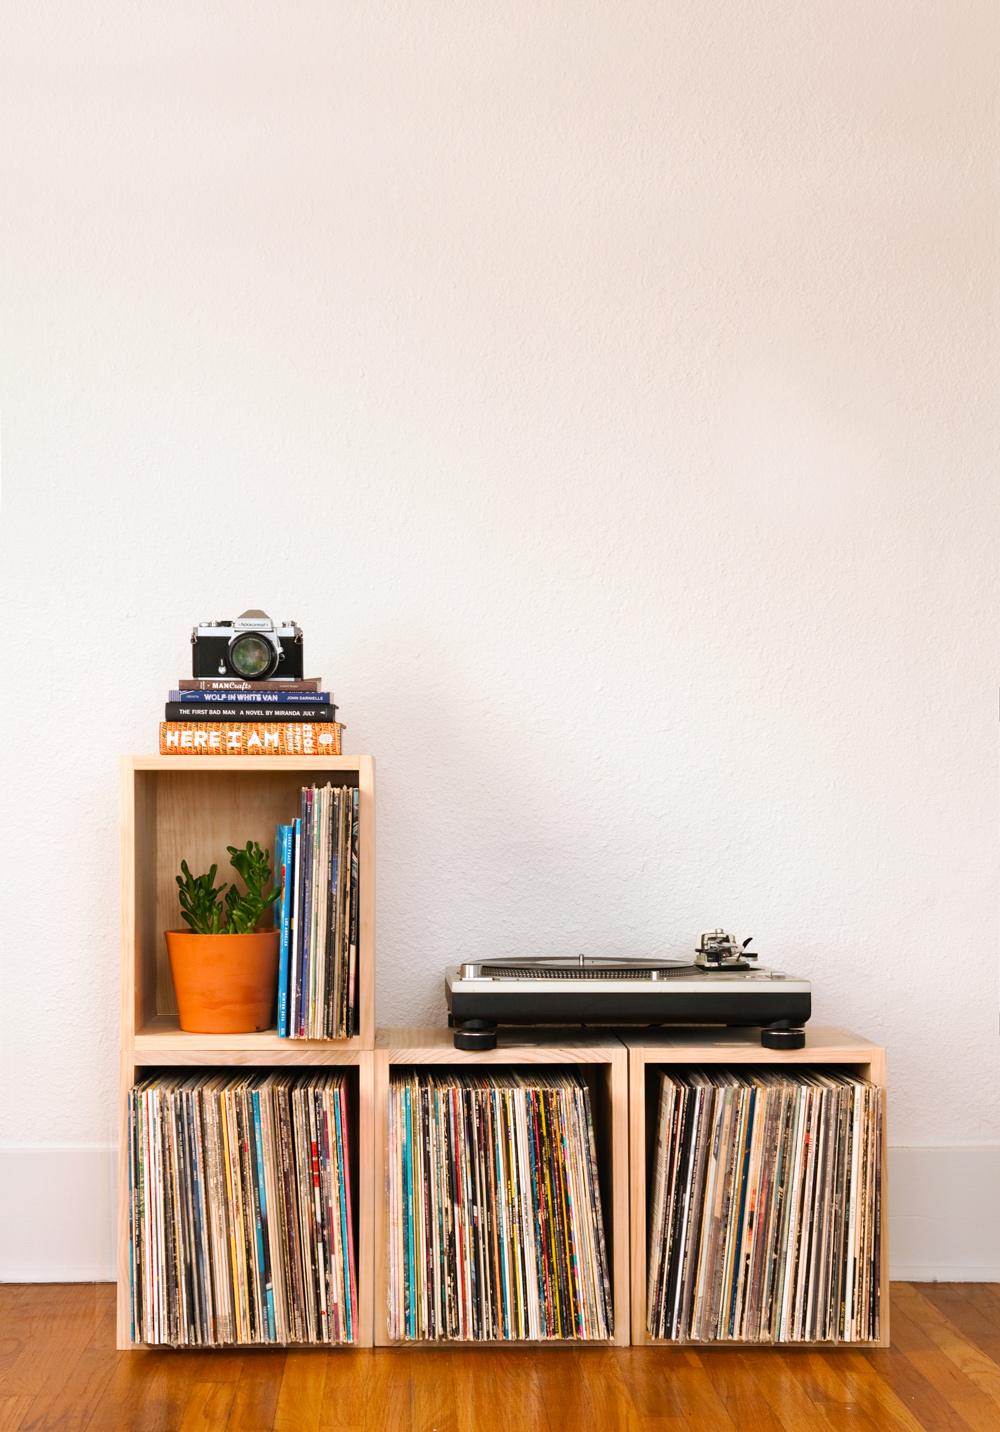
What I love about these boxes is that they're strong, stackable, and you can fit all kinds of stuff in 'em. I'm using them as DIY wooden record crates, but they'd also be great for toys, winter clothing (hats and gloves), or as closet organizers. They're sturdy enough for tools or heavy items; you can even stand on them without worrying that they'll break.
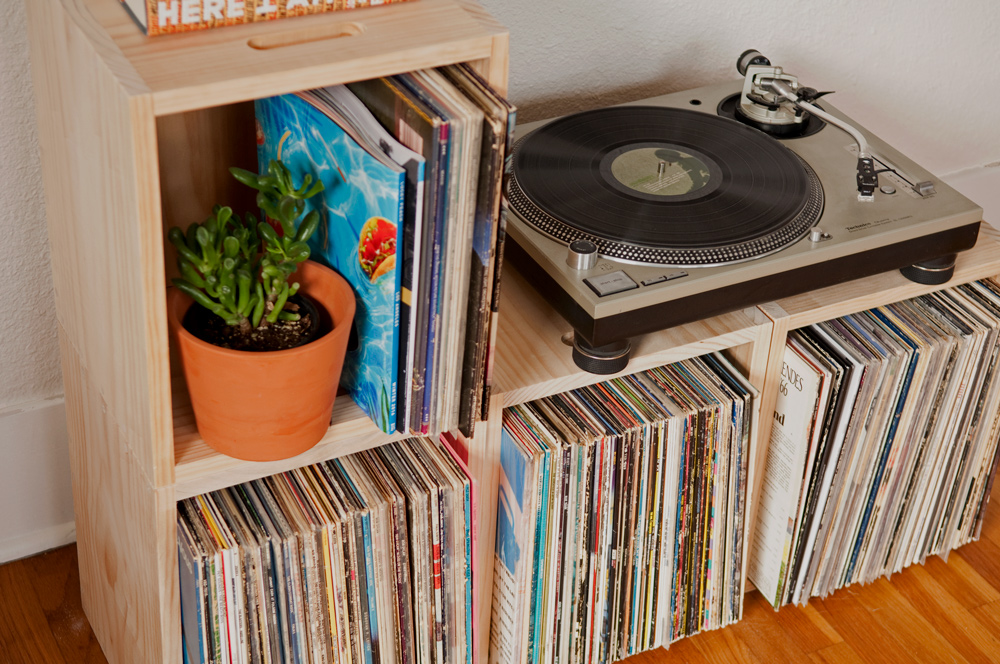

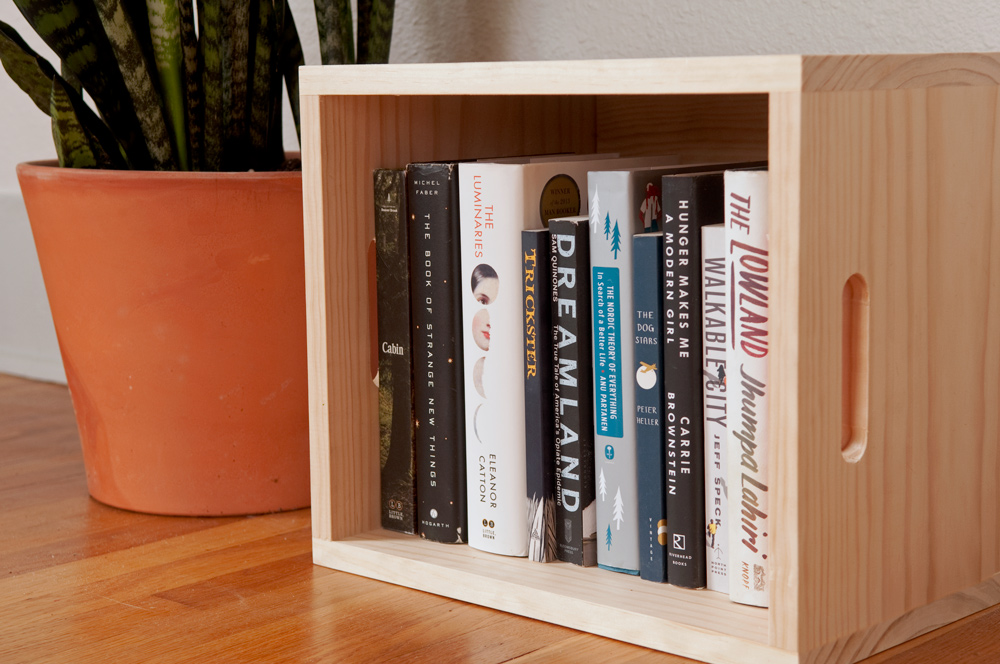
They work resting on either the long or short sides, or the base, and can be mixed and matched as needed. I made an extra one to house my lineup of books to read. I plan to whip up a few more to use in my garage for strong project-specific storage.


The Giveaway

CLICK HERE TO ENTER THE GIVEAWAY

Follow along with the #OrchardSimple campaign on their blog, Facebook, and Pinterest pages. It's all about thoughtful DIY projects that you can take on to help simplify your daily life. Can't beat that.
This post is sponsored by Orchard Supply Hardware. Thanks for supporting the brands that make ManMade possible.


