How To: Make the Perfect Homemade Salsa
Though it’s the way most of us consume them, salsas are not just for chips. That limitation is a shame, because these Mexican table sauces can be so much more than watery blend of canned tomatoes and vinegar intended for scoping. I was born in Mexico, so fresh, bright and bold salsas are close to my heart.

So, join me on a virtual south-of-the-border trip, and learn the basic techniques of making the perfect homemade salsa.
The term salsa – which basically means “sauce” in Spanish – is usually used to describe a tangy mix of tomatoes, onions, and peppers, but its origins and varieties go way beyond that. Salsas have been around for a really long time – think Spaniards wearing conquistador clothes and Aztecs grinding fresh ingredients in a Molcajete. They have been a staple in Latin cuisine for generations, so you can only imagine how many recipes have been created!
The concept is simple – use the right ingredients that complement each other well, and don’t over complicate things. Here’s the process, broken down into a few, basic steps. Take note!

STEP 1: Choose the ingredients. Chiles (fresh or dried), a base, and seasonings. That’s it. As long as you have a base (e.g. roma tomatoes, tomatillos, pineapple) you’ll only need a few complementary elements like cilantro, onion, and lime.
STEP 2: Prepare the ingredients. Roasted, smoked, raw – whatever floats your boat. Each method will dramatically change the flavor in your recipe, so feel free to experiment.
STEP 3: Finish him! The salsa, I mean. There are 2 basic methods: pureed or chunky. Think about how you’re going to serve it: on top of fish, in tacos, with roasted pork, etc, and pick a texture to match.
Now, let’s talk about the most common cooking and finishing techniques:
THE ROASTED

This method adds more depth of flavour and is perfect to complement any grilled dish, and adds complexity to winter dishes cooked indoors. What you’ll need:
- Roasting pan
- Canola oil
- Salt and pepper
Gather your ingredients, place them in a pan, and rub them with some love and canola oil. Season with salt and pepper. Place them under your broiler or – if you have a gas stove – roast them directly on the flame. Once the skin starts to char, remove from heat and place them in a paper bag, clean cloth, or sealable container. Let them “sweat” until they cool down a little.
Once they’re cool enough to handle, take them out of the bag/cloth and remove excess char. Finish according to recipe.
Bonus tip: If you want lots of heat, roll your whole roasted chiles on a chopping board – this will release the oil in the seeds and it’ll send you straight to picante town.
THE RAW

This method is recommended if you want to keep the tanginess of the fresh ingredients in the salsa. It’s also great for quick summer snacks and low-fat diets. I suggest you use really ripe ingredients, otherwise your salsa will lack flavor. Got an avocado that’s about to go kaput? Or maybe some fresh tomatoes from the garden? Use them up and get ready to have a fiesta in your kitchen!
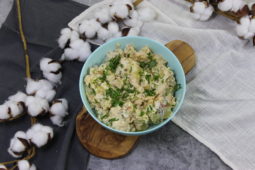
CHUNK

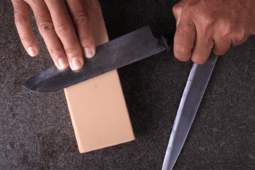
Just like the raw method, this one is a breeze to make. Chop, chop, chop, and away you go. If your knife skills suck, don’t worry! The chunkier it is, the more rustic it looks. Chunky salsas (made fresh at home) last for about 3 or 4 days in the fridge, before they start to break down. Try to prepare these at least an hour ahead so the ingredients can mingle.
PUREE

Let your food processor do the magic for you. This is probably the most popular method in Mexico. It’s easier to serve, and also allows you to freeze any leftovers. To make it extra smooth, strain your mix to collect any seeds or veggie skins.
This post originally published on April 24, 2013