How to: Make DIY Faceted Wooden Wall Hooks
 A few weeks ago, my good friend and professional collaborator Capree was redesigning her home office, turning a third bedroom/junk room into a organized workspace, from where she and her husband can both work from home on their many creative projects. One afternoon, whether cause she really thought I’d say yes or just to keep us both on our toes during the long, isolated days of working at home by yourself, she asked me if I’d be willing to make her some faceted wood wall hooks for her new office. “Sure,” I said. “Really?!” she replied, thinking I was joking. “Of course,” says I. “What wood species do you want?” See, for more than two years, I’ve been on again/off again experimenting with safe and clean ways to make organic-looking facets in wood blocks. Most power tools are designed to make straight, square cuts, so cutting things at random, without getting your hands too close to anything dangerous, has actually proved pretty difficult.

There have been several times when I’ve tried the compound miter saw, but its adjustable angles and flat table made more of a pyramid than a faceted gem shape. The band saw, I thought, would absolutely be the way to go, but it was tough to move the wood through the blade without enough support on the table, and I got too many blade marks and rounded-over edges to get the clean look I wanted.

I even bought a new tool to try cutting them with a handsaw – a Japanese pull-saw, but keep the blade on the same plane while cutting at a weird angle proved too be too difficult. (But I sure do like that new saw for other tasks).
Finally, I figured out a workable solution where I felt safe working on such a small scale and getting my fingers close to the cutter…which was, not to cut them at all, but remove the waste with sandpaper. Which, if you nick your finger or a knuckle (I didn’t here, but have sanded away some epidermis on other projects), is a little irritating, but not dangerous.
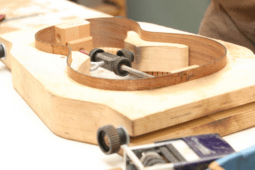
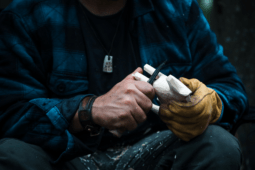
The best tool for the job is a stationary sander, which comes with a flat table on which you can rest your work piece. The most popular combo is a disc and belt combo sander, which uses one motor to spin both a 6 or 8″ disc and 4-6″ wide belt. If you don’t have a stationary sander, try clamping or vice-mounting a belt sander or random orbit sander. Or, just use some regular 80 grit sandpaper and a sanding block, and put on a movie!
For this project, I choose soft maple, which is presumably some other species than rock or sugar maple. It matched Capree’s color scheme, and I figured the “soft” would make it easier to sand away the material than a denser wood.

I cut a 10″ long 3×3″ into the following sizes (reducing the size after creating each gem, making all three from one length of stock)
- 2 1/2 x 2 1/2″
- 2 x 2″
- 1 3/4 x 1 3/4″

Then, I used an 80 grit disc and started shaping at random. There’s no science here; just move around the face, alternating corners, and avoiding any symmetry.

Once one facade was shaped, I cut the stock into a 1 1/2″ slice to make the final thickness.

Then, I begin to shape the sides and the bottom. Since these will be used to actually hold items on the wall, I made sure to sand the back into a gradual slant to make a “hook” on which to hang things.

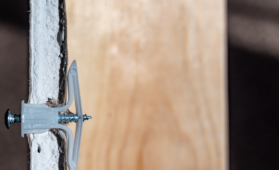
Lastly, I sanded each facet carefully, making sure not to round over the edges, to a fine 220 grit. To attach the hooks to the walls, I choose dowel screws, which are basically a two-sided screw with threads on each end, one for the wood, and one for the wall. I used a matching bit to drill the pilot hole, with a piece of painter’s tape to stop me from drilling all the way through. If you’re tackling this project,

To hang, just spin the screws into flush-sunk drywall anchors, or if you plan to hang something particularly heavy, toggle or molly bolts.
So, if you’ve ideas on how-to cut these wacky angles safely, please post them in the comments below. Otherwise, the sandpaper works just fine, and you can whip up as many as you want in about ten minutes a piece.
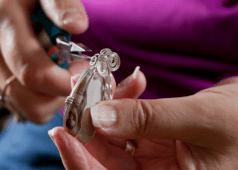
And! Lots of feature photos, since Capree is a way better photographer than me:


And if you didn’t see last week, these guys make a pretty fine modernist snowman: