Brewed, Part II: Preparing for Brew Day

While the first brew can be intimidating with so many items to collect, at this point the time has come to lay it all out and prepare for brewing. Let’s take a look at the pieces we need for a fast and easy brew day.  1. The Ingredients
The old adage “garbage in, garbage out” holds very true for brewing ingredients. While it may not always be possible, try to get fresh ground grains, use fresh hops (they’ll look like pellets of rabbit food, but smell delicious), and quality yeast.
Grains are the body of the beer, bringing the roasted flavors, malts, and other main characteristics that define the flavor. Grains can be combined to give notes of honey, coffee finishes, or a toasted wheat. The brew-store will work with your recipe to combine and grind all the grains into a single brown-bagged mix.
Hops give the finish aroma and flavor, which can be light and crisp or heavy and bitter depending on the quantity, boil time, and other ingredients. While the actual hops look like small seed bundles, what will be available in most stores are small pellets that are stored in temperature controlled air-tight containers. Some recipes can call for more than one type of hops, and a few ounces will go a long way, so start small and stay away from a triple-hopped recipe for the first batch.
Yeast is the heavy lifter in the brewing process. They are sensitive, temperamental, and need consistency to really thrive. While dry yeast is fine for this step, if available go with liquid yeast but make sure not to substitute another strain as this can alter the final product substantially. If going with dry yeast, make very sure to re-constitute gently in water for best results.

2. Getting Together All The Pieces
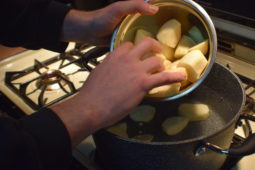
In addition to all the ingredients, take a good look at the tools to make sure everything is set. Most recipes will require an 6-8 gallon brew pot, steeping bag, long stirring spoon, floating thermometer, and plastic or glass fermenting container with airlock. A few extras might include a hydrometer to measure specific gravity, and a copper immersion cooler. A few things to keep in mind, the brew kettle needs to hold the water, and all grains within the steeping bag without overflowing. Also, the boil can get a bit out of hand, so if possible set up an outdoor boil to contain the mess.

3. Setting Up The Space
Efficient movement throughout the process minimizes the risk of contamination and makes it easier to get everything right for the first batch. Set up the space with everything you’ll need for the brew, and make sure sanitized tools and containers have a clean place to sit out of the way but close enough to grab without contamination. If brewing in a kitchen, wipe the countertops clean and claim the entire sink for sanitizing the goods. If brewing outside, a large flat table or counter is invaluable to keep gear off the ground. It takes a few hours to boil everything, so a few comfortable chairs for the guys are just about a necessity.

4. Sanitizing EVERYTHING
While there are plenty of steps in this process, essentially making beer is like brewing a huge pot of tea, then letting it age for a few weeks to achieve a balanced flavor. The brewing step brings all the ingredients together, and the fermenting stage converts those ingredients into carbonated alcoholic excellence. The issue with fermenting is the unpredictable nature of yeast growth, any contamination to the mixture can produce off-flavors or strange side-effects. That is why full sanitation of anything that may come into contact with the cooling brew. Once the boil has been completed it’s important to keep everything as clean as humanly possible. That is why a no-rinse sanitizer like Star San is essential.
On a related note, using tap water can introduce all kinds of unwanted ingredients into the brew, most notably chlorine but there are also many others which can drastically effect the fermentation. Be sure to use filtered water, or better yet grab bottled water from the store.
With these preparation steps, it’s time to brew your first batch of homemade beer. Here are a few notes on my hard learned lessons from my first brew:

My first batch of beer was an experiment that went a bit . . . off. The “dirty red” as we’ve called it, started out right but a few mistakes were made. First, temperature variations likely stalled some of the sugar extraction from the grains, it’s important to maintain consistent temperatures during the process. Second, when removing the grains, a large hole was found in the steeping bag which introduced grains into the boil, this contributed to a large amount of sediment and possible off-flavoring. Finally, when bottling the brew a few months later (yes, way past the recipe’s 2-3 week fermenting time), the long (way too long) siphon hose was set on the bottom of the barrel, sucking all the settled sludge into each bottle resulting in a very “dirty” Irish Red. Take the time to follow the directions, pay attention to details, and always use the right tools to make your first batch a great final product!
This is part two of a four part series on homebrewed beer. Next week we will be breaking down brew day as we turn water into 5 gallons of homebrewed excellence.