How to Replace Exterior Door Weather Stripping (and Why You Should)
If your home feels drafty or you’ve noticed bugs sneaking in around your doors, your weather stripping could be to blame. Replacing it is a surprisingly simple project that can improve energy efficiency and keep pests from getting inside. In this article, we’ll walk you through why it’s important and how to replace your exterior door weather stripping step by step.
For a more visual explanation of the process, check out Matt the Fixer‘s YouTube channel by clicking on the video below:
Why Weather Stripping Matters
Take a close look at the edges of your exterior door and you’ll notice a rubber or foam seal. This is your weather stripping. It’s designed to form a tight seal between the door and its frame, keeping out air, moisture, insects, and even rodents. Over time, however, this material can dry out, crack, or become compressed, making it less effective.
If you can see daylight around the edges of your door or feel a draft coming from it, it’s time to replace your weather stripping.

Choosing the Right Type of Weather Stripping
Before you pull off the old stripping, take a minute to examine how it’s installed and what kind it is. One common type is called “kerf-style” weather stripping, which fits into a small groove (or kerf) in the door frame. These are easy to replace and still widely used, even on older doors.
If your current setup doesn’t use kerf-style stripping, there are plenty of alternatives. Foam tape, vinyl seals, and even nail-on or adhesive-backed metal-and-foam combinations can work just as well, depending on your needs.

Start with the Door Sweep
Before addressing the weather stripping around the sides and top, it’s a good idea to check the bottom door seal, also known as a door sweep. In many cases, this area suffers the most wear and tear as it encounters the most friction, running back and forth against your floor. If it’s damaged, you might notice a large gap or even bite marks from mice.

To replace the sweep:
- Remove the door.

- Take off the old bottom seal.

- Trim the new sweep to the correct length.

- Slide or attach the new sweep in place.

- Reinstall the door.
Even just fixing this bottom section can solve a significant part of the problem, especially when dealing with pests or drafts.
Replacing the Weather Stripping
Once you’ve got your replacement material, follow these steps:
1. Remove the Old Stripping
Use needle-nose pliers to gently pull it out of the groove. If it’s nailed in, either remove or hammer down the nails to avoid obstruction.

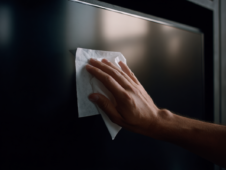
2. Clean the Area
Wipe the kerf or frame clean of dust and debris to ensure the new stripping fits securely.

3. Measure and Cut
Either measure the old pieces before discarding them or hold the new weather stripping against the frame to mark the right length. Use scissors to trim it to size.
4. Install the New Stripping
Align the stripping correctly, usually with the V-shaped portion pointing inward toward the door. Press it firmly into the kerf, starting at one end and working your way to the other.
Repeat this process for all sides of the door. For the vertical sections, start at the bottom and work upward to help cover any remaining gaps.

Add Extra Protection with Corner Seals
To improve the seal even further, consider adding self-adhesive corner pads at the bottom of each side of the door. These small foam inserts help close off the last bit of space that weather stripping might miss, especially where the vertical and horizontal seals meet.

Related Articles
- How to Replace A Garage Door Seal Quick and Easy
- Toilet Wax Seal Installation: A Step-by-Step Guide
- The Easiest Way to Reseal Your Driveway for Long-Lasting Results
Replacing your door’s weather stripping is a quick and affordable fix that can make a big difference in both your home’s comfort and energy efficiency. Even if your old stripping doesn’t look terrible, small gaps are enough to let in cold air, moisture, and pest, so it’s worth the time to replace if it’s due.