How to: Make Easy and Stylish DIY Concrete Coasters

So…if you’re anything like me, you’ll often see cool items in stores, you’ll say to yourself, “I could totally make that.” Which I do, all the time, and nine times out of ten, I’m totally wrong. But when I saw a set of concrete coasters in a cool little boutique, I knew it was worth a try. So, I gave it a shot. And? it was beyond easy to do. Here’s how:

Tools and Materials
- rapid set concrete (you can get a whole box at a home improvement store for like $10)
- plastic cups – one for each coaster and a couple for mixing
- Coarse and fine sandpaper
- a utility knife (I ended up not needing it, but I thought I might need to cut the cups off the coasters)
- presto felt (it’s felt with an adhesive backing. you could also use felt and craft glue, but presto is WAY easier)
Here’s What You Do:

1. Mix your concrete in one of your cups. You want to use four parts concrete to 1 part water. The cool thing about this stuff is that you don’t have to be exact. You want the concrete to be like melted peanut butter…. It should pour from your mixing cup easily!

2. Fill each of the cups with about 1/4″ of concrete, or however thick you’d like your coasters. Tap the bottoms of each cup against your work surface to help them level and get rid of any bubbles. I chose to make six coasters (hoping four would turn out well). Allow to dry for 60–90 minutes.

3. After your coasters are dry, turn each of the cups over and give them a good whack against your work surface. It wouldn’t hurt to put a towel down first, just to be safe.

4. Let your coasters dry for another 30 minutes. After that, clean up the edges and any other imperfections with sandpaper. Use a damp cloth to clean any concrete dust off of the coaster. Let dry overnight.

5. The next day, traces circles on the bottom of the presto felt to fit the bottom side of my coasters. Surprisingly, all six of mine turned out well, so I cut felt to finish all of them. I was able to use the little raised area from the cup as divot into which I could place the felt. Peel off the felt backing and apply to the bottoms of your coaster. Make sure you rub the felt onto the coaster really well.

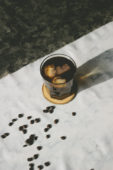
And…you’re done. Next time I try this, I’ll make my coasters just a little thinner for a more sleek look. But, the technique is super easy, and they’re quite durable, and will last me for a-many cocktail to come.
Cheers!