How to Install a Channel Drain
Proper water drainage for your property is one of the most important long-term preventative measures you can implement. Water build-up due to insufficient drainage can cause significant damage to basements, garages, and building foundations. If there is a lack of proper drainage, water can build up near or under the foundation of your property, which causes the soil to swell. This can lead to the foundation cracking or buckling under the extra pressure, or flooding in your basement. All of which will require costly and time-consuming repairs.
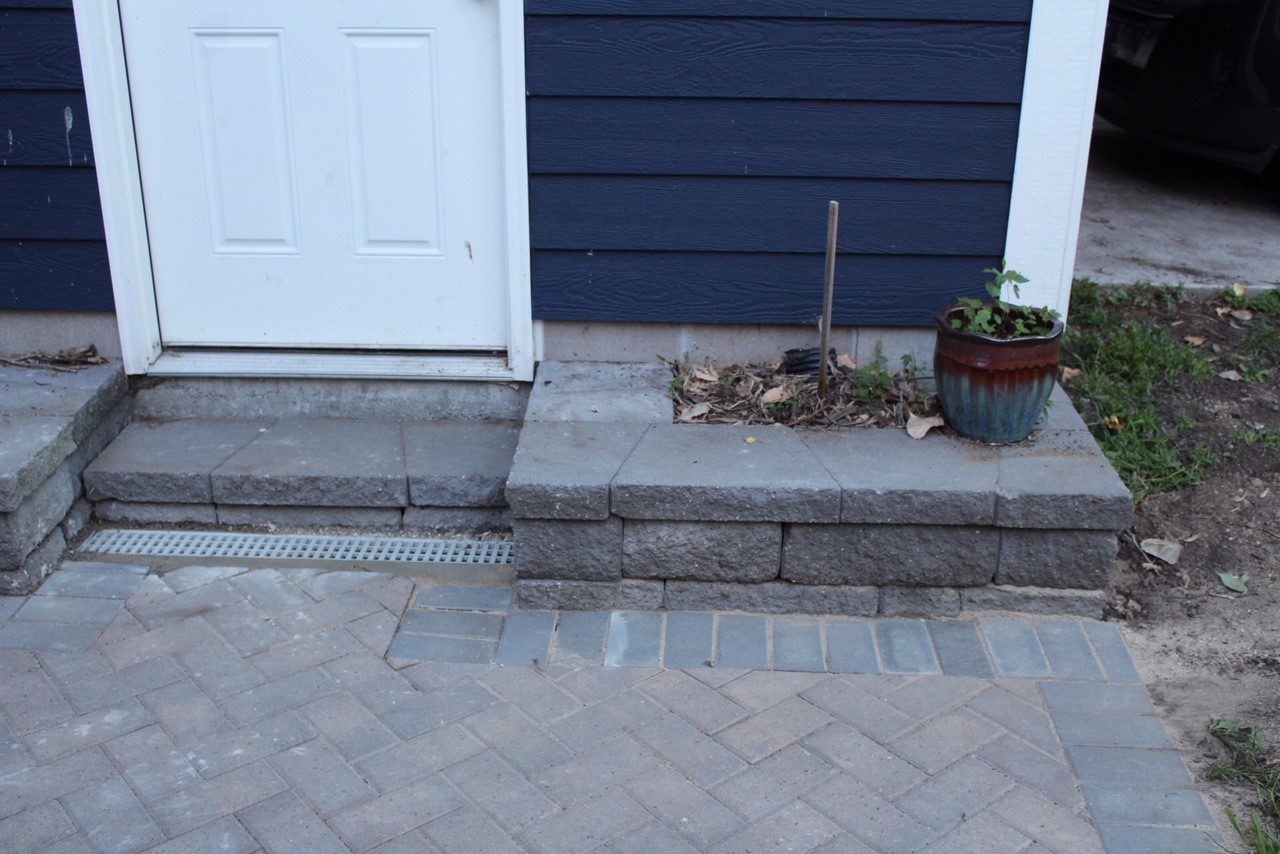
Knowing this information, I decided it was necessary to take preventative measures and add a drainage system on our back patio near our garage. On top of the damage that could result from excess water near the garage and back of my house, this patio area also became an ice rink during the winter months in Minneapolis (December – April). After doing the research, I concluded that a surface drainage system that connected to my existing underground tiled drain was the best solution. Channel drains feature metal or heavy plastic grating that is flush with the surface to be drained. Unlike many other drain systems, channel drains can be used in concrete areas such as garages, patios, or driveways where water tends to accumulate.
 After determining a channel drain was the best solution for my drainage problem, I set out to my nearest home improvement store to pick up the materials and get to work:
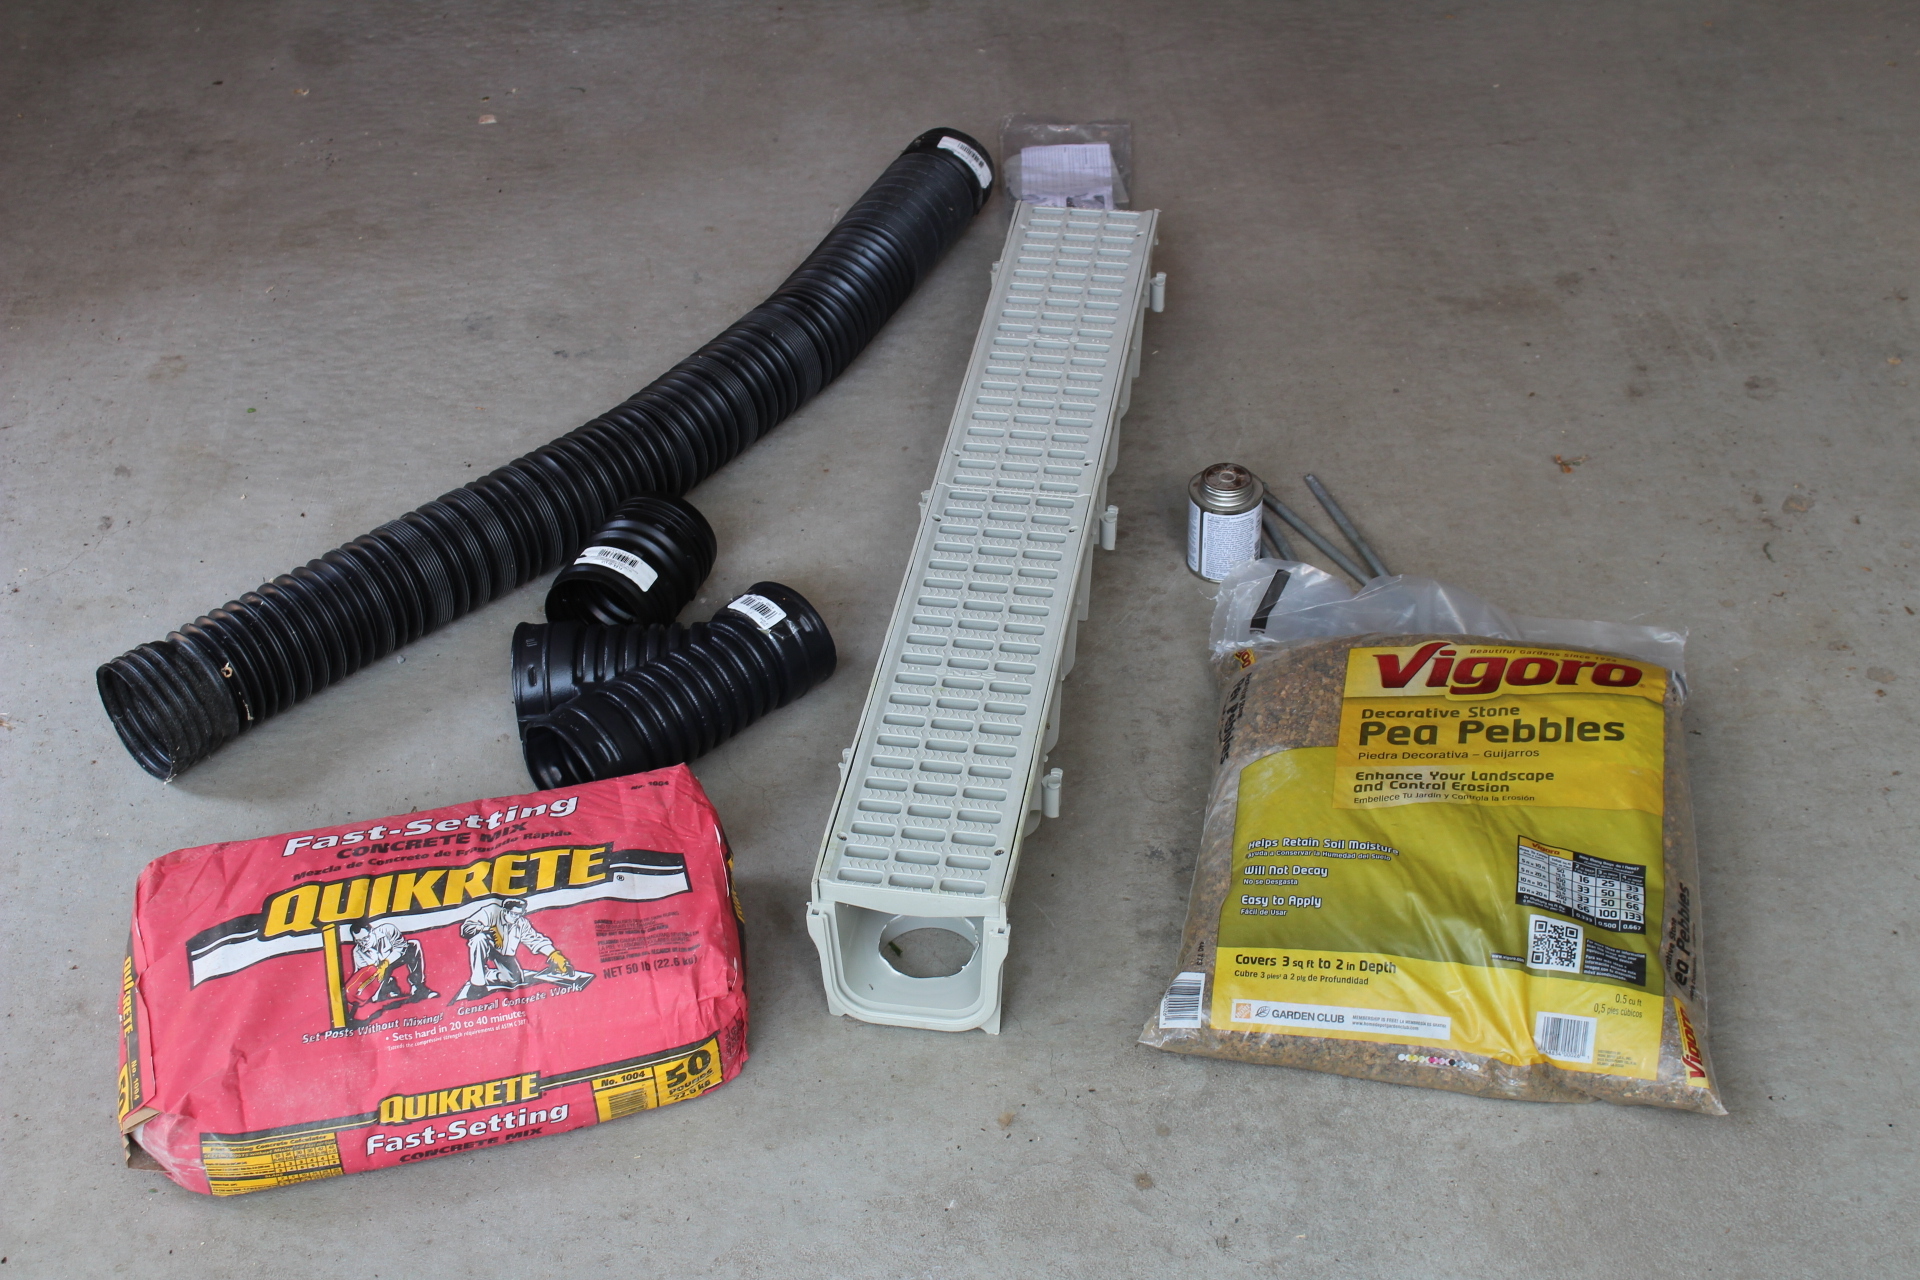
Materials
- Channel drain, AKA surface drain, perimeter drain, or French drain – $ 52
- Solid polypropylene drain pipe – $14
- Pipe connectors – Various costs depending on the need
- Concrete – $3 per bag
- Pea pebbles – $2.5 per bag
- Leveling sand (not pictured) – $3 per bag
- PVC solvent cement – $5
- Self-tapping screws
- Shovel
- Level
How to Install a Channel Drain
Dig your trench
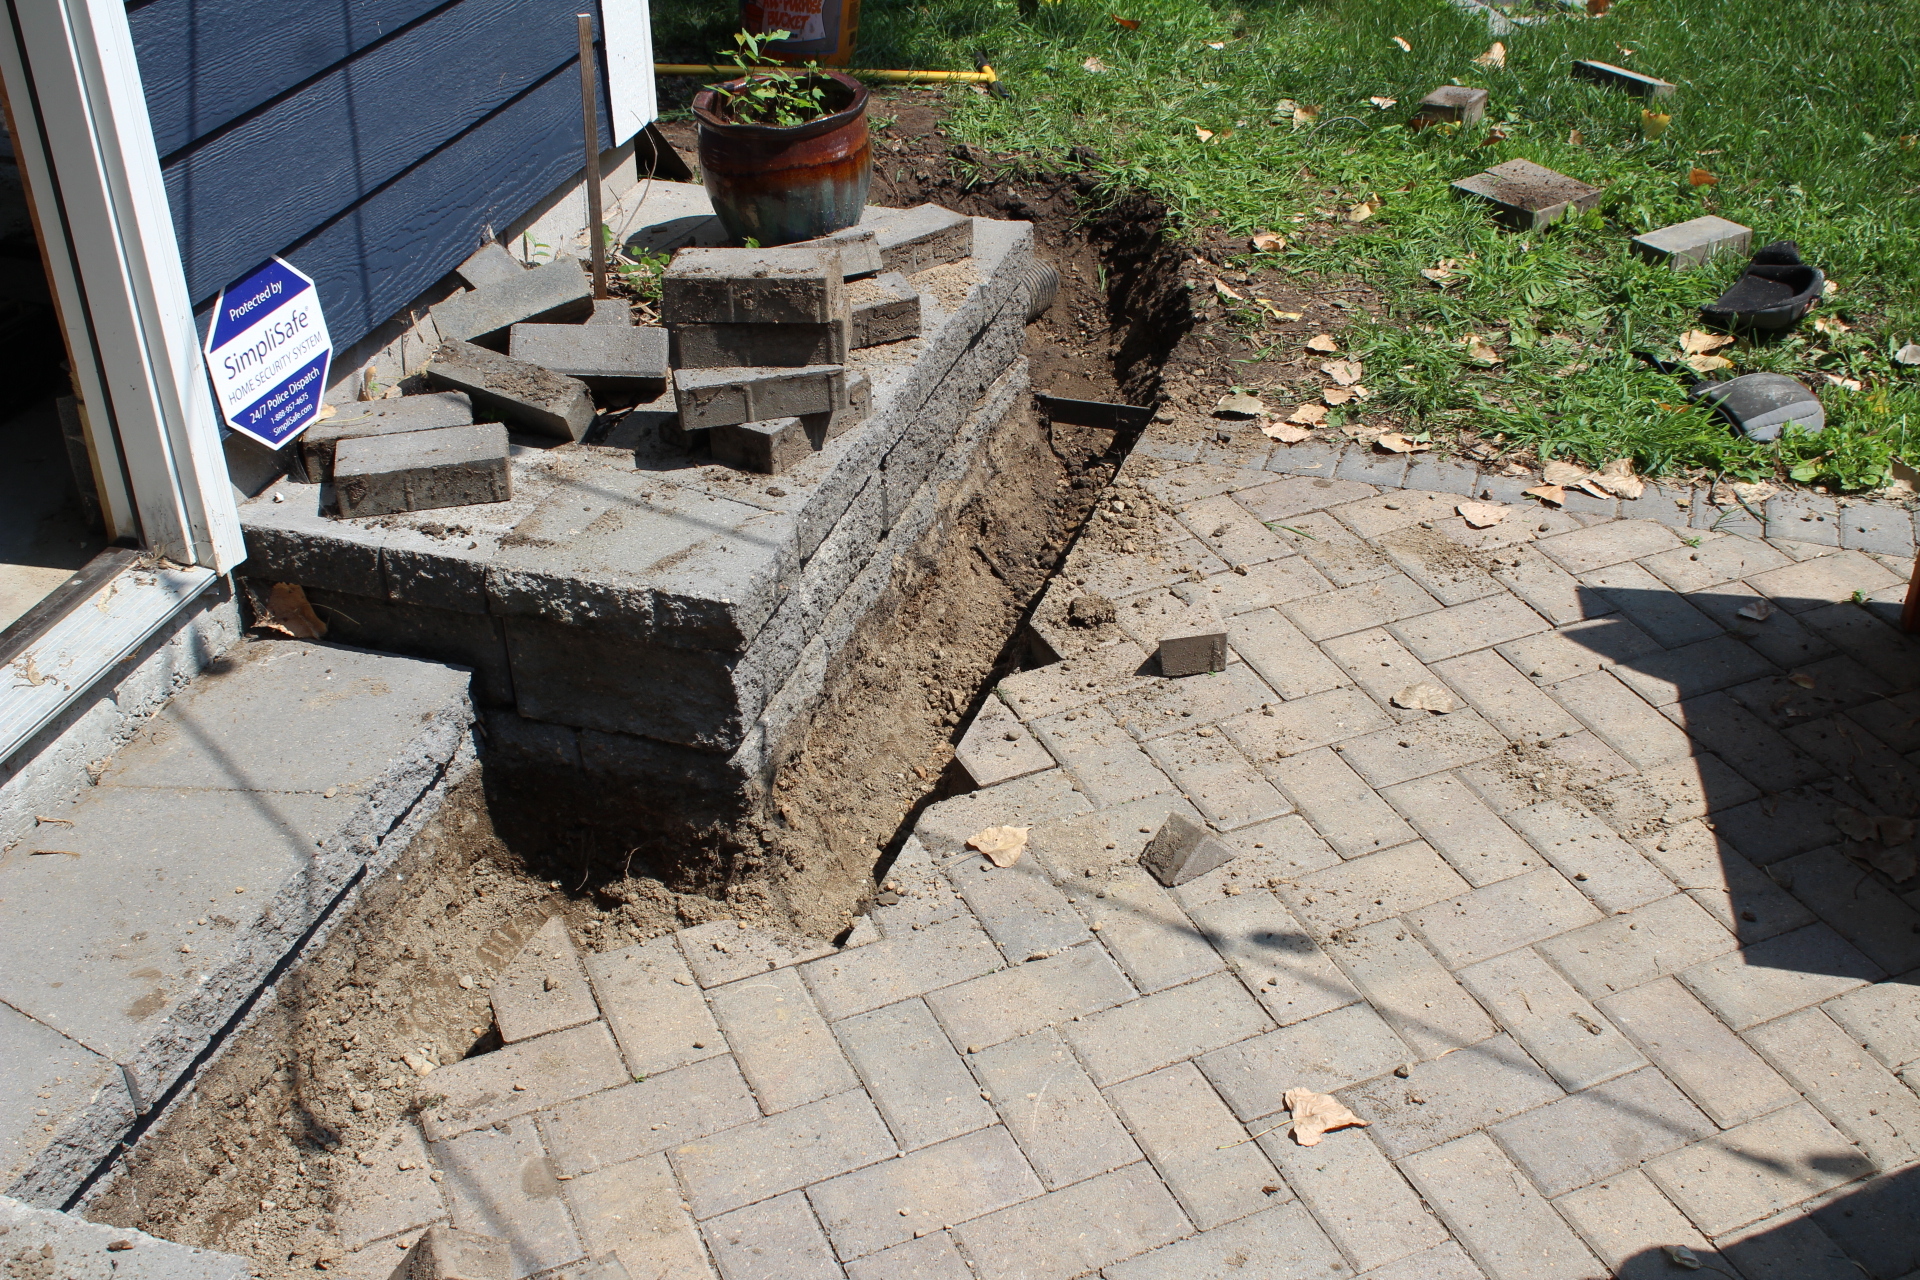
In order to get the channel drain set, I first needed to remove some of the patio bricks. Getting the first brick loose and removed was a bit challenging, but once that was removed, the rest were easy to remove. Next, I needed to dig the trench for the channel drain and the polypropylene pipe. Digging the trench is the most labor-intensive part, especially since we haven’t had a lot of rain in our neighborhood lately. I dug down approximately 10-12 inches.
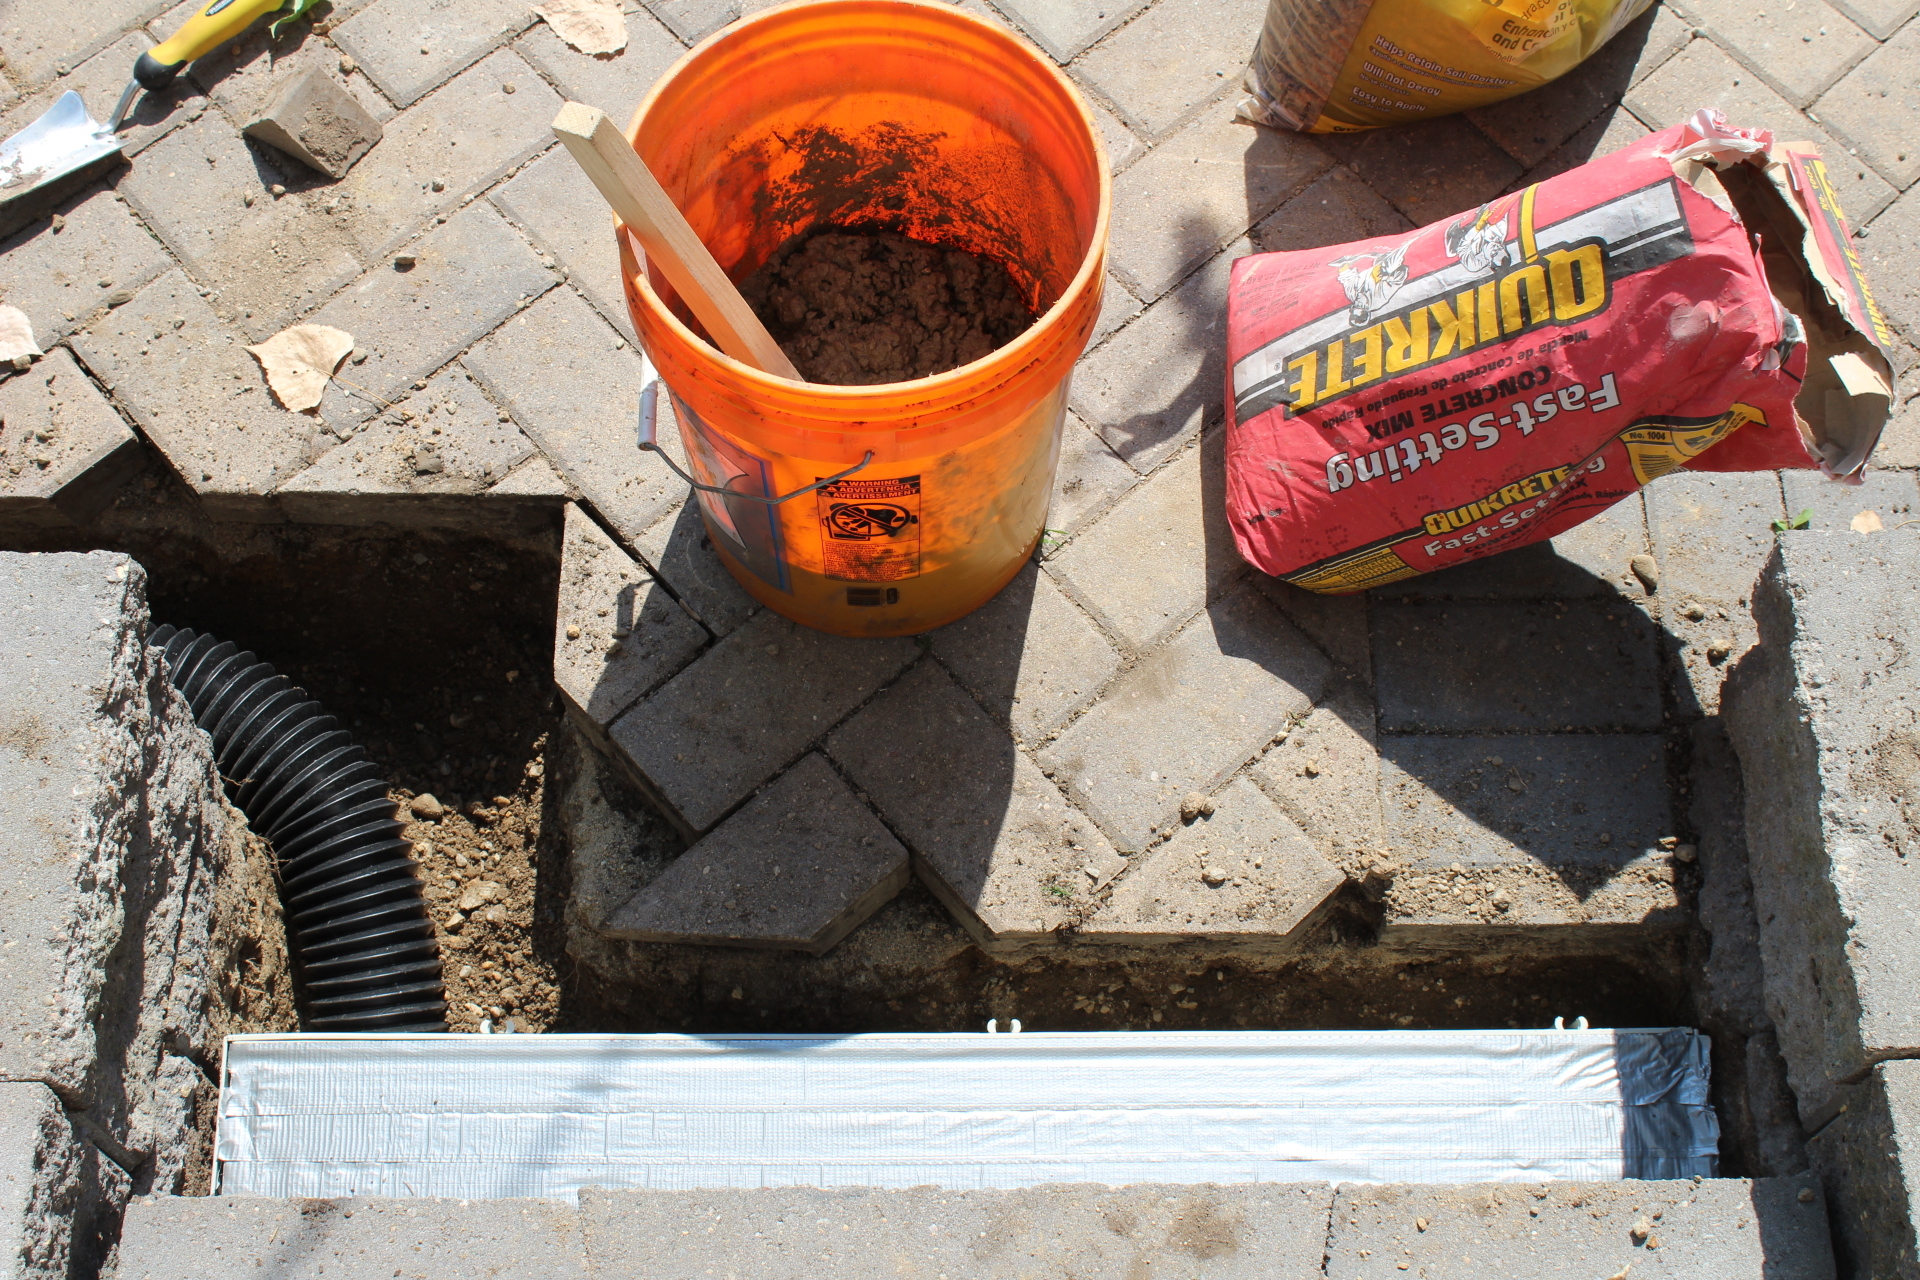

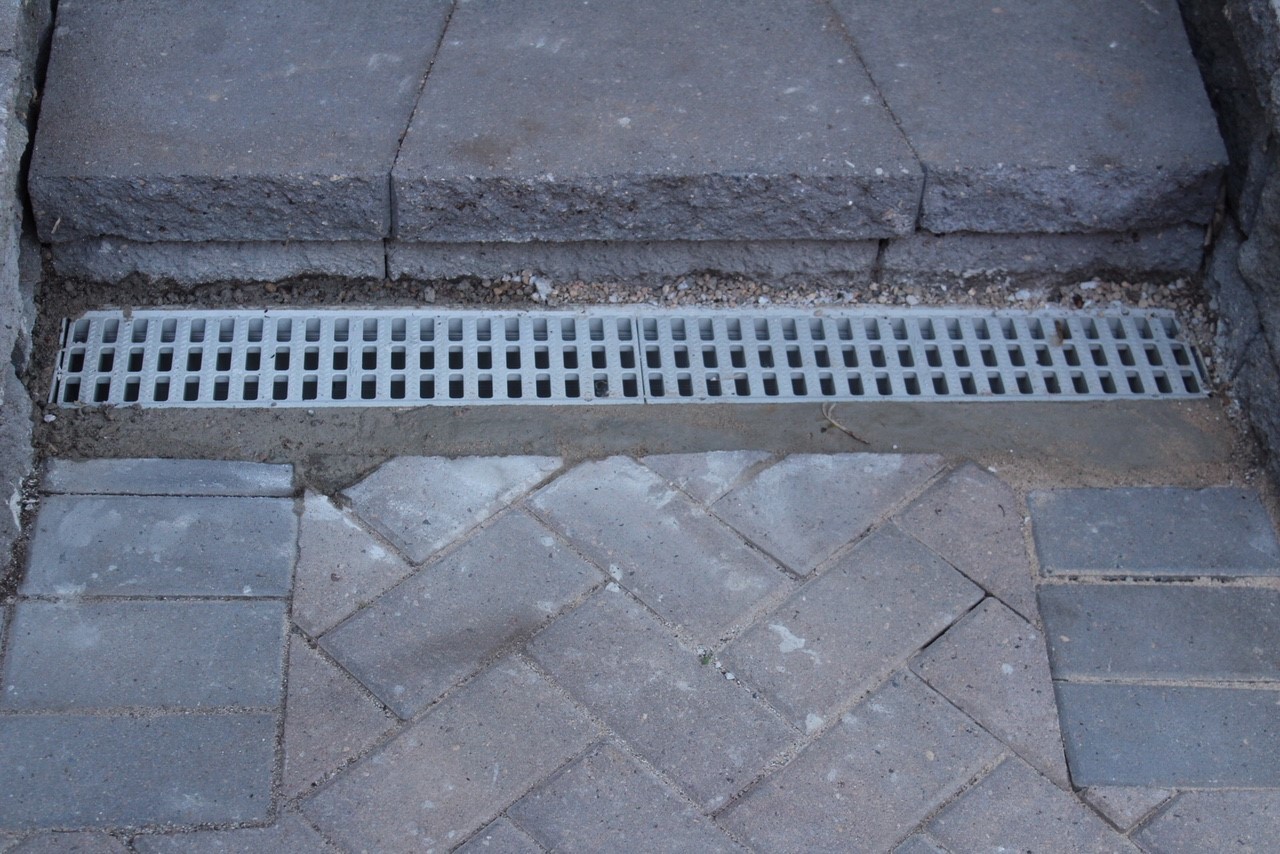
Set your channel drain
Once I was done digging my trench, I connected the polypropylene drain tile to the channel drain with the PVC solvent cement and self-tapping screws. When the pipe was connected, I leveled the area where the channel drain was going to be laid. I laid down a layer of pea pebbles first and then added a layer of sand to get the ground ready to put in the channel drain. I used a level to make sure the drain was at a slight angle in order to let gravity do the work to ensure the water would flow through the pipe and away from the house and garage. You’ll see in the picture that I covered the top of the channel drain with duct tape so I didn’t get any Quikrete inside the channel drain when I was setting the drain in place.
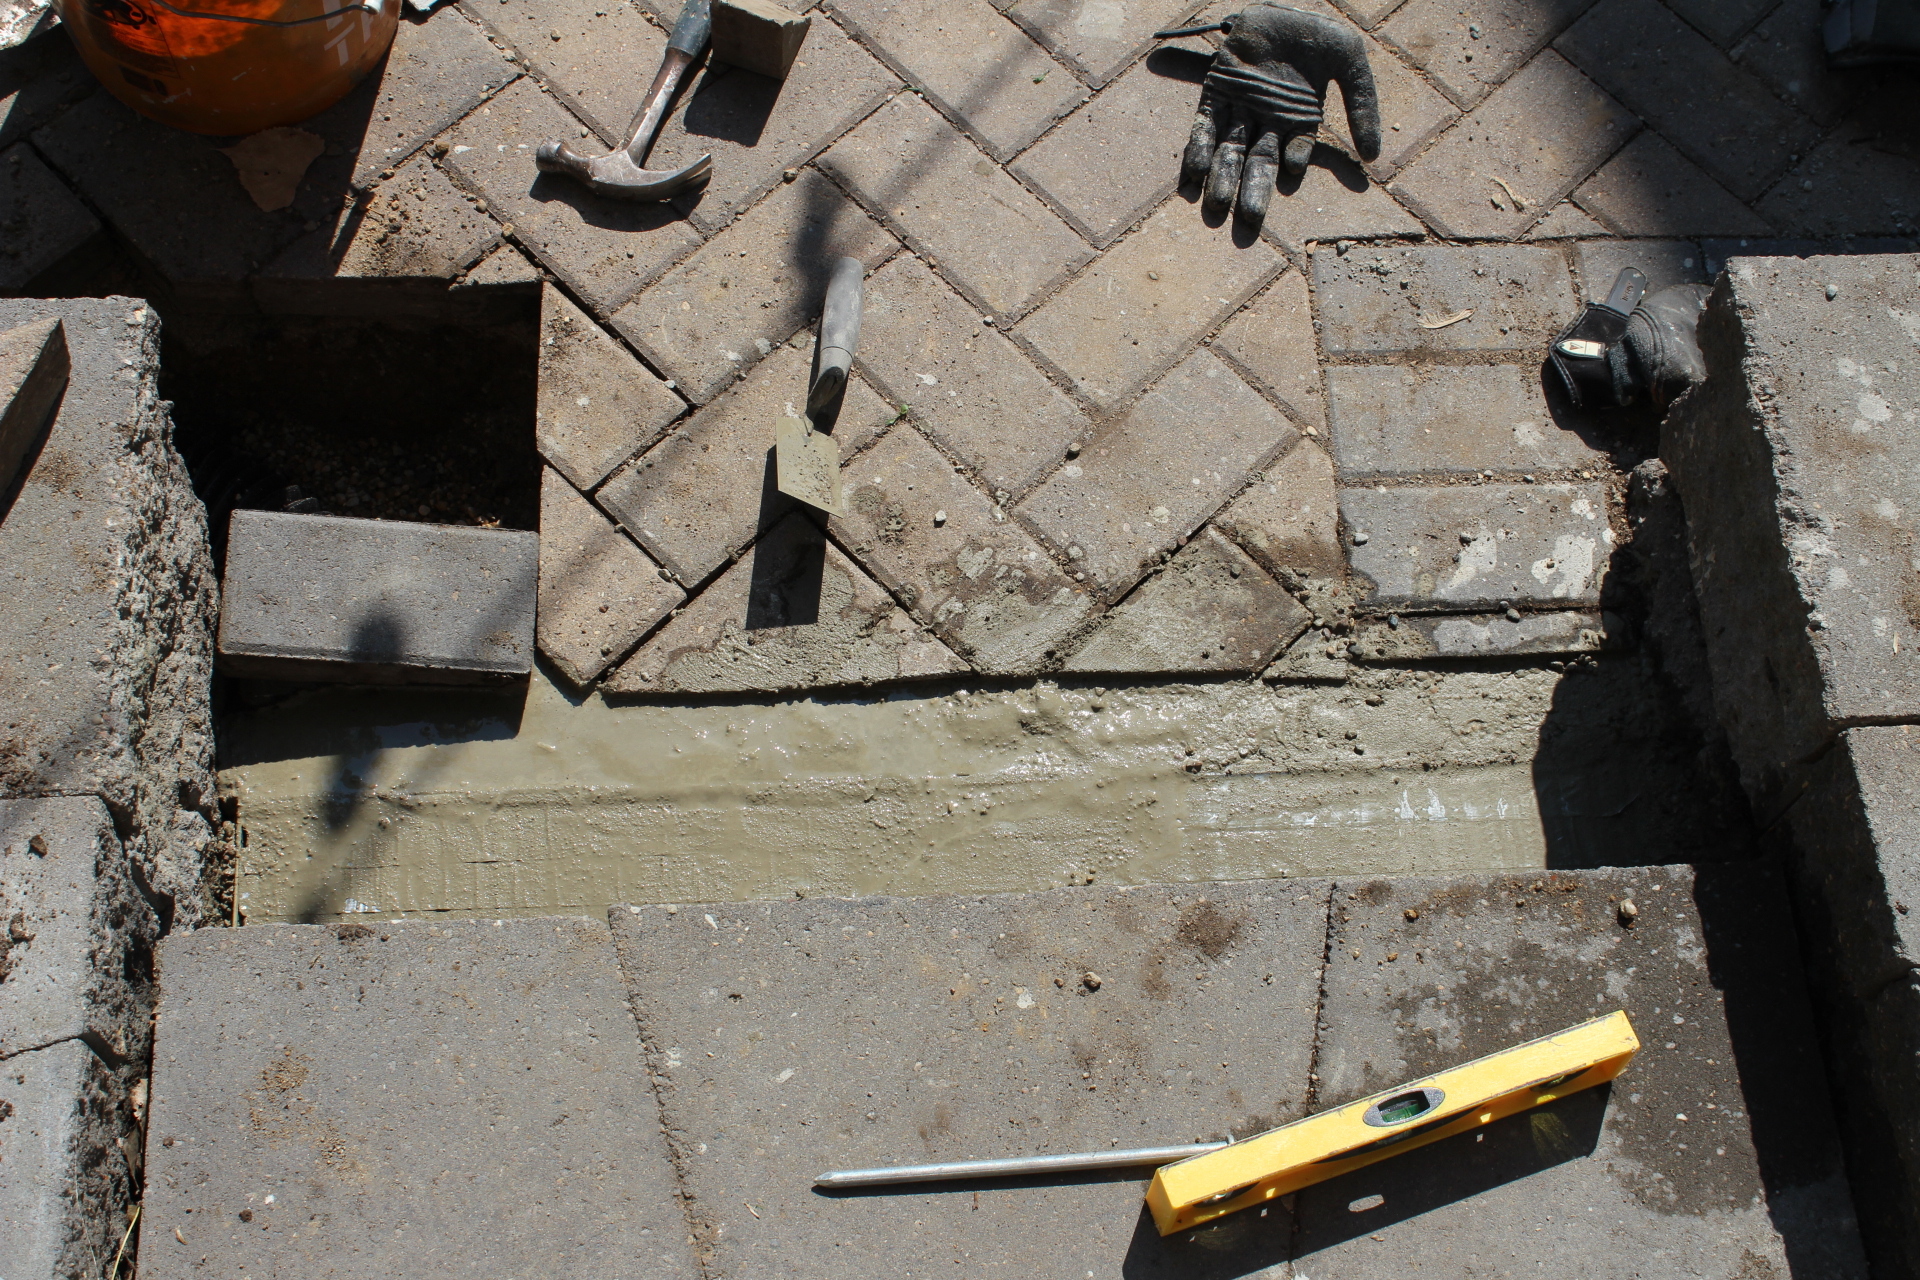
Set the channel drain in concrete
Once your channel drain is set, you will need to use your Quikrete to permanently hold it in place. I actually bought the wrong concrete, but I made it work. I purchased the fast-setting concrete, which is supposed to pour directly into a hole, and then water is added. I mixed the special fast-setting blend in a bucket and then added it to the hole around the channel drain. The concrete set up faster than I wanted it to in the bucket and I had a hard time working with the mixture. If you run into this problem, add more water and continue mixing the blend until it is workable again. Most people would be surprised how forgivable a bucket of mixed concrete can be with a little water and mixing.
Pour in your concrete and smooth out the area with a trowel. If you’ve never worked with concrete before, don’t be intimidated. Once again, if the mixture starts to stiffen before you’re finished, add a little water and use the trowel to rework the area. You can see from my picture above that it’s not 100% smooth, which was perfectly acceptable for my situation. There are always little sticks and leaves falling that area so we will never notice some small rough concrete areas.
Every installed channel drain will be different than the next based on the drainage needs and landscape. For example, I needed to connect my polypropylene pipe to an existing underground drain tile pipe about 8 feet away from the channel drain that will carry the excess water to a holding basin at the end of my property. Then I needed to put the patio bricks back in place. But the bulk of the work comes from digging the trench and getting the channel drain installed.
The channel drain comes in 4 ft. sections that can be connected to make longer sections. The plastic channel drains can be cut to exact lengths for easy installation.
Most people haven’t worked with concrete, so this can be an intimidating project, but I promise that any DIYer can do this project, which could save you $1,000s of future water or foundation or damages!