How To: Unbelievable Pizza from Scratch and at Home

Everyone should learn how to make pizza at home. It’s versatile, healthy, delicious, and relatively easy. You may never turn out anything as good as the pizzaiolos in Naples or New York, but making pizza that will delight your family and friends is within the reach of anyone with a few basic ingredients and a cooking scale.
I’ve been experimenting with different dough recipes and cooking techniques for about nine months now, and while I don’t consider myself an expert, I’ve learned a few tricks and can now produce thin-crust, spongy-cornicione, nicely-charred pizzas.
What follows is my typical pizza process (I make this about once a week for my family), with pictures and instructions inline. Most of this comes from Kenji Lopez-Alt’s incredible write-up on making neapolitan-style pizza over at The Pizza Lab, but I’ve added my own observations where appropriate.
The Dough
Full recipe here. I’m using a 60% hydration dough (that means, whatever amount of flour you use, you add 60% of that weight in water). A kitchen scale is absolutely essential here. Flour compacts in the bag, and trying to measure it out by volume (cups, tablespoons, etc.) always results in the wrong ratio of flour to water. If you’ve made the dough enough times, that’s OK, because you can correct it by feel, but if you’re new to this, make sure to use a scale. Here’s the one on my gift-list (although I don’t know why you’d need to weigh your grapes):

Ok, your dough will consist of:
- 20 ounces (4 cups) all-purpose flour
- .3 ounces (about 2 1/4 teaspoons) salt
- .2 ounces (about 1 teaspoon) active dry yeast
- .2 ounces (about 2 teaspoons) sugar
- 12 ounces water
You can try using Italian ‘Tipo 00’ flour (get some here or here), but I’d wait until you’ve practiced some of the other steps (making dough, stretching, etc.) first. I’ve used all-purpose and Tipo 00, and the difference wasn’t as noticeable as the difference between, say, measuring by volume vs. measuring by weight.
Combine the flour, yeast, salt, yeast and sugar in the bowl of your stand-mixer fitted with a dough-hook:


I’ve been reading a lot lately about people using food processors for this step instead; apparently the food processor blade brings the dough together much faster, meaning less oxygen exposure for the dough during kneading, resulting in a better flavor. Haven’t tried it yet, though.
Mix the dry ingredients up until fully blended, then add your water (not all at once!) and mix on low until the dough just comes together, and no dry flour is left. Then let it rest for ten minutes.

On this particular day, I got sidetracked during the resting period (I have a 1-year-old who can do that to you), and let my dough rest waaaay too long (about 45 minutes). More on that later; don’t do it!
After resting, knead on low for another ten minutes or so until the dough makes one cohesive mass and just barely sticks to the bottom of the bowl, but not the sides. You should hear a sticky/grippy sound that lets you know your dough isn’t too dry, or too wet.

Now put your dough ball in an oiled, air-tight container. I use these these 6-quart containers from Cambro, and they work great:

Refrigerate your dough for at least 8, and up to 72 hours. Occasionally (out of necessity), I’ve had to cut this time down. In an extreme case (yes, there are cases of extreme pizza-necessity at our house), I skipped this step all together and just let the dough rise at room temperature for about 3 hours.
Don’t be afraid to break the rules. My 3-hour dough turned out OK; it wasn’t great, and had very little poofiness, but it was surprisingly decent (almost like a thin, flat-bread crust).
If you have time, though, a long cold rise is the way go. My best pizzas have come from doughs that sat for almost three days in the fridge.

This is my dough after about 10 hours. You can see all the nice air pockets and gluten chains starting to form.
DON’T SKIP THIS PART!
On the day you want to cook your pizza, you’ll need to form the dough into balls and do a final proof (or rise). This part is really important, and not doing this right (as I’ll show you in this case) has a big impact on the quality of your dough.
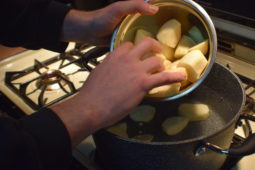
About three hours before you want to eat, take the dough out of the fridge, and divide it into evenly-sized pieces (each should be the size of a large-ish orange). Shape the pieces into balls by pulling the tops down toward the bottom of the piece, almost like you’re turning it inside-out. Careful not to tear the dough (esp. on the top).
Now, put your dough balls in a covered container coated with olive oil (I use Pyrex baking dishes with the covers on), and leave them at room temperature for at least two hours to rise. The balls should double in size, and you should see little air bubbles trapped in the dough.
WHAT I DID WRONG
In this example, I wasn’t able to get home soon enough before we wanted to eat to let the dough rise long enough. Instead of letting my dough balls rise for 2 (or even 3) hours, I tried to rush them in just an hour. Remember, since you’re taking these out of the cold fridge, they take a while to come up to room temperature (maybe a half hour or so). I’d calculate my dough balls only got about 30-45 minutes of rising time.
I even tried to speed things along by setting them on a warm radiator:

But that didn’t work very well. Bottom line, don’t rush your final proof. You’ll see how my pizza crust suffered in a minute.
The Sauce
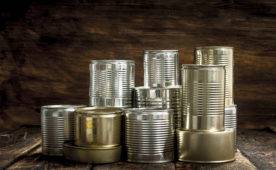
The sauce is important, and people too often overlook it. For mine, use canned, peeled plum tomatoes, olive oil, red wine vinegar, oregano, salt and a little basil.
Use canned tomatoes. 10 months out of the year, they’re better than any “fresh” tomato you’ll find at the store. In those glorious six weeks or so when you have really good fresh tomatoes from your garden (or the farmer’s market), don’t waste them on a sauce; just eat those with a little salt an pepper on them.
Lots of people swear by the D.O.P certified San Marzano tomatoes:

I’ve tried lots of brands (including the real deal, D.O.P. San Marzanos), and my conclusion? They aren’t the best. I find their flavor a little dull, and slightly acidic (even after rinsing; see below). I think the Muir Glen Whole Peeled Plum tomatoes have the freshest, boldest taste of any I’ve tried:

For Olive Oil, use the best quality you can find. Fresh oregano is nice, but not essential. Only use basil if it’s fresh (don’t bother with dried basil).
My sauce goes like this:

Rinse your canned tomatoes to reduce some of the acidity (use a gentle stream of water so you don’t destroy them and lose all the good tomato juice).
Next, I crush them up in a bowl with a potato masher. Any other crushy tool will do. Just crush them good.

I mix in about a tablespoon of olive oil and a tablespoon of vinegar. But you really have to learn to do this to taste. You want a smooth, bright flavor. Add in a bunch of oregano (I’d guess a tablespoon), salt to taste, and for kicks, some chiffonaded basil.
No need to cook the sauce ahead of time for a neapollitan-style pizza; spread it thin and it’ll cook on the pie.
The Cheese
Find some good mozzarella. You don’t need “di bufala” or anything, but a good test is that your mozzarella should ‘bleed’ a little. In other words, when you let it sit, milky water should come out of it. Don’t buy dry mozzarella, or anything that has a gummy, rubbery texture. Good mozzarella should tear into ragged clumps when you pull it apart.
You can make your own mozz; it’s not that hard (my mother-in-law does it all the time), but it’s also not that cheap (fresh cheese curd gets expensive). You probably won’t save much money, and I think a good ovoline ball from Whole Foods works just as well.
Prepare your cheese by blotting out its excess water on paper towels for about 10-20 minutes. If you don’t, you run the risk of getting a really soggy pizza when all that water comes out in the oven.

Stretching the Dough
Now it’s time to eat! If you’re having friends over for pizza remember one thing: the pizzaiolo never gets to sit down to eat with everything. Just get used to it. You’ll be going back and forth from the counter to the oven until the last pizza is done. Then you can sit down and relax.
Take a ball of dough and coat it with flour in a bowl. Lay it on a heavily-floured surface (it should flatten into a disc-type thing) and use your fingertips to indent a circle about 3/4″ in from the edge, like this:

By doing this, you’re creating the lip, or cornicione, that will puff up later. Note the small size of the disc I’m working with in the picture above. That’s because I didn’t let my dough rise long enough for its final proof, so it didn’t reach its full size. If you do things right, you should end up with a disc about 3/4 bigger than what I have above.
Next, use your fingertips (keeping your arms straight and locked), to press down the middle area of the disc flat, enlarging the circle.
No, place one hand on the dough, inside the cornicione (avoid touching it or squishing it), and use the other hand to gently pull the dough away. If the dough won’t stretch easily, let it rest for a few minutes and try again. It should give easily, but not so much that it tears.
Turn the crust over, rotate it 90 degrees, and repeat the above stretch-and-pull. Pretty soon you should have a circular-ish crust that’s thicker (and hopefully not compressed) on the edge.
Now pick it up and drape it over your closed fists, pulling gently apart and turning as you go, thining out the crust without tearing the center or man-handling the cornicione:
You should be able to go VERY thin with your crust without tearing:
Top it, cook it, serve it!
Get all your toppings ready while you preheat a 12-inch cast-iron or stainless steel skillet on the stove. The thicker the bottom the better, and no need to put anything on it (like oil or flour). Also, turn your broiler on high and put the rack right up to the top notch.

Above: sauce, coarse kosher salt, basil, olive oil and mozzarella.
A note on basil: don’t wash it, don’t cut it. For my money, washing the basil rinses off the best flavor. Tearing it off (instead of cutting it), seems to crunch of parts of the leaves and release even more taste (yes, I know that sounds crazy).
Slice your mozzarella into ‘medallions’ (see below). Some people do it in cubes, but I’ve tried that, and I think it keeps the cheese from melting and caramelizing the way I like it:

Once your skillet is hot (like, smoking hot), place a pizza crust on it (you should immediately see the cornicione begin to puff up). Moving quickly, spread a thin layer of sauce on (go lighter in the center to avoid sogginess, and obviously, don’t sauce the cornicione). Top with mozzarella (don’t go overboard, but this is definitely a matter of taste; I like to go a little heavy).

A note about the skillet-broiler method (see the full write-up on SeriousEats for the long version): we’re using a super-heated skillet to achieve the most heat-transfer possible into the bottom of the crust and the corinicione before the dough sets and prevents any more ‘poofing up’. I’ve found this method works MUCH better than any combination of pizza stones, grills, or super-heated ovens to get a spongy, charred crust that’s fully cooked without burned toppings.

See those wrinkles in my crust? That’s bad; a result of having to over-stretch an under-risen dough ball. Let your dough balls proof long enough, and you shouldn’t get those wrinkles in your crust.

Add some basil leaves (dip them in your sauce bowl or some olive oil first to keep them from burning in the oven), a dash of salt, and some olive oil. I use a basting brush dipped in oil to drizzle it on; an olive oil drizzler would work better, but I don’t have one.
Now, put the whole skillet into the over under the broiler, as close to the flame as you can get it:

You’ll have to stick around and watch the pizza so it doesn’t burn. I always have to rotate the skillet a few times to keep parts from getting too charred.
When’s it done? When the poofiest parts of the crust are charred and the cheese is bubbling/brown.

When it gets there, take it out and put it back on the stovetop at high heat until the bottom is charred and spotty, like this:

Don’t slice it right away; it needs to rest for about two minutes so the cheese can firm up.
Here’s a cross-section of my crust:

See how tight the crumb is? It looks more like a loaf of bread that a pizza. This means a much denser feeling crust. This batch of pizzas wasn’t bad at all, but that crucial mistake (not letting the dough balls rise long enough) was the difference between a pizza you can’t stop yourself from eating more of, and one that doesn’t quite get finished:

See all those left-over bones? On a really good batch of pizza, the bones are (for me) the best part. Light, airy, perfectly charred. On this batch, they were a little too dense and ‘bread-y’. A pizza chef never wants to see so many leftovers! Oh well, there’s always next time!
I hope this step-by-step walk through helps some of you out there to make better pizza. I’d love to hear your tips and tricks; drop your best pizza-making knowledge in the comments!