How to: Make a Wooden Hand Screw Rack & Organizer
I have tried almost every solution to keep track of my hand screws. I've hung them on pegboard hooks. I've stashed them in wall-hung cubbies. I've stacked them on shelves. I've put them in designated plastic totes. All of which have resulted in: I hardly ever use my hand screws.
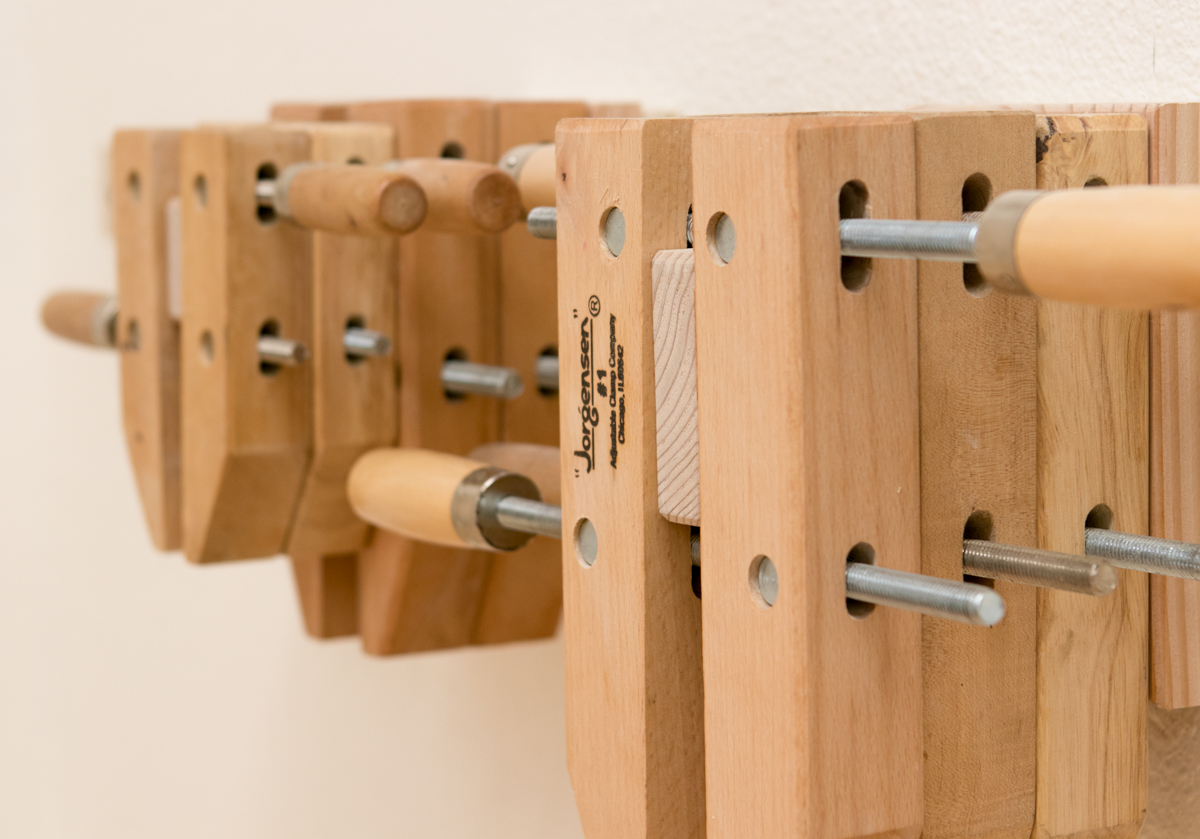
Which is a shame, because they're extremely versatile. They have a deep reach, and their wooden jaws are handy when you don't want to nick a blade or bit on something metal. So, last weekend, in my ever-continuing attempts to get my shop truly organized, I decided to build a wall-mounted hand screw organizer that would allow me to keep things in place and bring the clamps to the project when I need them.
The process is straightforward, and can be customized to fit clamps of any size.
Making the Arm
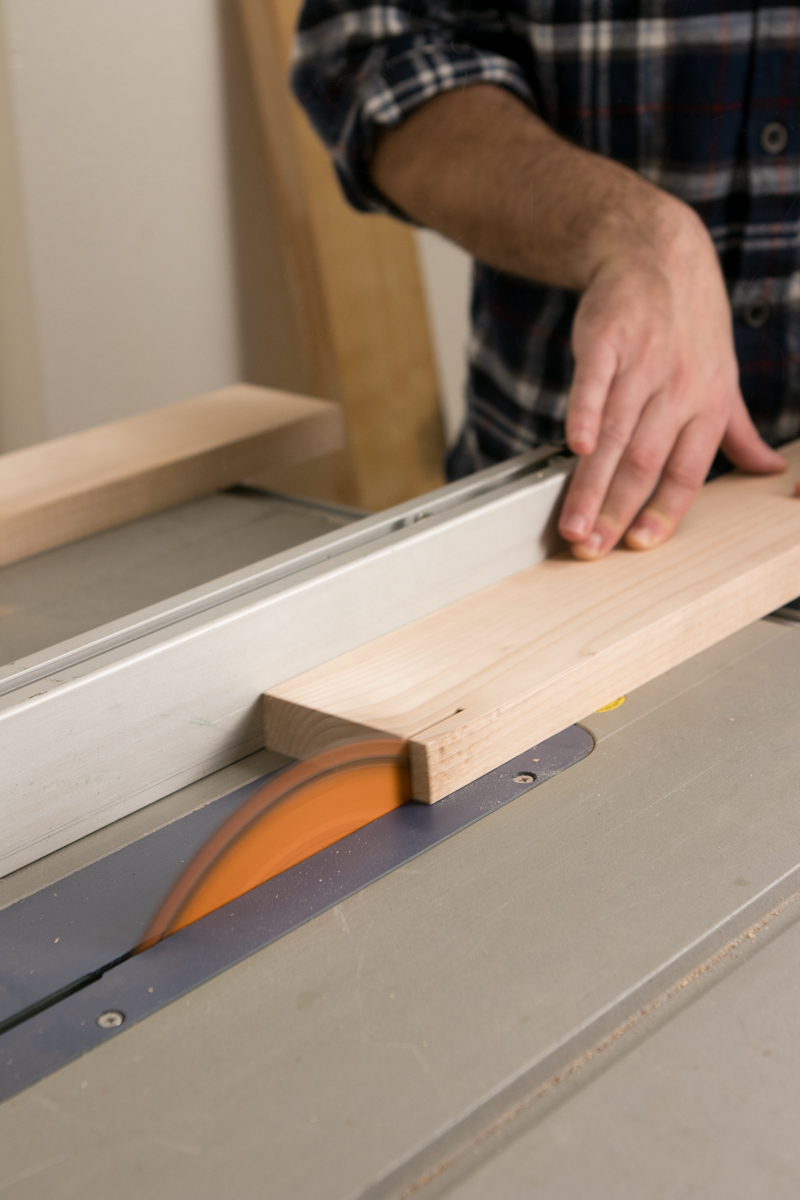
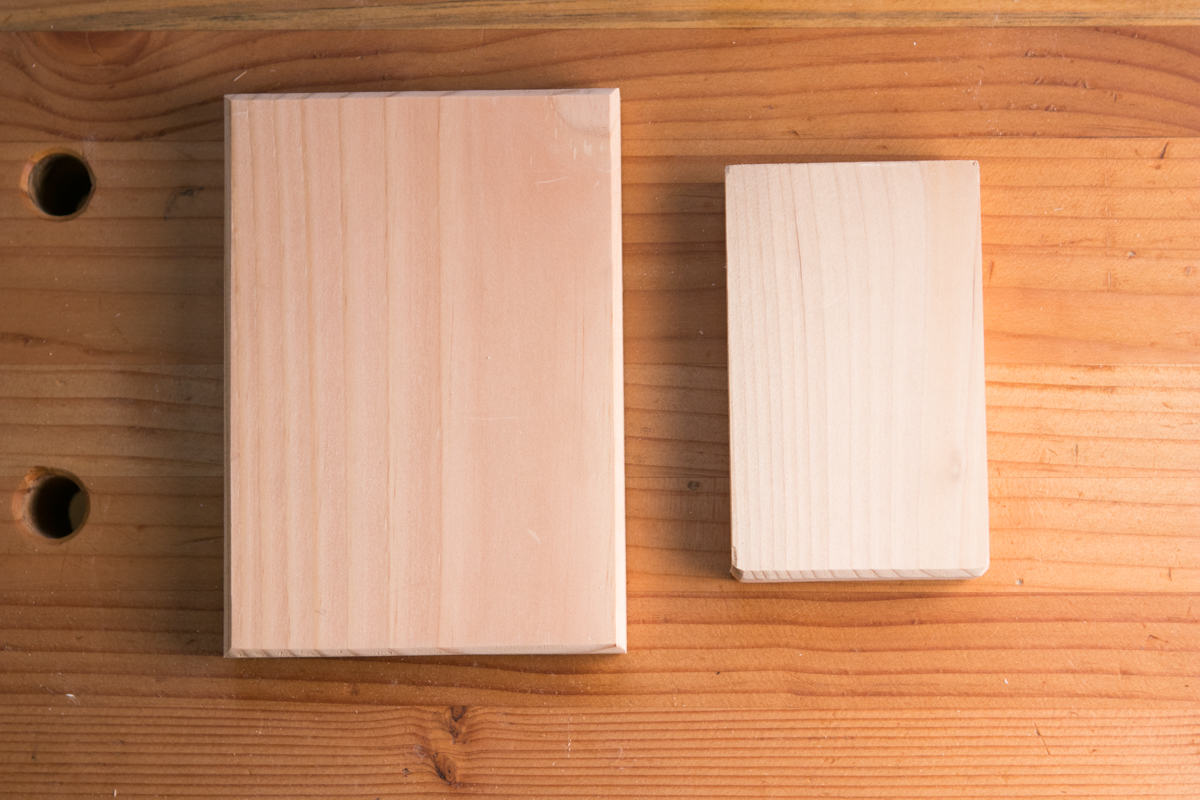
First, let's work on the horizontal arm that supports the clamps themselves. This is made from 1″ thick material. I planed down a scrap of Douglas fir 2×4, but you can use whatever you have lying around.
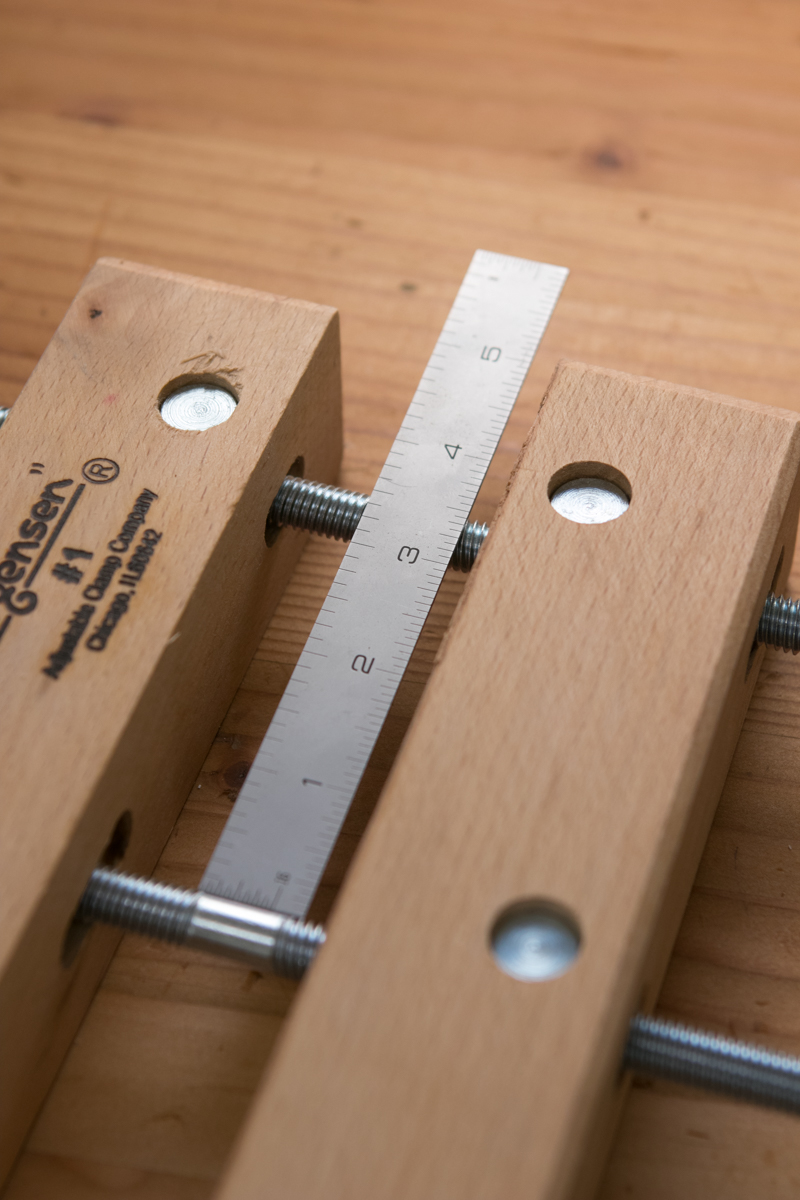
Determine the distance between the screws, and subtract 3/8″ of an inch. For me, this was 2 7/8″.
Cut the 1″ thick material to that width.
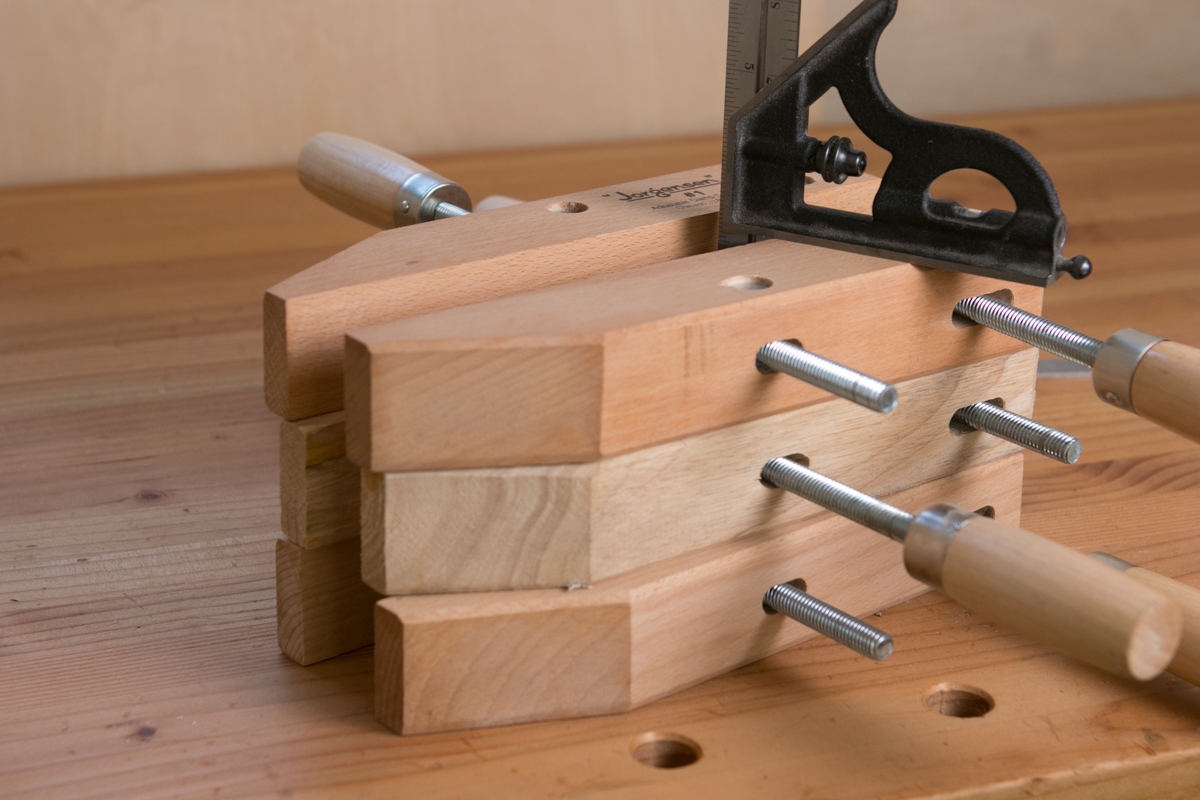
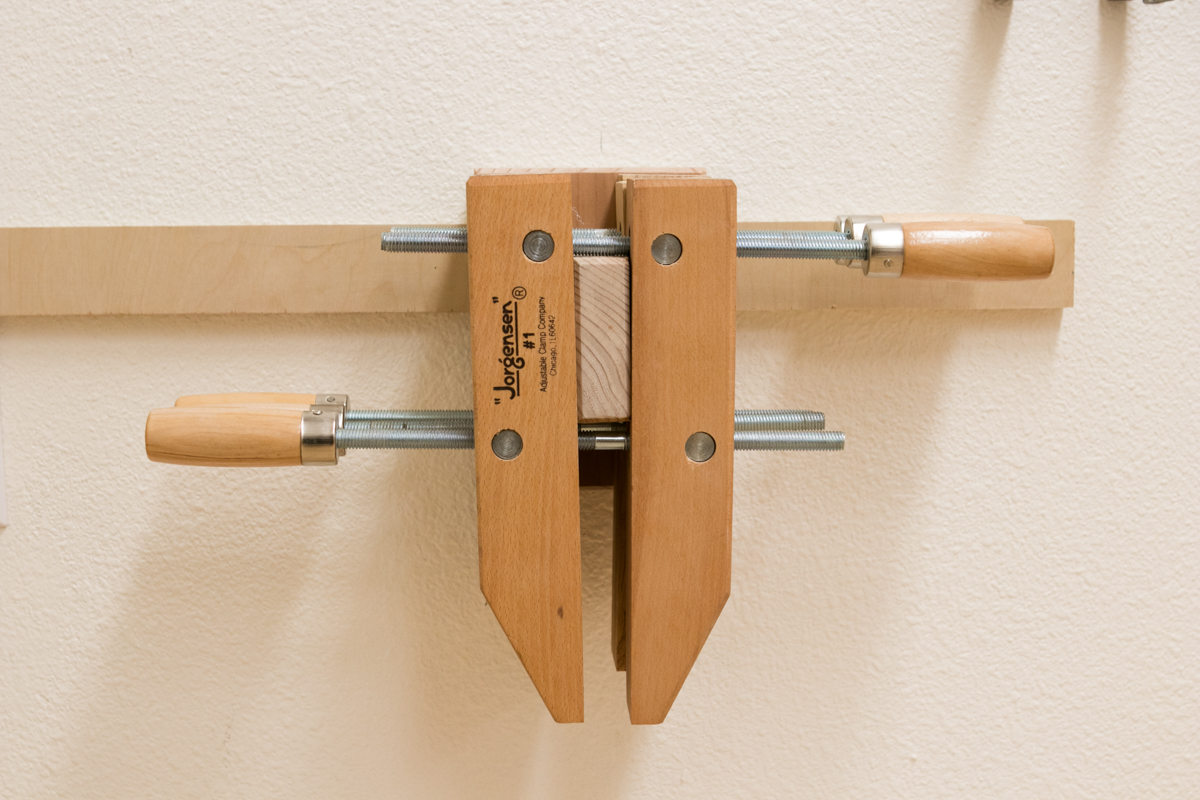
The length is determined by the thickness of the clamps. You could store up to four on one arm. I have six clamps in this Jorgensen #1 size, so I decided to make two racks of three. I regularly walk around in this area (at the end of my workbench), so I didn't want them sticking out too far.
Cut the arm to length. Mine was 5″ long.
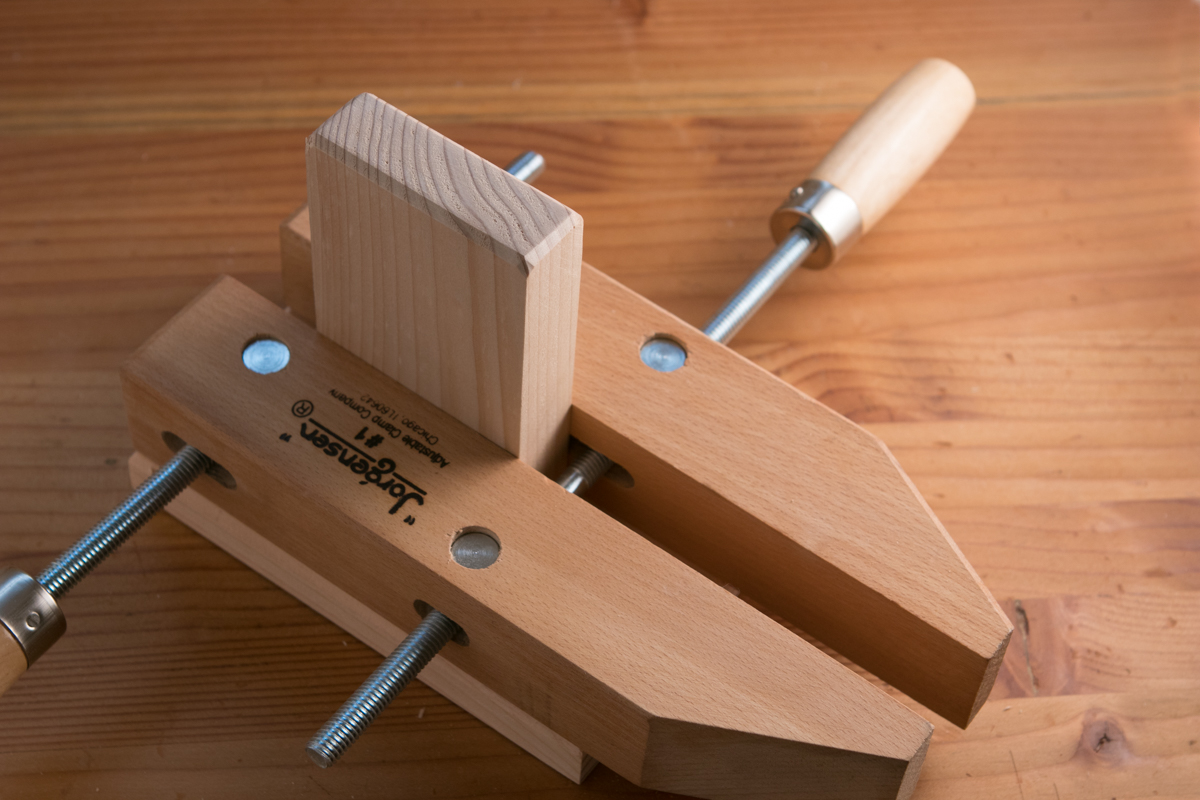
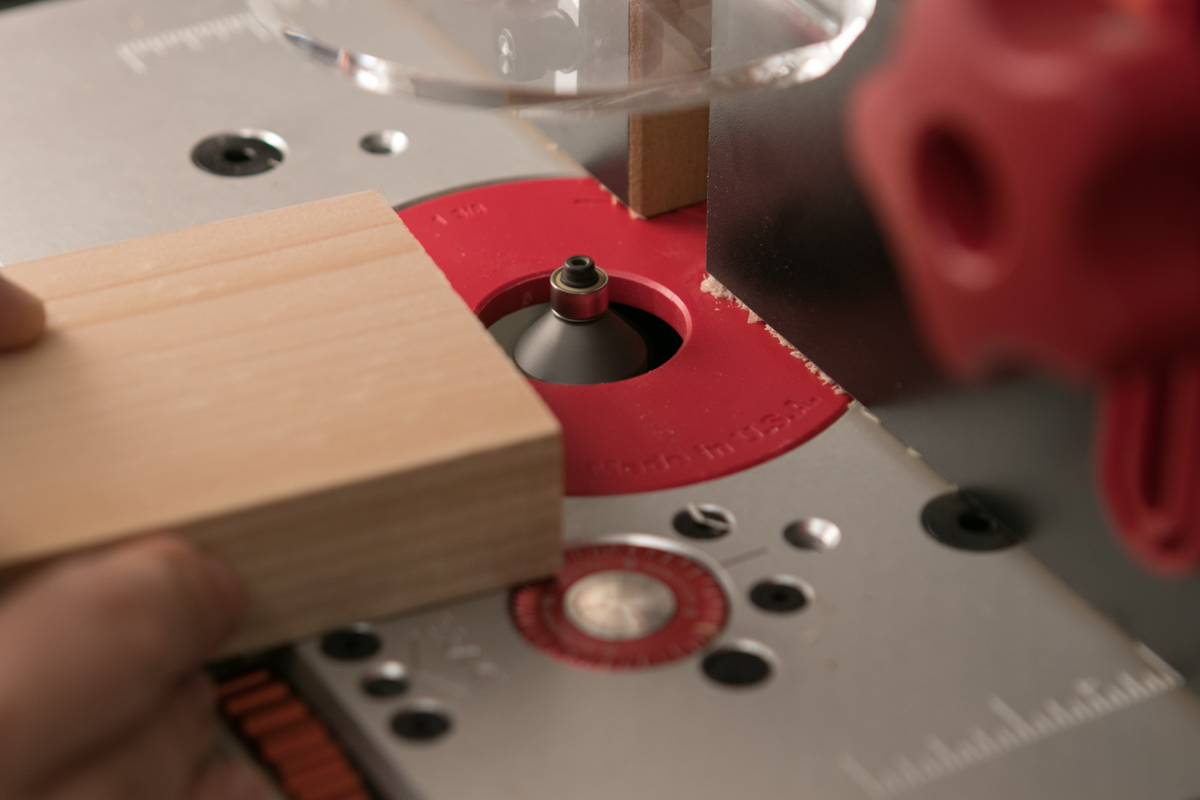 Since the clamp bodies regularly be in contact with the end of the arm as they slide on and off, I routed a 45° chamfer on the front edges.
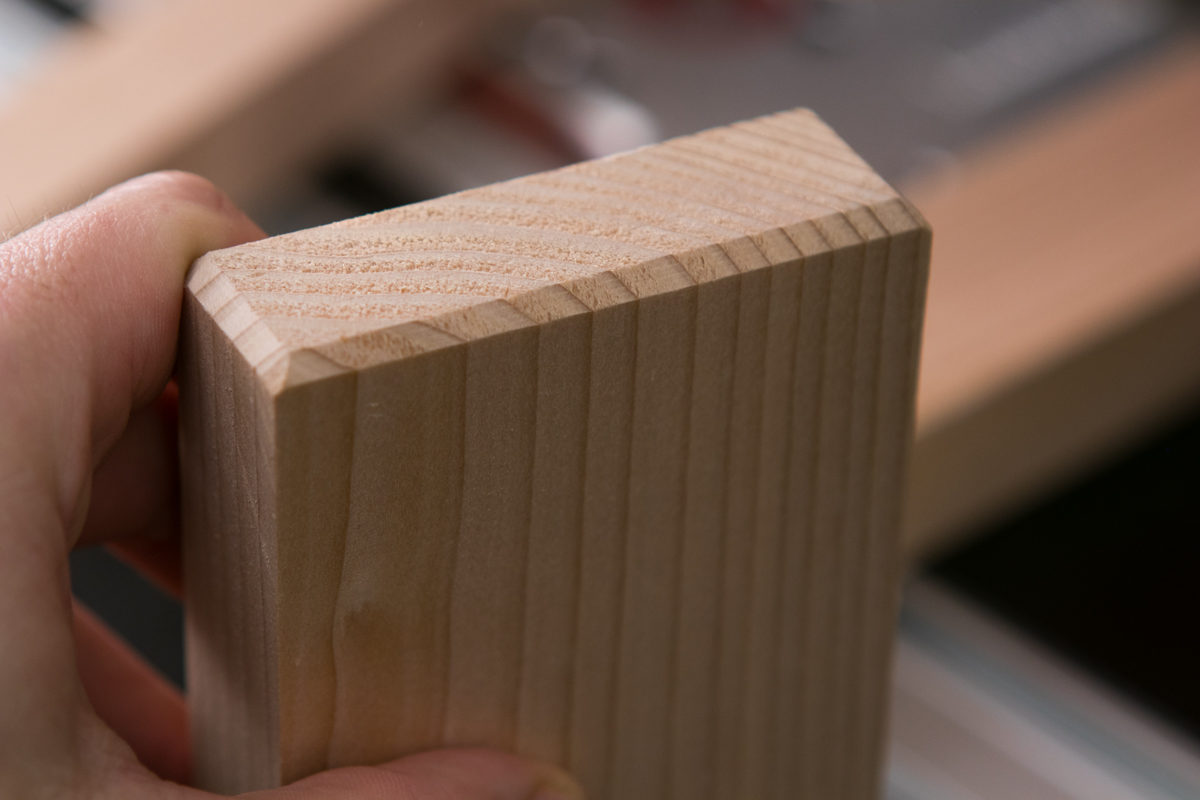
A simple 1/4″ chamfer will prevent things from getting too banged up.
Making the Back
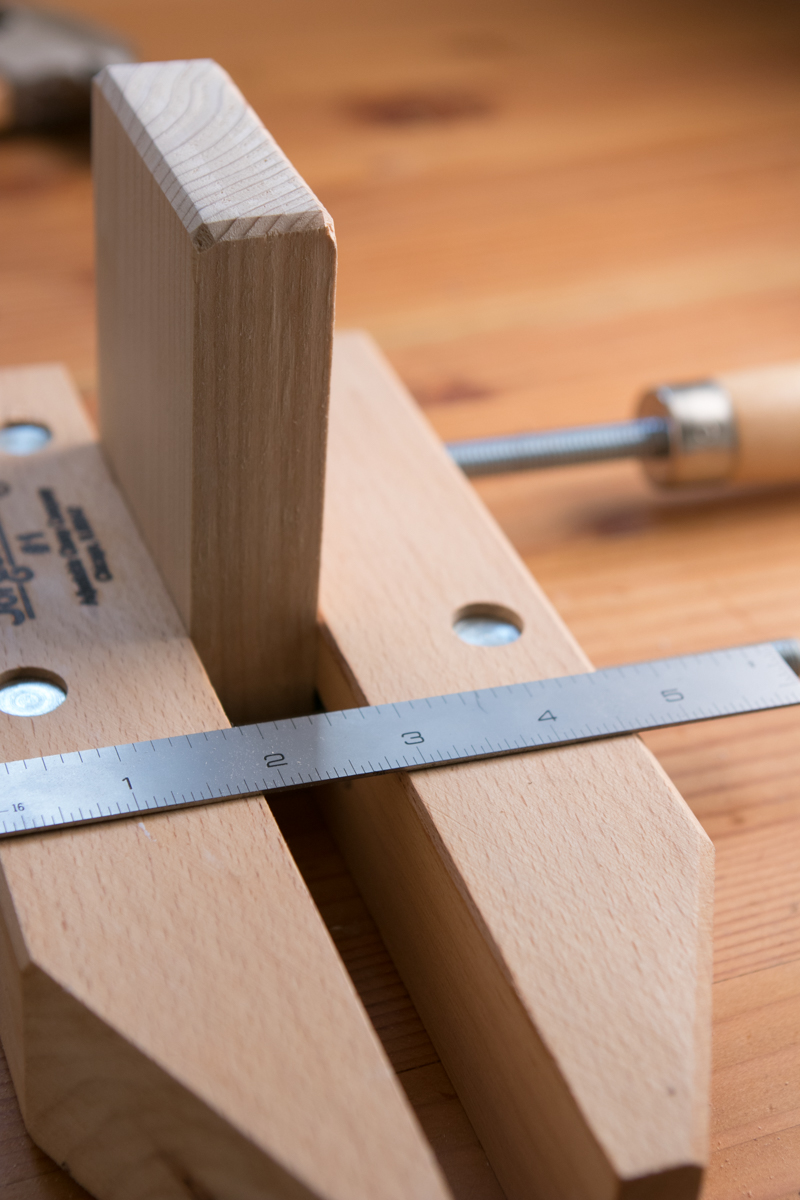
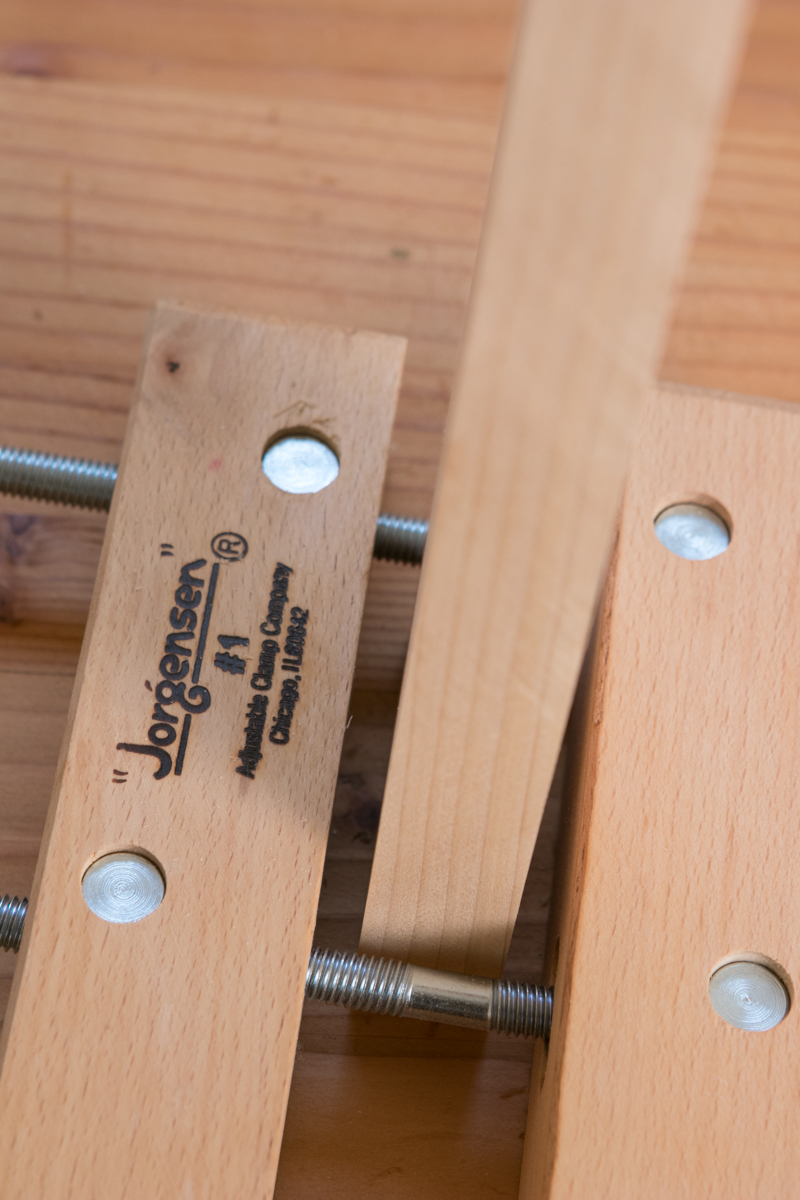
Now, place the arm inside a clamp, and determine the overall width. This is the width of the back. I made mine from 3/4″ thick fir.
Cut this to width, and then determine the length by subtracting 25% of the overall clamp length. My final size was 4 5/8″ x 6 3/4″.
A chamfer around these edges gives a nice finished look as well, and helps prevents any damage to the edges.
Assemble the Rack
Put the arm in a clamp, then place it on the back, with both tops flush.
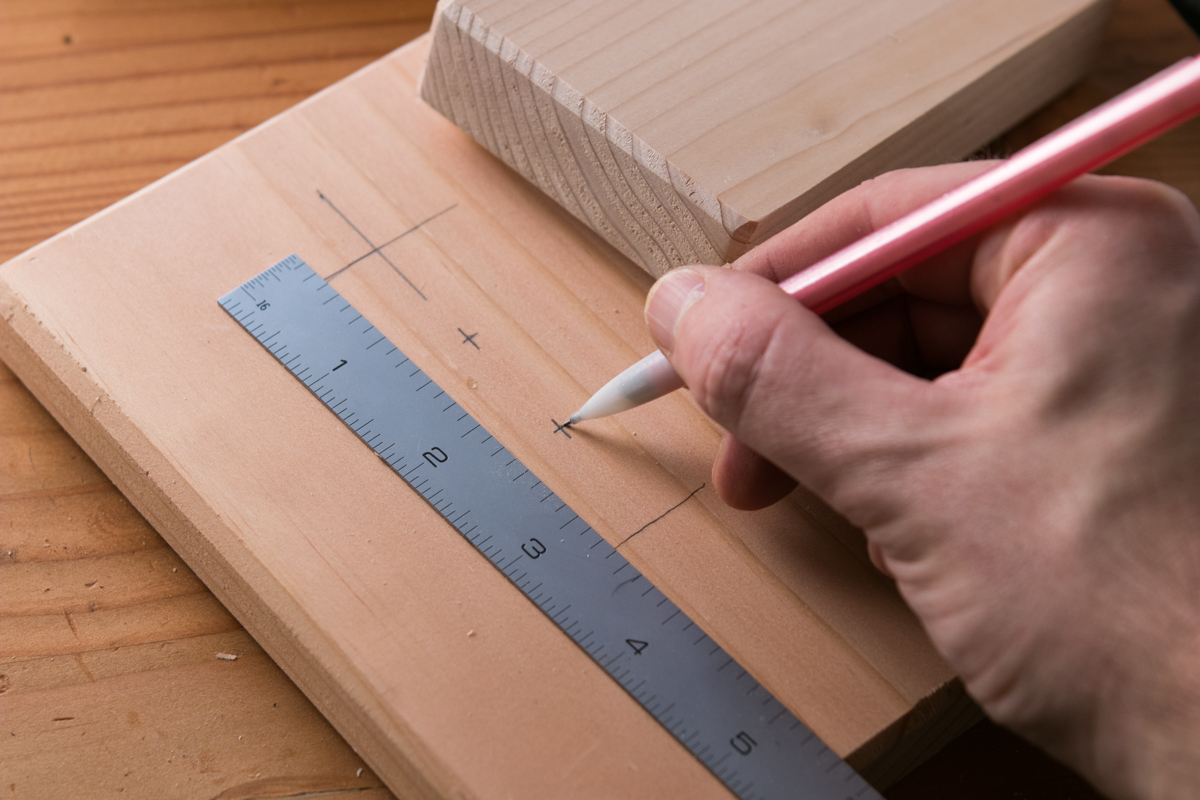
Mark the placement of the arm on the back, then determine the location for two screws.
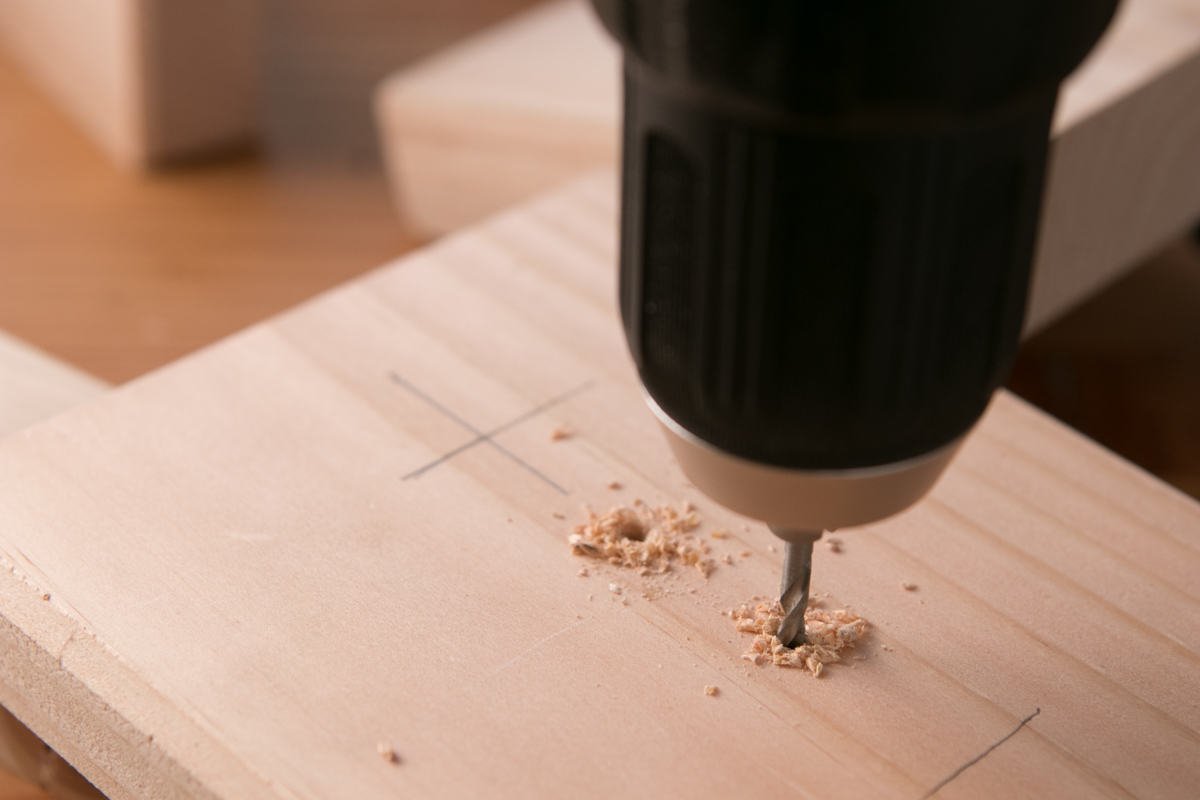
Drill a clearance hole through the front. Then, turn the piece over and drill a countersink for the screwhead. Next, add some glue, and attach the two pieces with screws, using the clearance hole to drill a pilot hole in the back of the arm. Since it's end grain to long grain, the glue simply keeps things tacky and in place while you fasten the screws.
You can hang it on the wall anyway you like. The easiest way would be to drill through the face and attach to the wall with countersunk screws. Since I wanted to be able to pick up a whole unit and carry it with me, I made a simple French cleat from some scrap plywood, and attached one side to the wall and the other to the back of the clamp organizer.
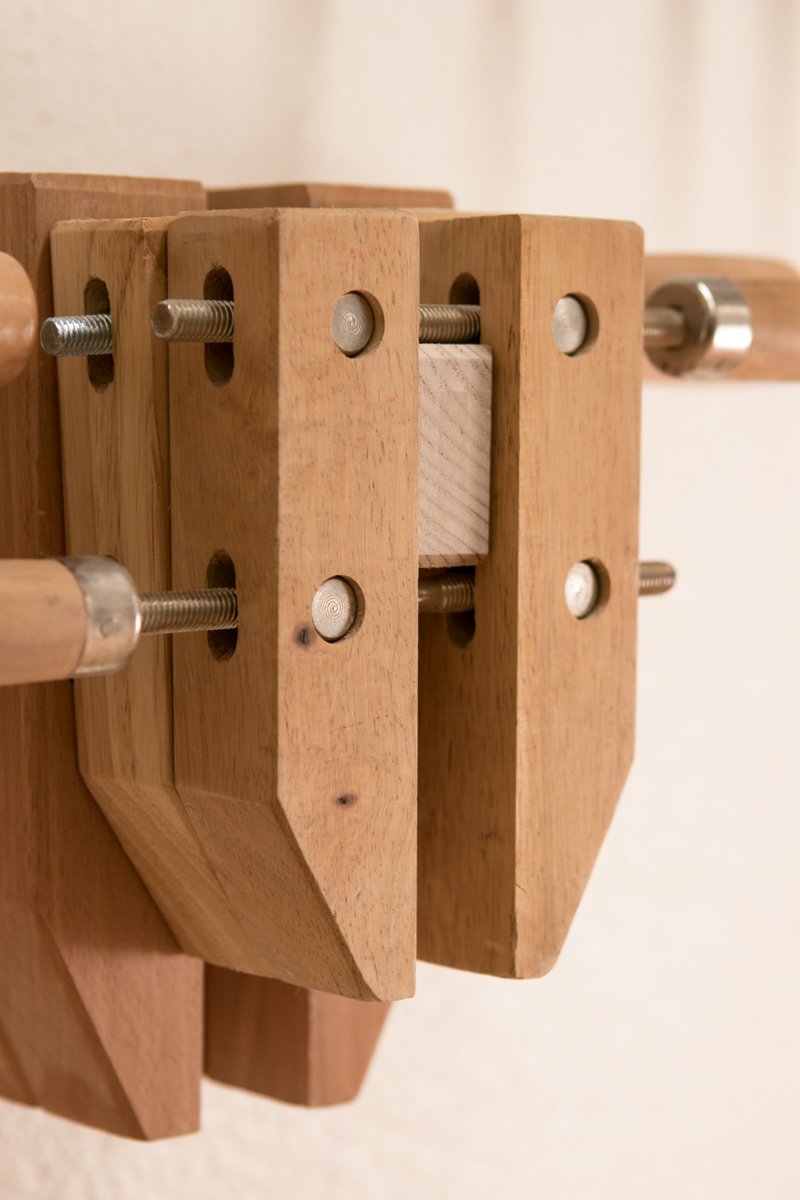
With the process figured out, I made a second rack for my larger clamps, and one for my four remaining ones. I sized the back to fit the medium clamps, but the arm to fit the smallest size.
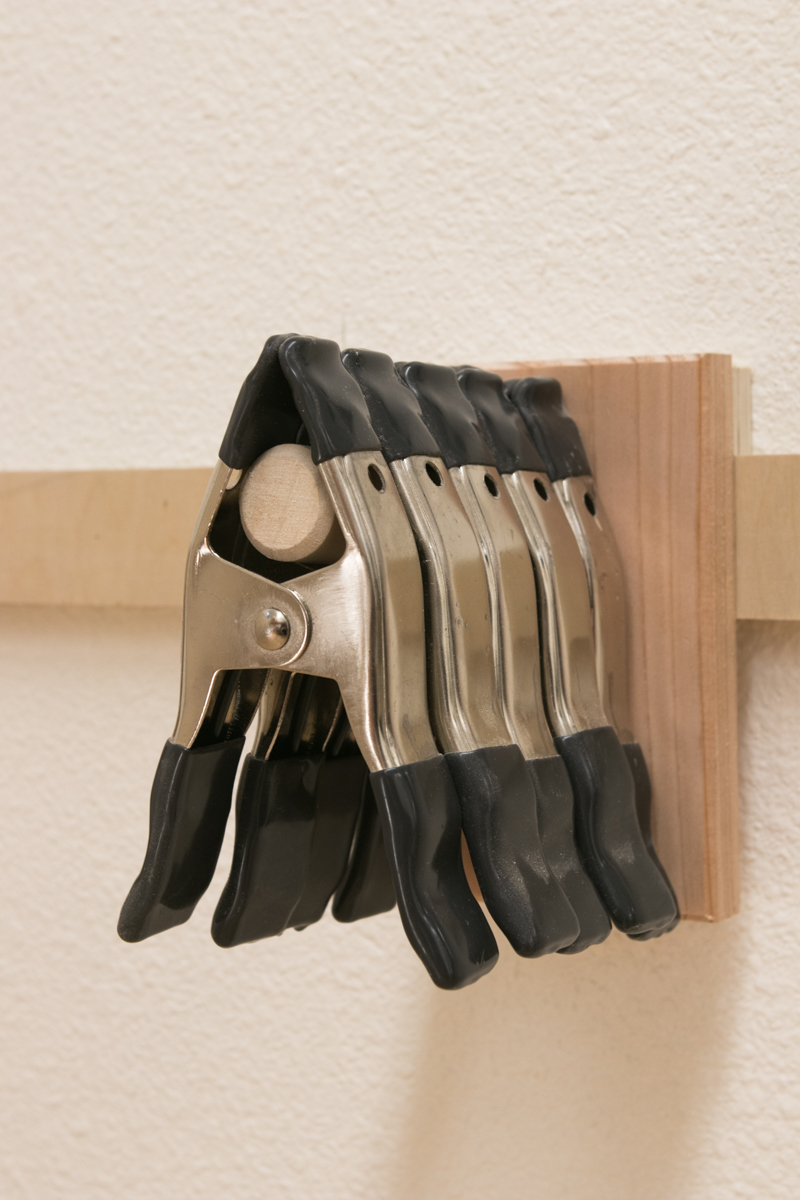
I wanted to hang my A-shaped spring clamps on this rack as well, so I created a back for them from the same material, and then cut a piece of 1″ dowel to length, and chamfered the end.
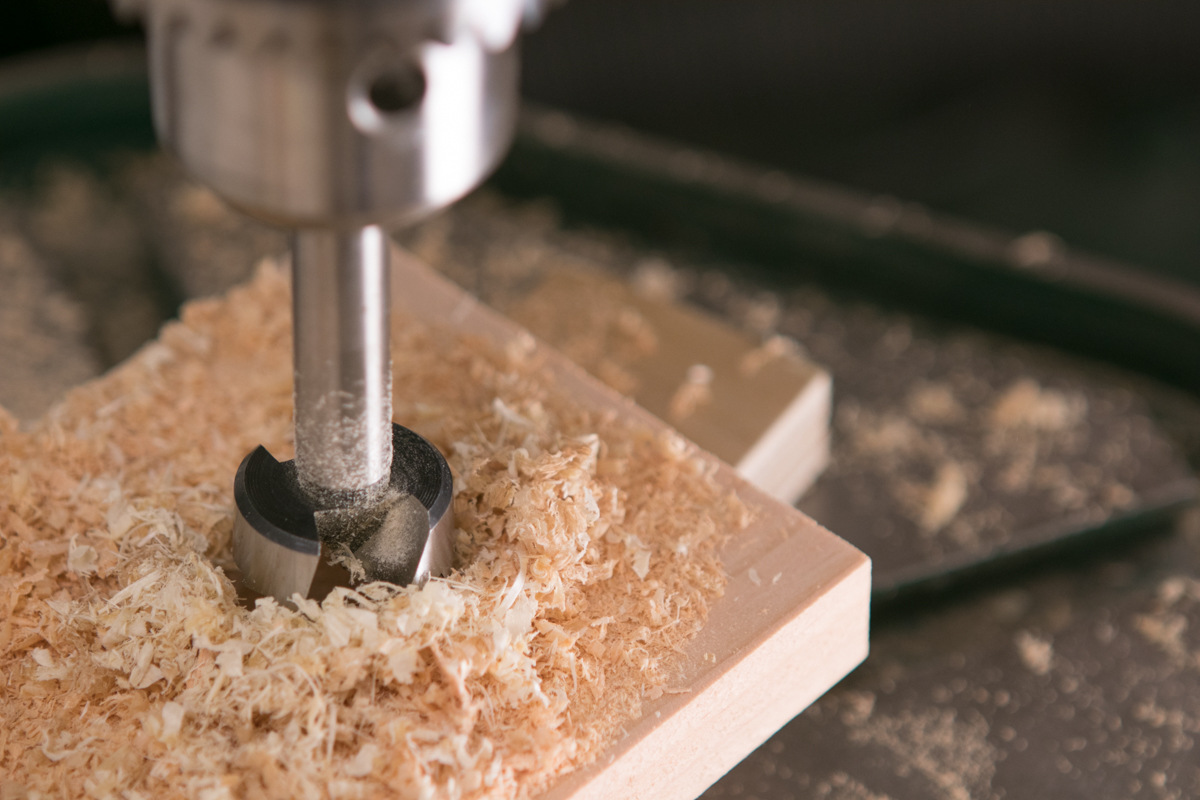 I drilled the round mortise to accept the dowel at a 5° angle to prevent the clamps from sliding off.
Finished!
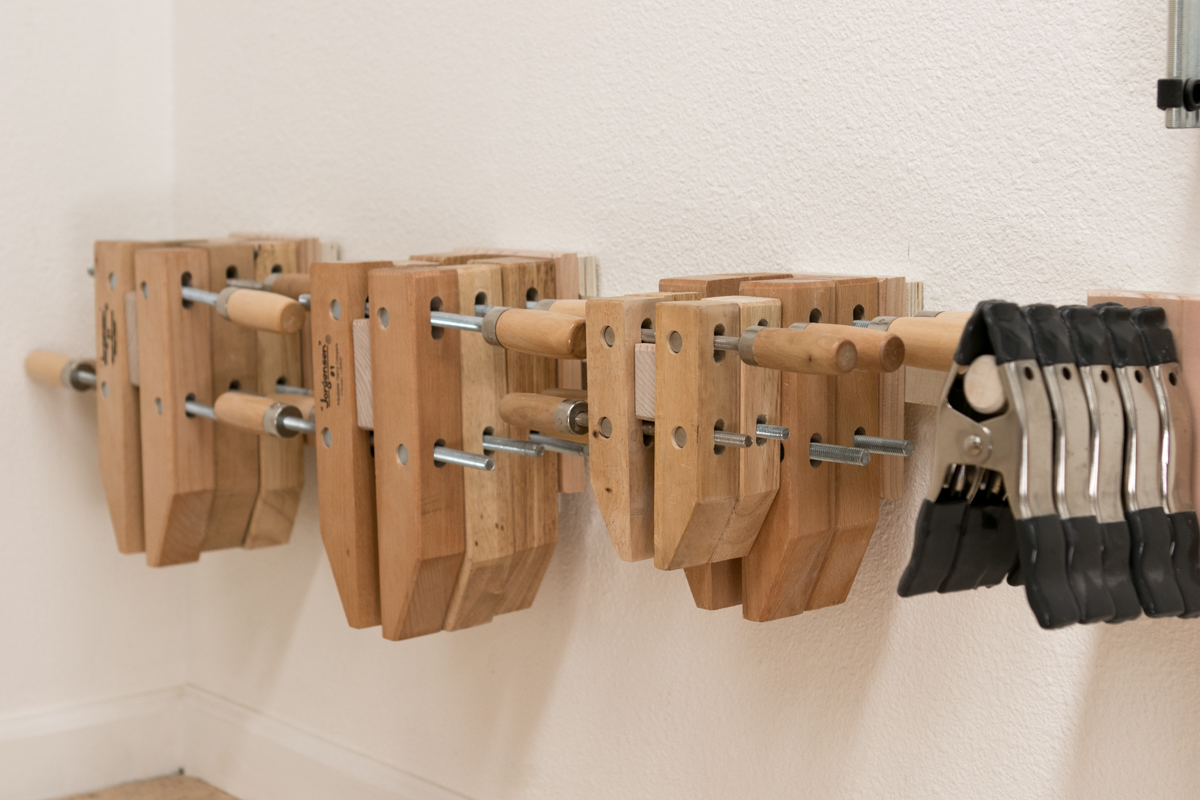
Each unit is removable, and they can be reconfigured in different arrangements. I made mine so they'd all be the same height, but if you wanted to save space, you could stagger the placement of the arms on every other clamp. This would offset the screws on each set, allowing them to be stored closer together.
This took me about an hour and fifteen minutes for all four of these. That includes design and problem solving, so you could put yours together even quicker.
One more thing off the floor! Onto the next project.


![How To Find a Good Mechanic [6 Signs To Look Out For]](https://www.manmadediy.com/wp-content/uploads/2026/05/pexels-cottonbro-4489721-25704-scaled-1-23155.jpg?width=300&height=160)