Your New Favorite Hobby: Everything You Need to Start Carving Heirloom Wooden Spoons and Utensils

We love a full-on major woodworking project. It's ambitious, challenging, and, once you've figured everything out, you're left with a piece of furniture that will get used everyday.
But, building furniture is also time consuming, takes up lots of space, and if you're using all hardwood construction, can be expensive to source the right materials. So, while it's lovely to learn joinery and finishing techniques, sometimes, you need a woodworking project that can be completed in a single day. Better yet, in a single sitting.
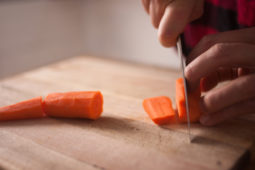
Enter the hand carved wooden spoon. (Or ladle, spatula, saute tool, what have you…). Working small is an intimate way of learning about wood. Splitting it, shaping it, and finishing it by hand can teach you about grain, fibers, and wood structure way more than making cuts on a table saw. You can carve spoons in your workshop if you want some alone time, but because it's quiet and you're making wood chips, not fine dust, you could set up a folding chair along side your sofa while you watch a film or listen to music with your family and friends, and just sweep up when you're done.
It's also incredibly rewarding, super affordable, and, once your finished, you'll have a beautiful heirloom object and keepsake for your kitchen. They also make a killer gift for everyone, because, who doesn't use spoons?
So, DIY wooden spoon carving gets our vote for your new favorite hobby for 2017. If you haven't discovered the joys of working with wood on the small scale, you certainly should be.
The Basic Kit
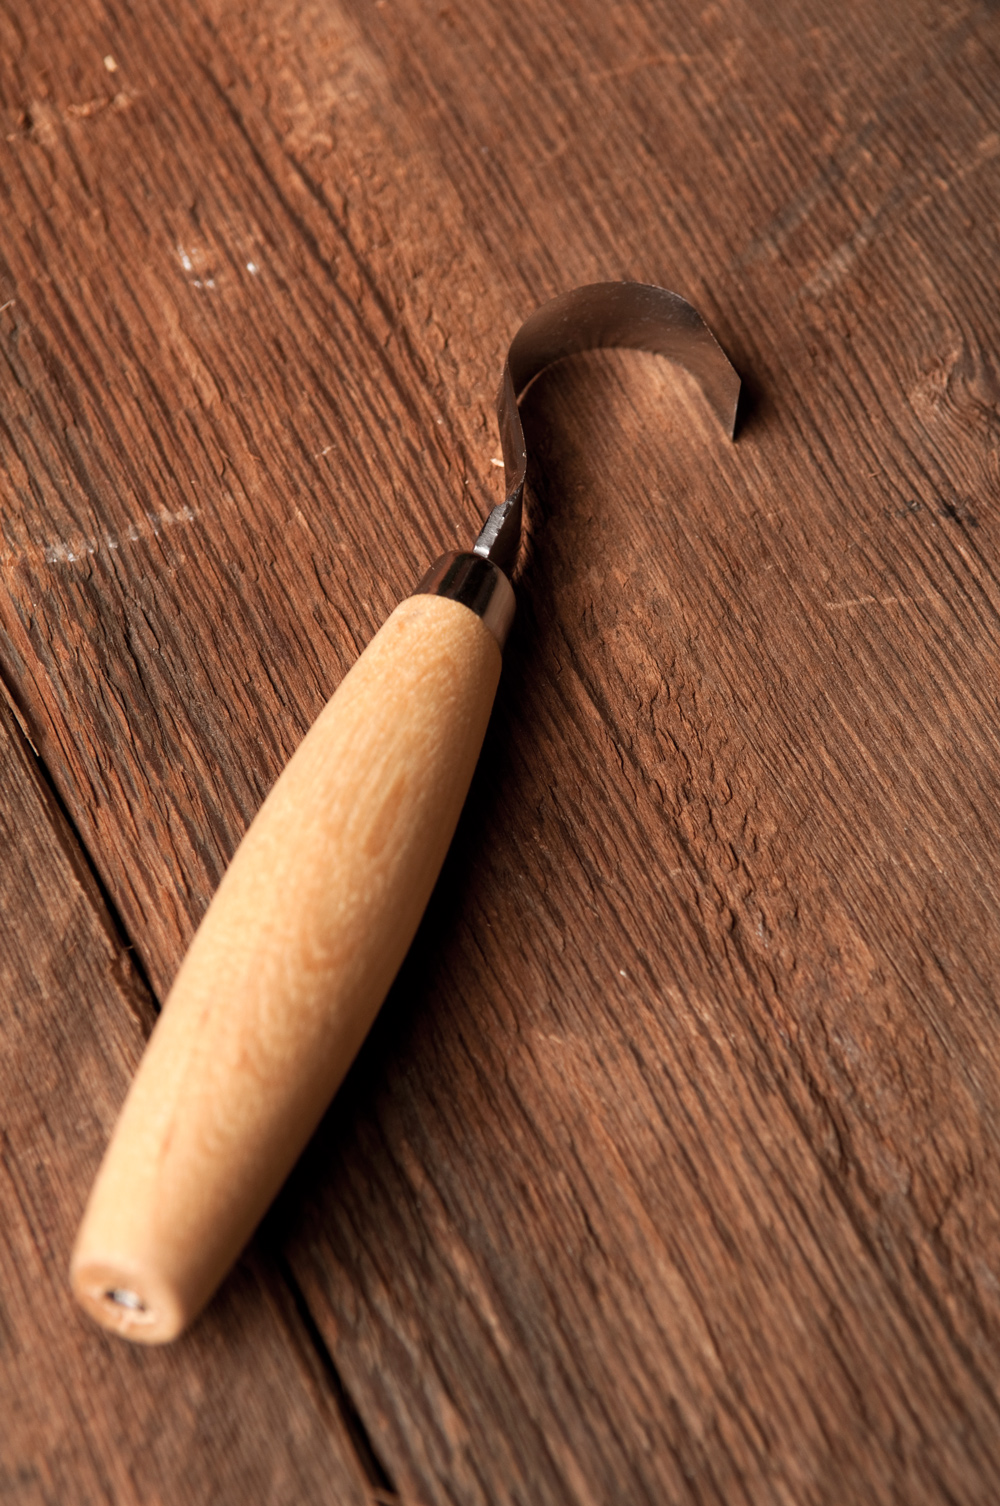
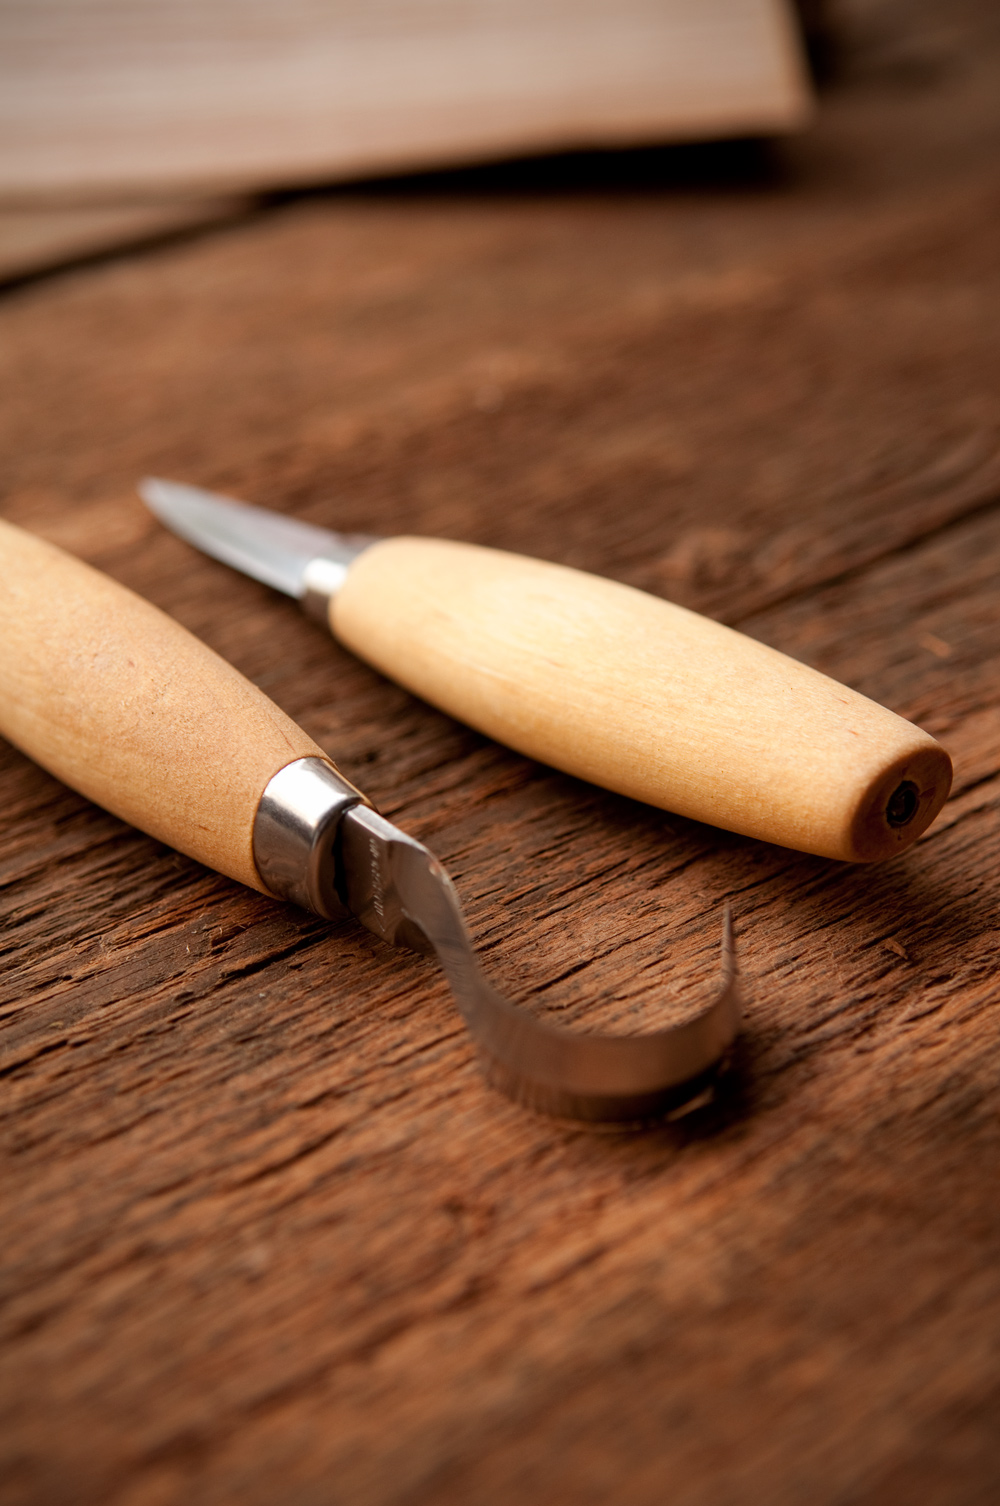
1. The Hook Knife (Crook Knife)
If you already own some basic woodworking tools like a band saw or jig saw, sanders, a spokeshave, or chisels and gouges, this is technically the only specialized spoon carving tool you need. Take a look at the blade, and you know both where the name comes from and what it's designed to do: cut the curved bowl that makes a spoon a spoon. You could do every other bit of shaping with your existing tools.
The hook knife is designed for carving “green” wood — relatively fresh cut wood that still has a higher moisture content and is easier to cut with this amount of leverage. The model you want is a Mora 162, which has been made in Sweden for over 100 years. Simple birch handle, hardened carbon steel blade, and, only twenty-five bucks.
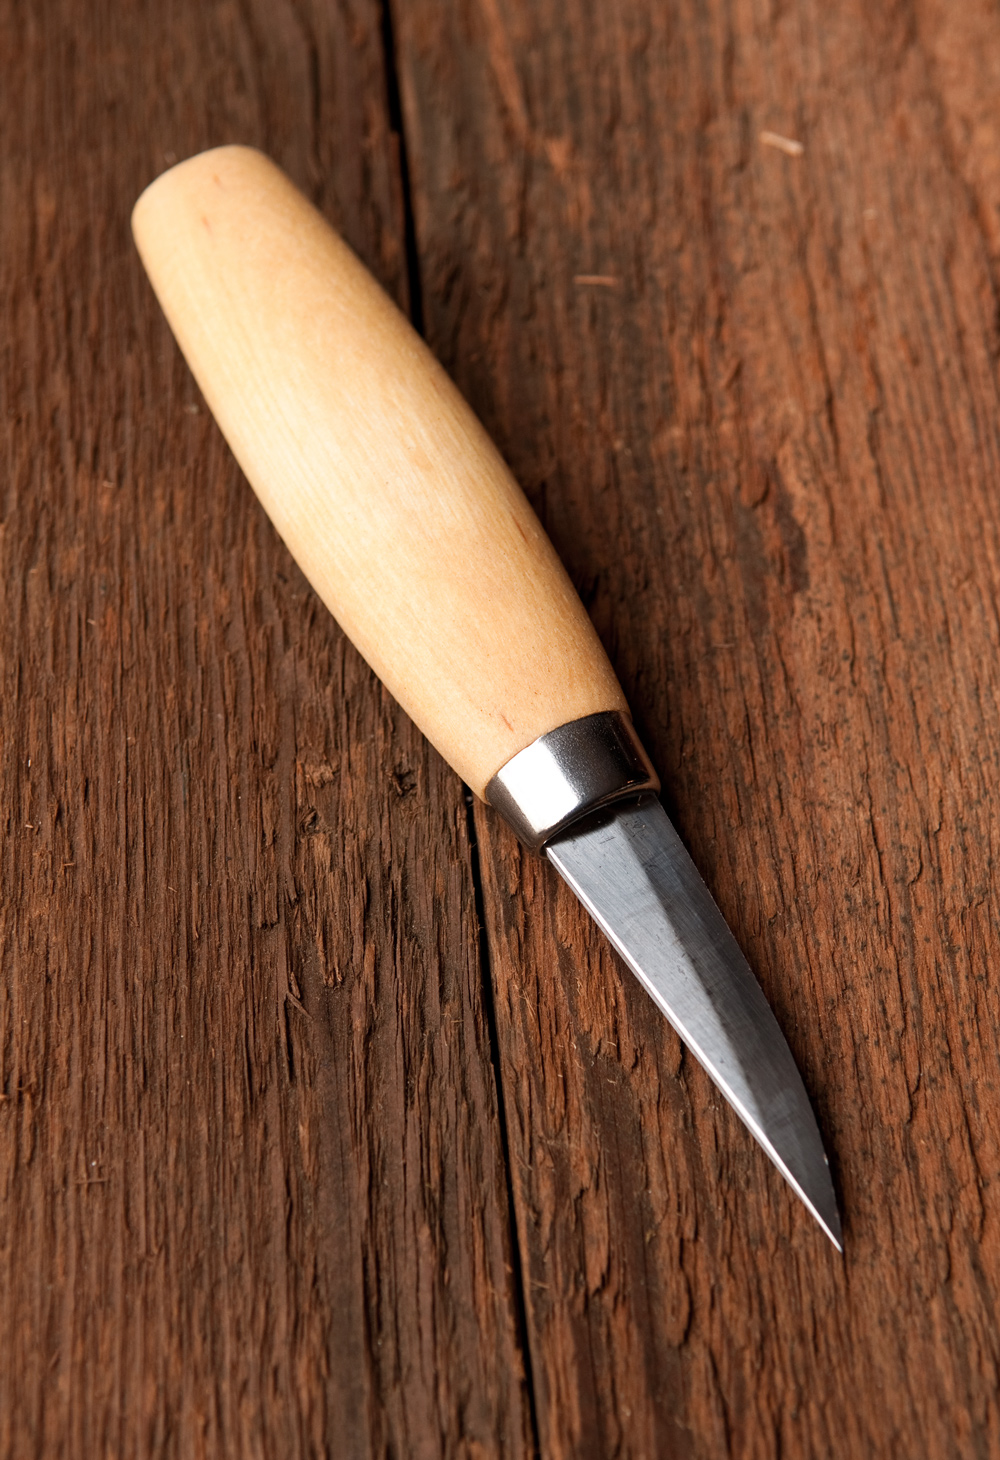
2. Straight Carving Knife
The hook knife takes care of the bowl, then its classic partner, the straight woodcarving knife, handles the rest. Again, we suggest opting for the tried-and-true Morakniv brand. The standard model here is the Mora 120. You'll understand the quality as soon as you get your hands on one. For twenty bones, it can't be beat.
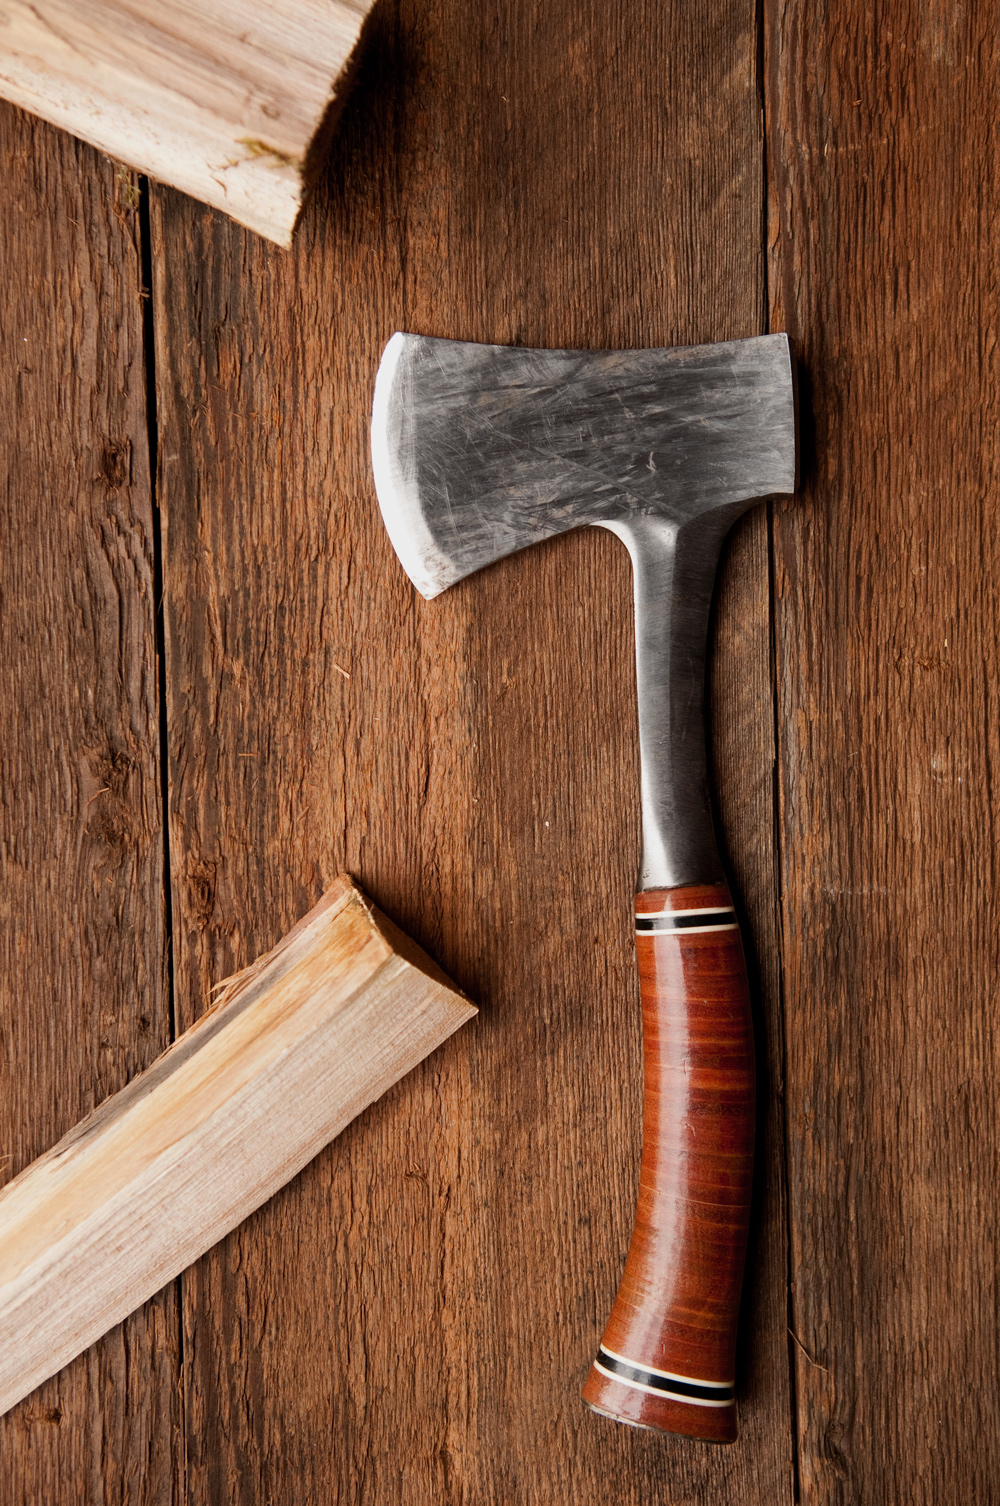
3. Hatchet
A small axe is used to split green wood. Splitting, over sawing, allows the wood to come apart naturally along its grain, making for a stronger spoon blank. When the wood breaks the way it wants to, it's more stable.
If you really get into carving knives, you'll likely want a nicer (read: more expensive) Scandinavian-style axe that will allow you to split and shape the wood with control. But if you're just getting started, the classy-looking Estwing hatchet works great for much less cash.
For the starter kit, that's it. Three tools, some wood, and you're off.
Advanced Tools
As your skills develop or you want to try more ambitious shapes and projects, a few additional tools can help speed up the process. These tools are better used in your shop, garage, or outside than a recliner in the living room, but you can rough your blanks out anywhere then bring them inside for a quiet night of carving.
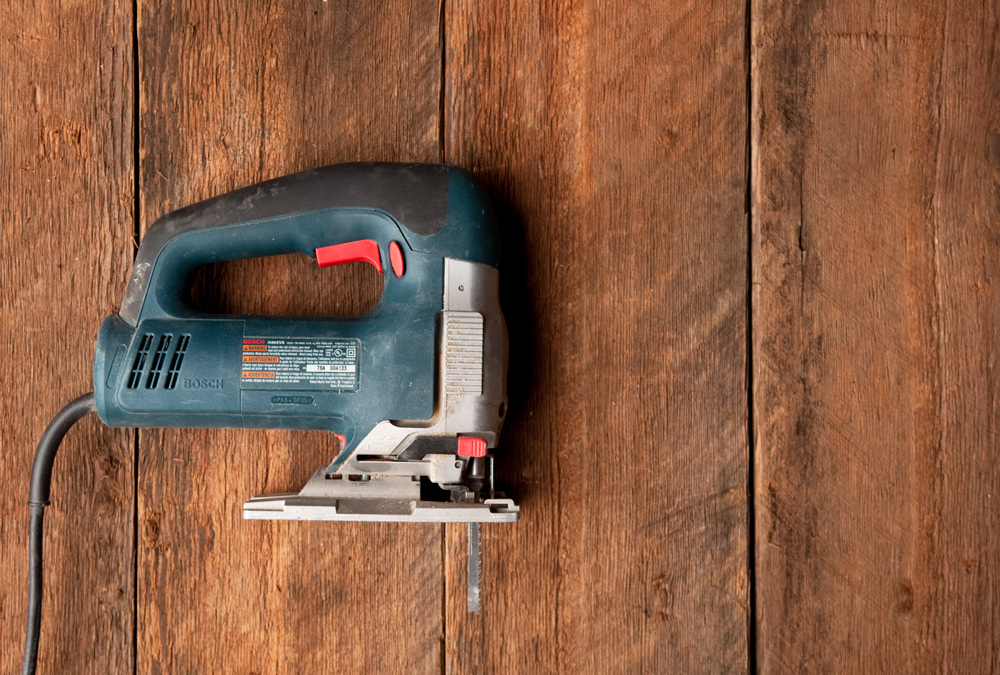
4. Jigsaw
Designed for cutting curves, a jig saw is a great way to remove excess wood outside your pattern with precision. They're also extremely versatile for all sorts of craft and woodworking projects, so if you make stuff and don't own a jig saw, it's time to add it to your arsenal. A band saw also works well, but if you own a band saw, you don't need me to tell you that.
ManMade Recommended
- Bosch JS470E 7.0-Amp – $149
- Bosch JS572EK 7.2 – $235 (No, this isn't too much to spend on a jig saw. Read the reviews, and you'll see why)
- DEWALT DW317 Variable-Speed Orbital Jigsaw – $83.
- Milwaukee 6268-21 6.5 Amp Top Handle Jig Saw – $202.
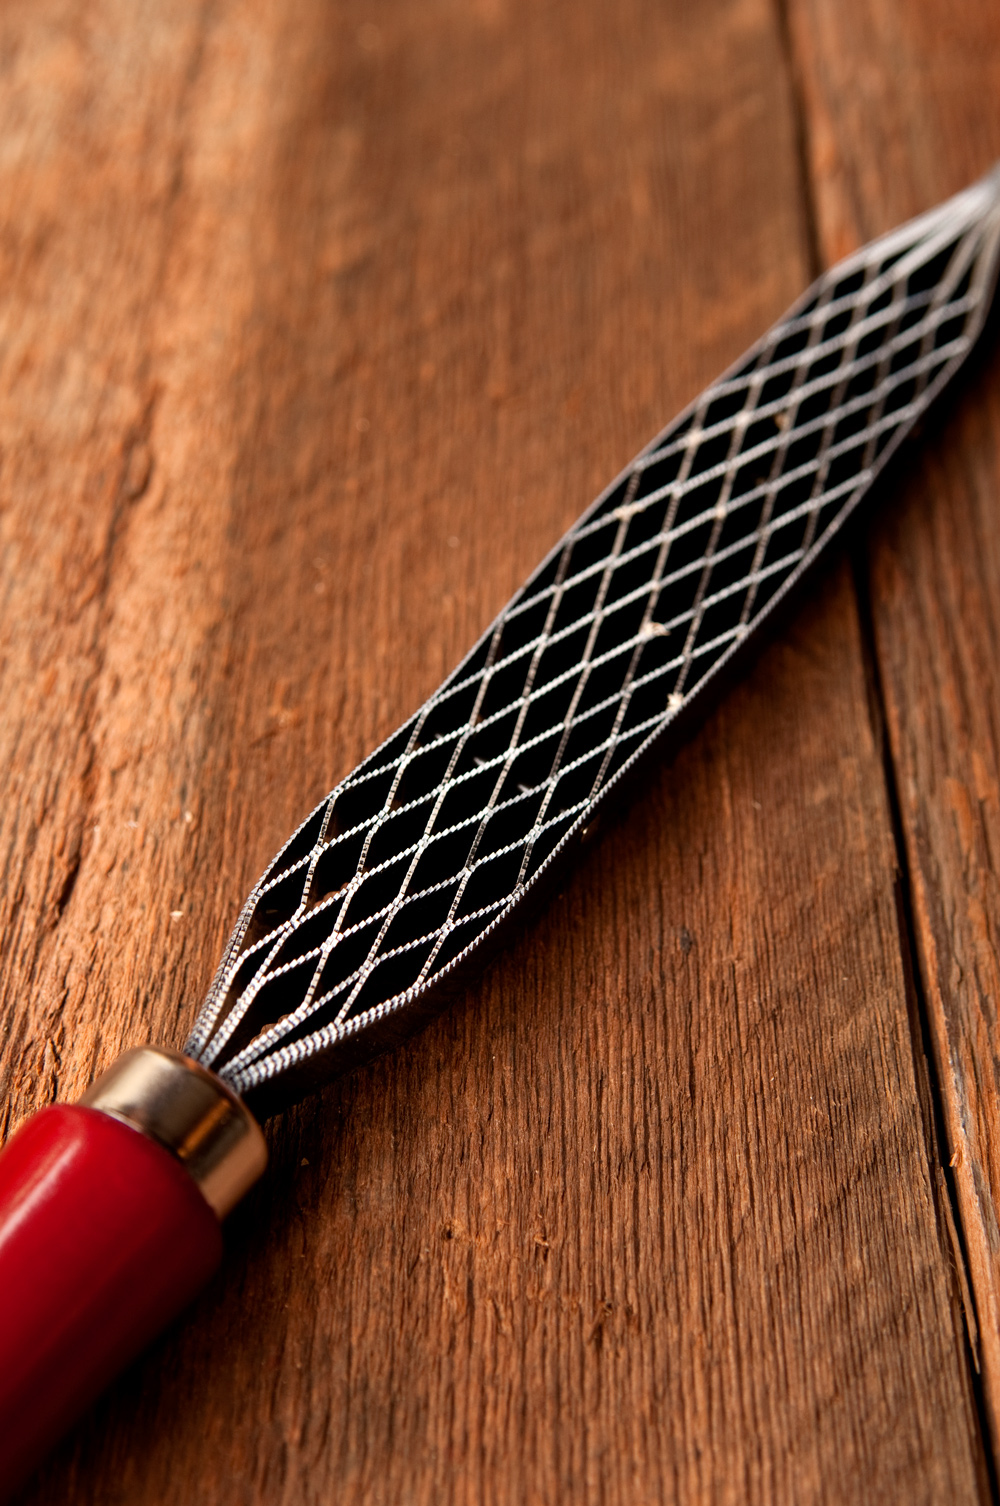
5. Rasp
A rasp is a quick way to sculpt curves and transitions in wood. There are really nice hand-stitched rasps out there, but the most affordable option is a Japanese-style saw rasp. These have a find and coarse side that will allow you to remove a lot of material and refine your work.
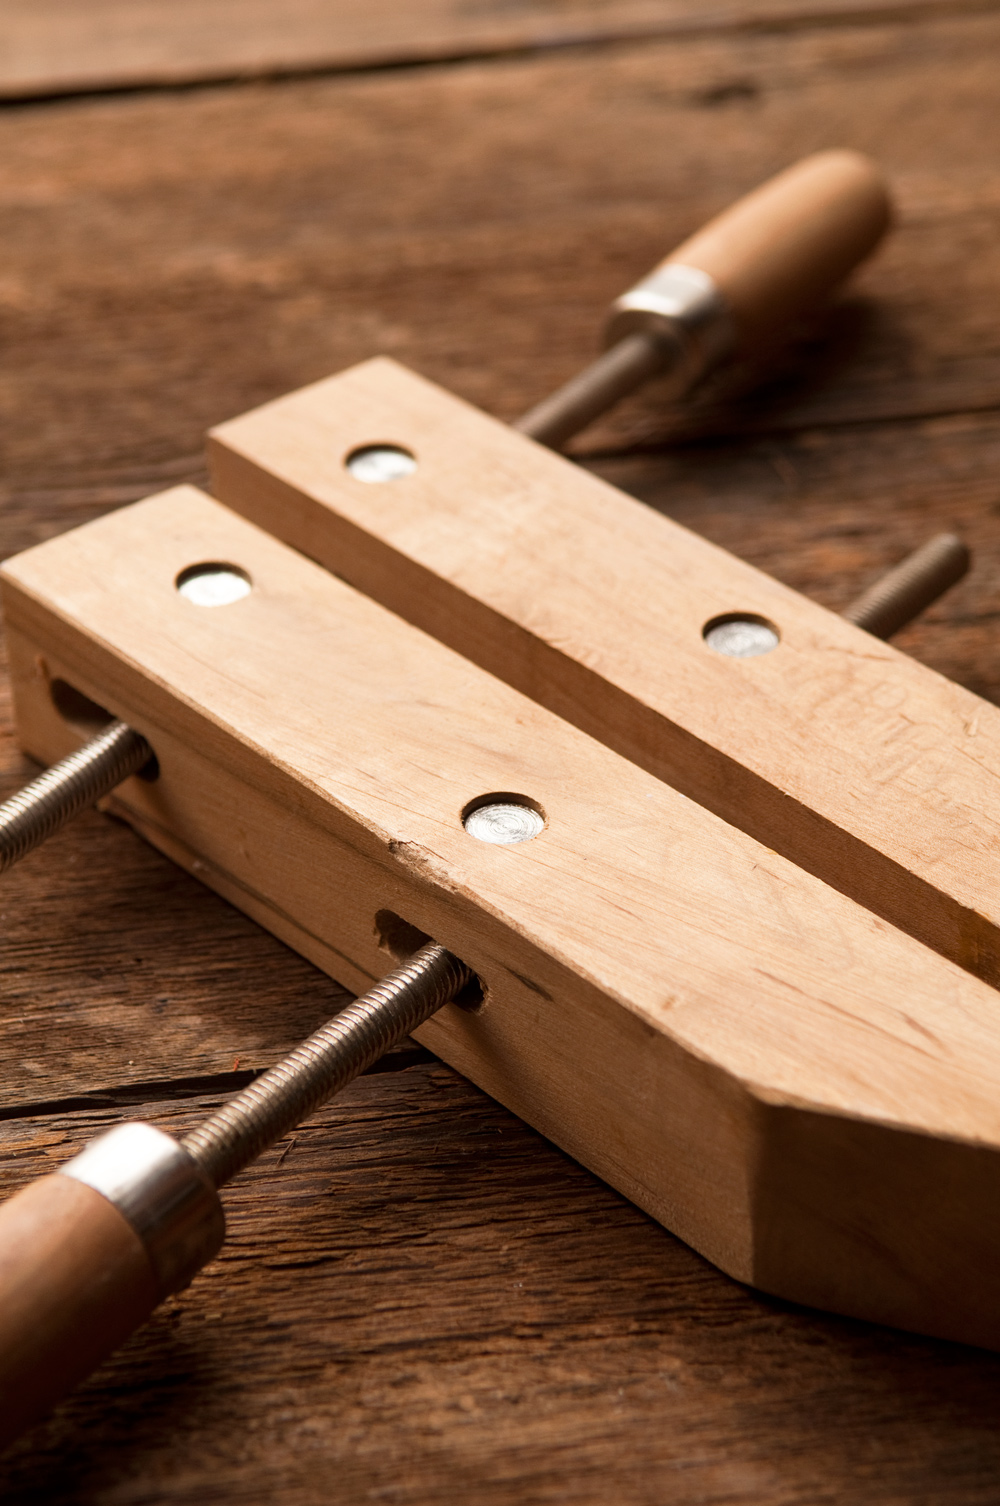
6. Handscrew or Clamp
If you're using either a jig saw or rasp to shape your work, you'll need a way to hold it securely. You may already own some clamps or a bench vise, and they'll work great. If not, I recommend a wooden hand screw. It will hold the non-square shape of a spoon or spatula easily, and the wooden jaws mean that if you slip, you won't damage the cutting edge of your tool.

7. Sandpaper
Like any woodworking project, you're going to need it to refine and prep your work. A selection of grits from 80 – 220p will do nicely.
You'll also need sandpaper to sharpen the unusual cutting edge of the hook knife. There, you'll want something like 600 or 800 to remove material and a honing grit of 1600.
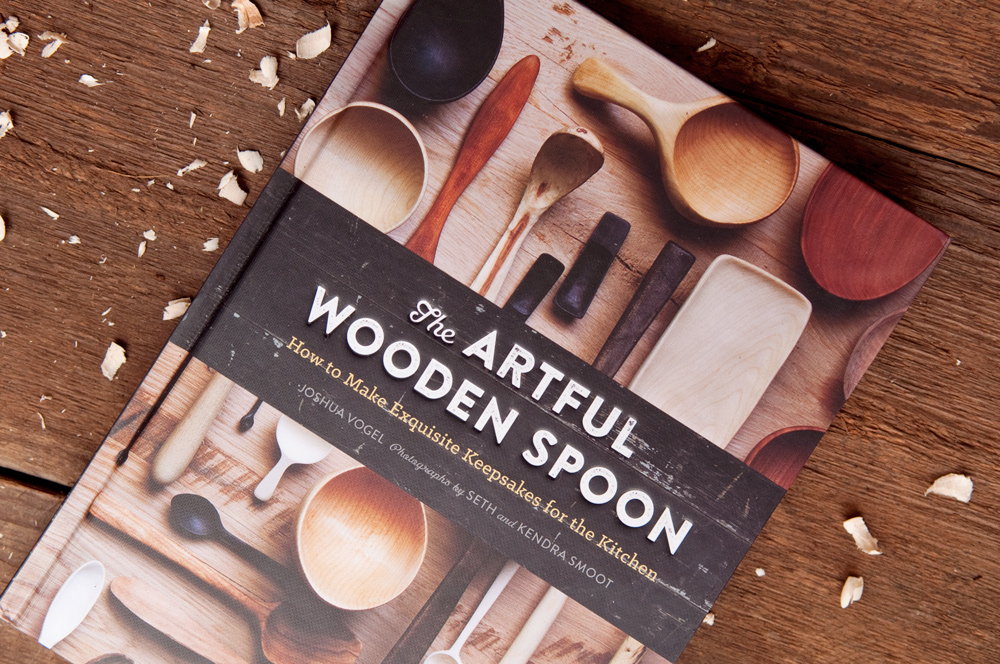
8. A How-to Guide
While you could learn everything you need from YouTube videos, there's something about the offline, all-analog activity of carving that seems better aligned to a good old fashioned paper book. There are plenty out there – even older books from the library will work, since the technique and tools haven't really changed in decades. My personal favorite is this relatively new book by designer Joshua Vogel. The designs and photography in here are amazing, and while I like a classic Viking-style soup spoon, these more contemporary shapes are the pieces I'm most inspired to make.