Make This: Stylish Leather Headphone + Cable Organizer
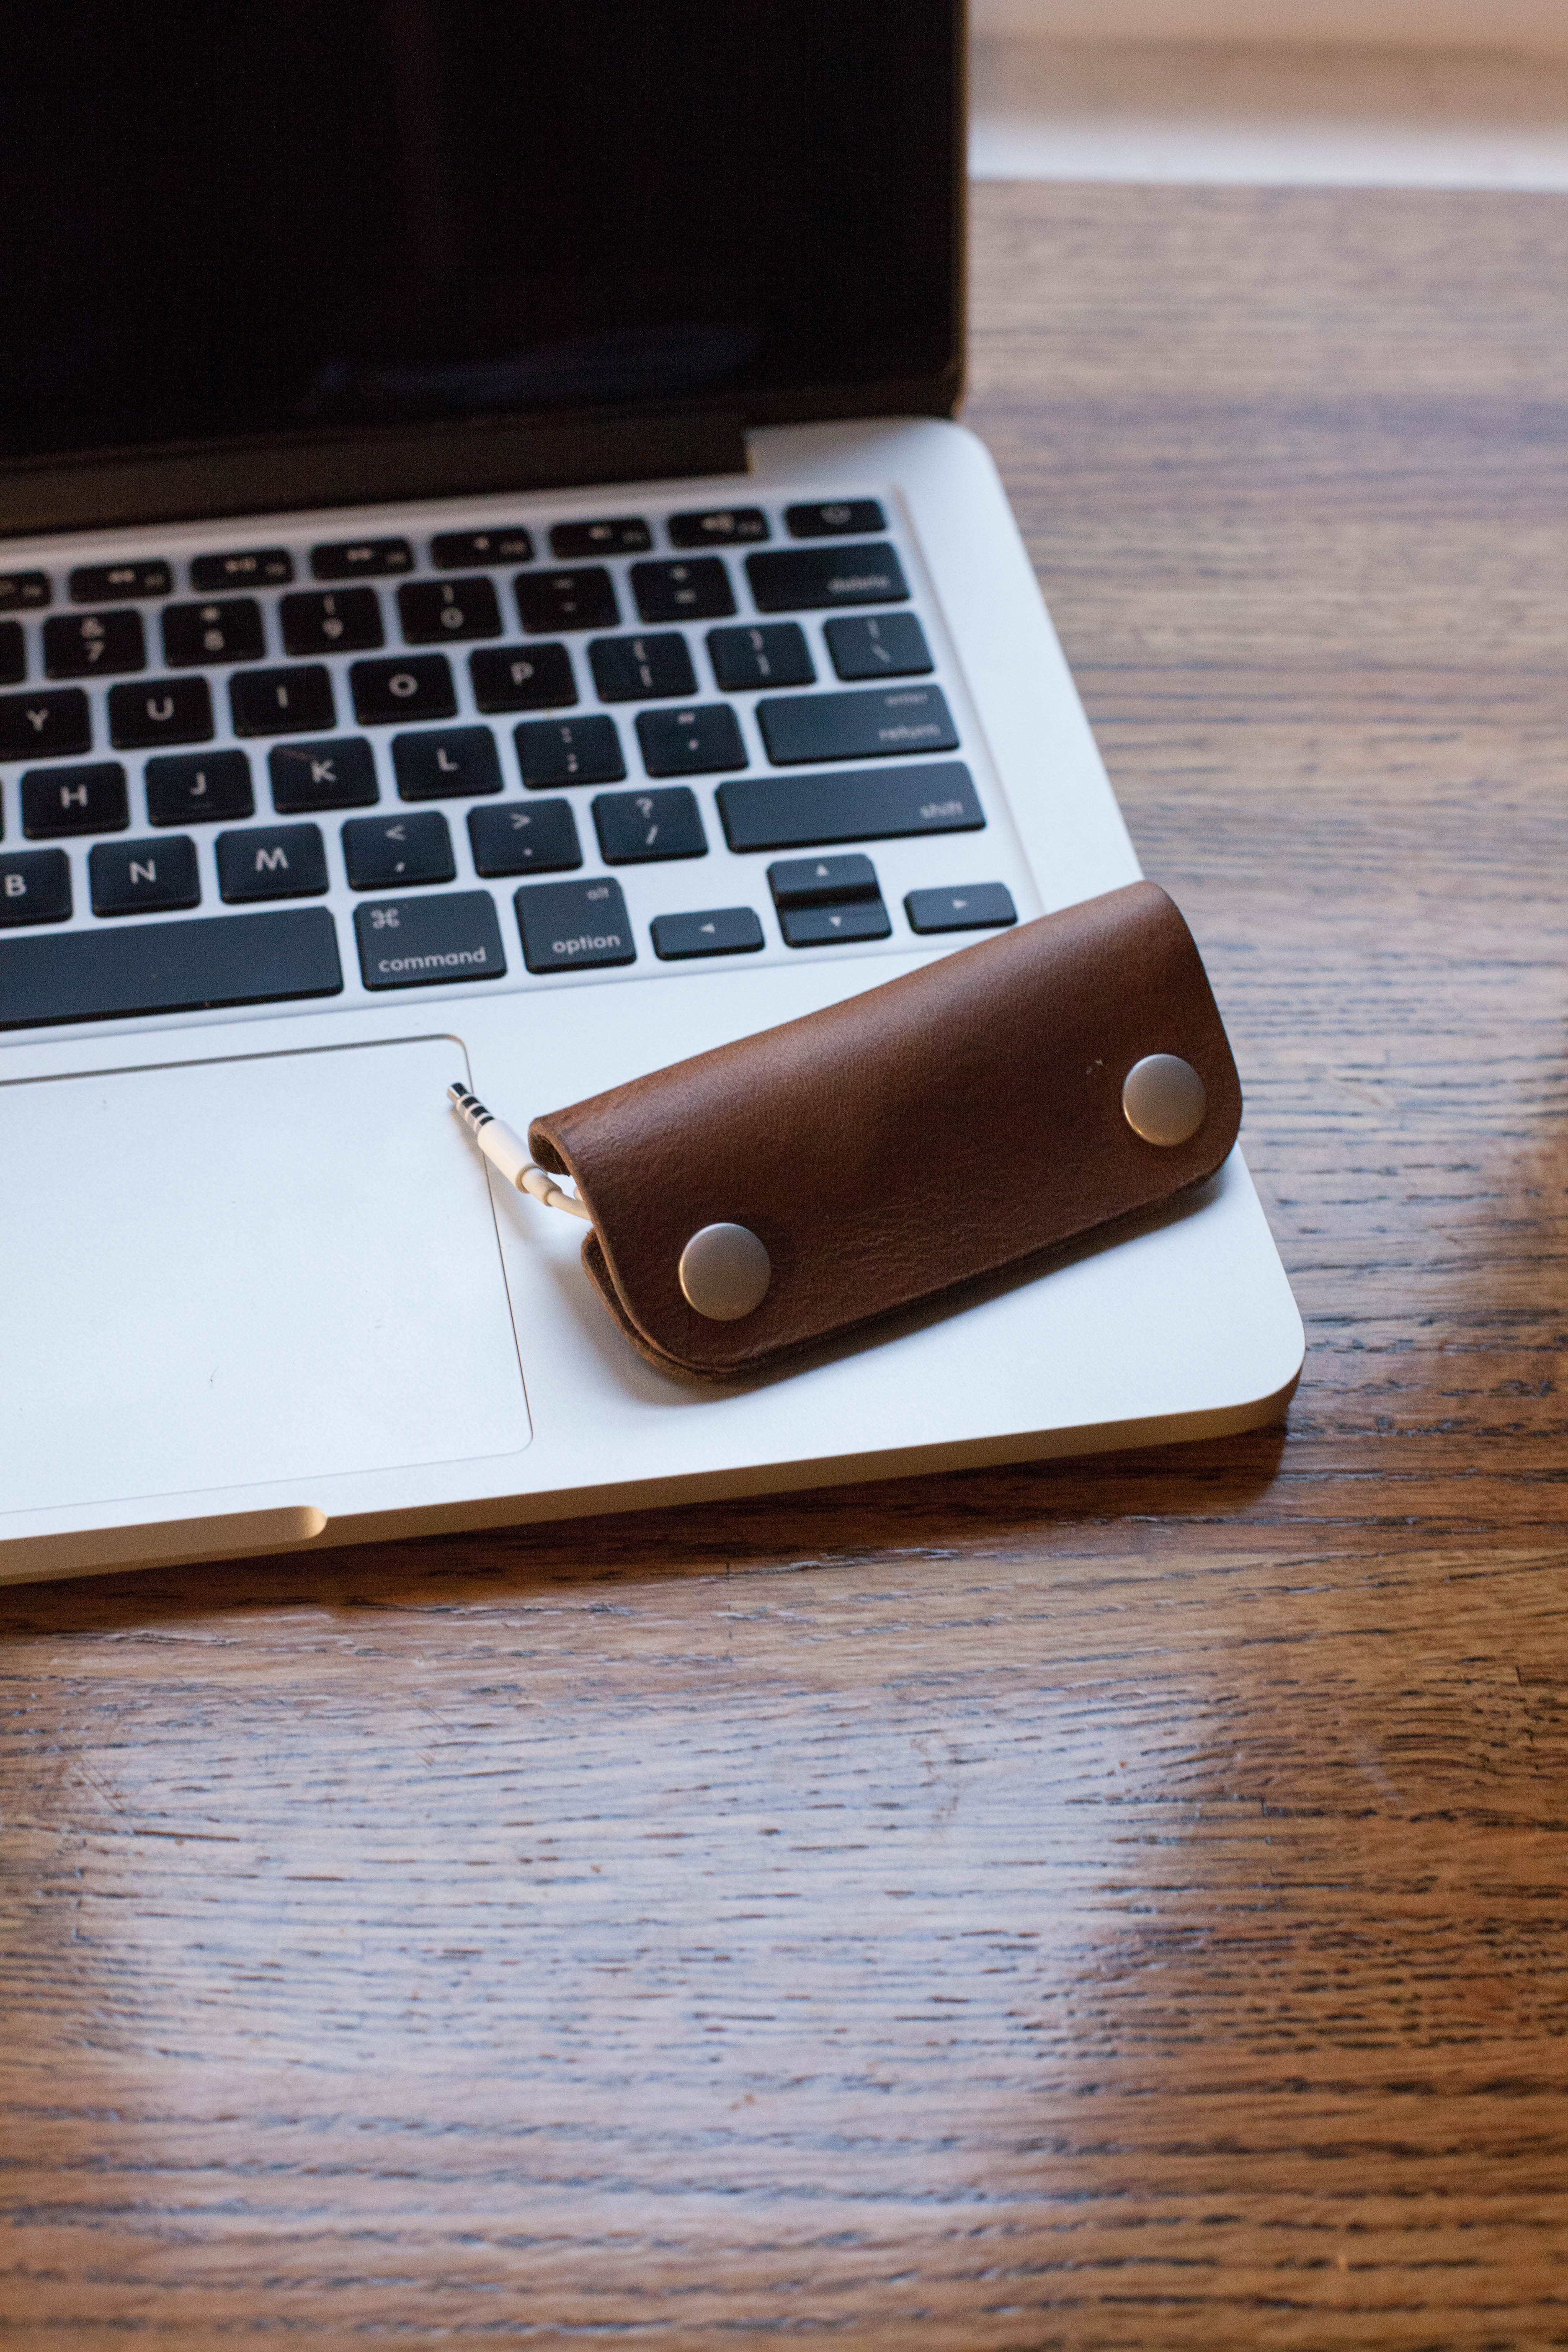
For those of you who have already made the switch to wireless earbuds (thanks Apple), tangled cords aren’t really an issue you have to deal with any more.
But, if your like me and carry around “old school” wired earbuds in your pocket, you understand the wad of knots you pull out every time you go digging. And, though some may appreciate the eternal struggle (and contemporary art sculpture?) it really doesn’t have to be that way.
This simple DIY earbud/headphone/cord organizer keeps your cables knot free and still fits sleekly in your pocket. Using it is easy: all you have to do is wrap your earbuds around the organizer and snap it closed. And making it is just as simple.
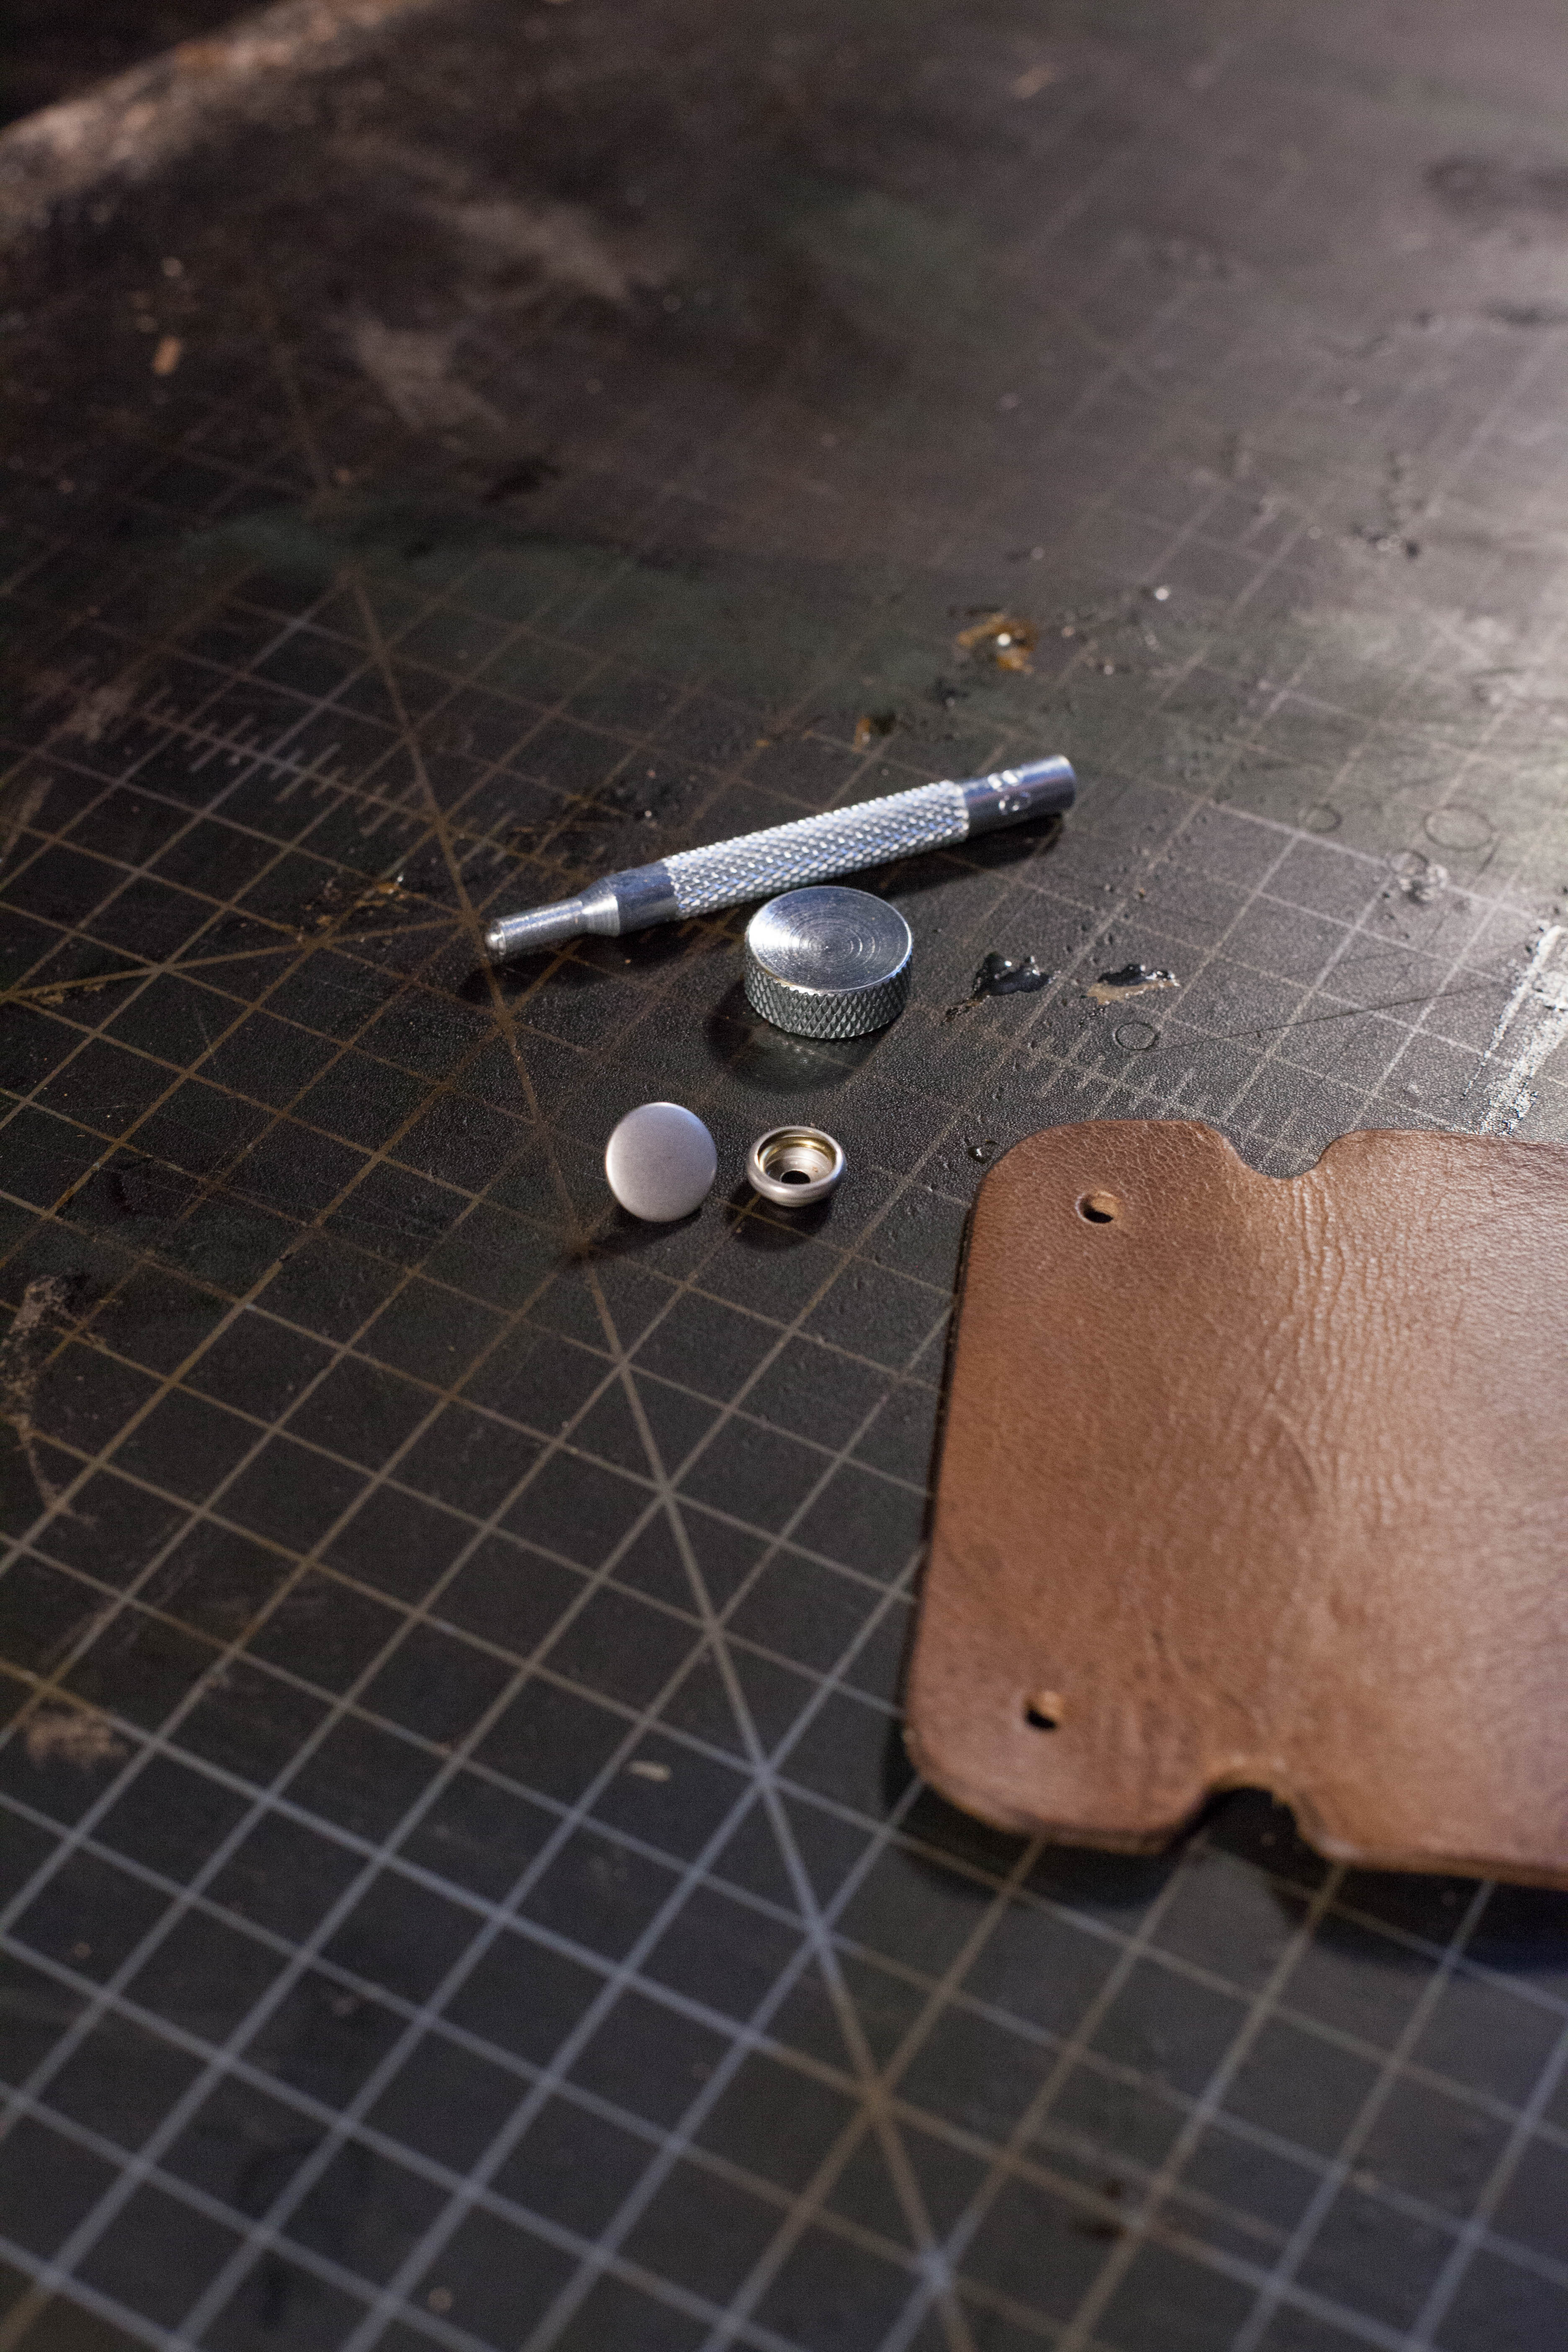
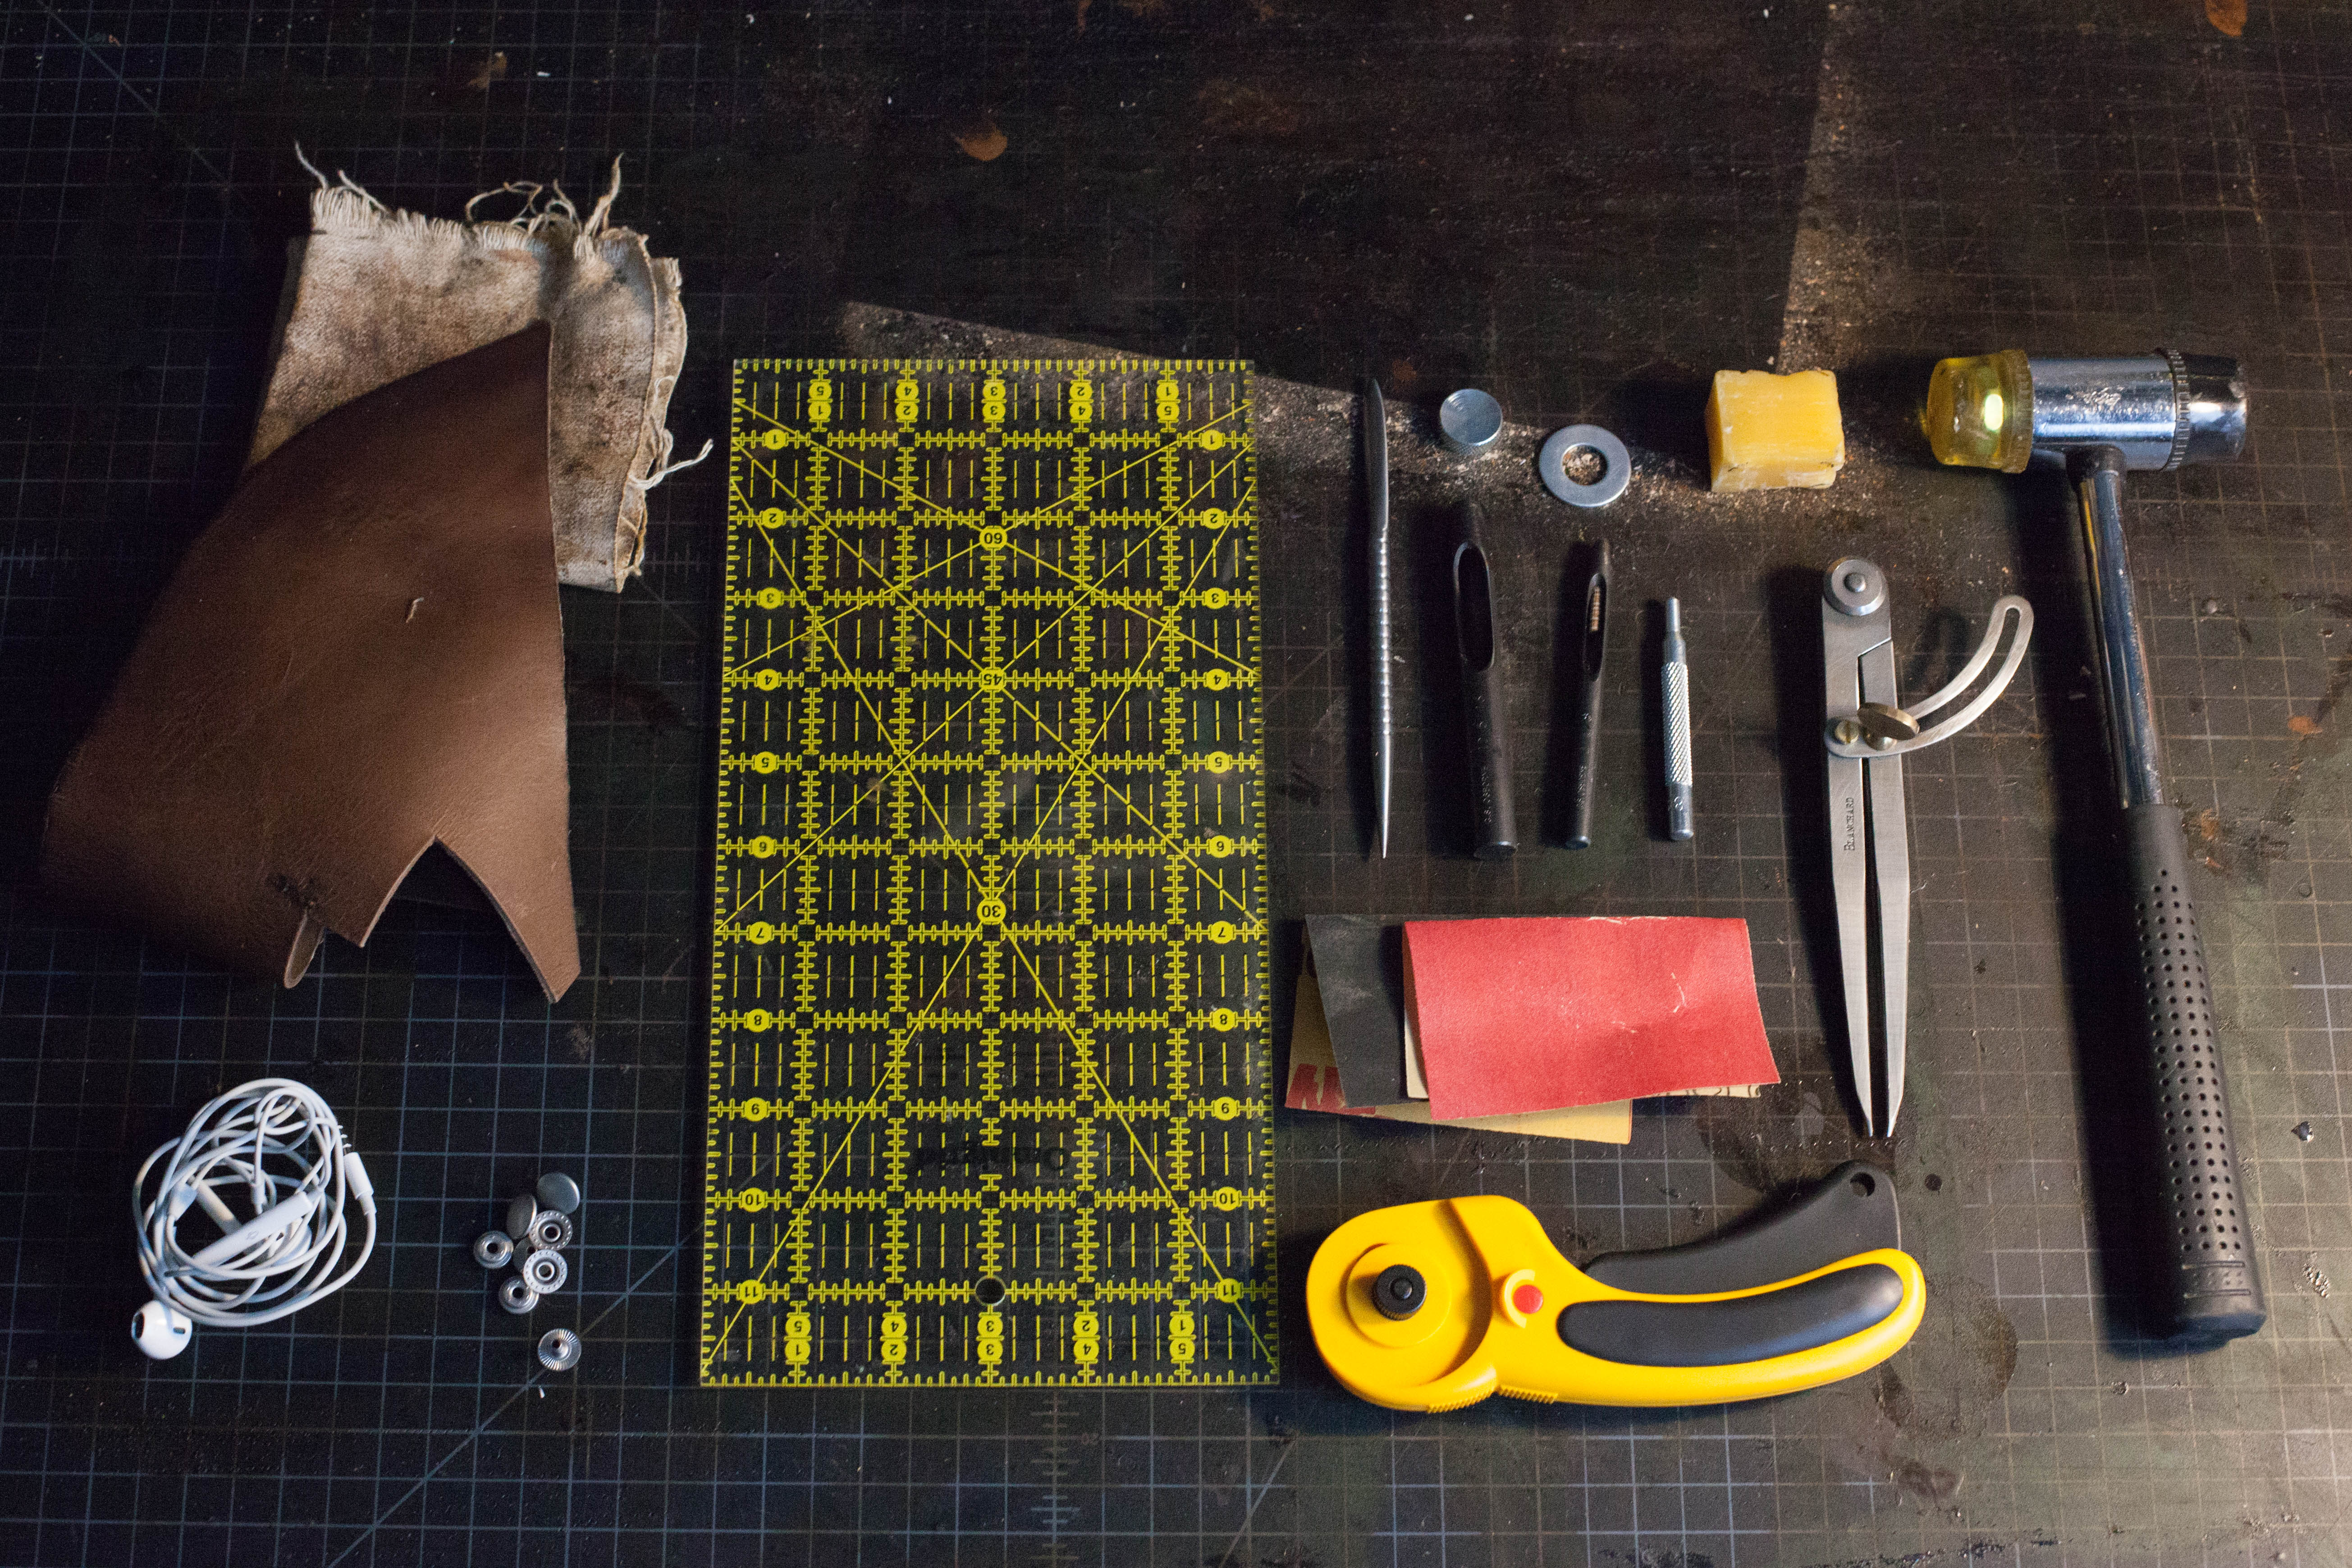 What You Need:
-
5oz finished leather scrap, approximately 5×5 inches
-
a wad of earbuds, charging cables, what have you
-
2 sets of snaps (4 domed pieces, 2 female pieces, and 2 male pieces)
-
a ruler
-
a piece of canvas
-
220/600 grit sandpaper
-
a leatherworking knife or rotary cutter
-
punches (size 5/16″ and 5/32″)
-
a washer
-
rivet setter and anvil
-
beeswax
-
a hammer
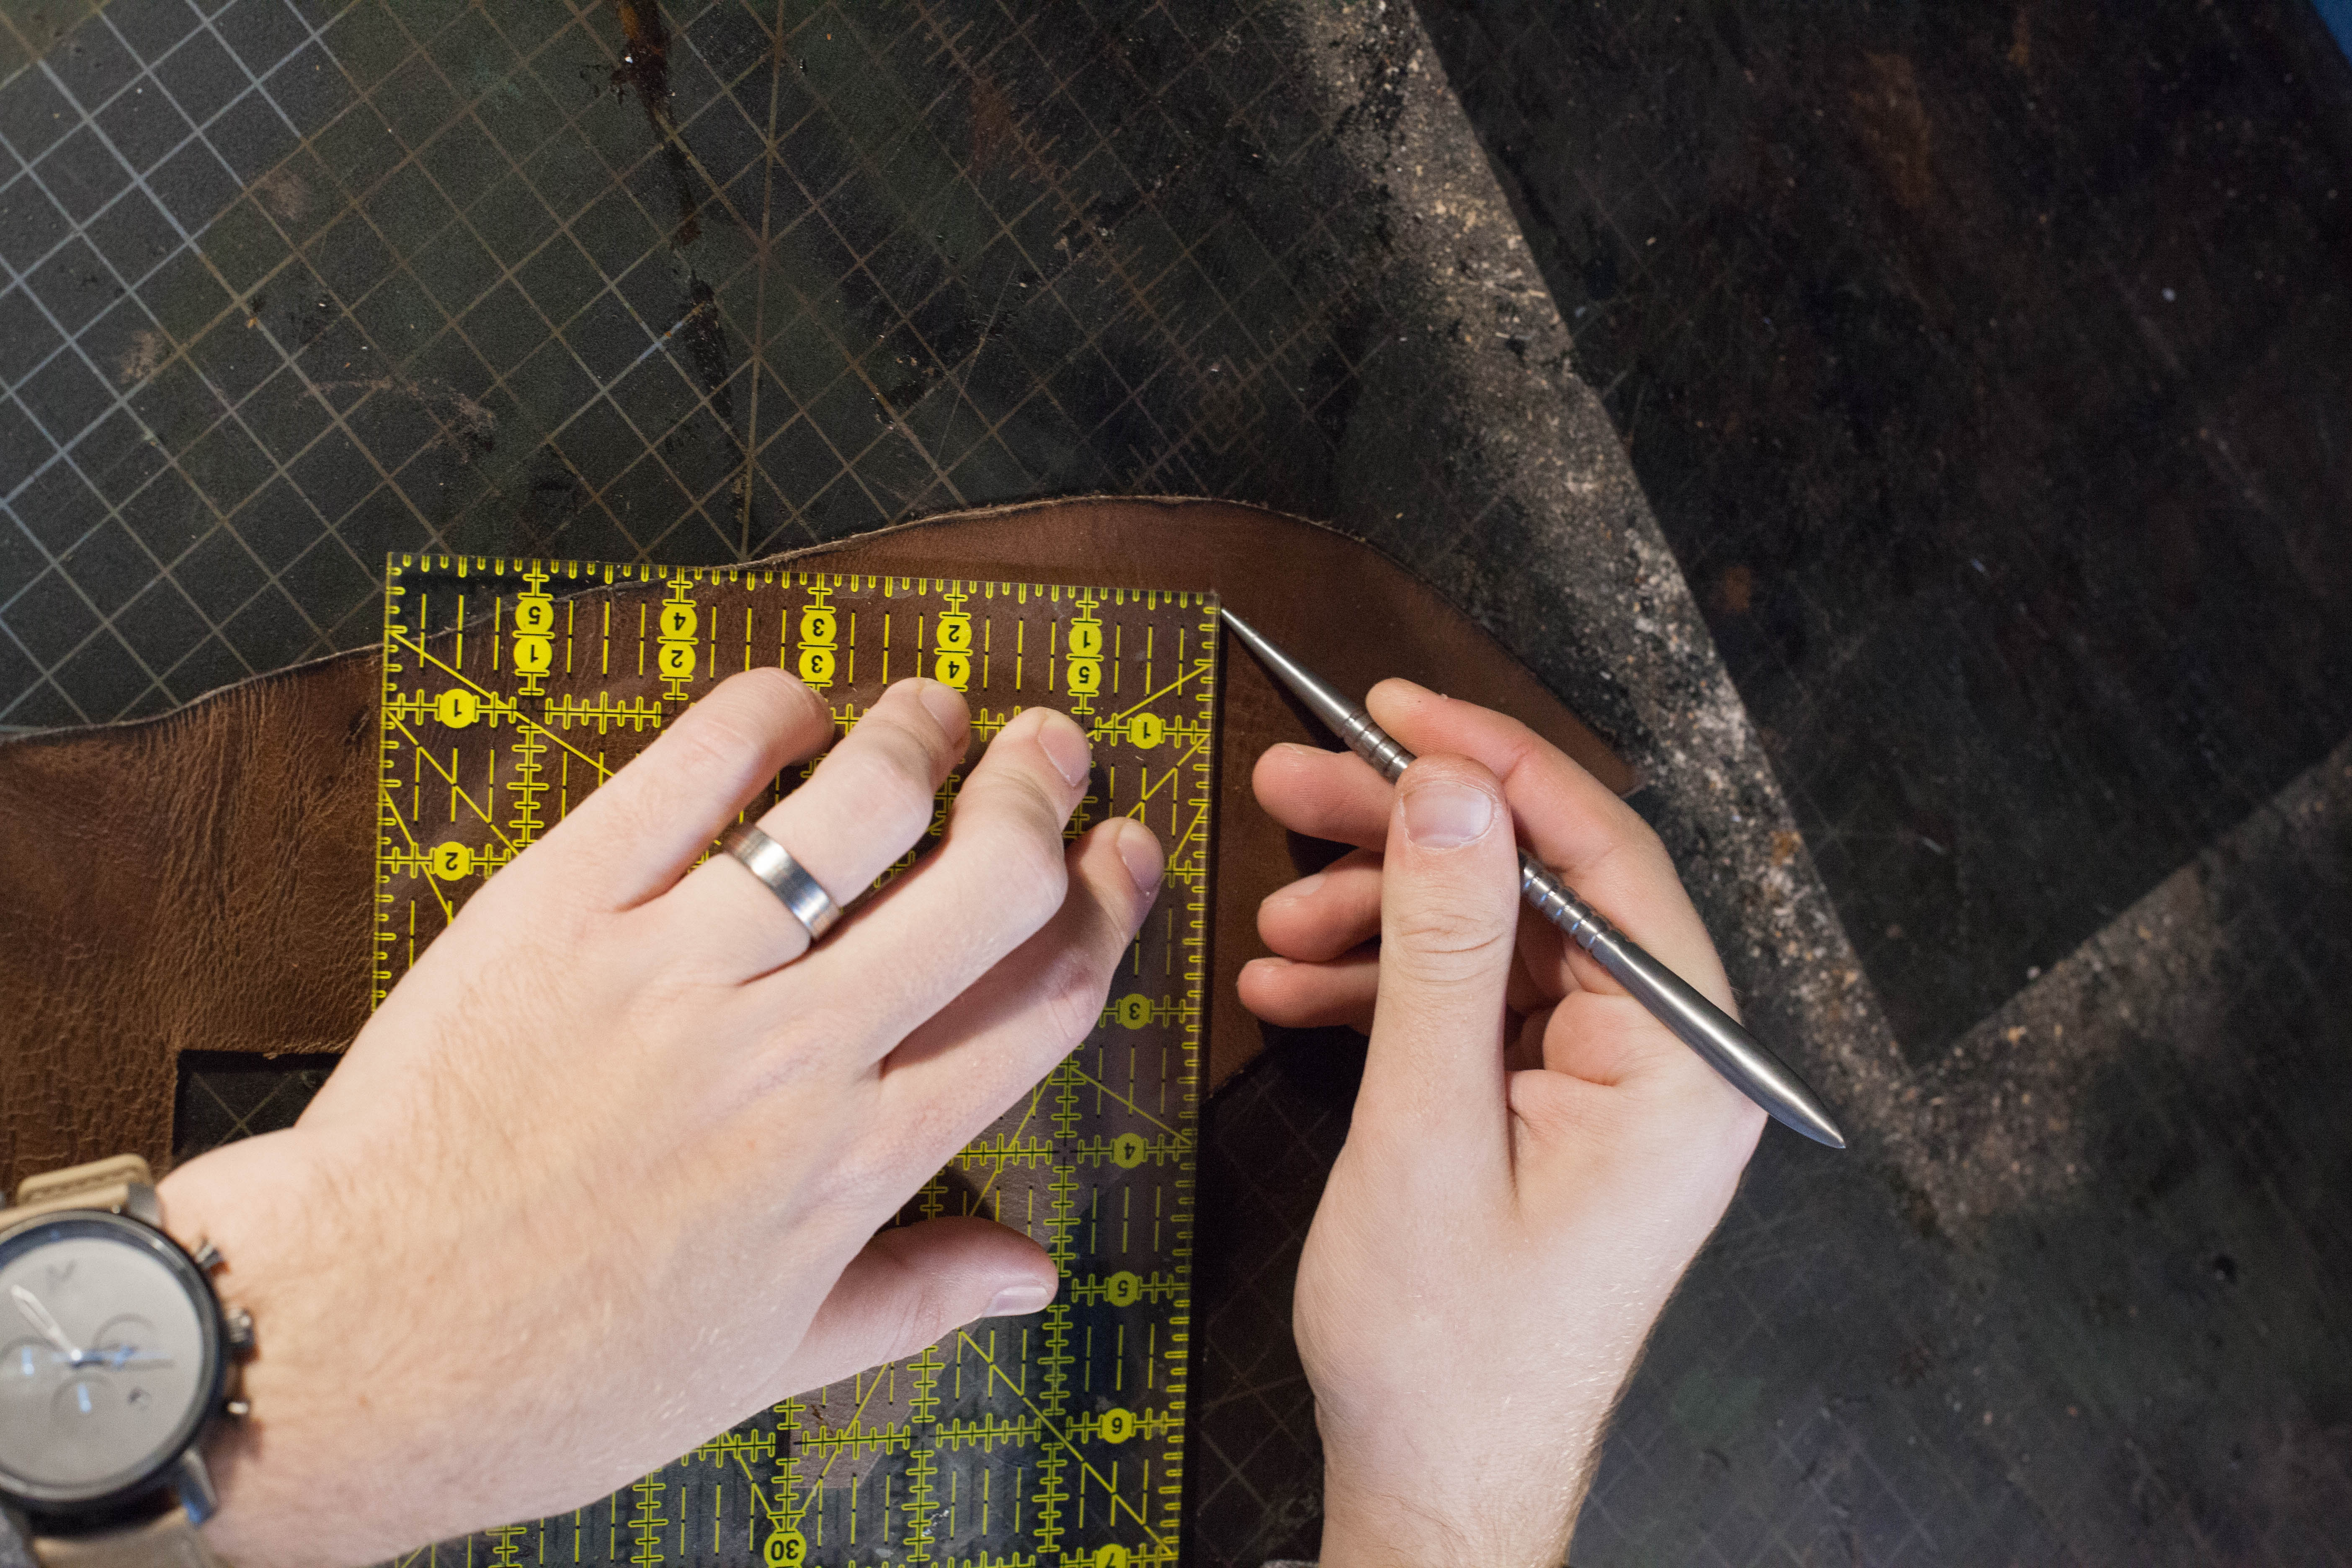
Step
Using the ruler and the scratch awl, trace out a 4″ x 4″ square onto the leather.
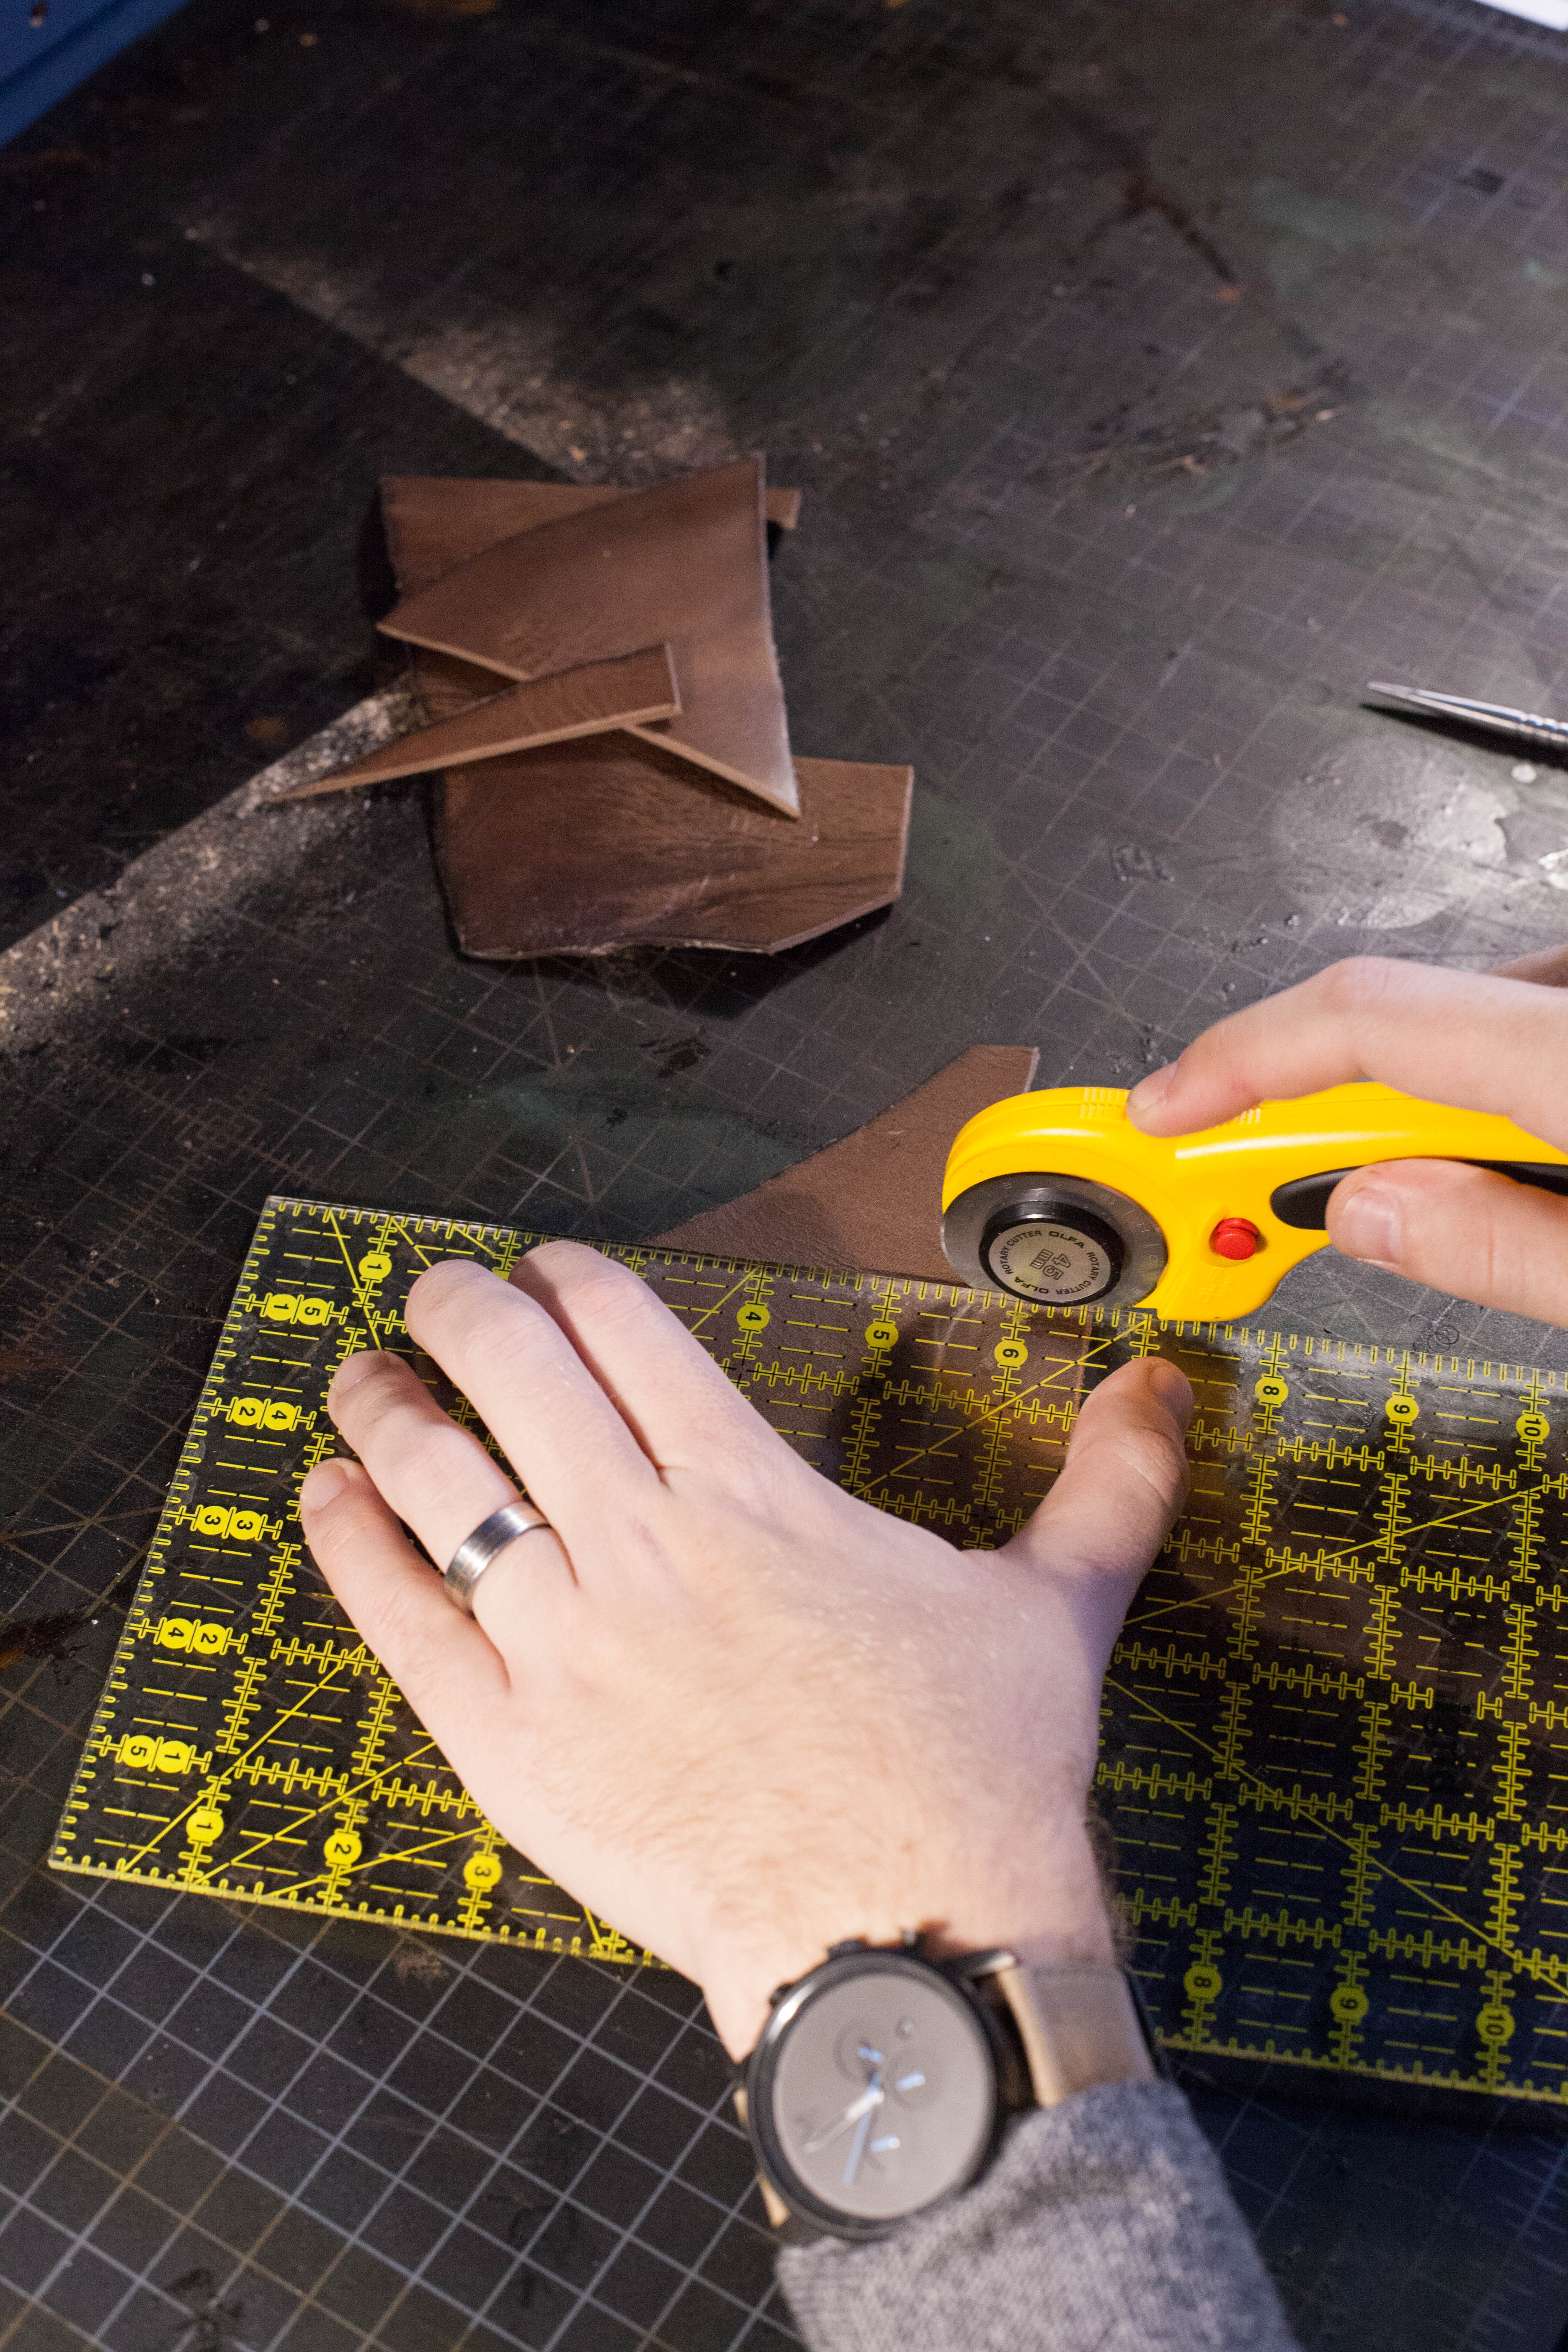
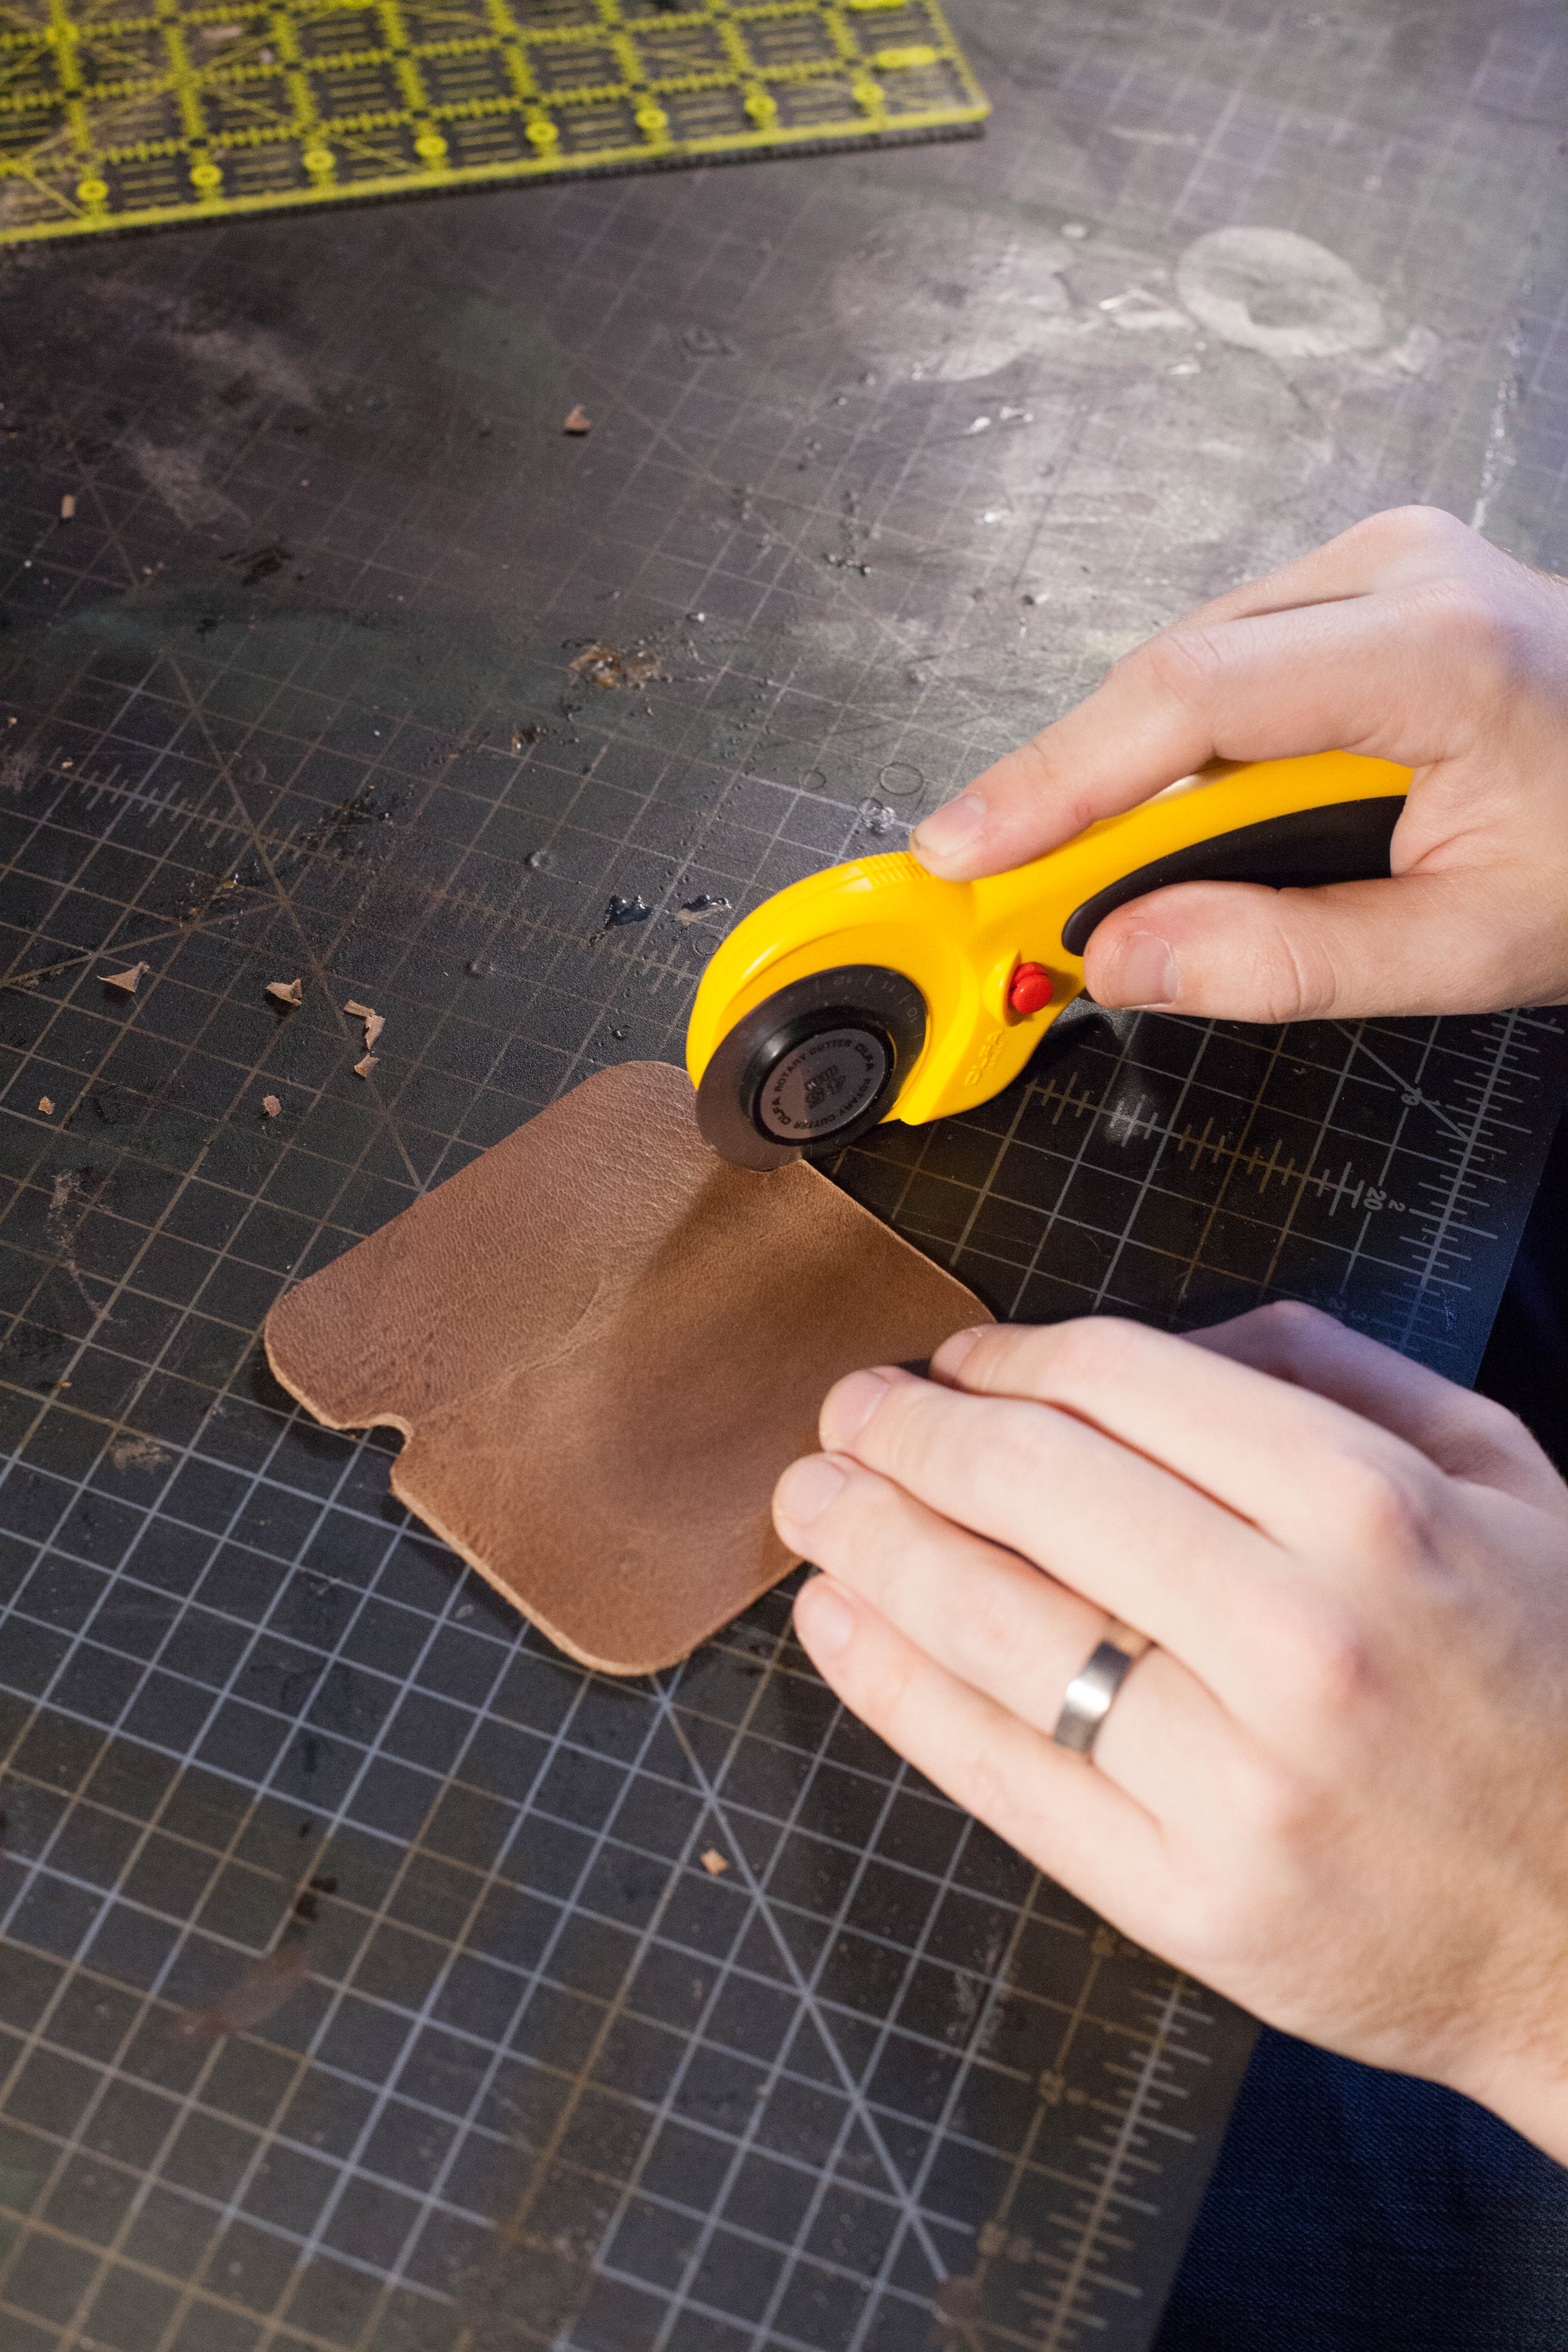
Step
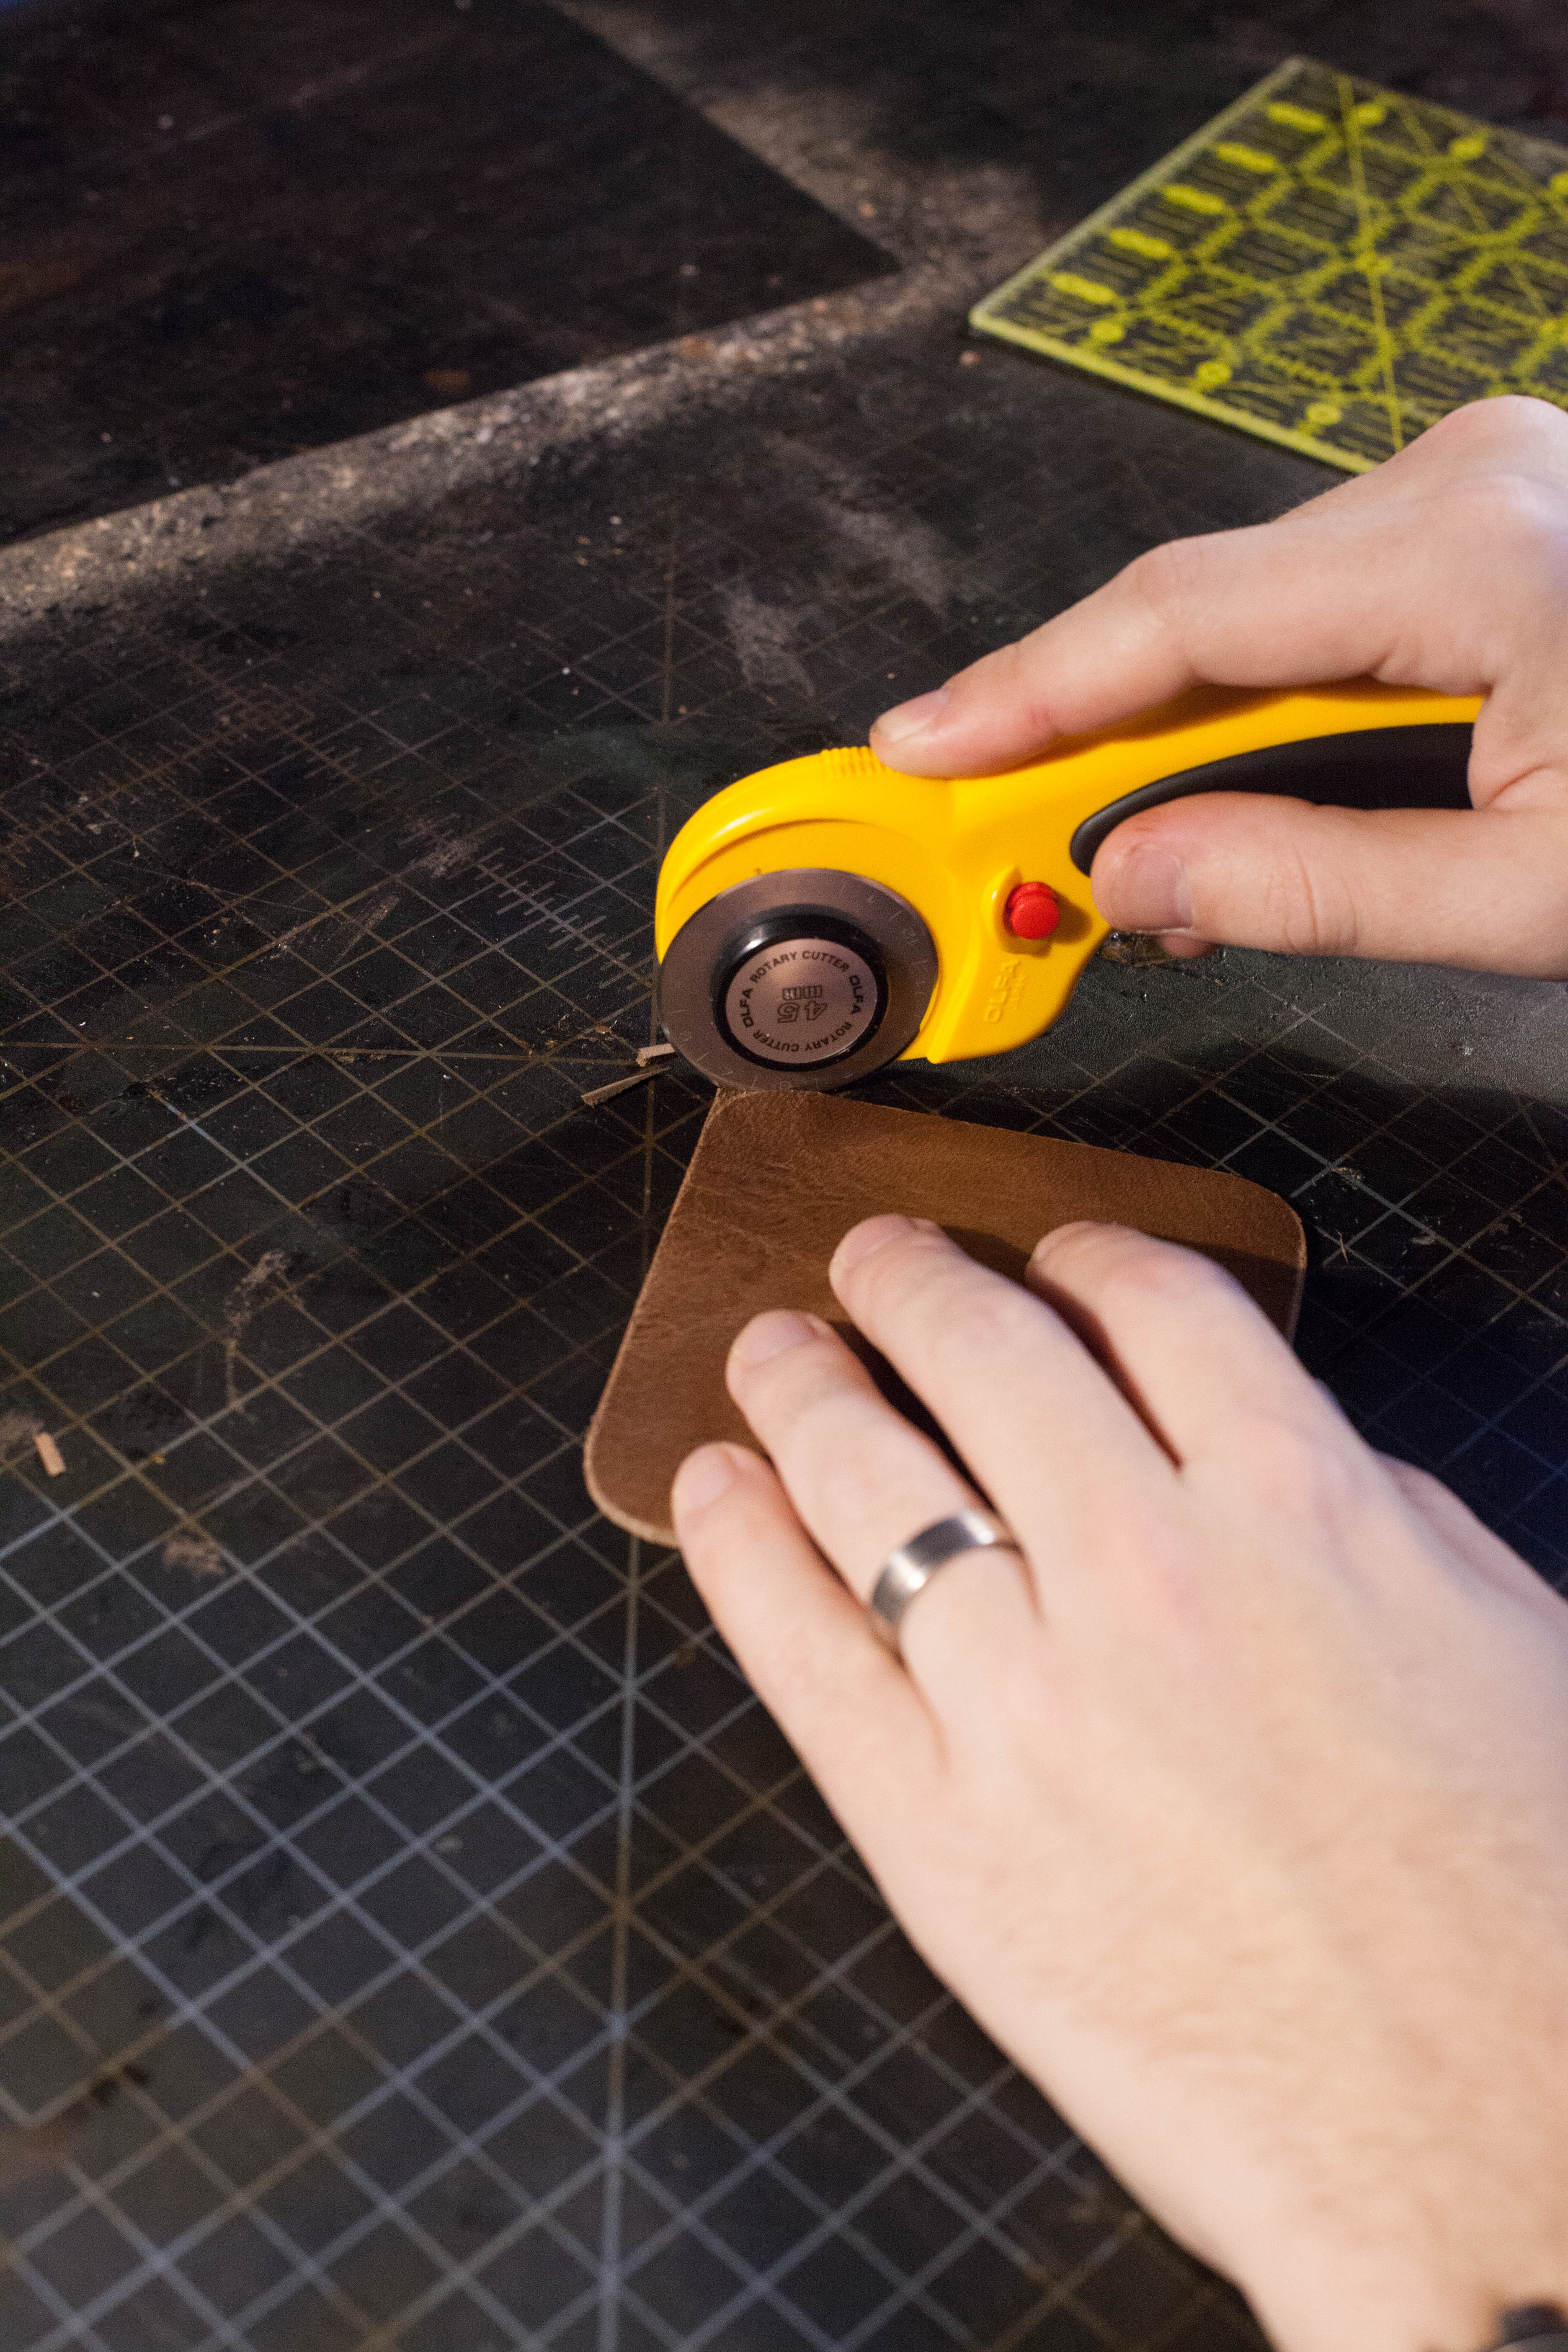
Still using the ruler, cut out the square with a rotary cutter. There really isn't anything tricky about this, but to make sure your edges look good by the end of the project, make sure to keep the rotary cutter perpendicular to the surface of the leather. If you allow your hand to roll, even though your cuts look straight, your edges will not be.
Step
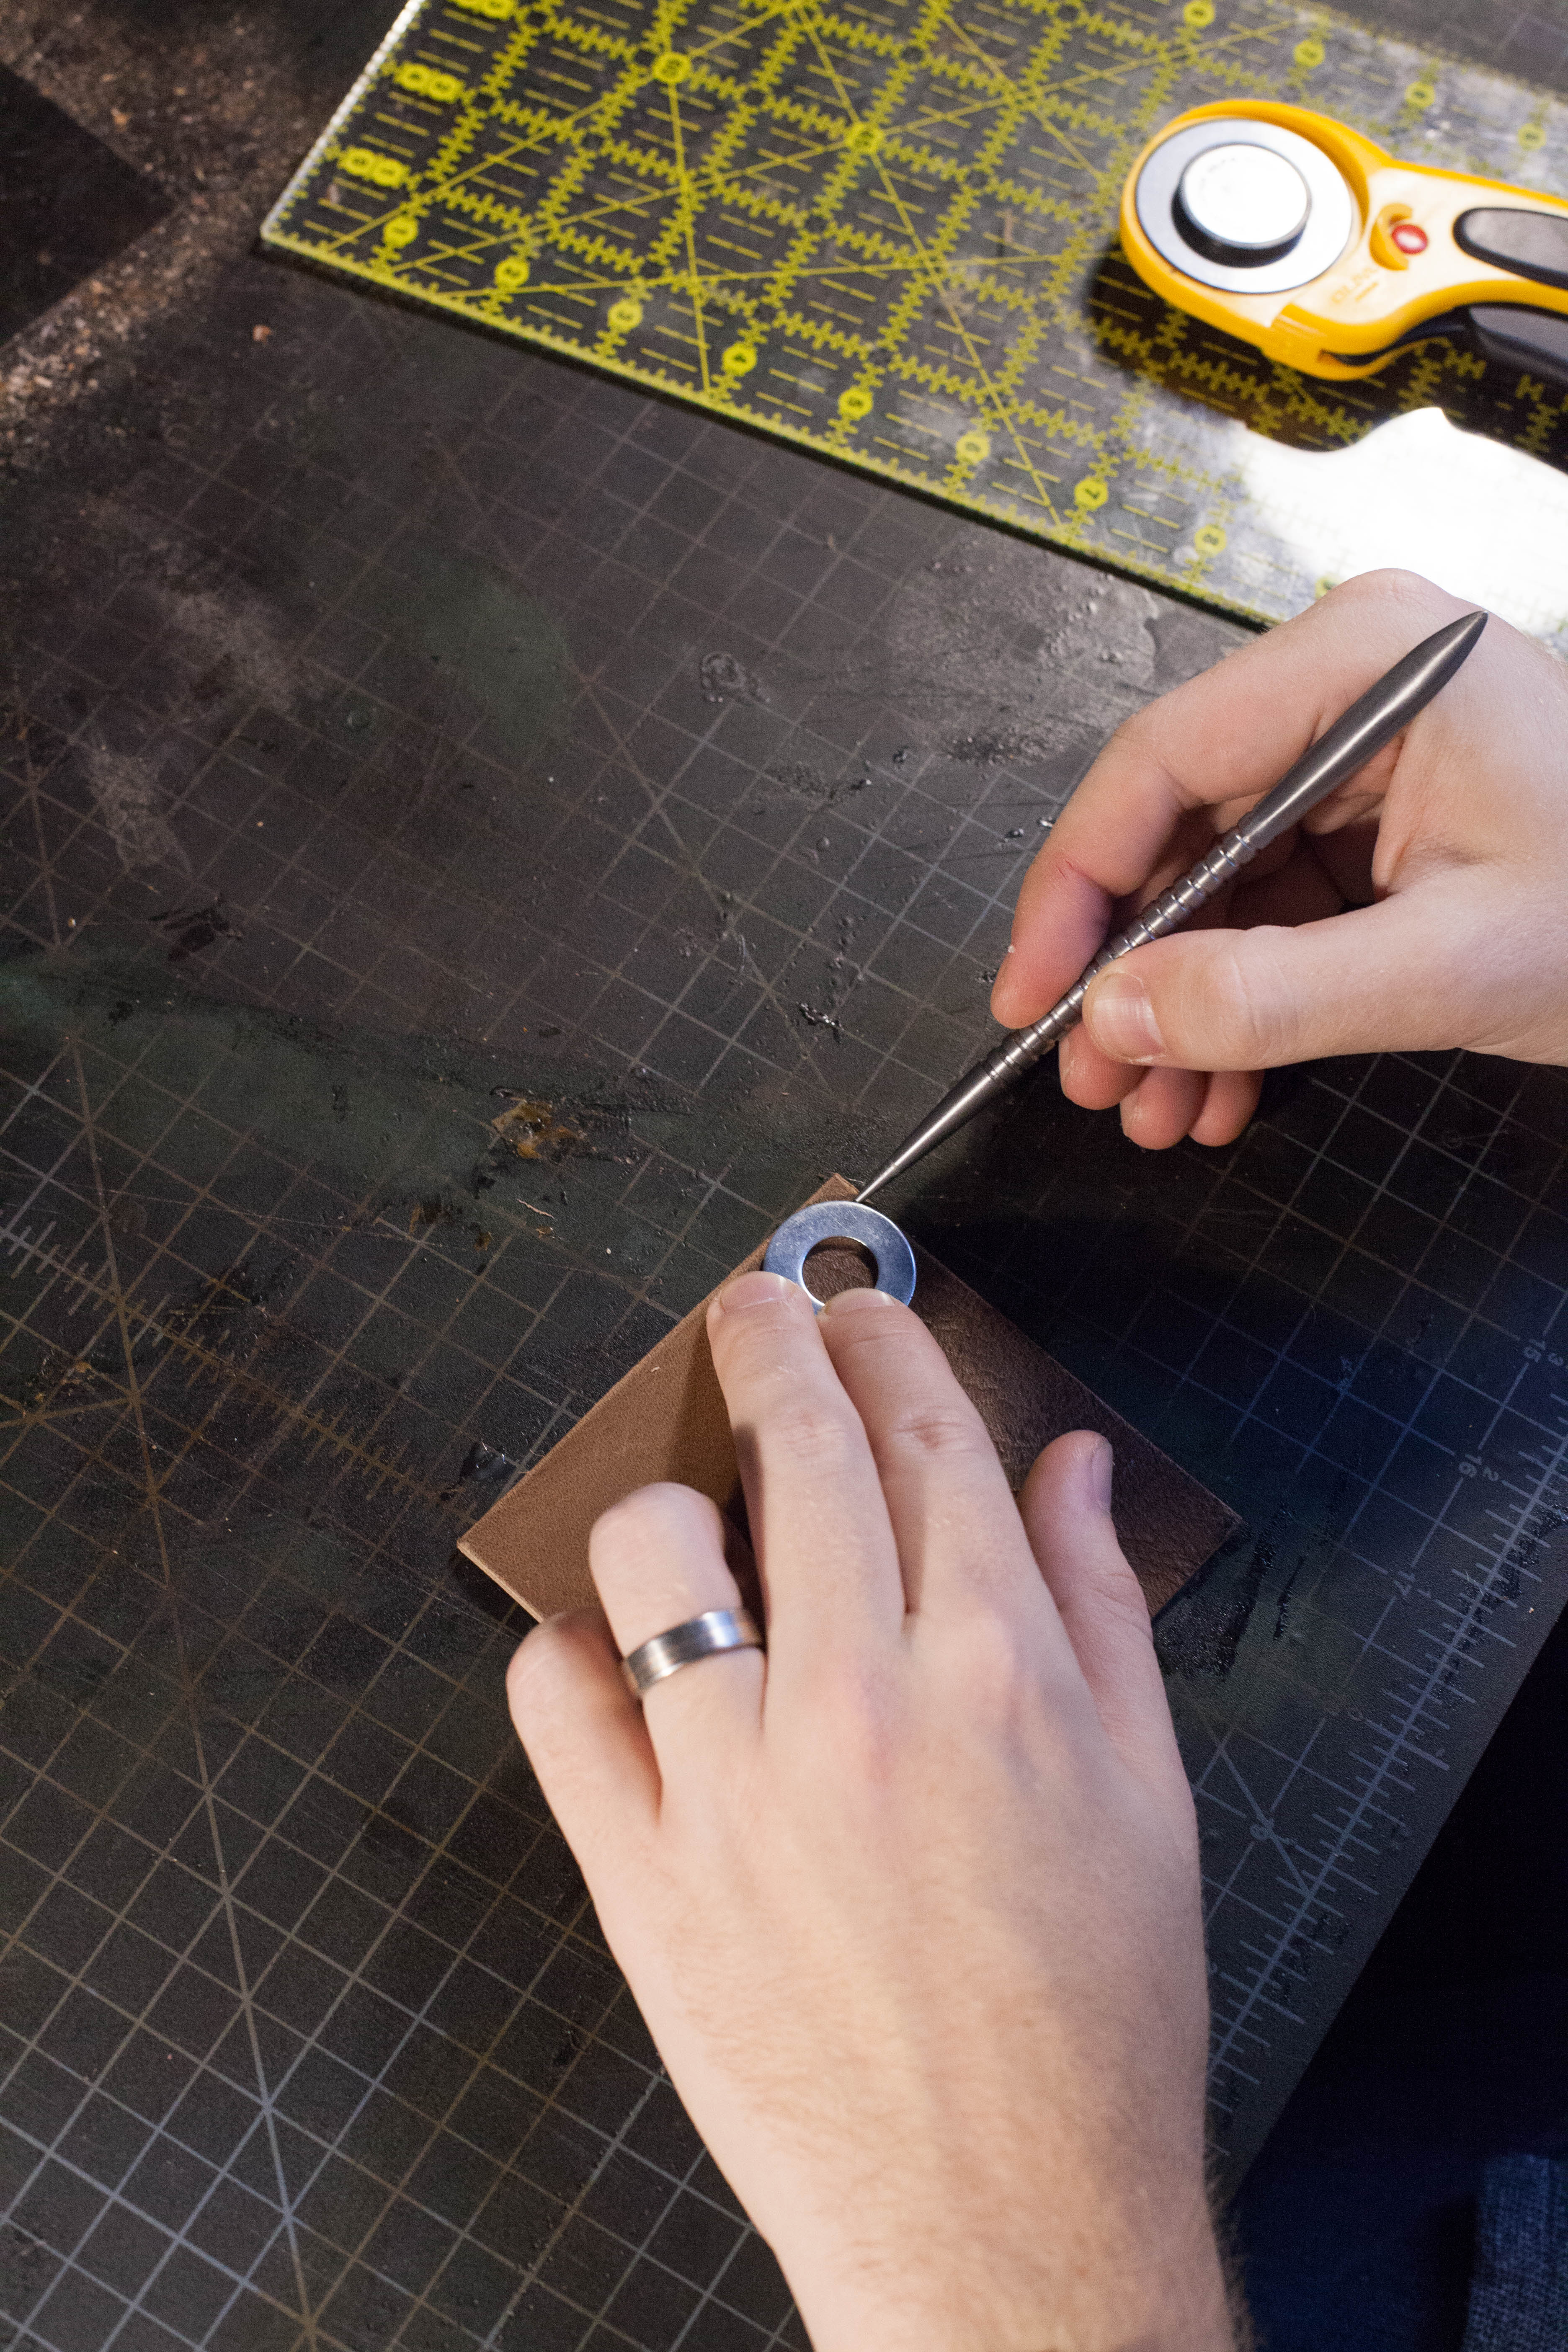
Rounded corners wear much better than squared ones, so now's the time to round them out. While you can get punches for making rounded corners, they are just as easy to make with washers. Set the washer in each corner, making sure to line it up the edges of the leather, and trace it with your scratch awl.
Step
Now, using your rotary cutter or leather working knife, cut out the corners you've previously traced. There are a few methods to cutting corners well, but the easiest is by making many small cuts. You can read more about that method here: https://www.goldbarkleather.com/sourceblog/cutting-corners
Step
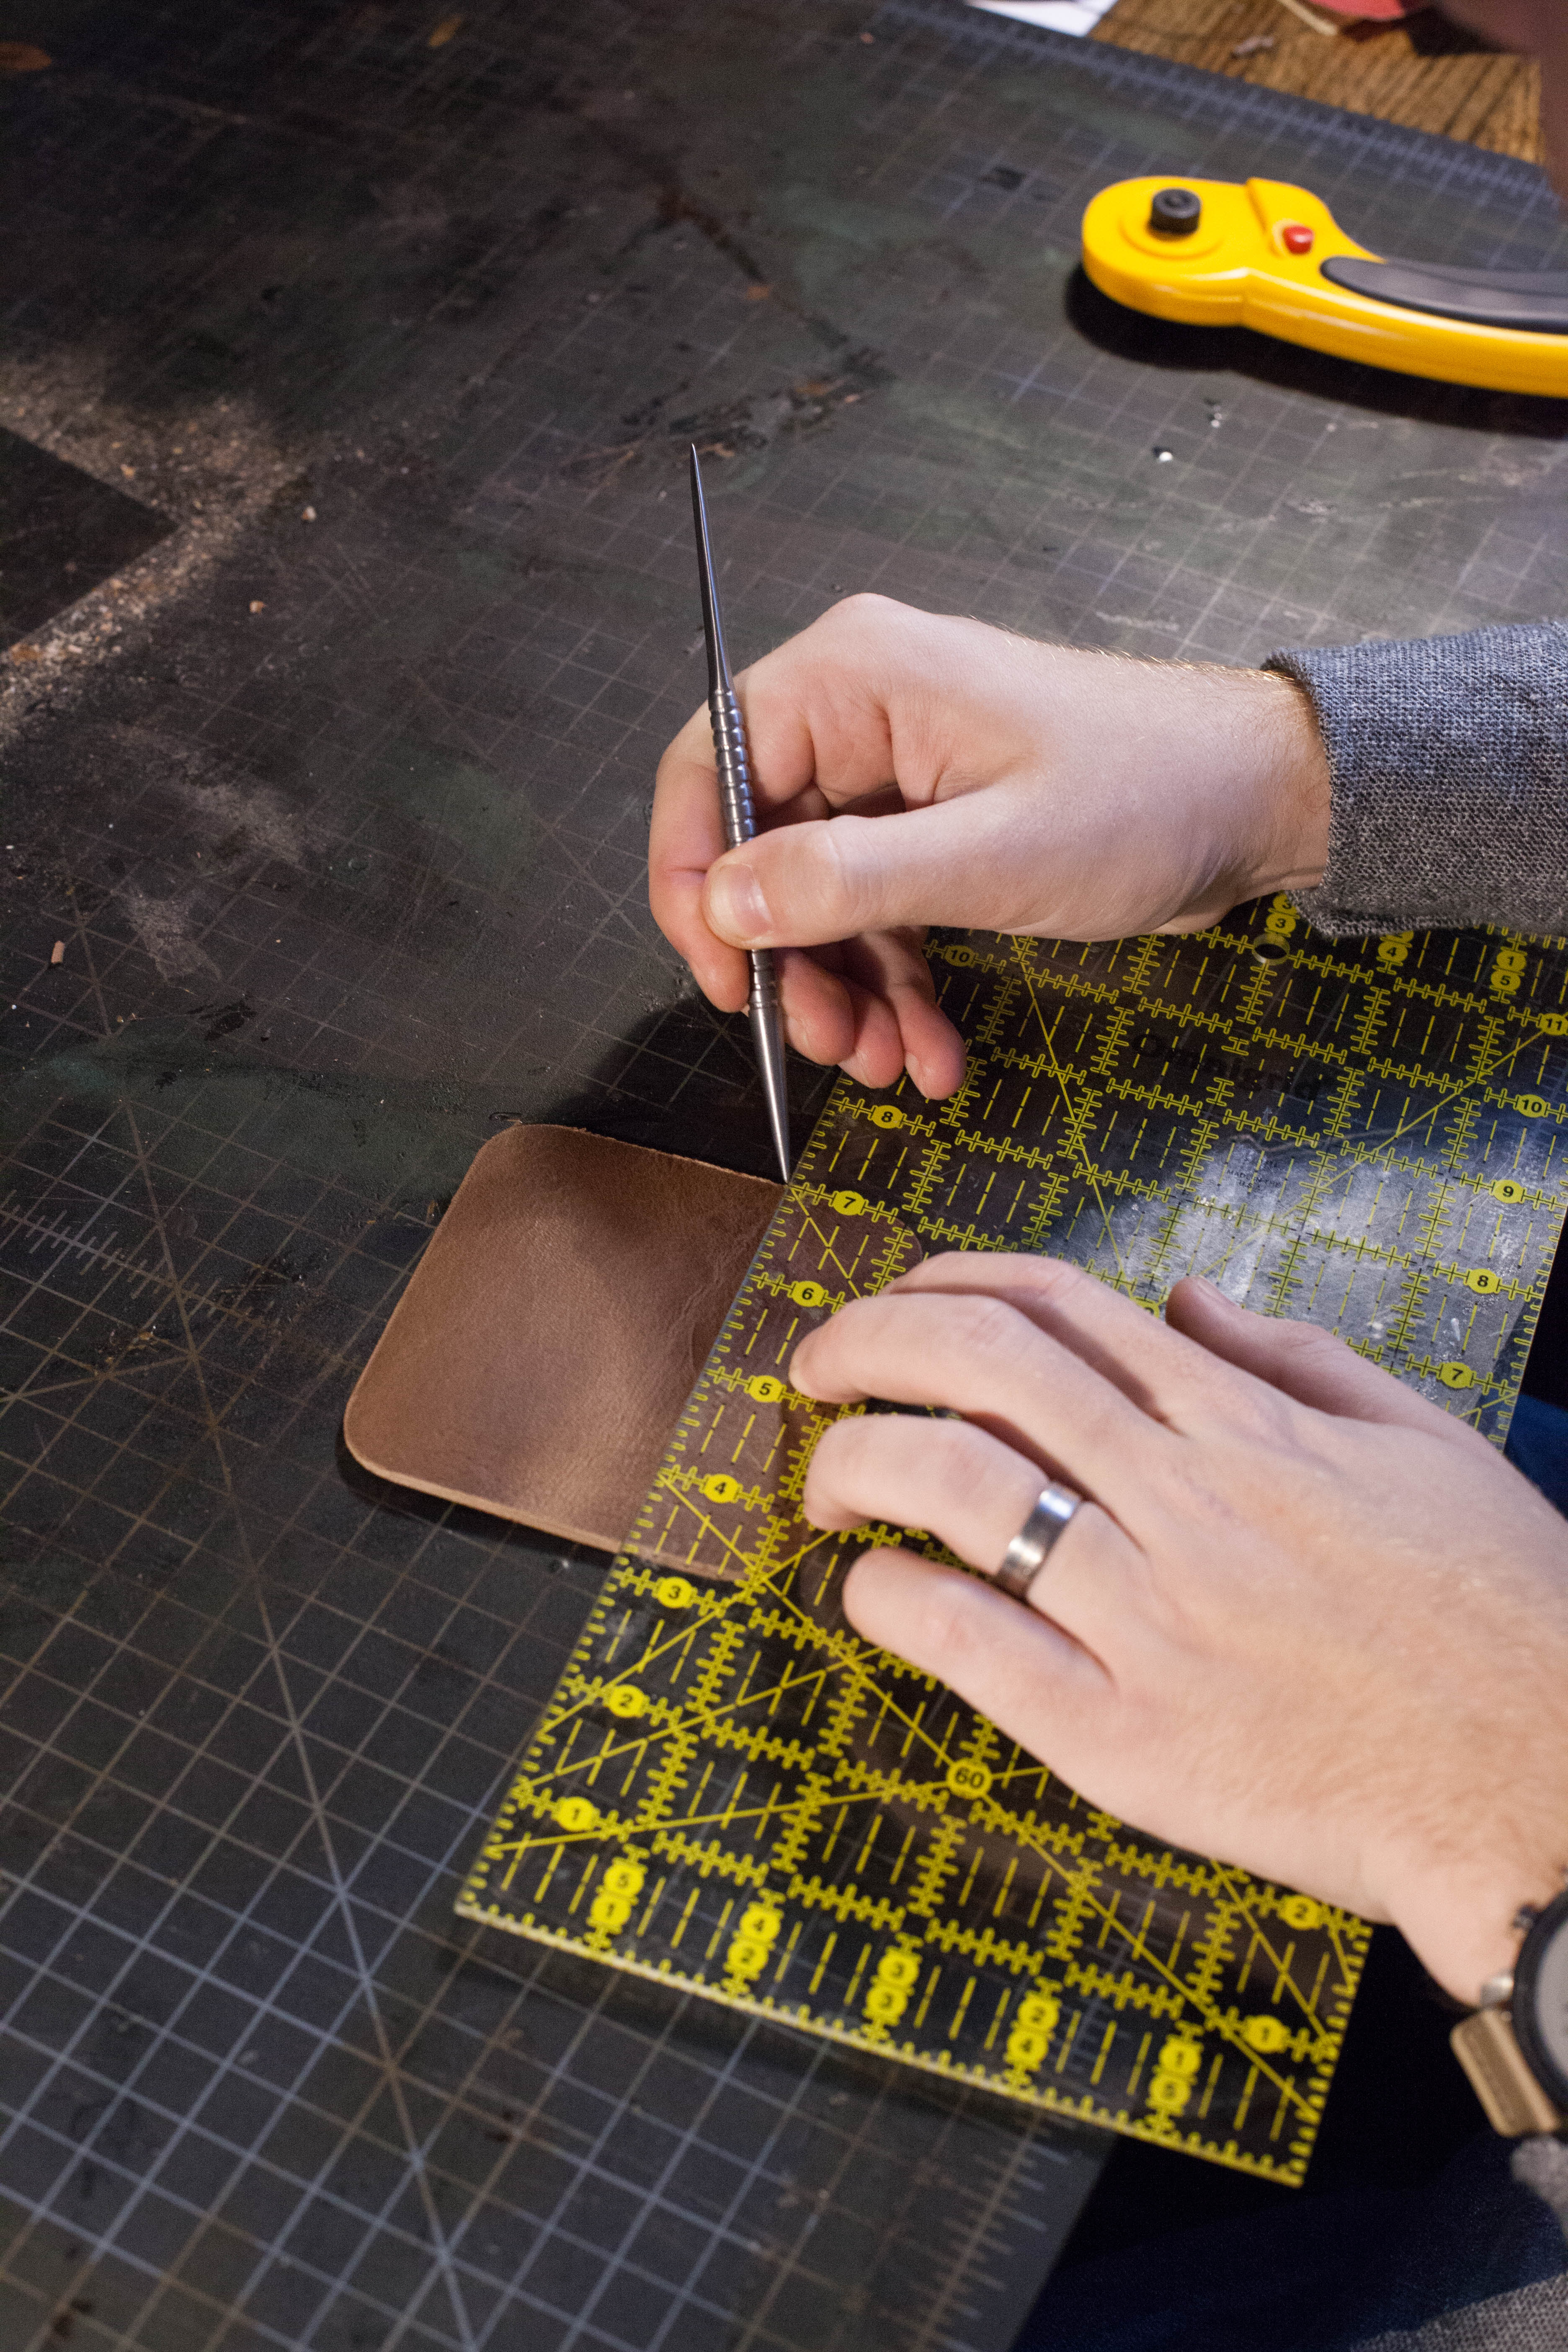
Now it's time to create the slot that your earbuds will sit in. To do this, make a mark with a scratch awl on either side of the leather square about 1.25″ in.
Step
Using a 5/16″ punch, punch out a hole where you made the mark in the previous step. Make sure the edge of the punch rests just on the edge of the organizer, as shown in the picture.
Step
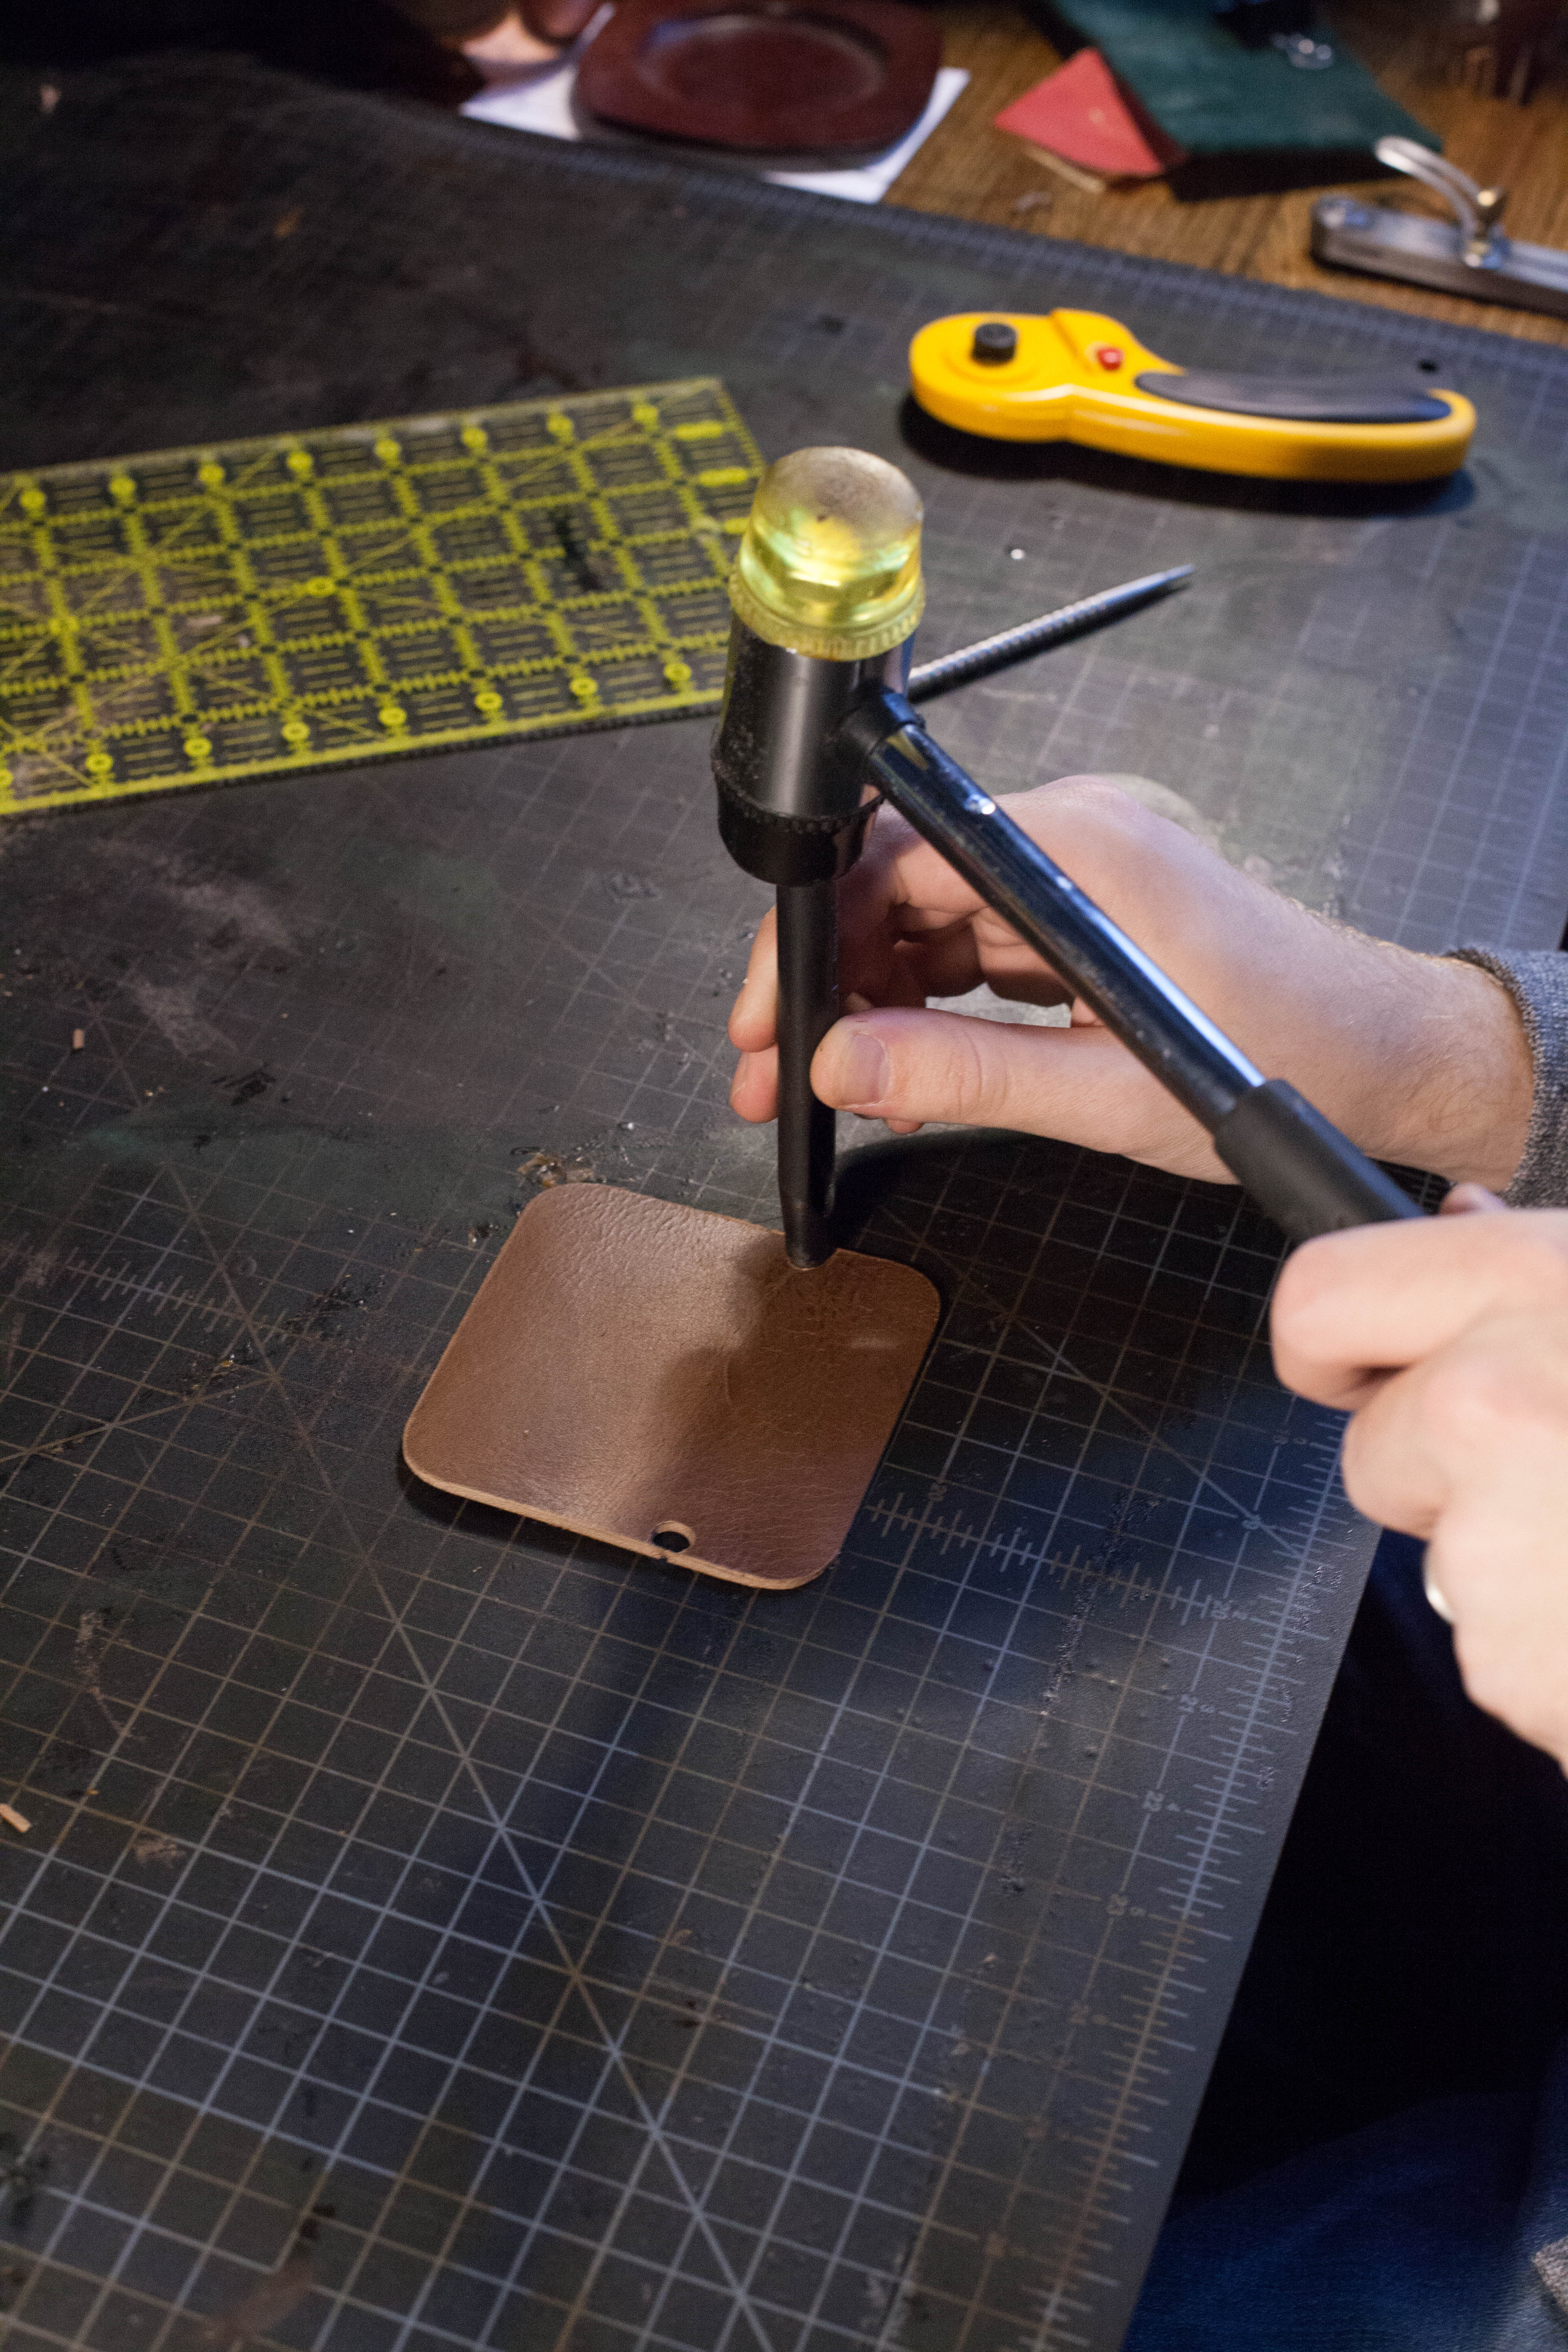
It's time to round out these edges too. I used the rotary knife I was already using, but honestly this step would be a little bit easier if you were using a leather working knife or X-acto knife. With your knife selected, round out the corners as you did before. The hole you made is so close to the edge that it makes it pretty easy to eyeball, so I didn't use a washer this time. You can use a washer if you like, but I would suggest using a smaller washer so you don't round off too much of this smaller corner.
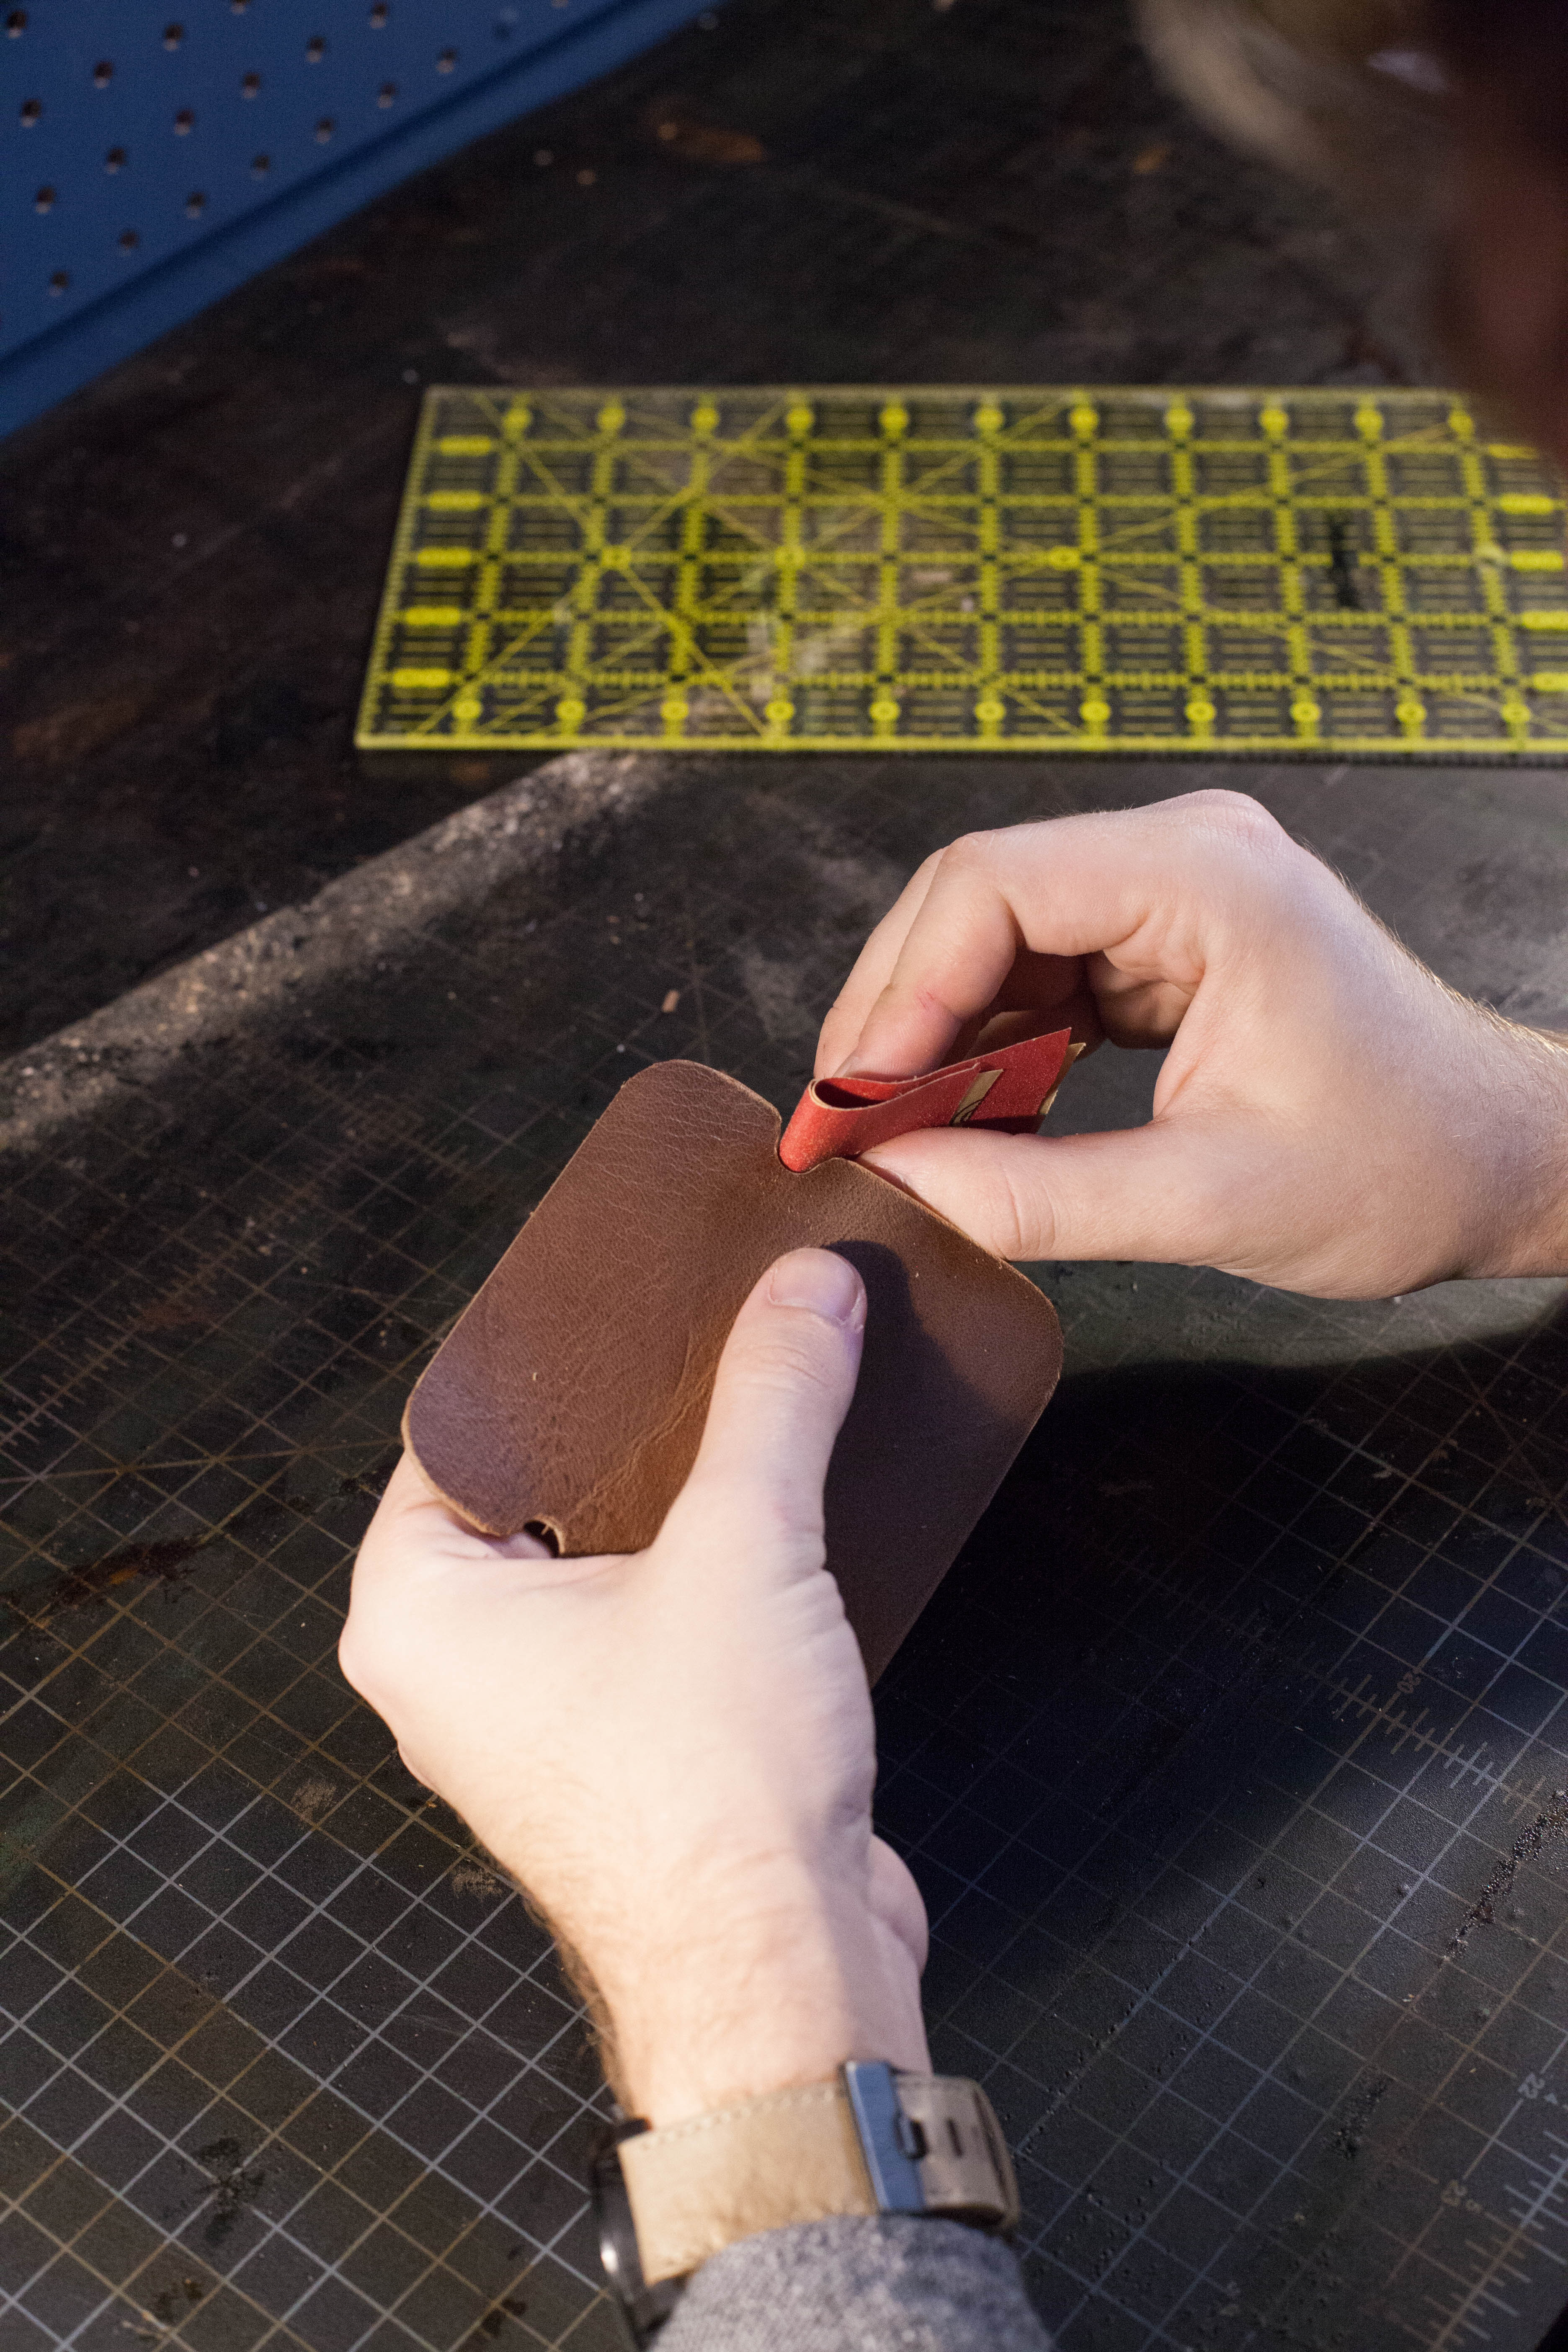
Step
All edges need to be sanded prior to burnishing. It's pretty difficult to make perfectly rounded corners and sanding helps to make your rounded corners look a heck of a lot better. In addition, it removes a lot of the lose fibers on the edge, which will give your edges a better finished look after you've burnished. To do this, hit the edges with 220 grit sand paper. This grit is really just for smoothing out rough areas, like the corners. So once your edges start to look even, you can stop. After that, hit it with 600 grit sand paper. This grit is less about shaping the edges and more about eliminating loose fibers. So once your edges feel smooth to the touch, you can stop.
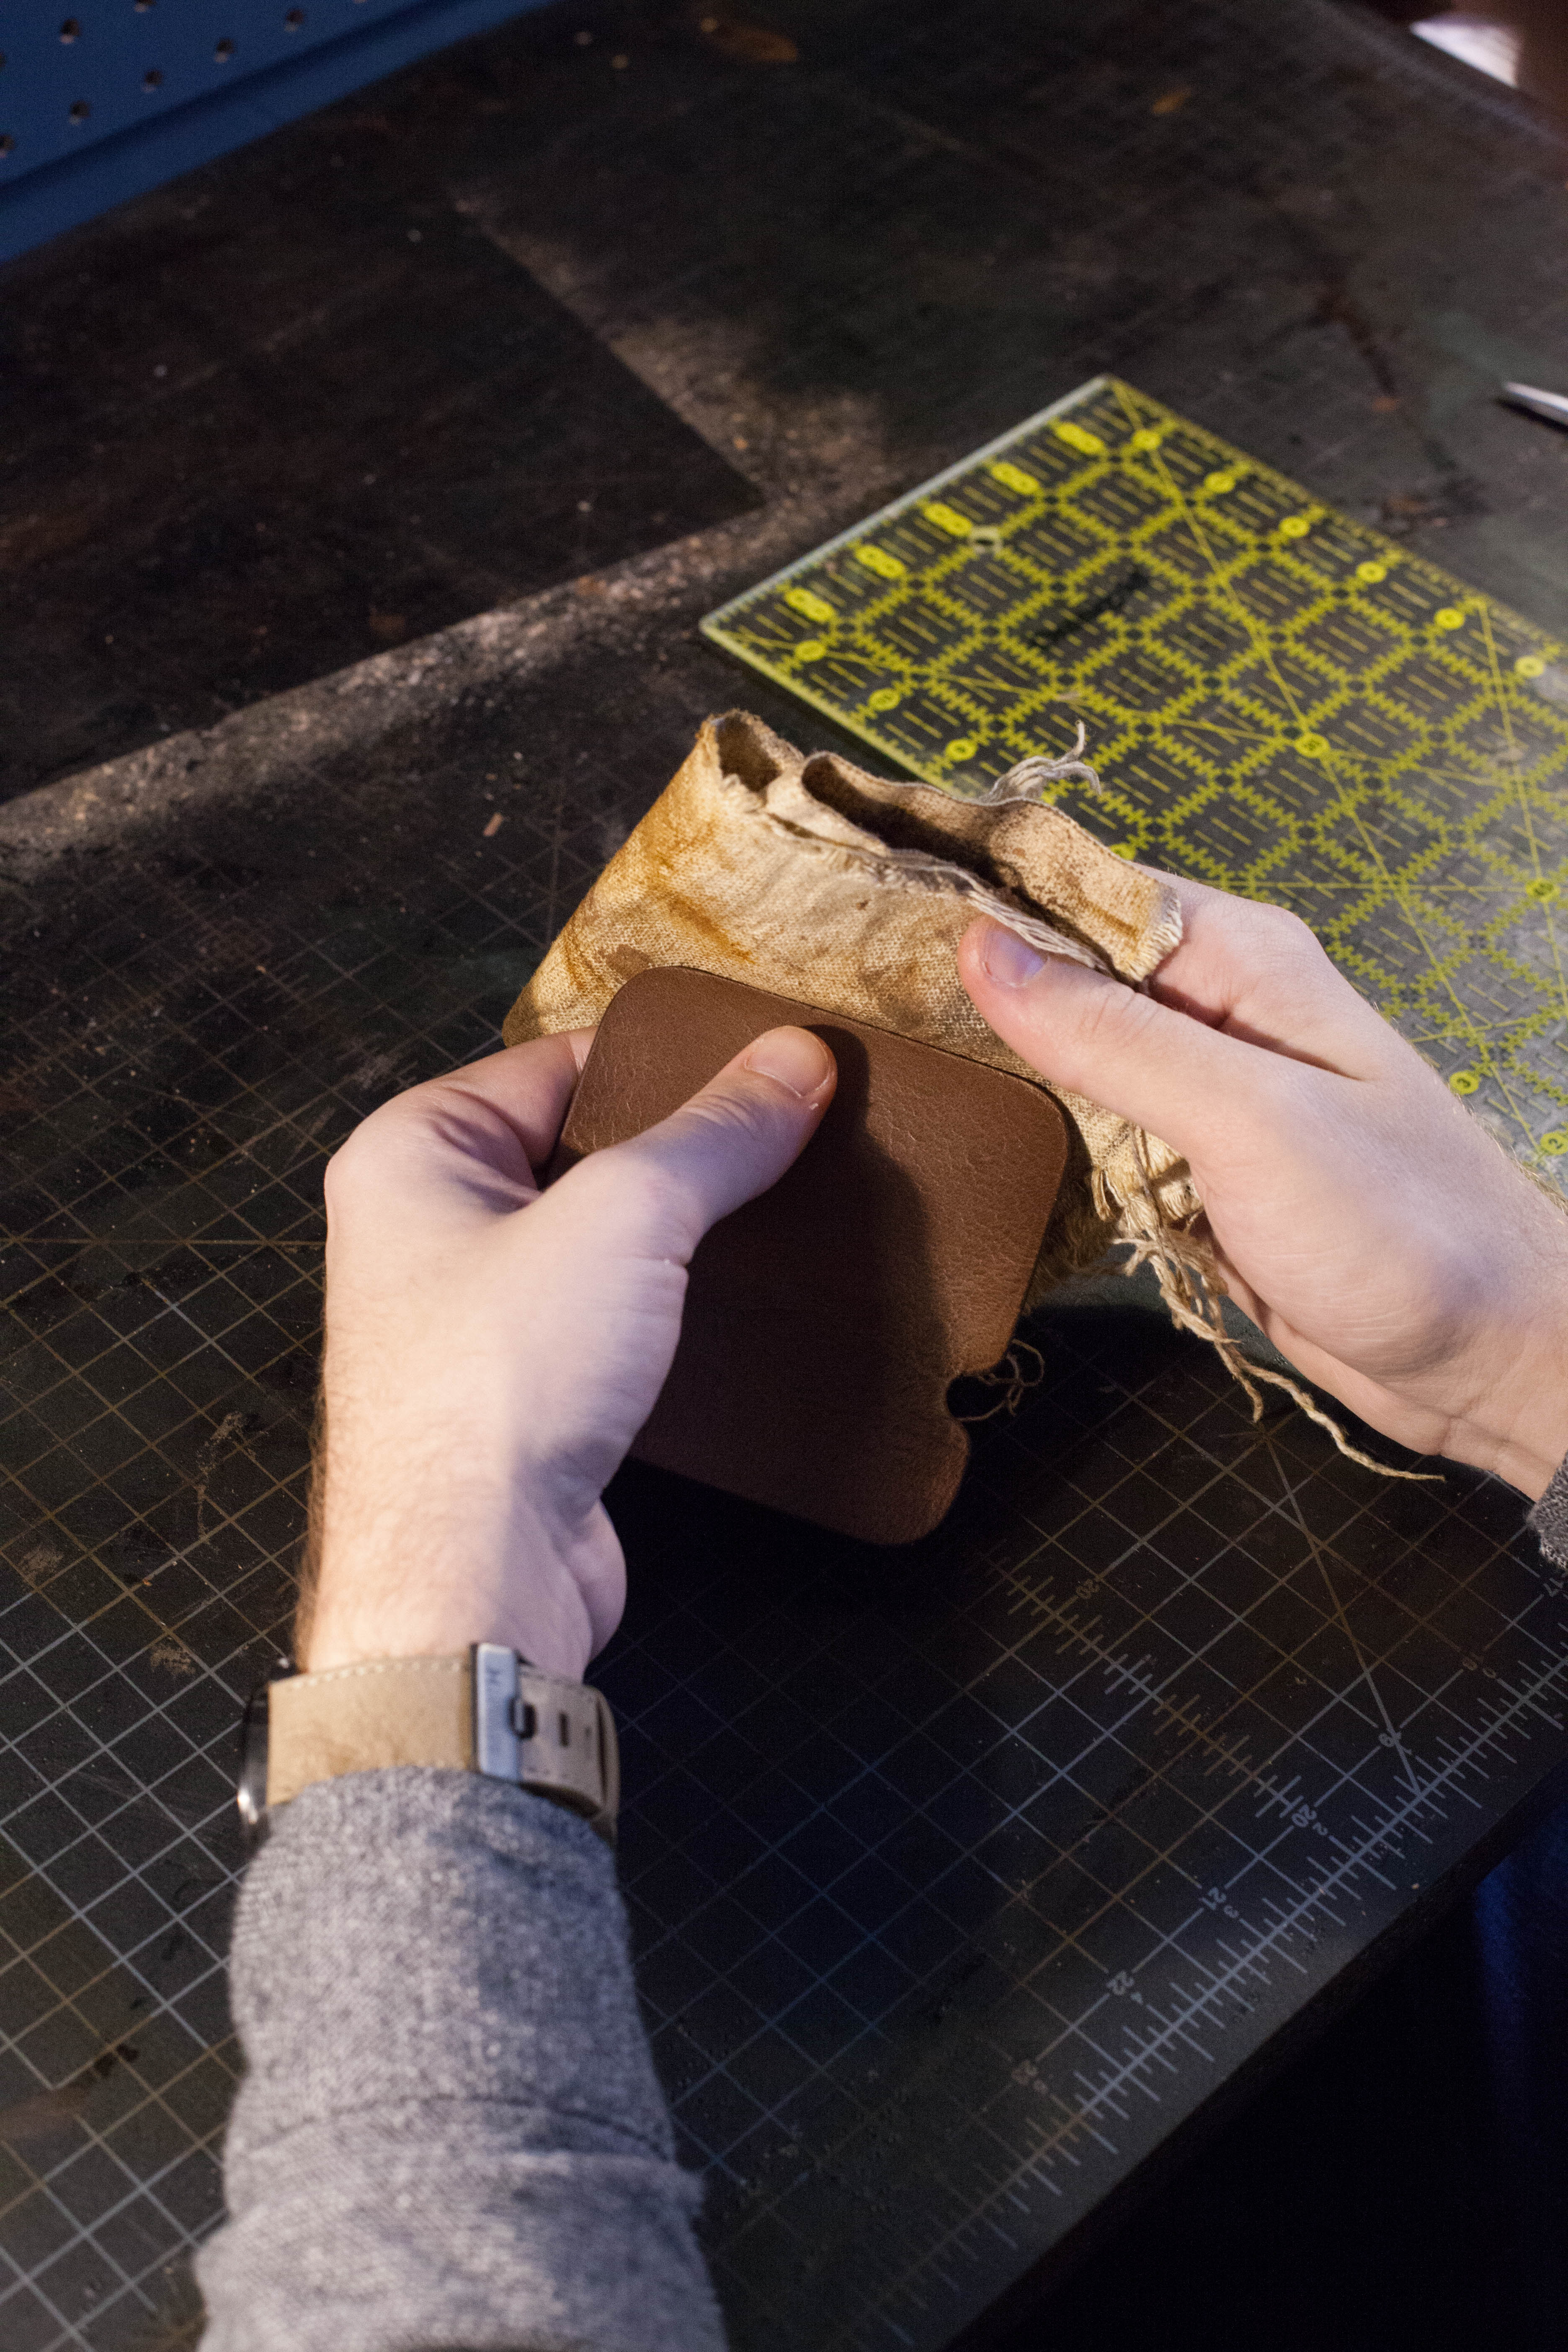
Step
After sanding, you can start the burnishing process. Most leather workers have their own take on the burnishing process, and I've written a basic one here. To start, lightly wet one edge with water. Then, using a canvas cloth, briskly rub the edge. You'll know you're done when the edge darkens, has a shiny surface, and starts to make a tacky sound. With one edge done, finish the other three remembering to lightly wet each edge before hitting with the canvas cloth. Finally, apply a small amount of beeswax to all the edges and work it with the canvas cloth.
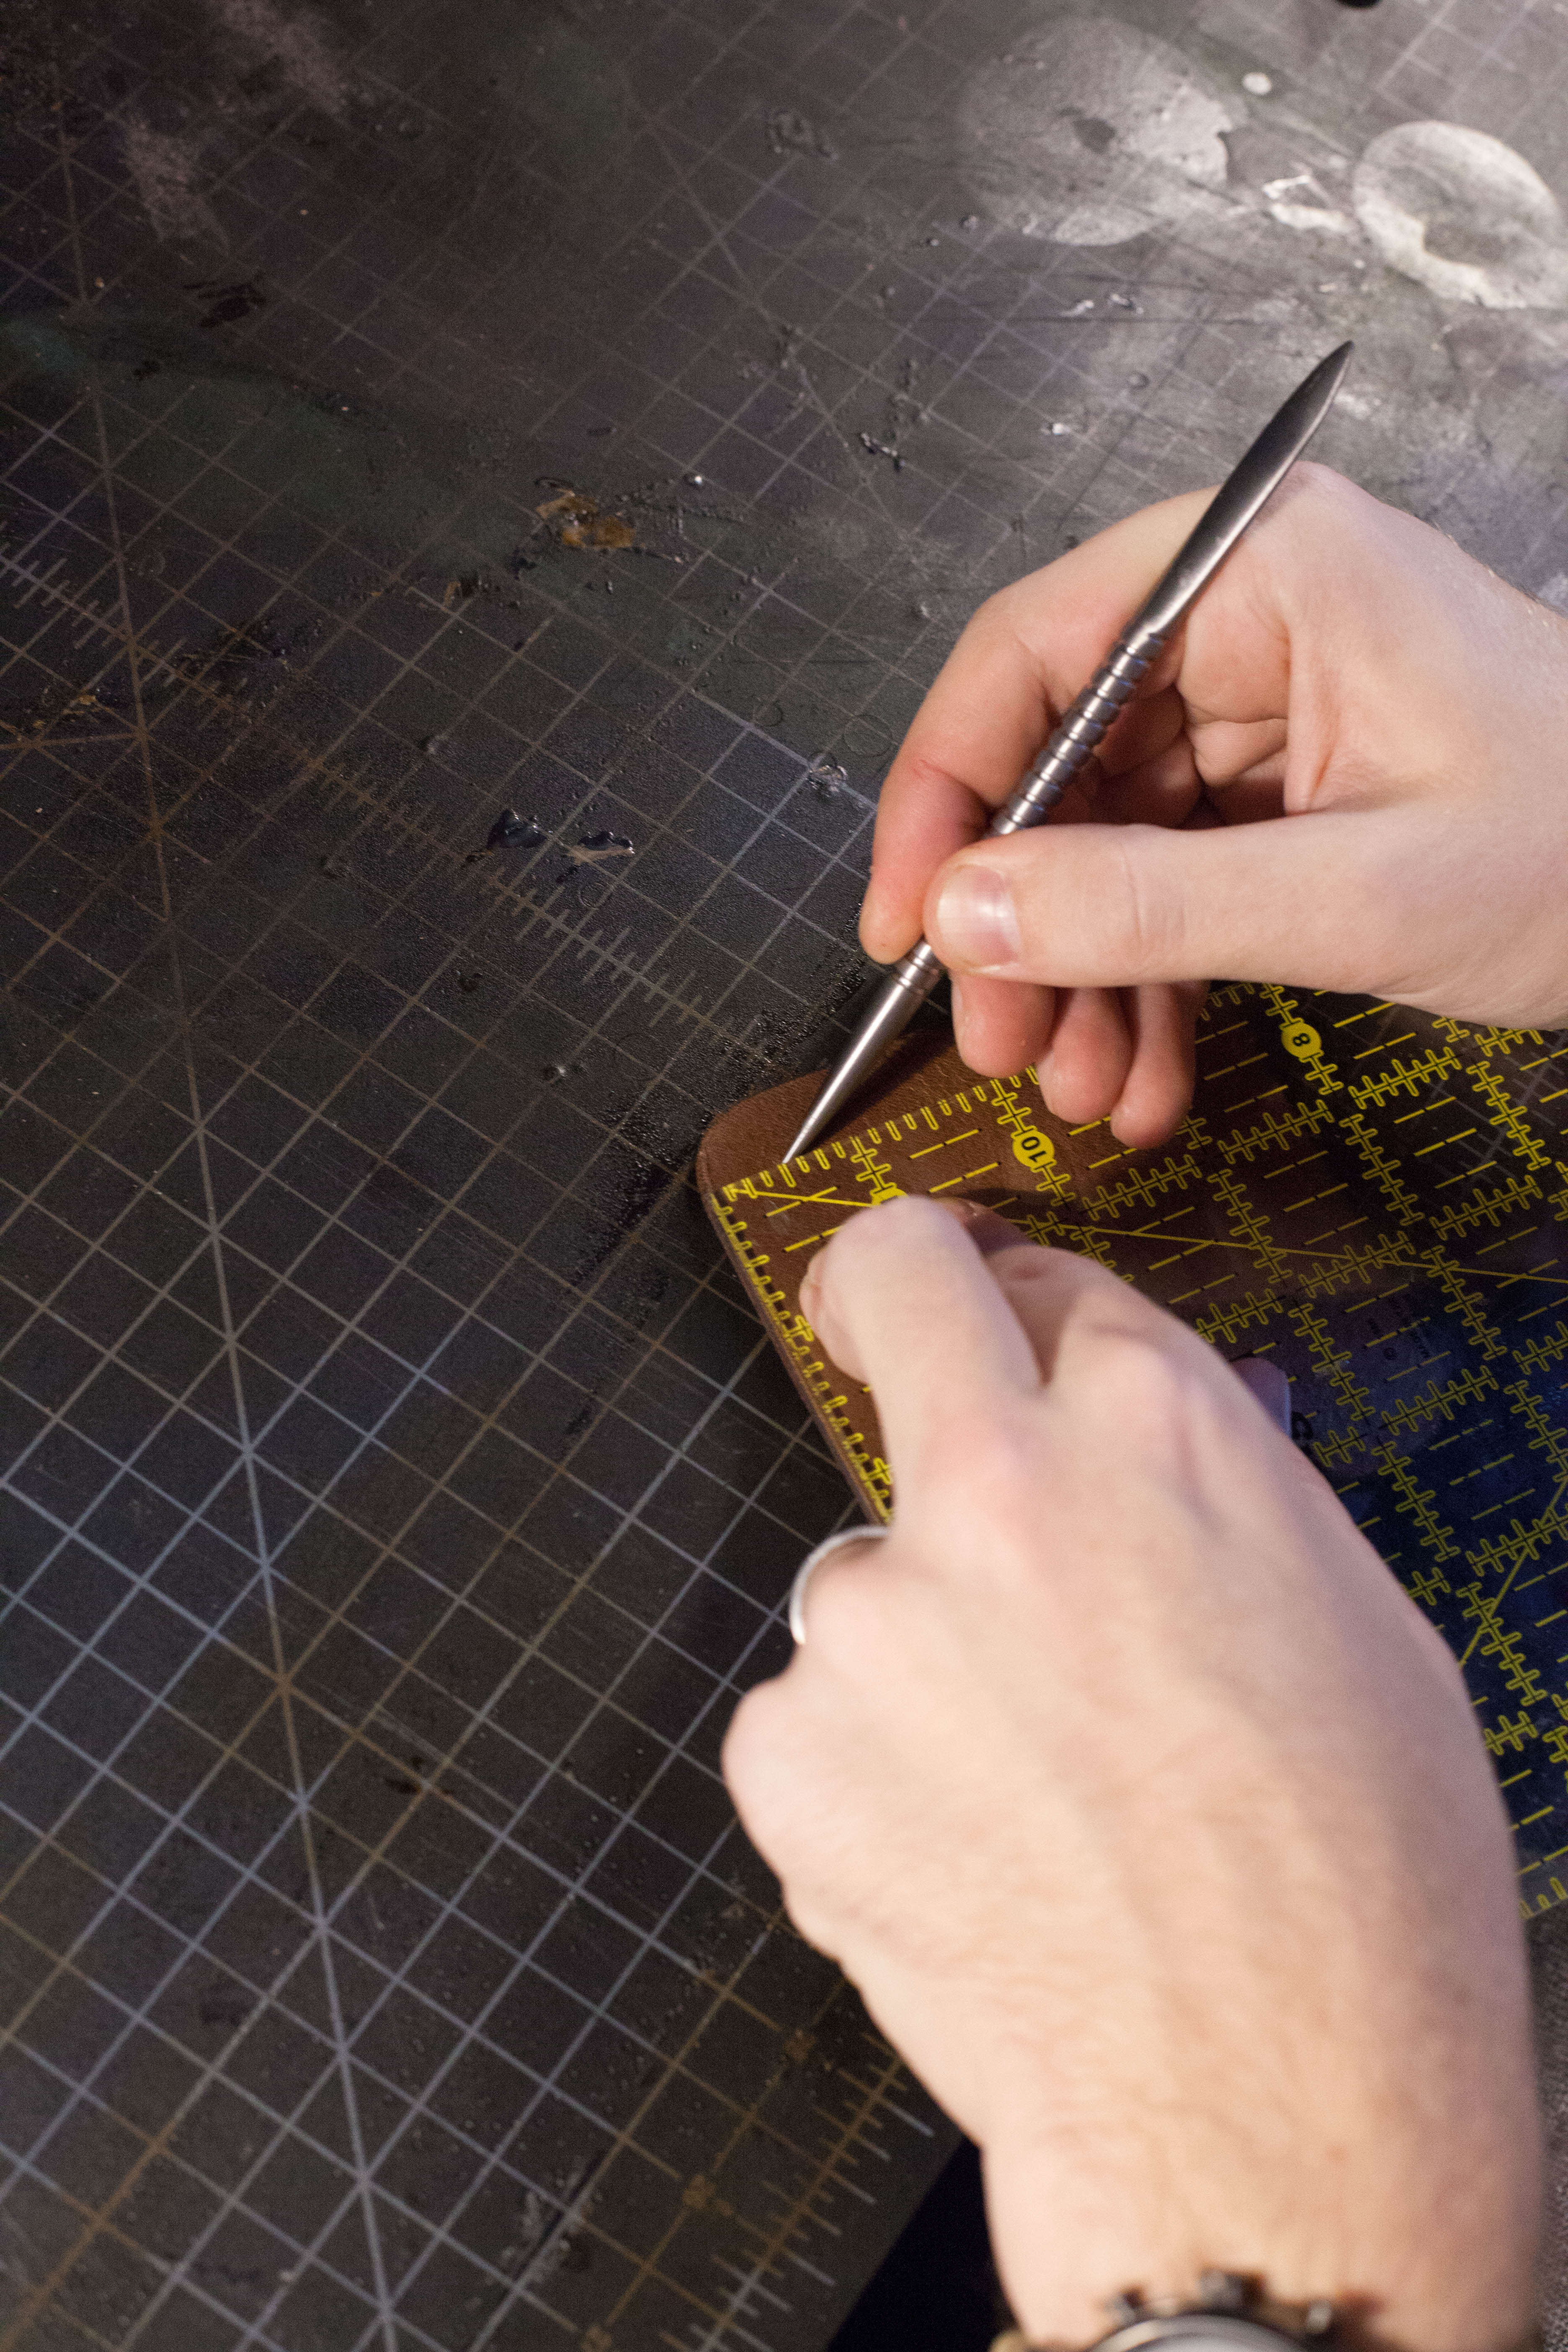
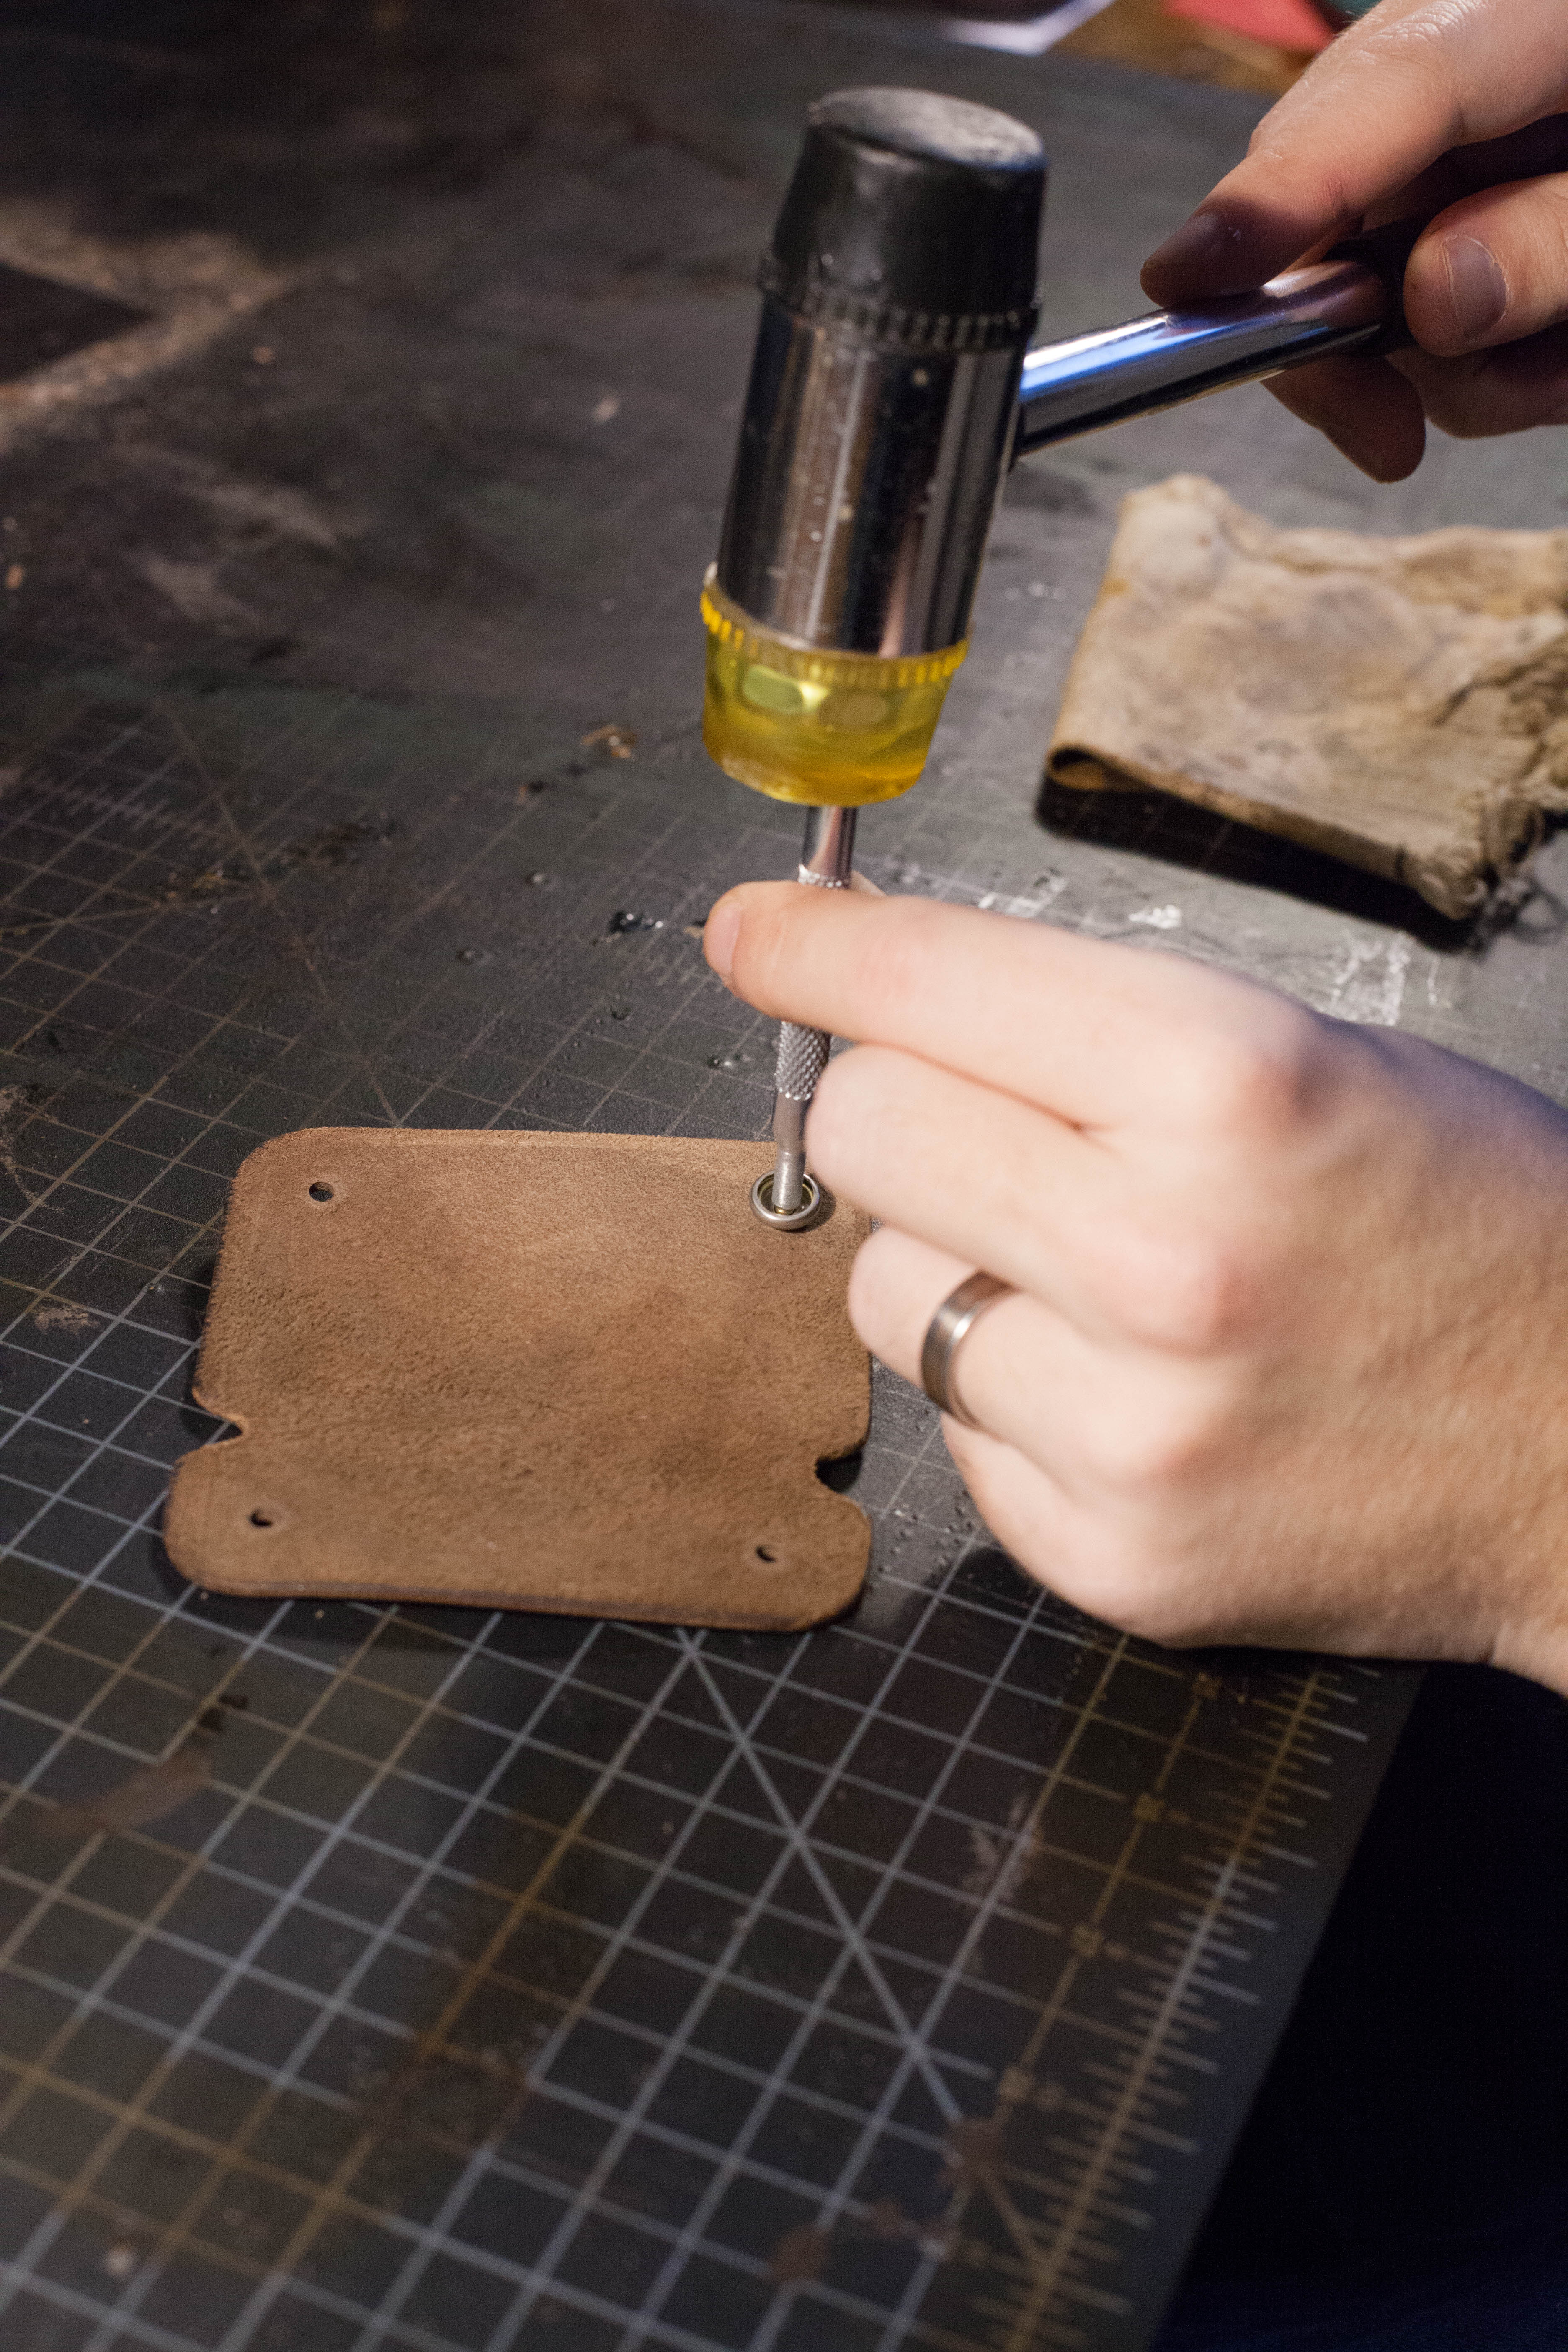
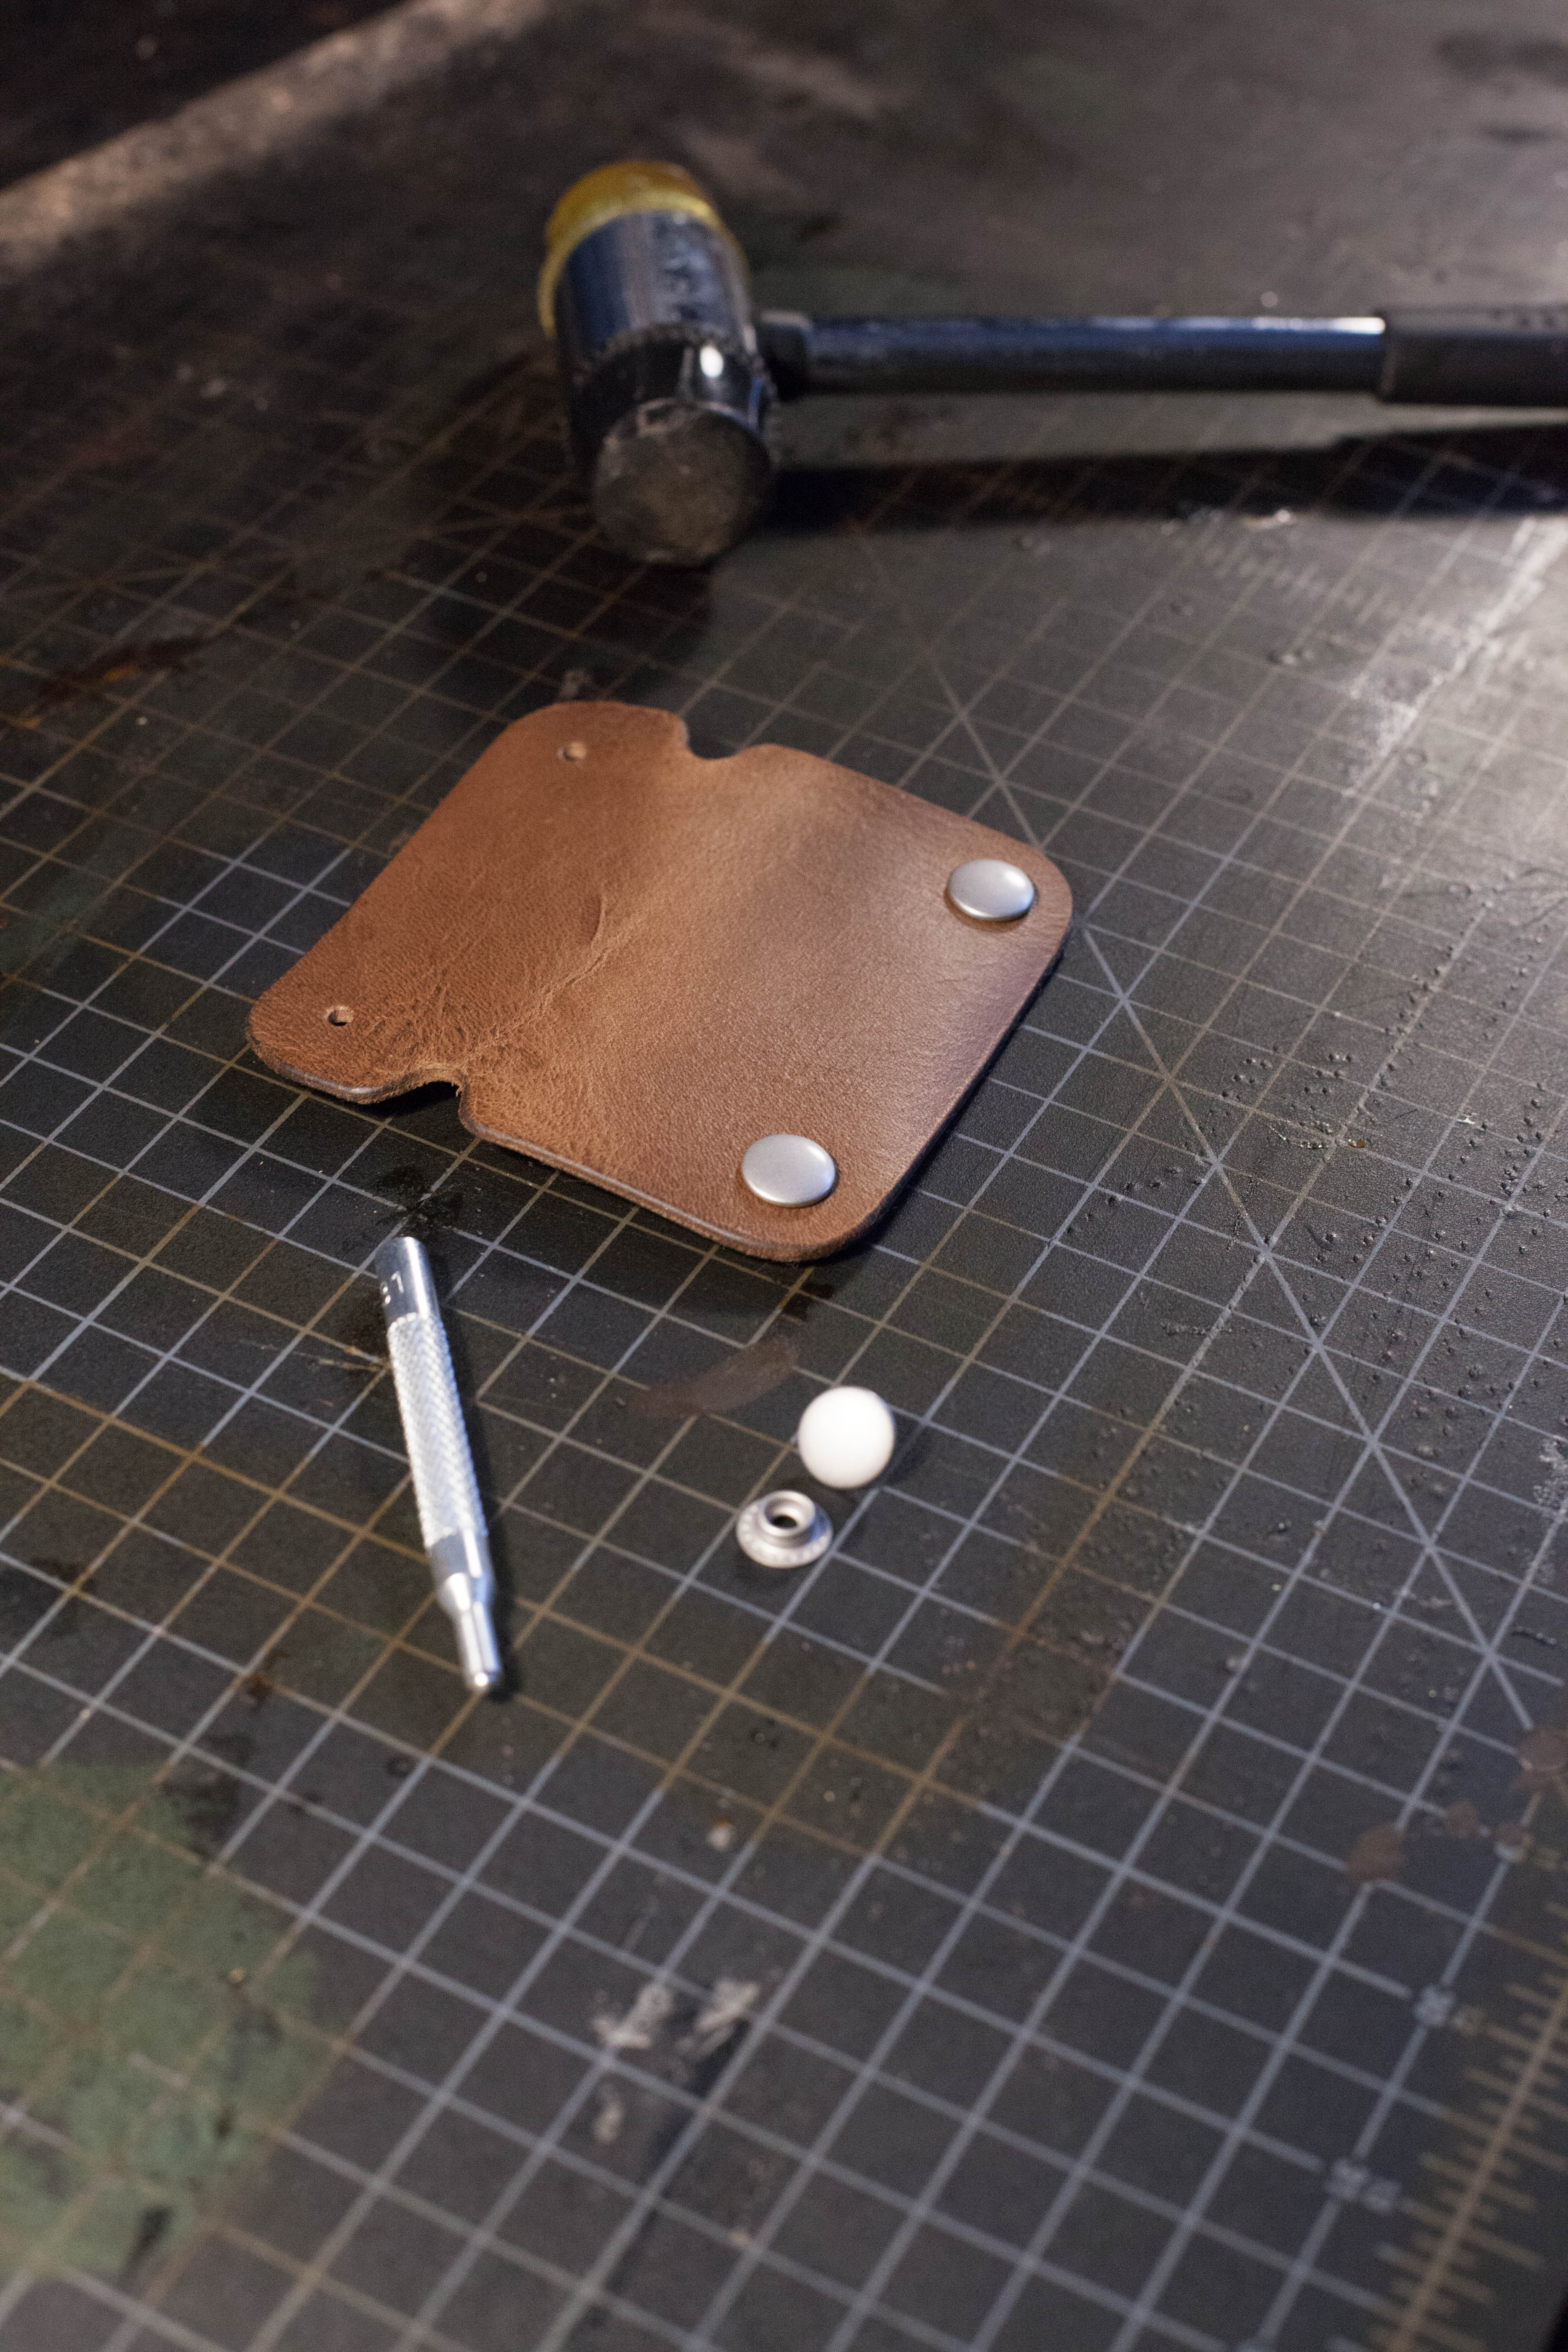
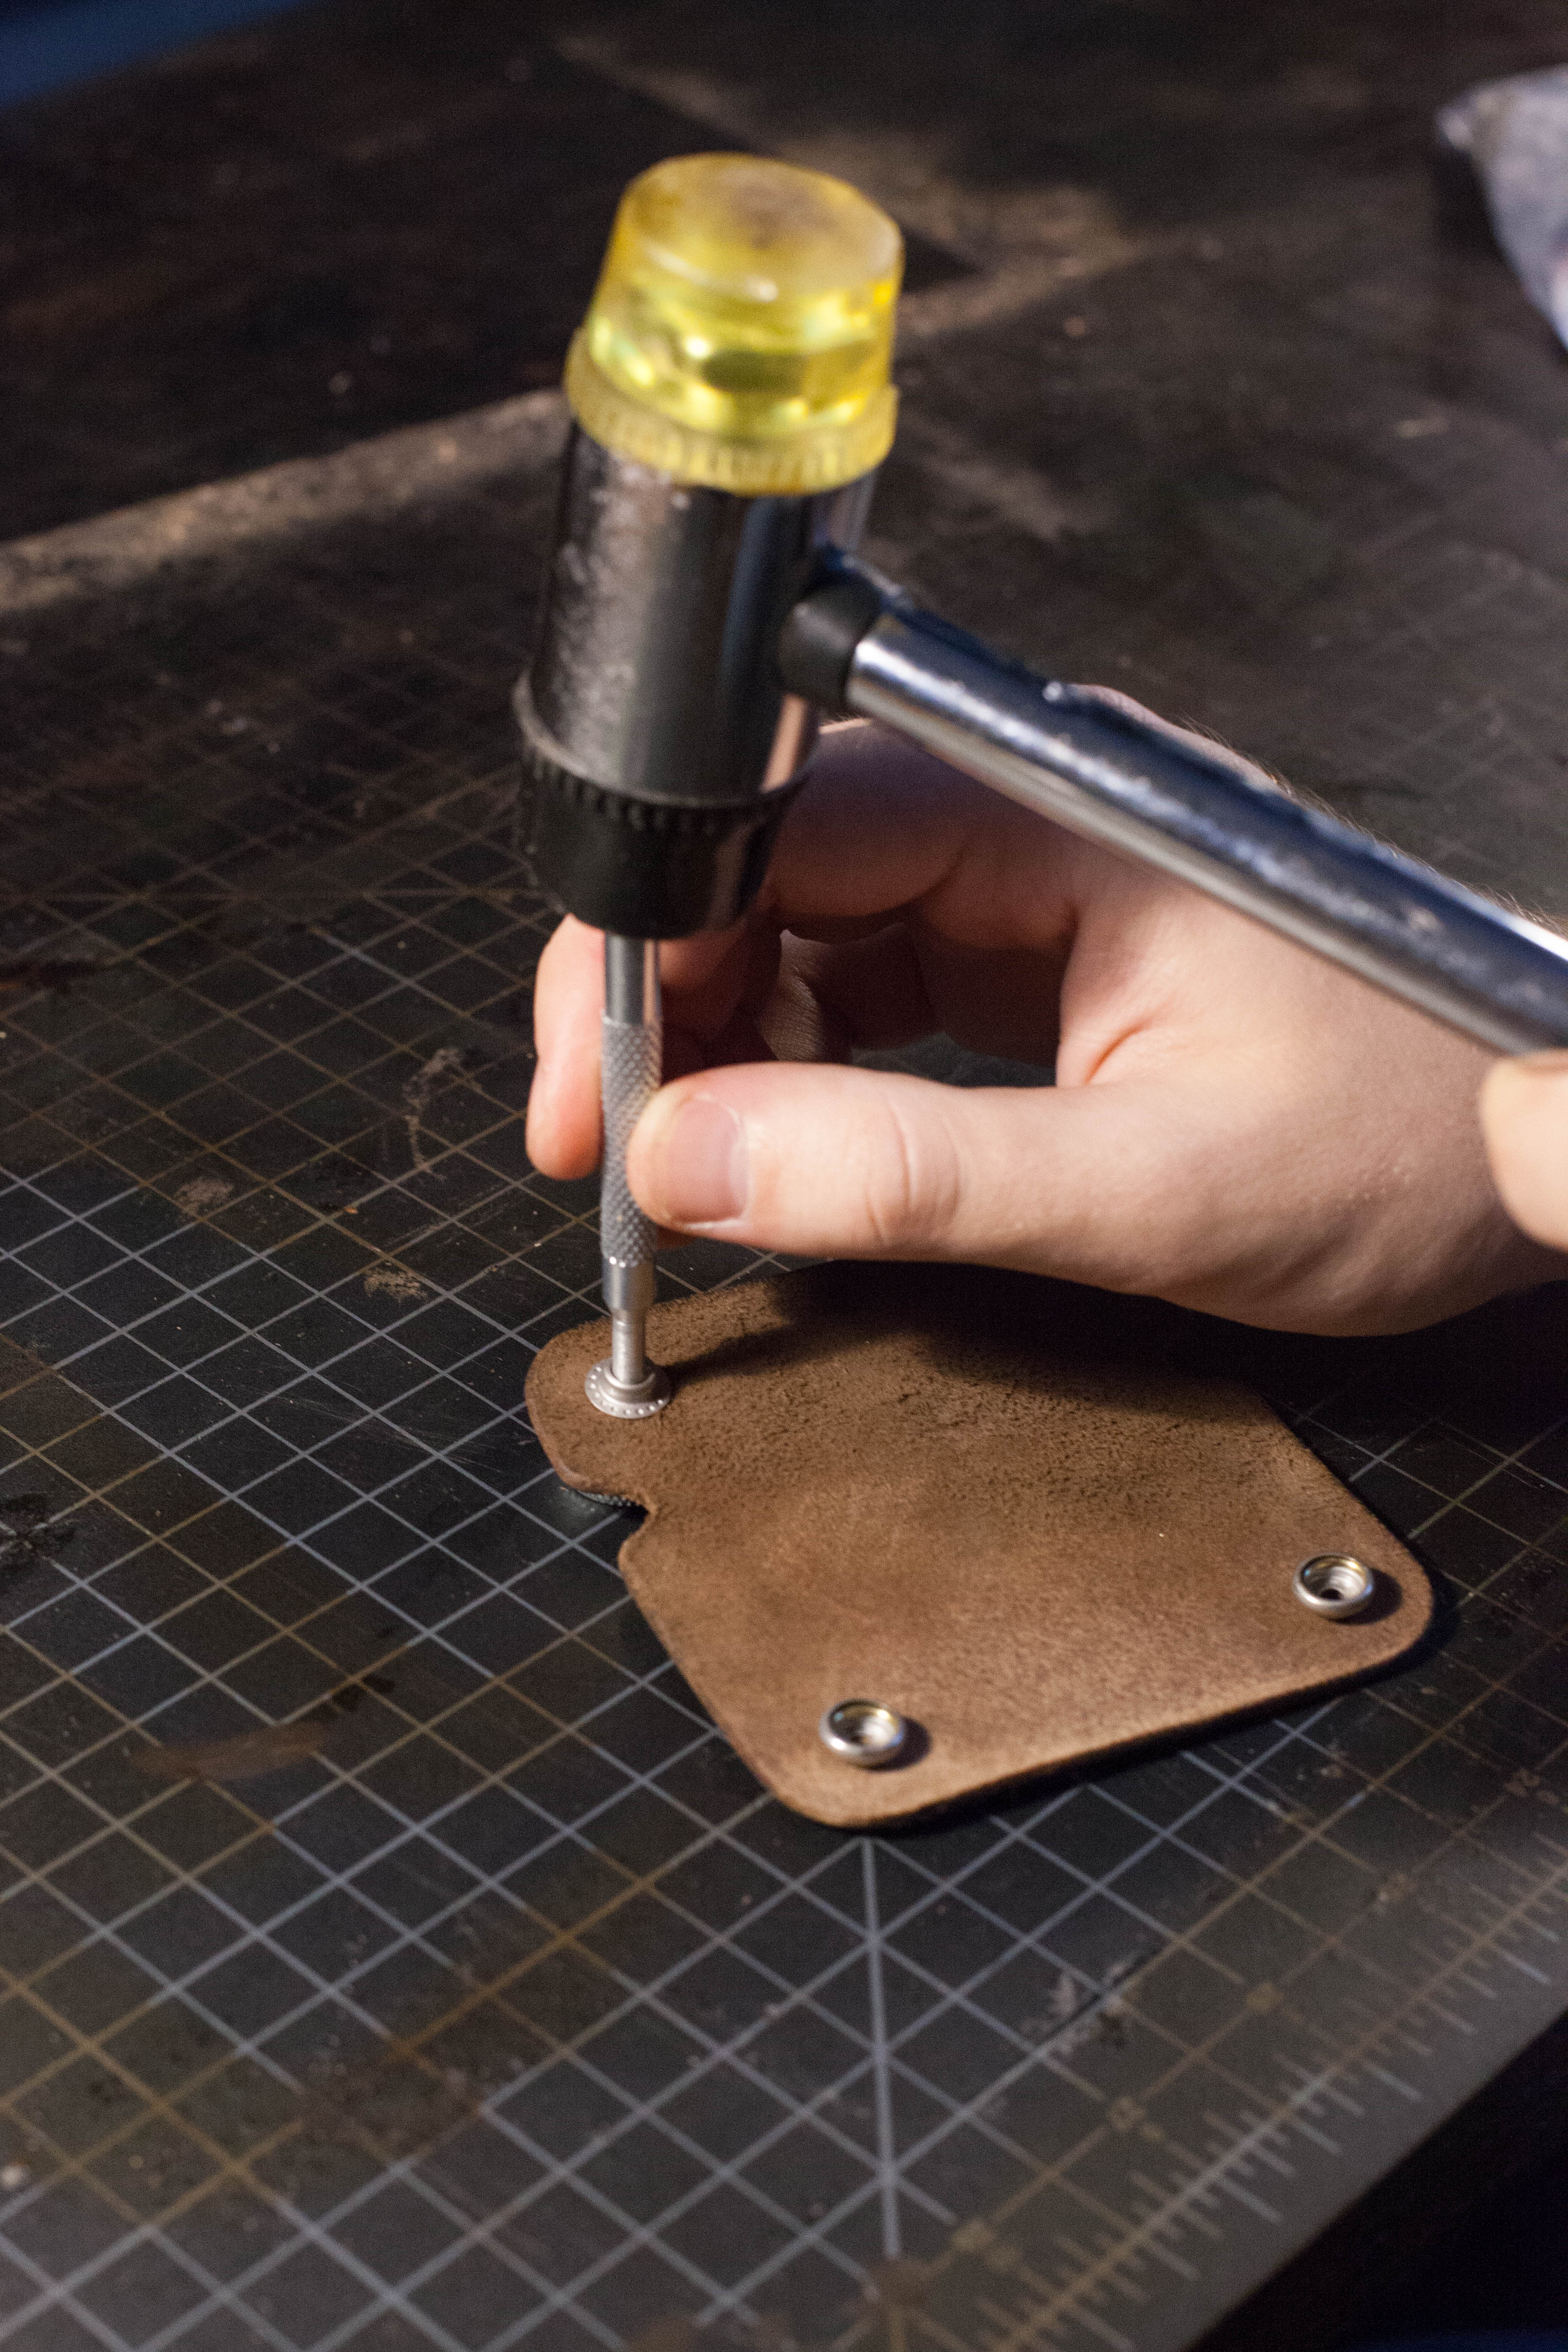
Step
All that is left to do is install the snaps. To start, use your scratch awl to make a mark at each of the four corner .5″ in, as shown in the picture below. After you've marked the location of the holes, go ahead and punch them out with a 5/32″ punch.
Step
Snaps can be a little confusing the first time you use them because they have a few different pieces. In this case, you should have 3 different types: a domed cap, a male piece, and a female piece. It doesn't really matter if you start with the female or male piece. Do make sure to keep the domed caps on the outside of the project, the two female pieces on one side the project, and the two male pieces on the other.
In this example I started with the female pieces. Set the domed cap onto the domed anvil and then place the leather on top with the flesh side facing down, making sure the cap goes through the hole. Then set the female piece on top and rivet into place with the rivet setter and the hammer. With the two female pieces in place do the same thing on the other side of the organizer with the male parts. Finally rivet the male piece in place and you've finished the project!
If you completed this project start to finish and it's looking sharp, there's no reason not to brag. Share a picture of your hard work with us on Instagram by tagging @manmadediy and @goldbarkleather.


