How to Make a Concrete Fire Pit That’s Really Built to Last
_large.jpg?1470121531) Looking for a way to keep the fun going when the sun goes down? A firepit is the perfect post-BBQ gathering point for a bit of warmth, some roasted marshmallows, and conversations well into the night. I wanted to build a place where we could keep the summer nights going, but the store-bought kits just didn’t catch my eye. That’s why I decided to build my own from durable, solid outdoor materials that will hold up to years of use, and look great doing it. This project is pretty straightforward, and combines with my backyard corner benches project to create a place where a long evening turns into a lasting friendship.
Looking for a way to keep the fun going when the sun goes down? A firepit is the perfect post-BBQ gathering point for a bit of warmth, some roasted marshmallows, and conversations well into the night. I wanted to build a place where we could keep the summer nights going, but the store-bought kits just didn’t catch my eye. That’s why I decided to build my own from durable, solid outdoor materials that will hold up to years of use, and look great doing it. This project is pretty straightforward, and combines with my backyard corner benches project to create a place where a long evening turns into a lasting friendship.
_large.jpg?1470121392)
Of course, no night spent around a fire is complete without a little refreshment, so we teamed up with mike’s hard lemonade for this project. mike’s is made with all natural ingredients for a refreshing, flavorful alternative you can enjoy on any evening with friends, whether outside or in.
Building this firepit is totally straightforward, with a bit of time spent on the details. I think the end results are really worth the extra time to get the details just right, but you could simplify this project as you like. Here’s how I did it:
_large.jpg?1470121178)
The Frame
Cut To Size and Make Joint Cuts – I used fir lumber for the frame: 4×6 posts for the corners and 2×4 boards for the cross-members. To ensure solid joints, I cut laps out of each post so that the boards could have plenty of glue surface.
_large.jpg?1470121954)
Assemble – The frame came together with outdoor waterproof glue and countersunk screws. Be sure to square up the frames before cinching down the joints.
_large.jpg?1470121190)
Texture – Using a chainsaw, I roughened the frame. This method leaves deep grooves and adds some dimension to the surface. To roughen the wood, be sure the secure the piece well. Chainsaws are dangerous, so be sure to use appropriate safety equipment and operate with caution. Keep the blade parallel to the surface and the speed of the saw up to make sure it won’t dig too deep, try to make it “skip” over the surface. If you’re not experienced with a chainsaw, you probably want to skip this part.
_large.jpg?1470121226)
Burn and Brush – Burning the surface of the wood makes the texture really stand out. That’s because the outer section burns dark while the recesses stay lighter in color. A wire brush softens the black areas for a nice overall coloring.
_large.jpg?1470121446)
Finish With Outdoor Stain – An outdoor stain and finish creates the hard shell that will protect against the elements. It’s important to seal the bottom and inside of the frame as well to make sure moisture stays out.
_large.jpg?1470121488)
Add Concrete Liner – because there will be plenty of heat in the box, it’s important to protect the interior of the frame. Adding a concrete board liner adds a layer of fire-proof material that helps to protect the wood from the heat, and also provides a backing for the stone.
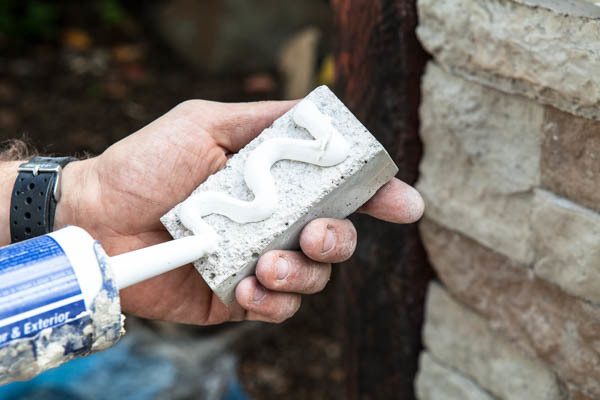
Final Touch – The Stone. Using the same stone trim I used on the BBQ surround, I added a few rows for a great final look.
The Top
Form The Frame – The form is made from Melamine, which is particle board with a plastic coating. Nothing sticks to the slick surface so it’s an ideal material for working with concrete. The top is poured upside down so the final surface is against the smooth plastic for a nice finish. I added a small quarter-round trim to the bottom edge for an interesting edge.
_large.jpg?1470121562)
_large.jpg?1470121579)
_large.jpg?1470121589) Form the Hole – A round hole is a pain to form up, so I cut a large round piece the right thickness (about 2” for my form) on the table saw. A simple jig and a bit of time is all it takes to make an accurate round form. I measured the fire bowl to get the right diameter.
Form the Hole – A round hole is a pain to form up, so I cut a large round piece the right thickness (about 2” for my form) on the table saw. A simple jig and a bit of time is all it takes to make an accurate round form. I measured the fire bowl to get the right diameter.
_large.jpg?1470121605) Cut the Reinforcement – The concrete top needs to be reinforced to make sure the heat and time don’t cause it to crack. I added an inner form of wire mesh and rebar to make sure it was going to last for years.
Cut the Reinforcement – The concrete top needs to be reinforced to make sure the heat and time don’t cause it to crack. I added an inner form of wire mesh and rebar to make sure it was going to last for years. _large.jpg?1470121619)
Pour and Cure – Using simple concrete from the home center with some charcoal colorant, I poured and vibrated the top to help settle the mix. After 48 hours of curing, it was ready to break open the form, sand to smooth the edges, then install the top with construction adhesive.
_large.jpg?1470121355)
Bringing it Together – The final product really came together. The fire pit is exactly what I hoped it would be, and it really brings the corner space together. After about a month of final curing, add a waterproof cure and sealant to keep the top protected from the remainders of sticky s’mores, which is also my indication of a good night.
_large.jpg?1470121217)
_large.jpg?1470121203)
_large.jpg?1470683990)
_large.jpg?1470684396)
_large.jpg?1470121549)
This post was sponsored by mike’s hard lemonade, but all opinions are mine alone. Thanks for supporting the brands that make ManMade possible.


