How to Build Your Own Outdoor Kitchen (For a Fraction of the Cost)
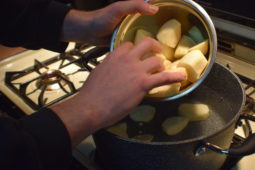
Perhaps you’ve heard – it’s suuuuummmmmmeeeerrrr!!!! That means the evenings stretch out seemingly forever, and every dinnertime is an opportunity to get the grill going. I love it. But I got tired of trying to cook dinner for my family in a space that is, objectively speaking, not a kitchen. I mean, where am I supposed to set plates, cooking tools, and seasonings, fill pots, and chop veg and everything else I need to fashion a fantastic BBQ?
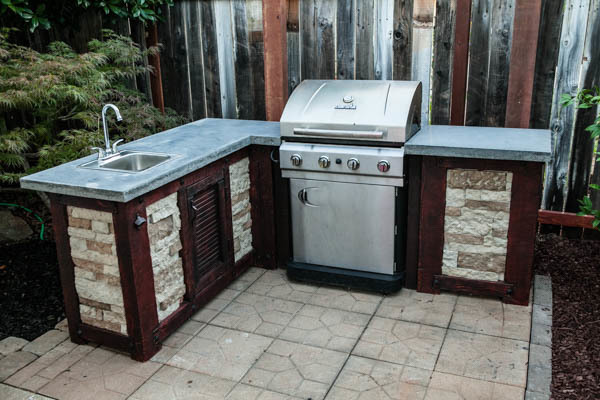
So I finally decided to go for it, and build my own outdoor cooking space, complete with a durable concrete countertop, lots of storage, and a convenient outdoor sink. Here’s how I did it:
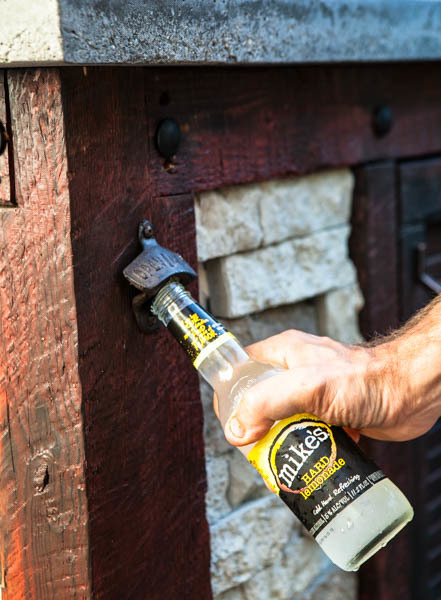
This project was sponsored by mike’s hard lemonade. mike’s is made with all-natural ingredients for a refreshing, flavorful alternative you can enjoy on a warm summer evening.
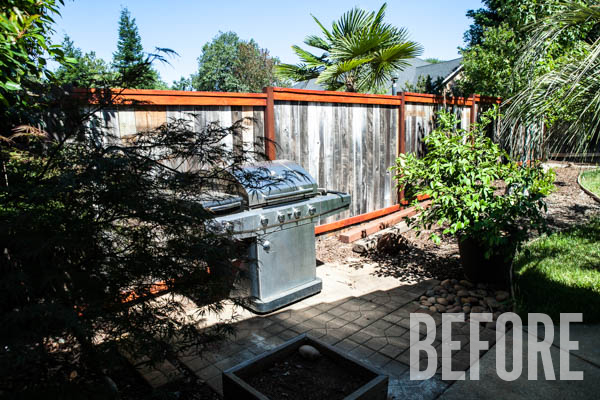
This little backyard adventure has been in the back of my mind for a while now, beginning when a perfectly good steak slid off a plate balanced on the ledge of my grill. I’m not above dusting a little dirt off my sirloin, but when your food is on the floor, it’s a good sign you have a problem. So I started off with the objective of building the one thing every grilling area lacks: a countertop. Take a look at the steps I took (and you can follow) to make my own custom BBQ surround.

The Frame:
I started off with a sturdy base of 4×6 posts secured with 2×4 cross-members, because the concrete countertop would need something solid to support it. The wood came from the standard lumber yard, so to make it a bit more interesting, I roughed it up with a chainsaw, then charred it to add some weathered character, and finished with an outdoor stain.
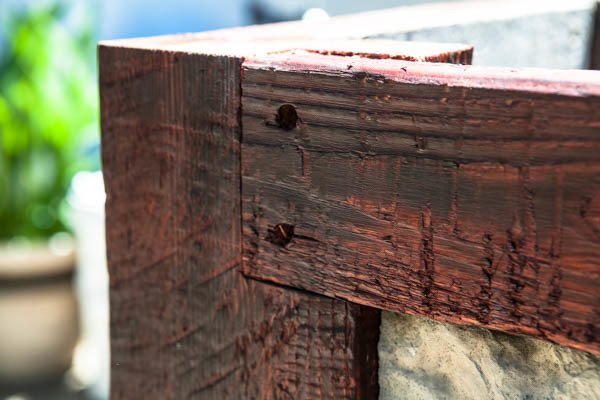
The crossmembers were joined with rabbets in place to give the entire frame a bit more stability and strength (and also because the joinery is interesting and adds a bit more unique character to the project).
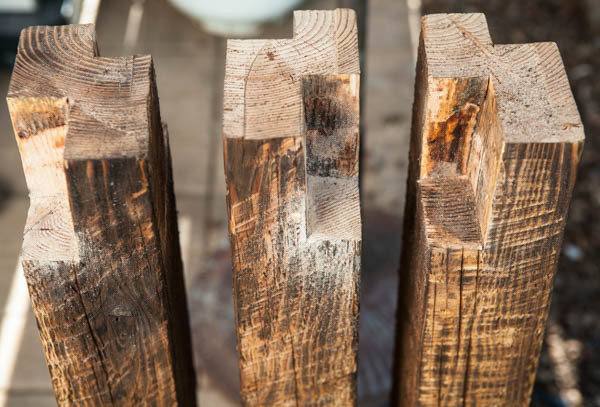
Rabbets were added to the legs to accept the crossmembers.
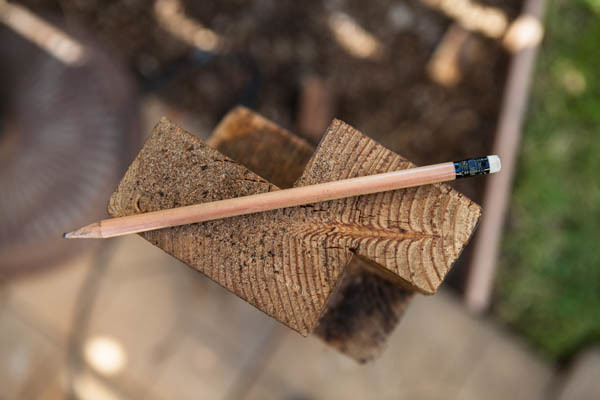
I cut the joinery with my oscillating saw and a plunge blade which took some time, but was much easier than a chisel and mallet.
The Backing:
The backing between the framing members provides lateral support, as well as a surface for the stone facing. For this I used a water-and-mold-resistant concrete board. This material is much more stable than wood and can withstand the weather much better over time. After I cut it to size and glued it in place, it also added some extra weight and structure to the frame.
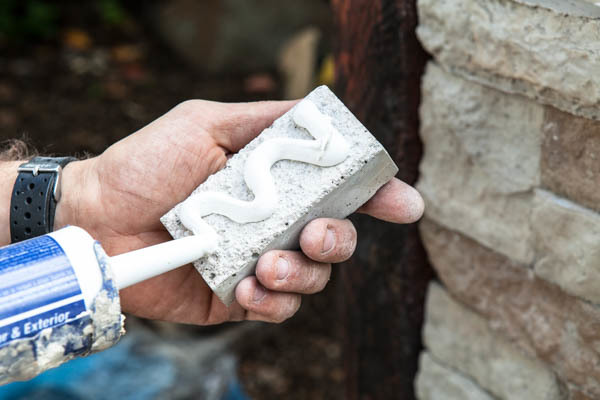
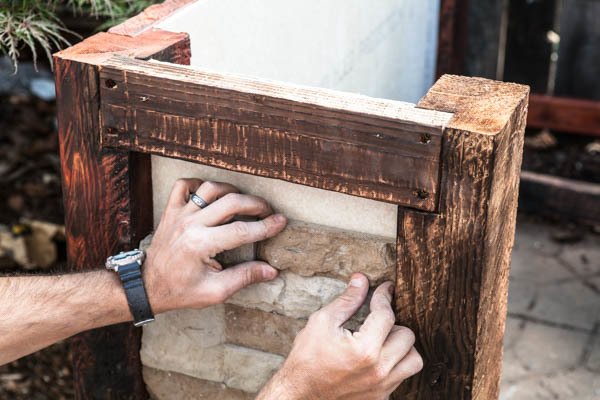
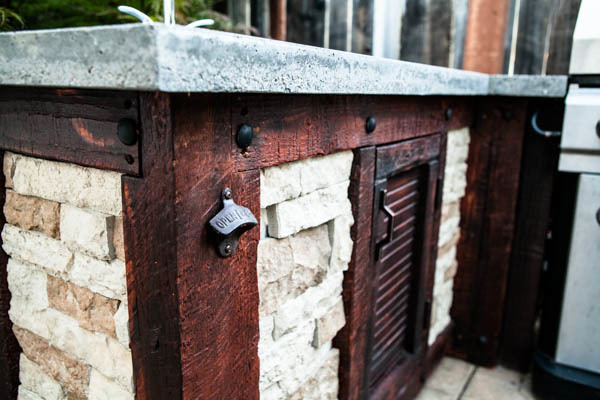
The Stone:
The outer stonework on this project was a light, flat brick material that can be cut easily with a multi-tool. It secures in place with construction adhesive to the rough concrete board backing. This material is great for an outdoor application because it’s stable and won’t get damaged by water.
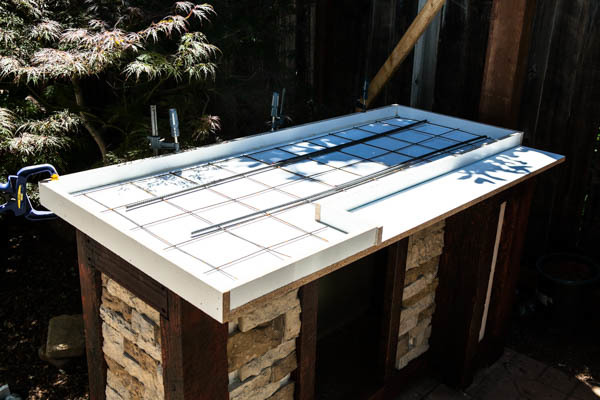
The Concrete Mold:
Making a concrete top was a bit of a process … but totally worth it. The countertop was poured upside-down, allowing me to get a really nice, smooth surface without having to trowel the face at all.
Using melamine sheet goods (smooth plastic layer on top of particle board), I made a mold with a cutout for the sink area. The construction of the mold took a bit of time, but wasn’t overly complicated.
Once the mold was finished, I added wire mesh and rebar, measured and cut to fit with about an inch room around the edge.
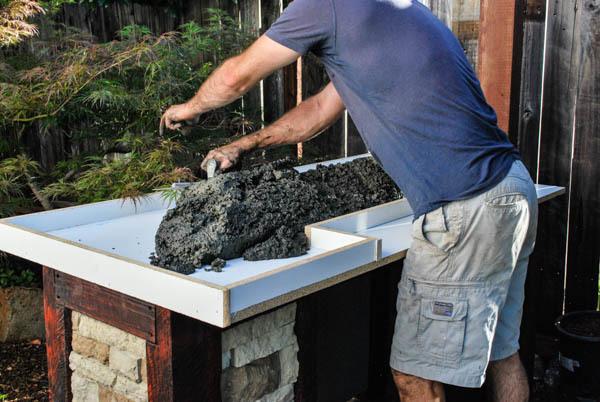
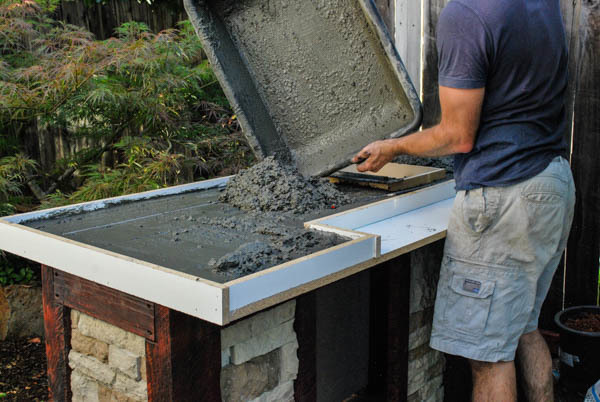
Pouring the Top:
This was the fun part. I mixed up a batch of standard, high-strength concrete, colored it, and then poured it into the mold. The first batch was wet enough to flow into all of the edges and corners, but it’s important to limit the water use to control cracking and surface bubbles.
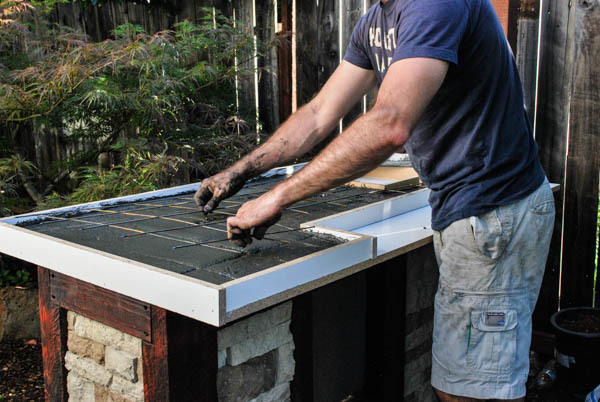
After the first lift of concrete, I gently inserted the metal frame and tamped it into the wet material. Then the remaining concrete was added, screeded flat, and floated smooth.
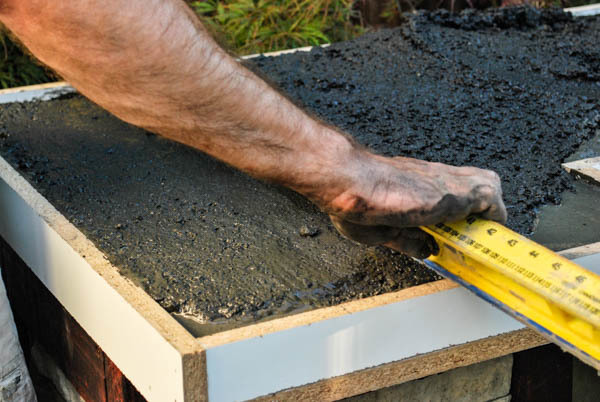
It’s important to vibrate the concrete really thoroughly with a sander and rubber mallet for about 30 minutes to bring most of the bubbles to the surface (what will be the bottom) and away from the finished side. After about 48 hours, it was ready to flip and secure in place with adhesive.
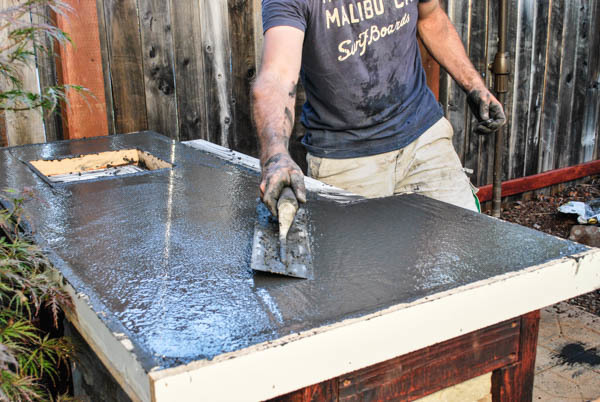
Finishing Touches:
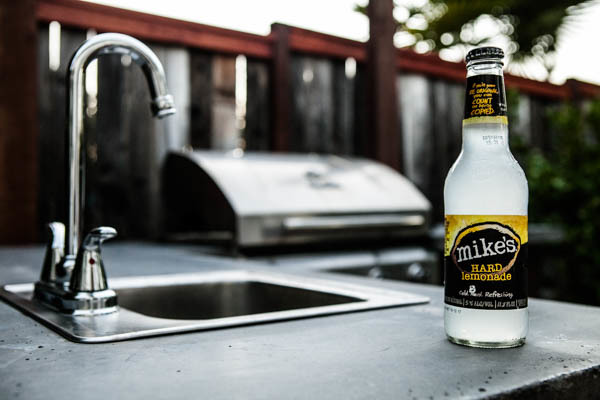
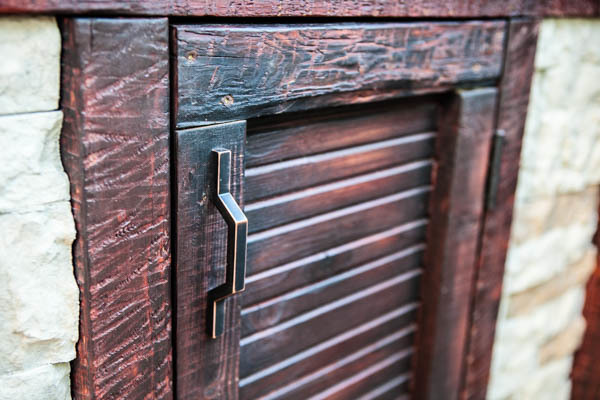
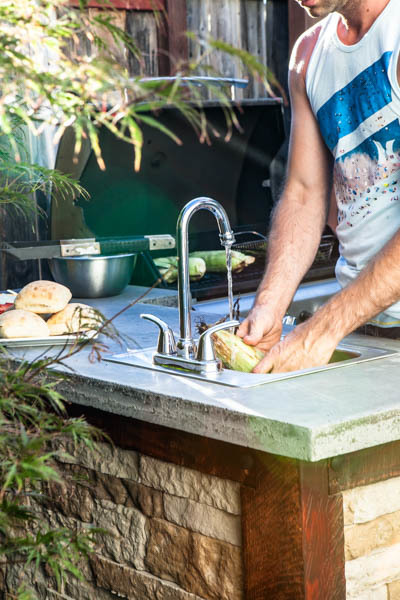
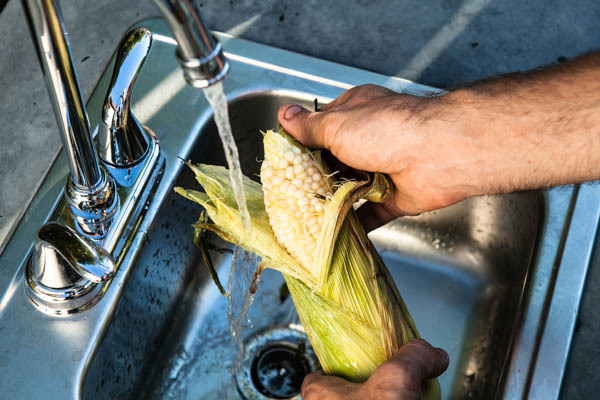
To finish off the project, I applied a final stain and clear protectant layer. The concrete top was left mostly organic with just a bit of sanding on the edges to knock off and exposed surfaces. The stainless steel bar sink was plumbed, and simple door and hardware bolts were installed to bring together the pieces and provide a protected place to store outdoor supplies.
The sink was plumbed with a garden hose attached to the faucet via a splitter and a few brass pieces, and another short run of hose from the drain out into the shrubs. For now that will be good enough as long as I watch the usage and use biodegradable soap. In the future, I’m planning on adding a climbing vine to the trellis against the fence and I will route the drain water through a reservoir in that planter.
This was a long project, taking about 40 hours to get fully right, but the results sure make it worth the effort.
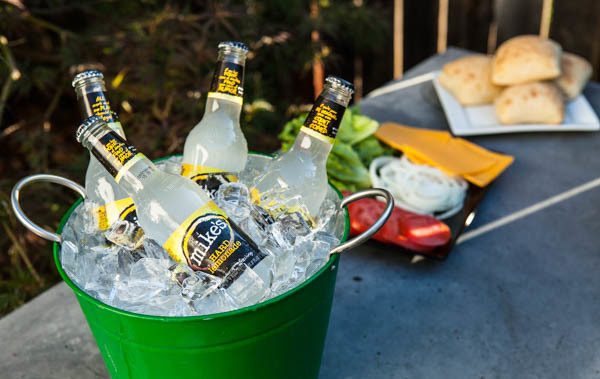
Imagine the next outdoor party with food prep and cleanup all done without making a mess of the inside kitchen. And Mike’s Hard Lemonade is the perfect drink to enjoy while grilling in my new backyard – it’s light, flavorful, and refreshing.
Now that’s a successful barbecue!

This post was sponsored by mike’s hard lemonade, but all opinions are mine alone. Thanks for supporting the brands that make ManMade possible.