Make This: Handcrafted Collar Stays
_large.jpg?1460392109) You may not even know you’re wearing them, but there is a little piece of style in your closet that needs an upgrade. Those pointed collars have a little backbone in them called a collar stay, and a little bit of work will make them look great again. I started thinking about upgrading my collar stays when one of my favorite shirts started looking a bit haggard. After a good starching, the collar was still a bit rounded and sagging. A few minutes in my shop turned out some new collar stays and I was back to looking sharp. Here are the easy steps to make your own:
You may not even know you’re wearing them, but there is a little piece of style in your closet that needs an upgrade. Those pointed collars have a little backbone in them called a collar stay, and a little bit of work will make them look great again. I started thinking about upgrading my collar stays when one of my favorite shirts started looking a bit haggard. After a good starching, the collar was still a bit rounded and sagging. A few minutes in my shop turned out some new collar stays and I was back to looking sharp. Here are the easy steps to make your own: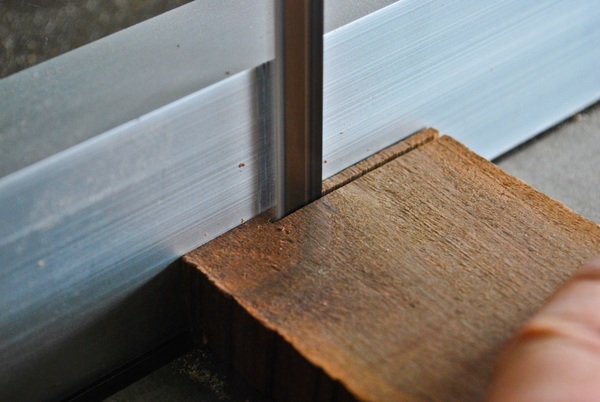
1. Pick the wood – I picked a spare piece if bubinga that I had in the shop for a few reasons. First, the thick, oily wood polishes up nicely with a smooth reddish finish. Second, it smells amazing when you cut into it – I’m a sucker for the smell of fresh sawdust._large.jpg?1460392079)
2. Cut a few pieces to rough size –I used the bandsaw to slice off 6 small pieces that are roughly the size I need them, about 1/4″ x3″._large.jpg?1460392548)
3. Use a set of plastic stays to trace out the design – using the flimsy stays from one of my shirts, i traced out the rough shape. Keep in mind there are 2-3 standard sizes so it’s best to take a look at the stays you will be replacing to get the right sizing._large.jpg?1460392143)
4. Cut out the shapes – Using the bandsaw, I cut the pieces close to finished size. Since I’m planning on sanding on the belt sander, I left a bit of room to be able to sneak up on the shape at the sander._large.jpg?1460392207)
5. Sand to final size – With 120 grit on the sanding belt, i sanded the pieces to final size. Sanding such small pieces can sometimes be hard, so I used a pencil to hold it close. The eraser is grippy enough to hold tight, and it’s not problem if it touches the sanding belt._large.jpg?1460392258)
6. Finish sanding – i sanded all pieces with 120, 240, 400, and steel wool until they were smooth and just about all of the marks had been removed. I then wiped clean and added a thin layer of oil-based finish to keep them protected.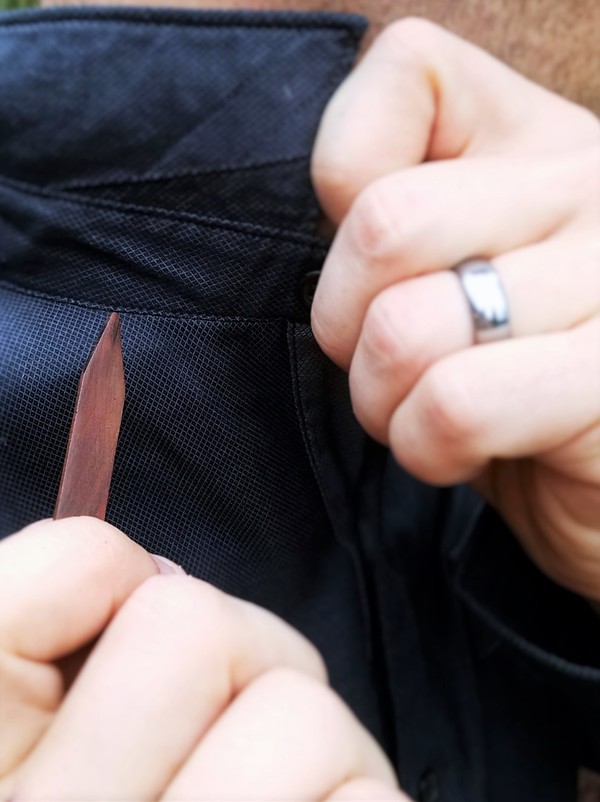
7. Dapper up that collar – now that you have some custom collar stays, it’s only fitting to slip them in and instantly tighten up that outfit. Although this is something no one will see unless you’re showing off your workmanship, it adds a clean line to your collar that those flimsy plastic pieces just can’t match.
This whole project took about 20 minutes to make 3 sets of stays, so now you have no excuse to skip the shop this weekend. We’d love to see you set of collar stays, send us some pictures when you finish up you own set of handcrafted stays.