How to: Make a Simple, Rustic Folding Magazine Rack from Wood and Fabric
This is a guest post from Mike at The Crafty Gentleman blog – a site dedicated to original DIY and craft projects.
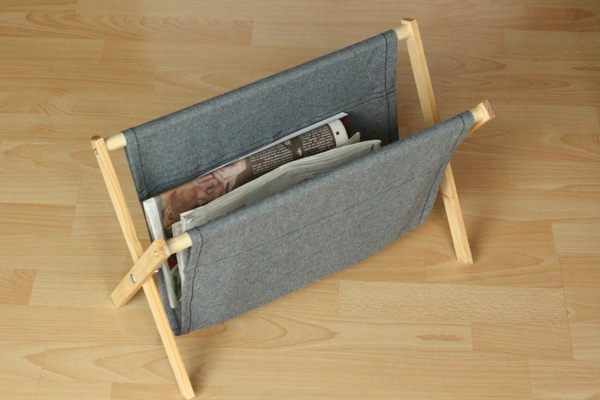
Yeah, we’re living in the digital age, but I still enjoy a magazine or newspaper with my morning coffee. To keep them tidy and at hand, I designed this minimalist magazine holder, which would fit neatly alongside any table or sofa. The raw wood and denim look gives it a rustic, rugged feel – but you could easily paint the wood or use different fabric, to customize it perfectly for your space.
This DIY makes use of both simple sewing and some basic construction techniques , but you definitely don’t need to be an expert in either to make it! All you really need is to know how to use a cordless drill, and how to add a simple running stitch to fabric (using a sewing machine, or by hand). If you aren’t sure on either of these, this is a great place to start.
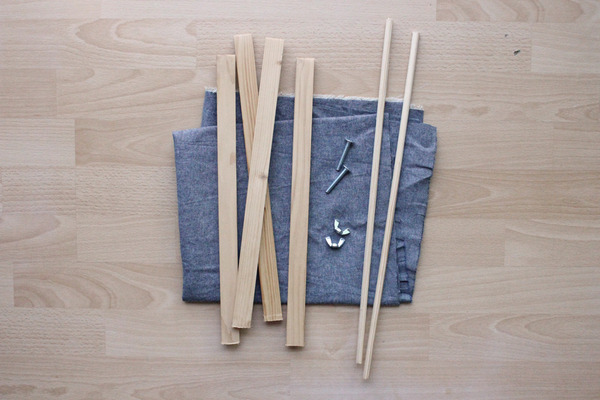
Supplies:
- 2x hardwood dowels, 5/8″ thick
- Several wood slats
- 2x 3/8″ bolt and accompanying wing nuts
- Wood screws
- Large piece of fabric
- Needle and thread or sewing machine
Editor’s note: Mike lives in England, so material availability varies a bit than those in the US.
1. Cut a piece of fabric to 90 by 40 cm (this measurement includes seam allowance).
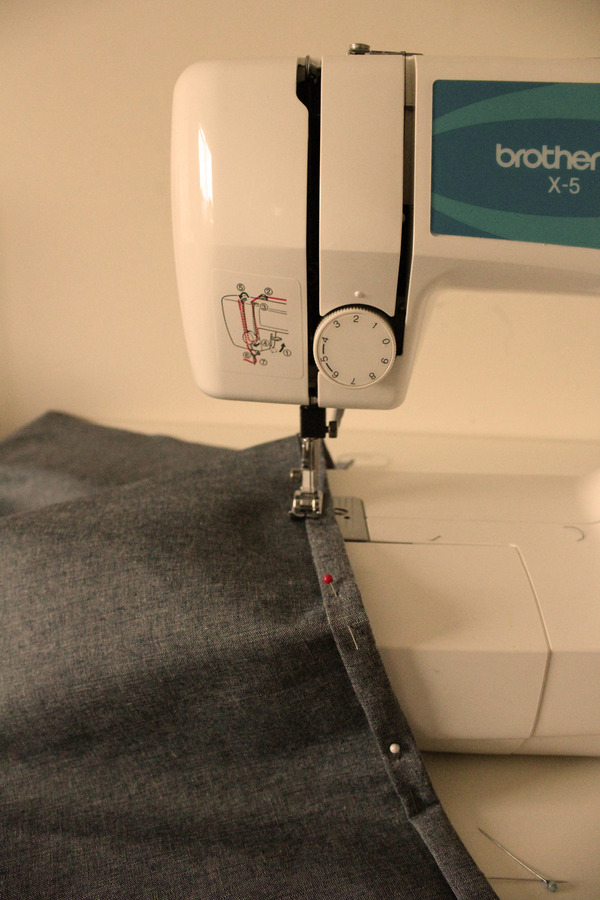
2. Hem the sides by folding one edge of the fabric over onto itself by 1 cm, then again by another 1 cm. This ensures that the raw edge is hidden. Pin and sew this hemline in place, removing pins as you go, then repeat for the other three edges.
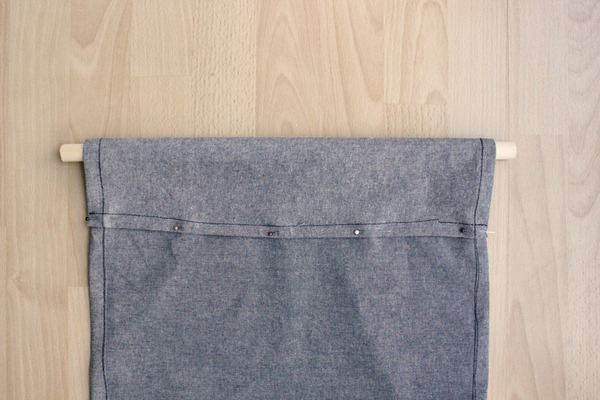
3. Fold one of the shorter sides of the fabric over onto itself by 5 cm, pin and sew in place along the very edge (so you leave a loop/gap through which to insert the dowelling). Repeat for the other short edge of the fabric.
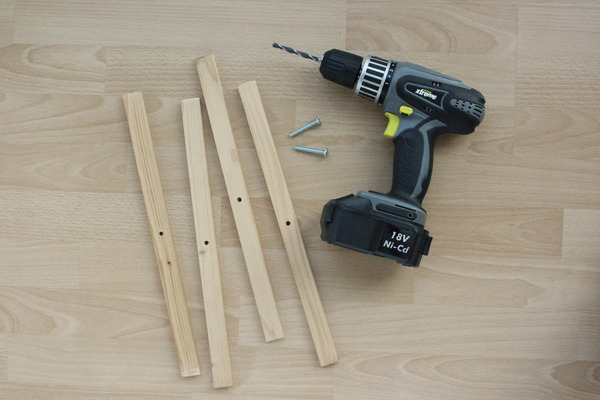
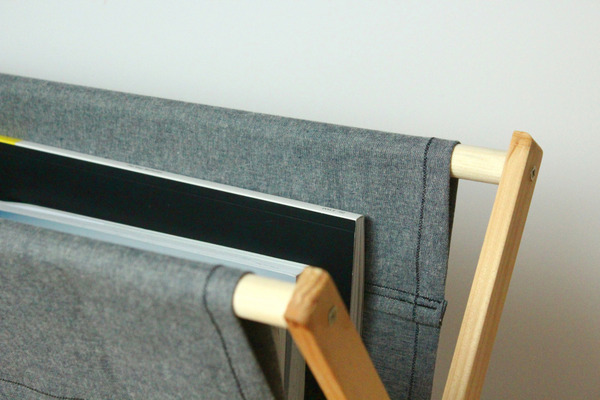
4. Cut four identical lengths of wood to 40 cm each and sand the edges. Mark the middle of each piece of wood, then drill a hole through the centre of each. Make sure the hole is large enough to fit a bolt through – you’ll need to use it later.
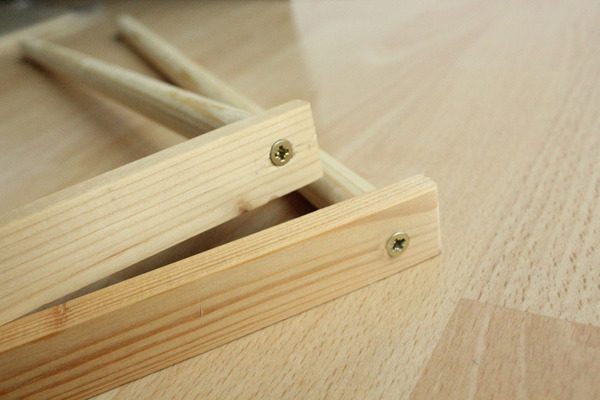
5. Cut a thick piece of dowelling into two 45 cm long pieces and sand the edges. Place the flat end of one piece of dowlling onto the side of one of the wooden pieces (position it at the end of the large flat face, so the wood and dowelling form a right angle). Drill a long screw through the wood and into the dowelling, so it goes down through the centre of the dowelling (you might need to drill a small hole first to guide the screw).
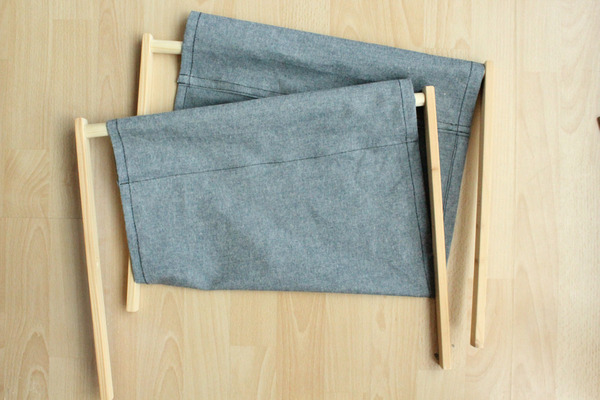
6. Thread one end of the fabric pouch onto the length of dowelling that you’ve just joined to the wood. Repeat the previous step to add another piece of wood to the other end of this piece of dowelling, in exactly the same way. You’ll be left with two parallel pieces of wood, joined at the top by a length of dowelling that has one end of the fabric pouch looped onto it.
7. Repeat the previous two steps using the final two pieces of wood and the second length of dowelling. When it comes to threading on the fabric pouch, just use the loop at the other end of the fabric.
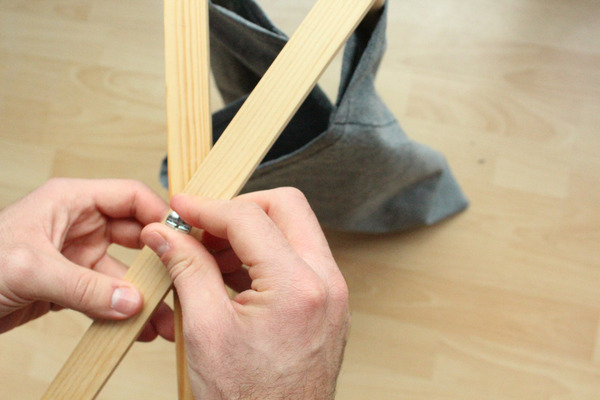
8. Finally, join the two pairs of wood together by screwing a bolt through the hole you made earlier in the centre of each piece. Rotate each pair in an X shape, so the fabric drapes between them, then fasten in place with a wing nut (you should only need to make it finger tight). Repeat on the other side.
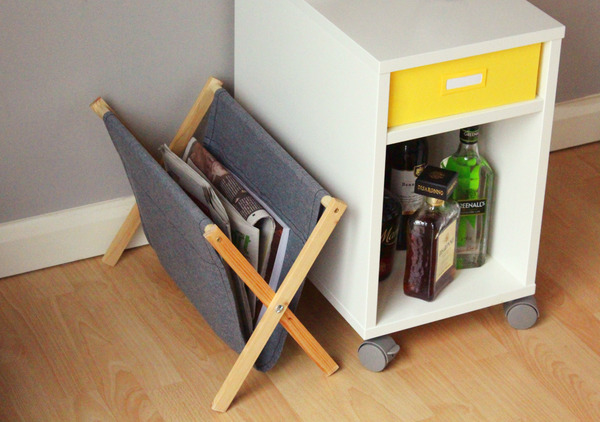
Pretty simple, right?! Even if you aren’t a magazine reader, this would be a great DIY to store an iPad or books in. Or why not make one for your office, to hold your paperwork? You could even change the scale of this project and make a small letter/notes holder. So many options!
See more projects like this over at The Crafty Gentleman blog now, and follow Mike on Instagram and Pinterest.
This ManMade post was originally published in September 2014