This Project is Easier Than You Think: How to Make + Install Wall-Mounted Air Compressor Lines
 Working in my small shop, I've tripped over my air hoses countless times. And many times an air hose has snagged on something a pulled a tool off the work bench (dangerous!). That ends today with wall-mounted air lines. Adding hard-lined air compressor lines in the shop eliminates the need to stretch air hoses across the room, reduces set-up time, and eliminates a tripping hazard. There are a few options on materials, set-up, and design; but there are also some hard and fast rules to never follow when installing a system:
1. Never, ever use PVC piping. It’s designed for water, not air. The problem with PVC comes down to the amount of compression water has vs. air. While the details are pretty technical, the jist is that air can be compressed much more than water at the same PSI, so if there is a burst in the line, the pipe literally explodes (think plastic shrapnel) from the expansion. I opted for Black metal pipe for a few reasons, namely it’s cheap, easy to work with, and as a bonus – won’t explode into flying shrapnel. It will likely rust a bit after years of use, but a flush at that time should address that. Other options are galvanized pipe, copper piping, or even reinforced rubber hoses (hoses designed for air compressors).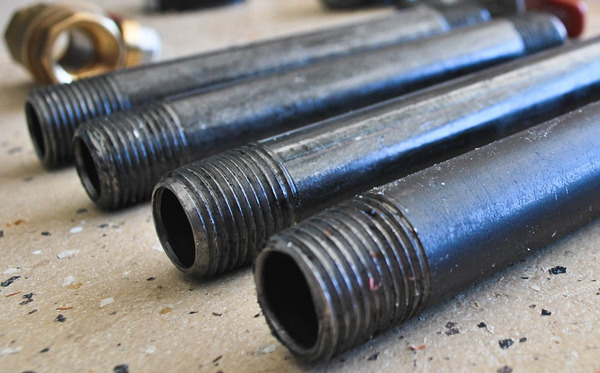
2. Be sure to manage condensation. Compressed air carries moisture that can sit in the pipes and damage tools if not properly managed. Add a bit of slope to your runs, tap in on the top of pipes to minimize any water to outlets, and put a valve in the low point for draining.
With those tips in mind, let’s dive right in.
Plan It Out
While a SketchUp or blueprint is admirable, a simple diagram should suffice for most standard installations. Start at the compressor and think about a few things. First, be sure to plan for future expansion of the system if you think it might happen. What happens if you get a bigger compressor, will it still fit in the same corner? Consider where else it would go and plan accordingly or you will be wishing you did down the line.
Standard piping to use for the lines should be ½” or larger, depending on anticipated use and needs (and budget). Remember that the standard fittings are ¼”, so reduction adapters will be needed at the points where lines come from the compressor and then at all outlets to the tools. Also plan for including filters/separators or in-line oilers if the tools you will be using need them. A few things to plan in –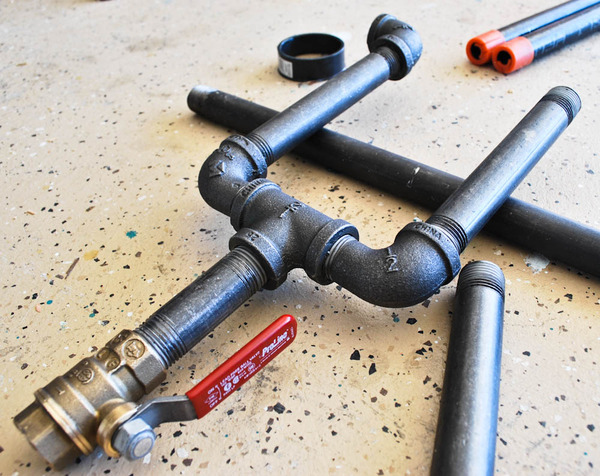
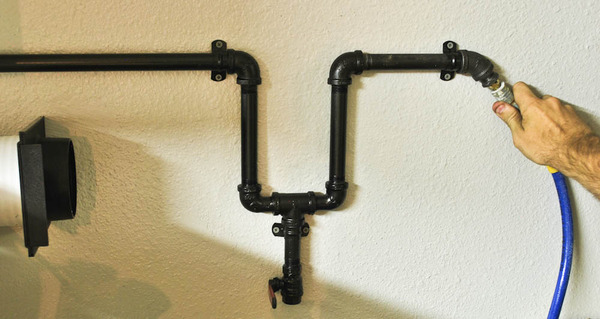
1. Drain Valve – The best way to be sure you can collect the water from the pipes is to put a drain valve in the bottom of a U-shaped part of the system right after the air comes from the compressor. This will allow for collection and drainage of condensation as needed (after every use).
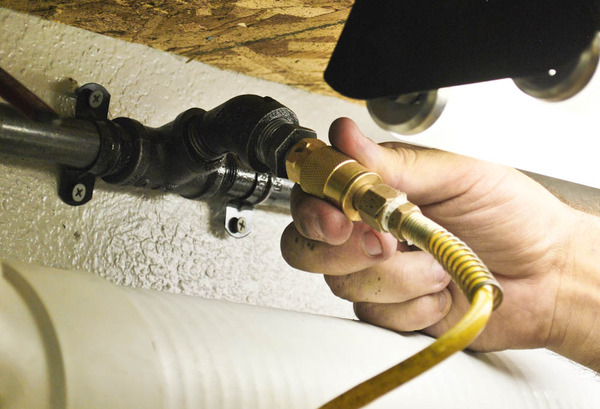
2. Regulator – A regulator and pressure valve at the point where the line comes from the compressor – and even at outlets where low-pressure tools may be used – is a good idea. This allows for monitoring pressure and fine tuning without a visit to the compressor.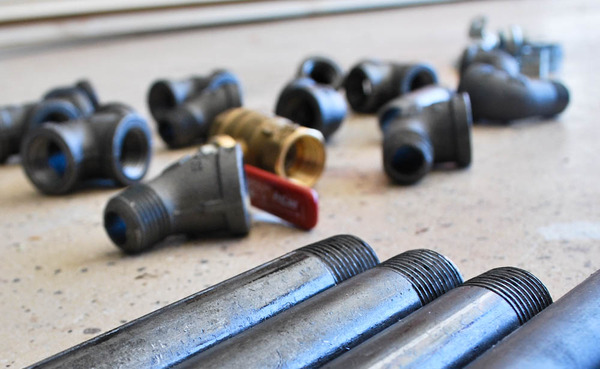
Collect the Parts –
This takes quite a bit of planning to get right, and plan on at least a few trips back for that one extra fitting you forgot. Also consider painting the pipes with spray paint to make them uniform and clean-looking. Be sure to grab U-brackets to hold the whole system to the wall (and drywall anchors if needed). The brass connectors will be located in the air-compressor section, but all other items should be in the plumbing area. Pipes come in threaded sections of various size from 3” to 10’, so measure well and get the pieces you need.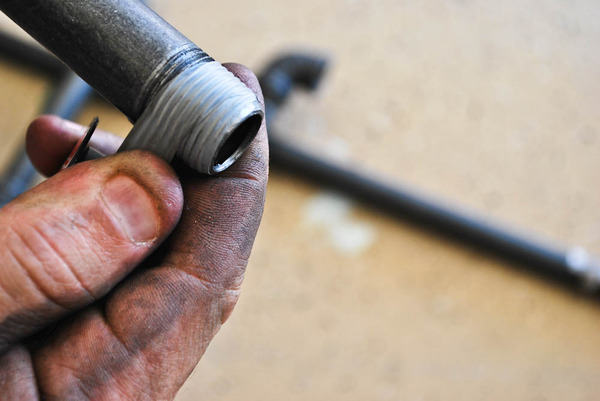
Lay Out the Pieces, Then Assemble
On a flat floor, start to lay out all of the pieces in order to make sure it all fits together. This will be the time you realize you are about four fittings short and have to make another trip to the store.
Check the measurements and then double check the wall to confirm it all fits properly. Once everything is laid out, start wrapping all threads with sealant tape and screw together. The easiest tool for this is a pipe wrench, crescent wrench, and creative leverage. Some pieces screw down easily, but there are bound to be a few that are stubborn enough to be a problem.
When forcing pieces, be sure to keep away from the threads with tools, as shredded threads don’t hold a seal well. A few small 3-4” pieces of extra pipe can be easily screwed in to provide temporary leverage. Test the system on the ground to make sure it’s sealed up well.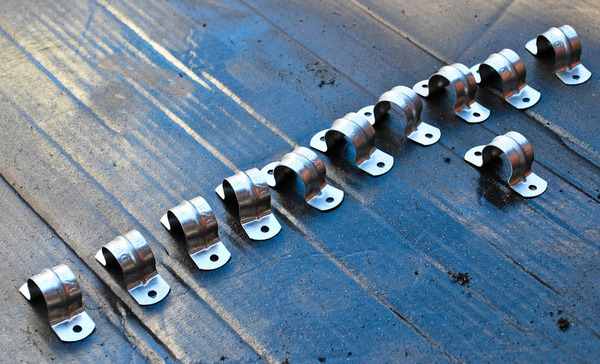
Wall Mount
Once the whole system is together and tested, get it up on the wall and put in place. Mounting on the wall can be a two person job, as the whole assembly is bulky and awkward to manage. Be sure to install the system with a slight angle towards the U-shaped drainage area to make sure all condensation can run back to that low point. If installing in drywall, screw u-brackets to the studs, or install drywall anchors to hold the weight. Be sure to install brackets close to the tool outlets to protect against pulling when the tools are plugged in.
Enjoy!
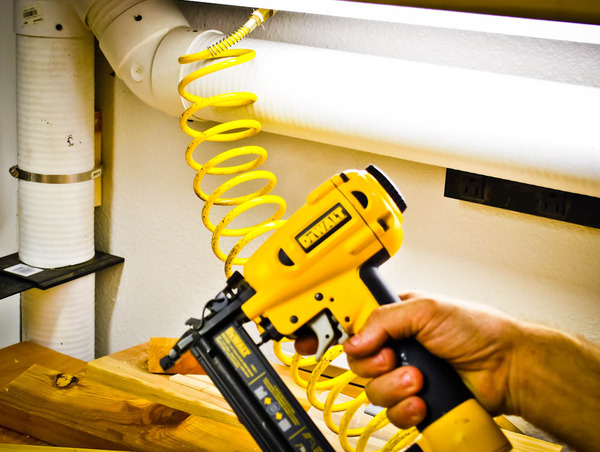
I immediately went out and grabbed a few coil hoses, and 5-foot rubber hoses which had no purpose before this system was in place. Having no hoses running across the shop is such a great upgrade to any shop, and with only a few hours of work it was a quick project that didn’t break the bank. Altogether, I installed 3 outlets with ½” black piping (about 9’ total length) for about $100. The most expensive pieces were the two brass on/off valves and the brass outlets for the tools.