How to: Make Your Own Journals + Notebooks from Scrap Materials
Did you know you can make your own sketch and shop journals with just the materials you have on your shelf? Now you can scrap those yellow pads for something a lot more classy.
I dipped my toe into bookbinding a few years ago, and let me tell you: there's a lot to learn about it. Making a bound book the traditional way is a very involved process that requires a few special materials and a block of time. But I learned to make some super useful journals that are perfect for sketches, notes, and general shop needs in an afternoon, and they keep me working well into the future. Here are two simple methods to make your own:
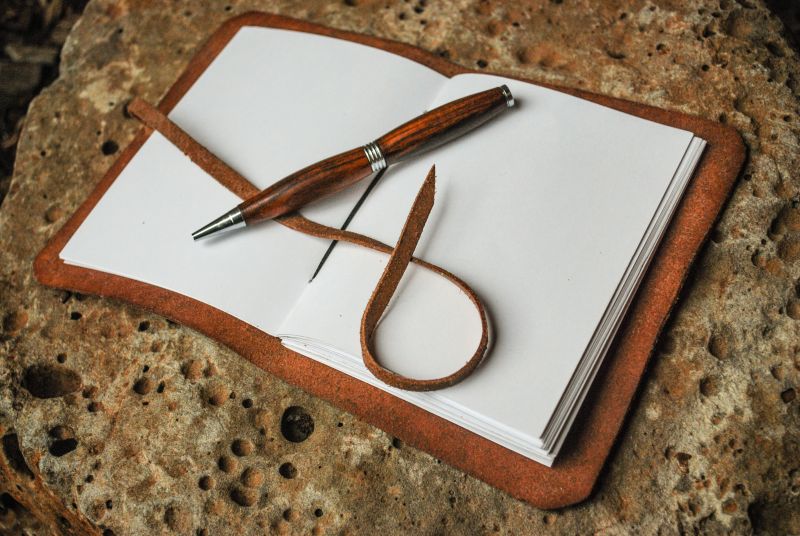
Leather Cover Journal
This project is a super simple leather cover stitched directly to a few signatures (units of folded paper). It takes just a bit of sewing and cutting to make a convenient, portable, and classy journal.
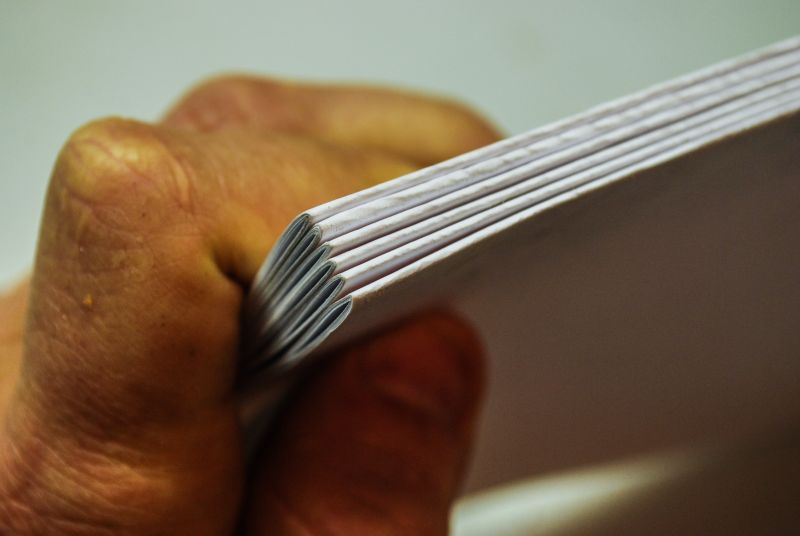
1. Paper – I used standard printer paper for this journal, and cut it in half to 5 1/2″ by 8 1/2″ dimensions. I took stacks of 10 pages and folded them in half then pressed them flat with a smooth piece of wood. This folded group of papers is officially called a signature, or just sig for short. The final dimensions on the sigs were 5 1/2″ by 4 1/4″ once folded.
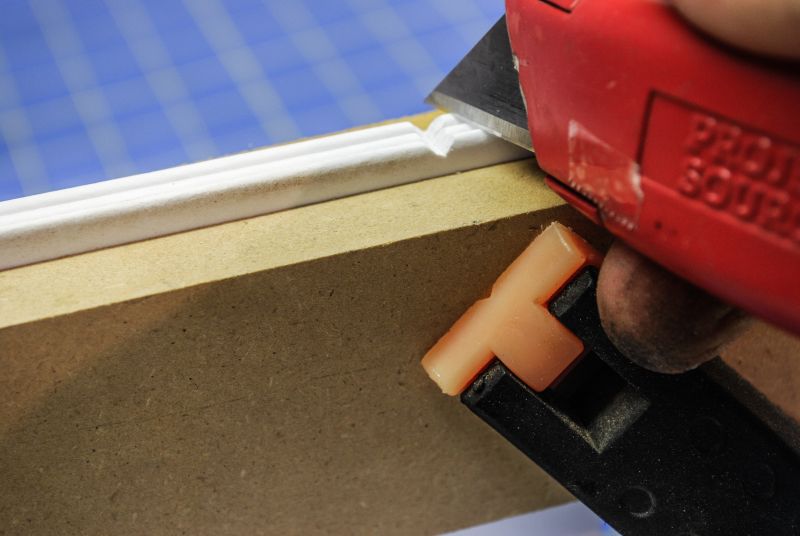
2. Cut the holes – I took three sigs and lined them up square and clamped them together with the folded edge sitting about 1/4″ proud of the clamping board. I then used a razor knife to cut three small “v's” in the spines. Be sure to get through all the pages, without making this opening too wide (too wide means the papers will be loose when sewed together). It's important the make sure the spines stay perfectly lined up for this step.
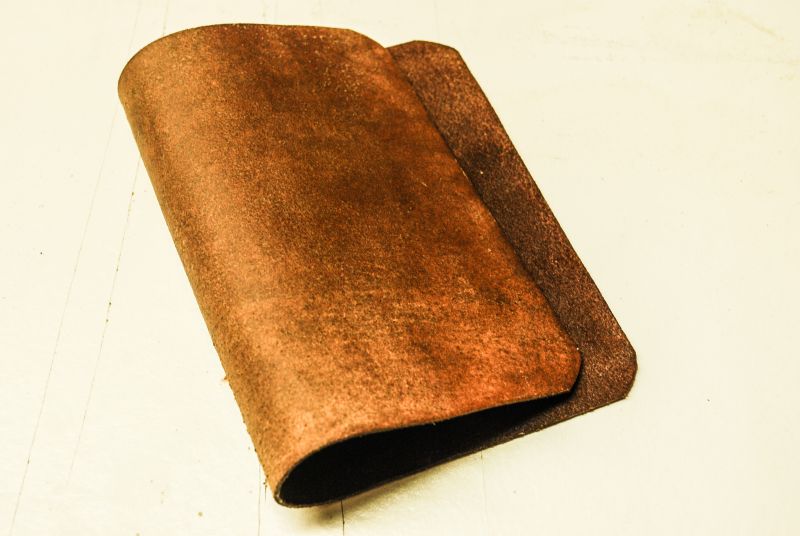
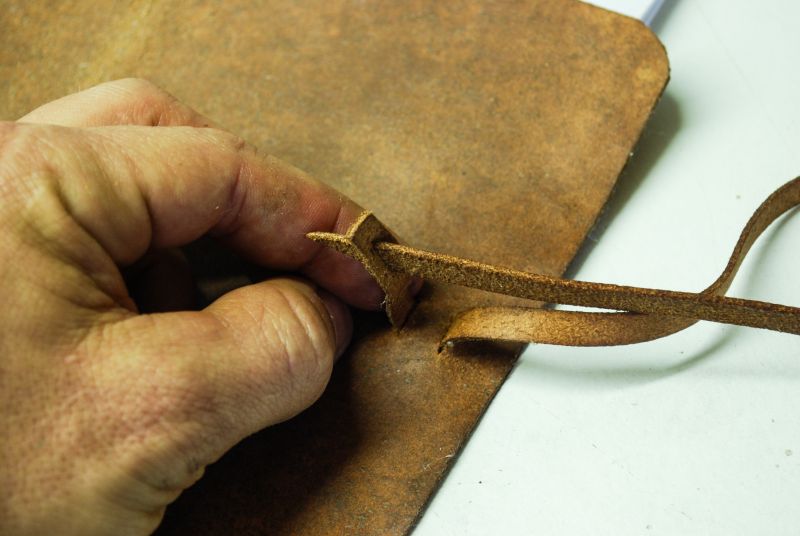
3. Make the cover – I used a simple piece of flat leather for the cover. I cut it about 1/4″ larger on 3 sides so the pages would be well protected. That means my 5 1/2″ by 4 1/4″ signatures fit into a flat piece of leather that was 6″ by 4 1/2″. I cut a long piece of leather to hold the journal closed and cut a 1/4″ slit near one end. I fastened it by cutting two small slits in the cover on one side, and threading it through itself. I used preservative to give the leather a smooth feel and protect it a bit from shop abuse.
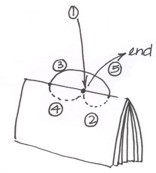
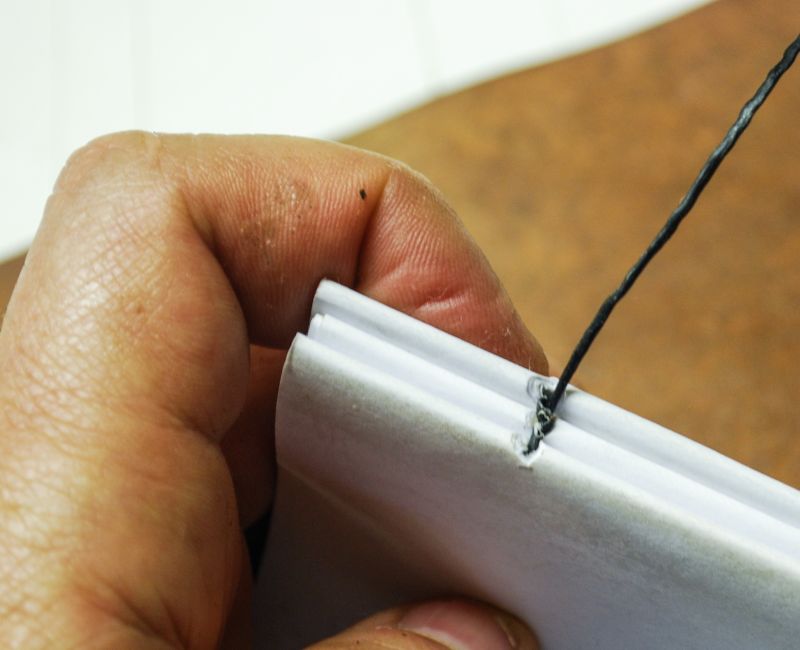
4. Sew in the signatures – With the sigs stacked up, I threaded a waxed needle through the center hole then back out the bottom hole. Then I passed it through the bottom hole in the cover and back through the top hole in the cover and the signature. It then came back out the center hole, and into the center hole in the next signature. I repeated this step with each signature until they were all secured to the cover. Easy enough, right? Here's a small picture of the threading:
That's the simple journal process. It took me about an hour to complete one, and it was an excellent gift for a fellow maker. You can make it thicker by adding a few more signatures, or dress it up with some burned custom lettering.
Exposed-Stitch Waxed Journal
Another great process is the bit more complicated fabric covered wooden journal. I used some 1/8″ plywood I had, along with some fabric from my Waxed Tool Roll Project. This version is a it more involved in the cover construction, but the signature sewing is pretty similar.
1. Signature Prep – Look above on step 1 and 2 for preparing the signatures. The only difference is that on this one I used the entire 8.5″ by 11″ paper, so my folded signatures were 8.5″ by 5.5″.
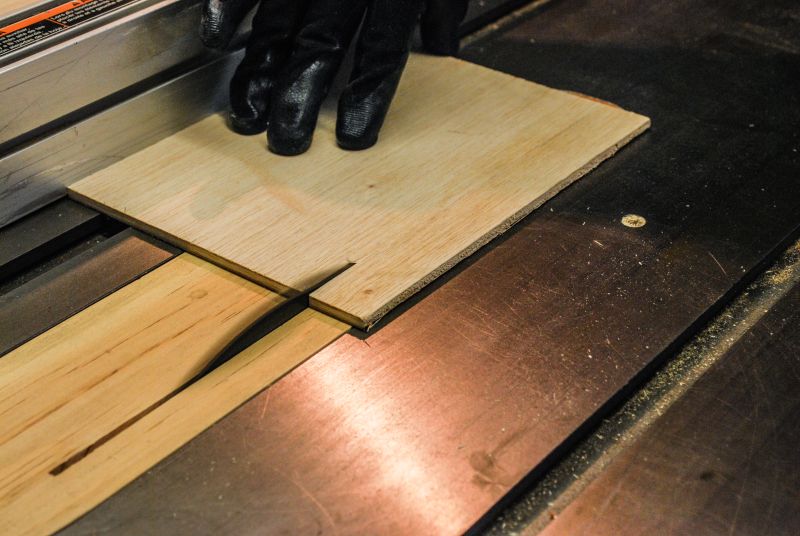
2. Make the cover – I cut two pieces of 1/4″ plywood to 9″ by 5 3/4″. I then lined up the signatures and marked where the holes in the spine were on the wood. I then drilled small pilot holes to thread through on the drill press.
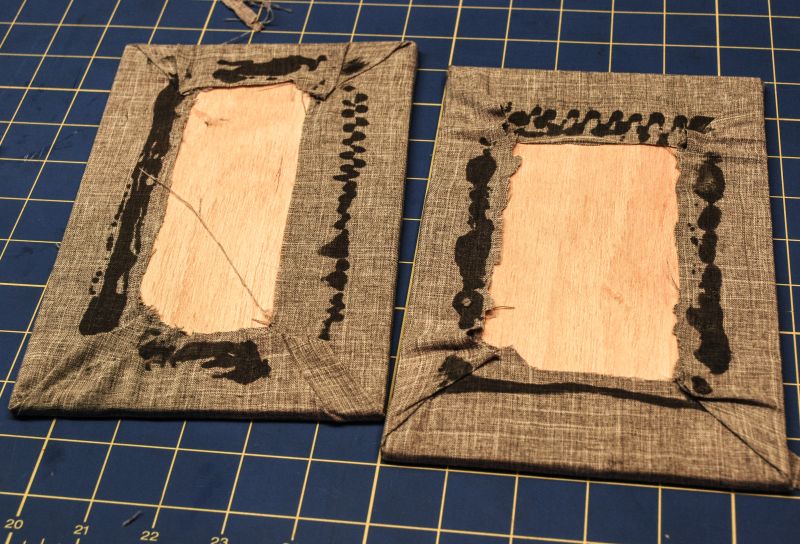
With the holes drilled, I sprayed a layer of adhesive on the wood and stuck fabric to them, making sure it overhung on all sides by about 2″. I then stretched the fabric over and glued it to the back of the wood using CA glue. The corners are a bit tricky, but keep them as flat as possible and make sure the fabric is tight on all the edges. I trimmed the excess fabric once it was glued tightly.
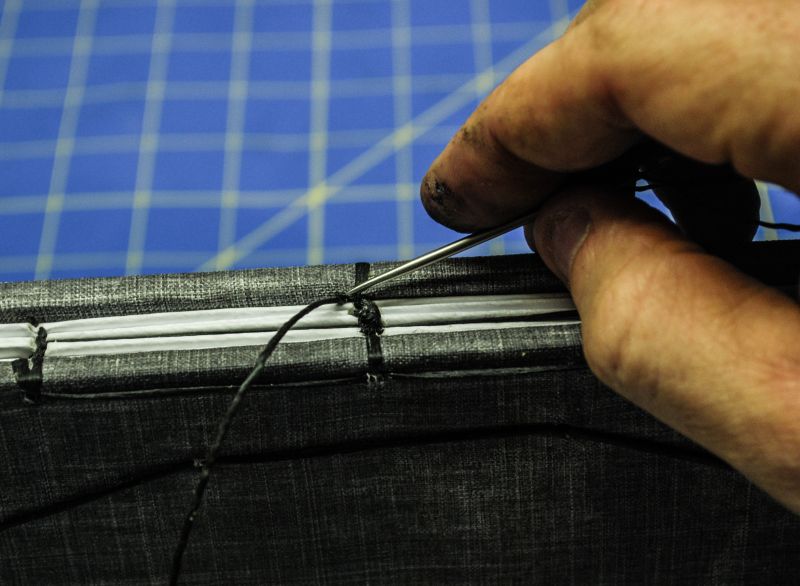
3. Sew on the signatures – I used a bit different sewing pattern on this one because of the exposed signature spines. I first passed the thread through the bottom hole in the cover and into the bottom hole on the first signature. I passed it out the center hole, through the hole in the cover, then back through the center hole. Then through the top hole in the signature and through the top hole in the cover. I then went through the top hole in the second signature, back through the center hole, looped around the thread from the first signature and back through the center hole in the second signature. I then thread it through the bottom hole, around the thread in the first signature, and then back through to the bottom hole on the third signature. Repeat this until you're through all signatures and the other cover. I finished up by looping it a few times around the last thread and tying it tight to that last loop. It may take some trial and error, but it's a pretty secure method for a shop book and the exposed stitching is a cool detail.
4. Finish it up – The inside of the covers at this point are pretty ugly with the exposed fabric glue line, so this is where you add a heavier end sheet. The end sheet attaches the signature to the cover, and covers up the stitching and back of the covers. It also adds some stability to the book, so use a bit higher weight paper if you have some. I had some 120 weight cover paper that I used. Fold it in half, and glue to the cover with contact adhesive or something similar. Then, glue the other side to the first page of the first signature. You can glue the entire page to the signature page, or just put a bead of glue along the bottom and glue the first 1/4″ of the page.
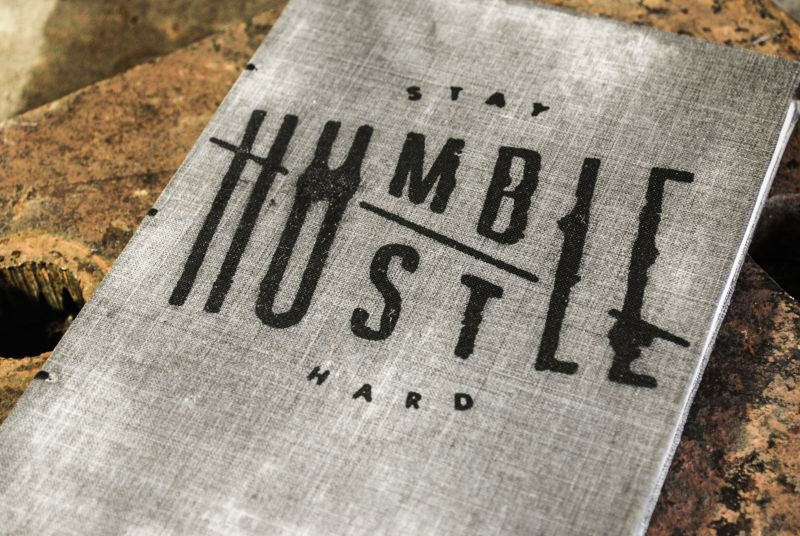
I added a design to my journal cover, then waxed it with some waterproof fabric wax to fend off shop dirt and stains.
You can finish up a few of these journals in an easy afternoon, they are perfect for collecting your shop work, or they make excellent gifts for anyone who loves to write, customize the cover, or even print some pages out with sayings or designs that you can bind into the book.


