Stone Cold Flavor: Why a Mortar and Pestle Gets the Most Out of Your Food
I'd wager that when most people first pick up a mortar and pestle, their first thought is something like, “you can't be serious!” Very rarely is there a tool that you can buy at, say, Williams-Sonoma––perched alongside the electric pepper mills and the seasonally-themed waffles irons––that has not really changed since the invention of the wheel. A gigantic, blunt mineral rod and a heavy rock bowl is, quite literally, stone age technology. And for anyone who has not yet seen the magic and serious power that this tool puts into your hands, there is an instinct to look for electrically-powered appliances that can replace it: A food processor? A blender? Spice grinder? One of those slappy chop things they sell on late night TV? The conspiracy against stone-on-stone kitchen work runs deep, and I would say that the majority of online outlets and mainstream food publications advocate for some other method than this primitive tool. But in the realm of the kitchen, there is no tool that will enhance, while smashing to bits, your aromatics, spices, or herbs like a mortar and pestle.
Myself? I only came to respect this tool began when culinary luminaries who are ordinarily pragmatic realists gave voice to the unique properties of the mortar and pestle. The first was Jeffrey Steingarten, who lavished praise on the tool in his eye-opening essay about Thailand. This was years before Thai cuisine became mainstream outside of the largest U.S. cities, and the root of the curries, sauces and soups that Steingarten was eating always seemed to be the mortar and pestle. He writes in his essay “Thailand” of the tool that accompanied him home from his trip:
My most prized and cherished treasure is a gray granite mortar and two pestles, one of palm wood, the other of stone. The mortar weighs 20 pounds and measures ten inches across, and in my mind it stands at the heart and core of true Thai cooking, the first step in preparing curries, sauces, dips, and soups. It signifies the irreducible and irreplaceable manual labor demanded by this remarkable cuisine, the magical release of flavors and aromas, the meditative rhythm of the pestle in a communal Thai kitchen, and the enduring closeness of Thai cooking to the forest and the jungle, to the Neolithic era, when food was gathered as much as grown.
The details of the cuisine notwithstanding, this is a tool for truly slow food that can only be created with a kind of magic. Later, I read Daniel Gritzer of Serious Eats who took on the task of truly perfecting a procedure for making pesto. After making equivalent recipes with a food processor and a mortar and pestle, he concluded that nothing can really beat stone-age tech. He explains:
the mortar-and-pestle pesto… had pieces of basil of different sizes, and their texture was soft, silken, and tender, totally yielding. The food processor pesto, meanwhile, had lots of uniform little bits, but in the mouth you could feel them all—they felt almost like grit compared to the mortar one. The flavor was different, too. The mortar-and-pestle pesto was infused with the flavors of all the ingredients. On pasta, the differences really become clear. The mortar-and-pestle pesto… coated the noodles beautifully, bathing them in a gorgeous green-tinted sauce. The food-processor pesto just stuck to the pasta in little bits, like glitter, and the oil had absorbed little of the basil's color. The best pesto, as its name has insisted all along, should be made under the pressure of a pestle.
I have made curries with jarred green and red paste. I have processed the bejeezus out of basil, garlic, pine nuts and grana padano cheese. I still have a dedicated blade-style coffee grinder that I use only for spices. I have made slurries and grated garlic and smashed ginger. I have even spent whole Netflix shows mincing fresh herbs, garlic and lemon zest to make what I figured was a serviceable chimichurri. I thought I was doing things the careful way, the artisanal way, the hand-made way. But until I got my hands on rough granite and saw what patience and a little pain in the triceps could accomplish, I didn't realize I was living a lie. What comes out of the stone bowl is not simply flavor––it is a flavor and texture that is much greater than the sum of its parts.
Ready to invest in one? There are three main options.
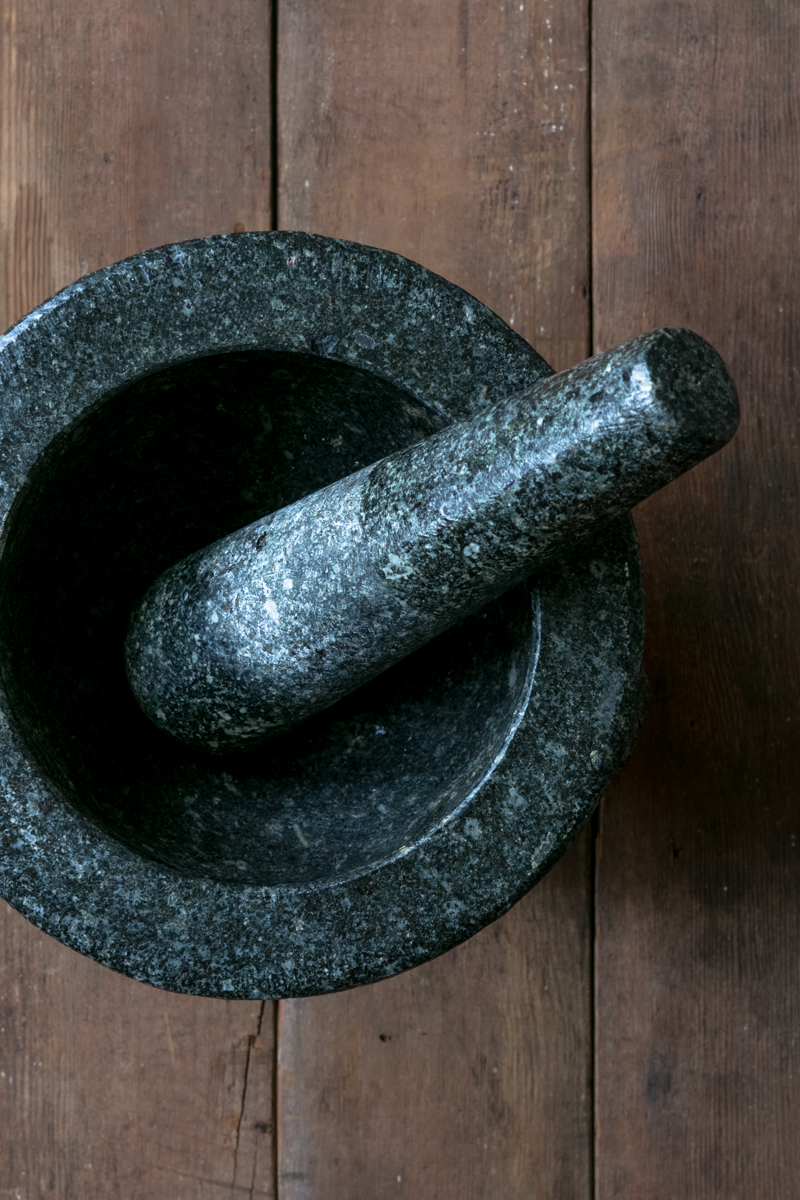
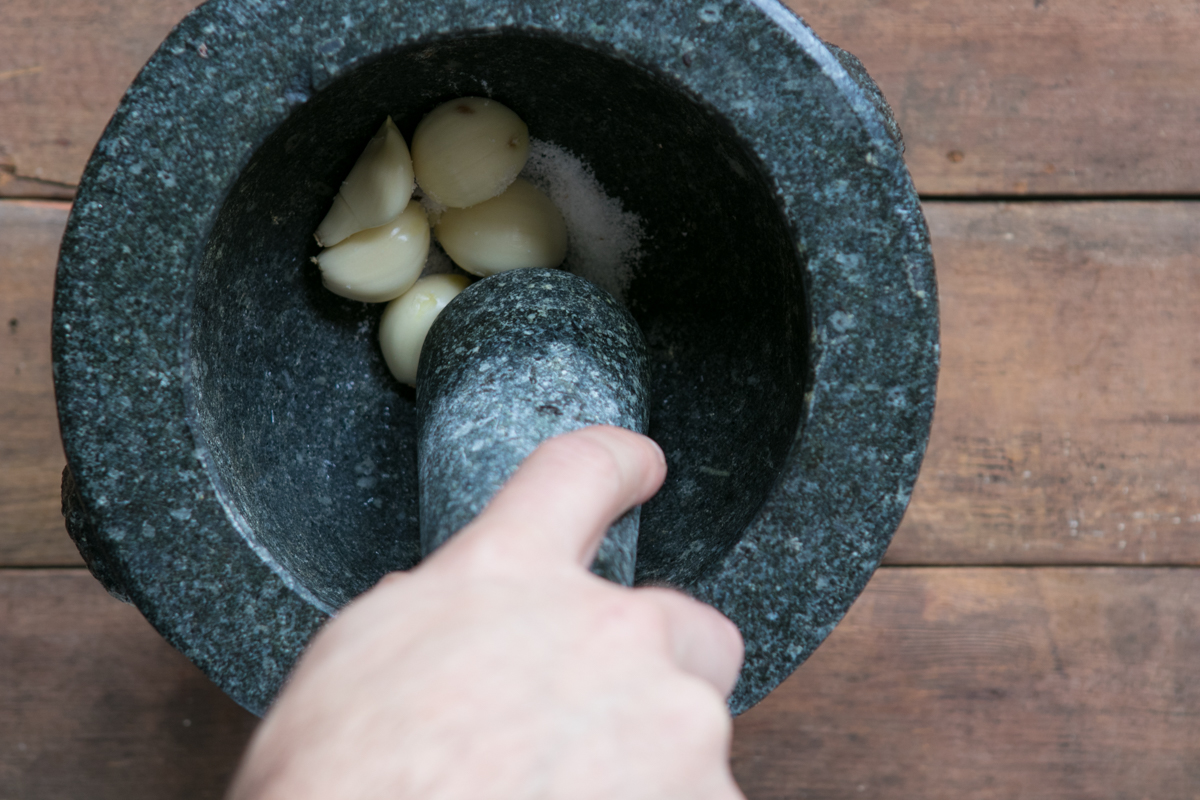
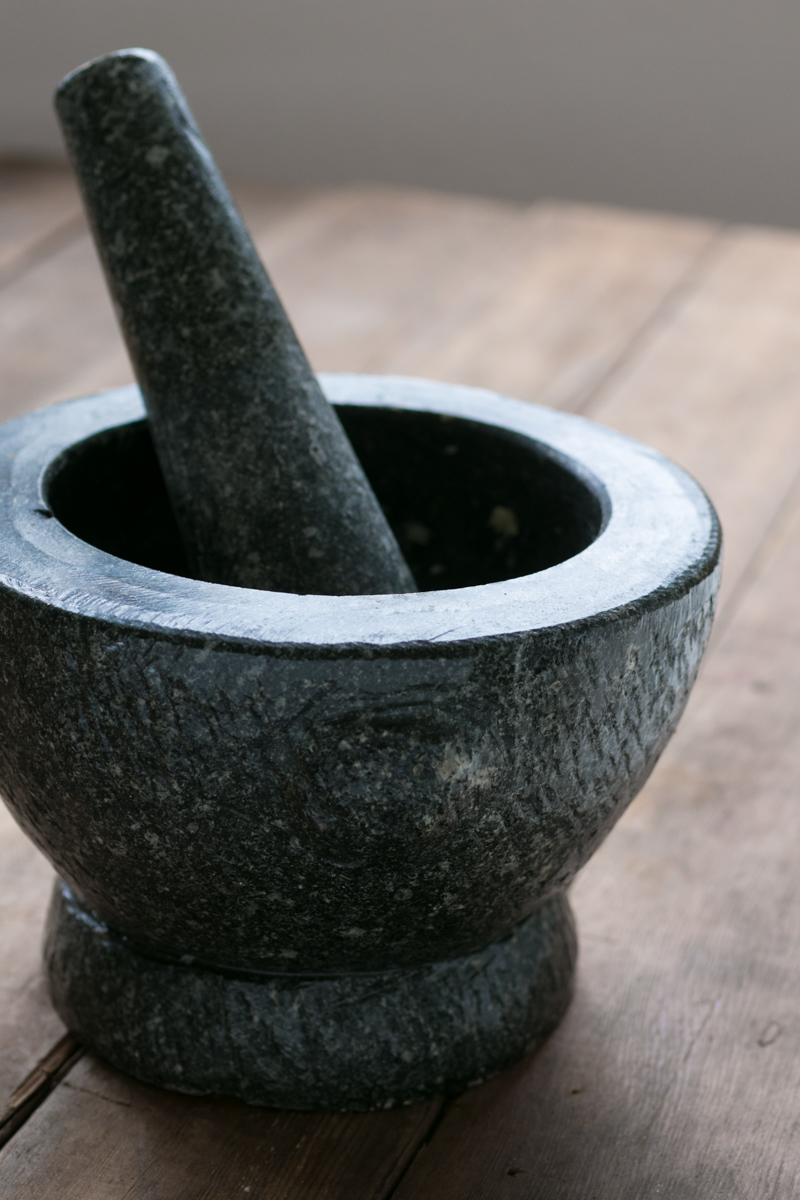
- Southeastern Asian Style Granite Mortar and Pestle: We like the options sold at Temple of Thai. It's the option pictured here. They're affordable, super high quality, and will last a lifetime.
- Continental French Marble Mortar and Pestle: A bit smaller capacity, but it will get most jobs done. Just make sure the inside is ground rough, not polished, to create the friction necessary.
- Mexican Molcajete: Is this technically a mortar and pestle? We'll have to ask the Mayans and Aztecs who invented it, but it's a big stone bowl and a smashing tool, so it's good for most recipes mentioned here. In this case, the stone is lava rock, or basalt, which makes it a bit lighter, and the natural air pockets call for a grinding motion over a pounding. But you'll get the hang of it.
Technique in Action: Provençal Aiol
There isn't really a recipe for many of the things that you would make in a mortar and pestle. Using this tool is developing a technique that comes from training your senses, developing true patience, and being willing to push your kitchen craft that extra 3-4% from really good to amazing. If you are making a curry paste or a pesto, the ingredients will change, but the effect of the mortar and pestle will be the same. So the best thing you can do if you are ready to take the stone-age plunge is to start with something simple. And nothing is simpler than a true Provençal aioli. If you've been to an Applebee's in the last decade or so, there is a very good chance that you've ordered some onion rings or a grilled chicken sandwich with something called “aioli” on top. The term became one of those words that food marketers got their hands on to describe gussied-up mayonnaise. It sounds a little bit like “oil” with a Super Mario Brothers-y accent on it, so it was fancy but familiar. In truth, aioli is something truly special and really distinct, and it cannot be made without a mortar and pestle.
If it is helpful, you can think of an aioli like a cousin of mayonnaise, because it will be effectively a sauce in which olive oil is suspended in an emulsion. But the thing that makes mayonnaise cool is that it is really an expression of the emulsifying capabilities of egg yolks, which is why any recipe for mayo talks a lot about the very very slow introduction of oil to yolks. (Incidentally, if you've ever worked up a hollandaise for a special brunch, you are making basically a hot, tart mayo.) Eggs are amazing, but aioli demonstrates that garlic is just as amazing. It turns out that if you really really break garlic down into whatever mushy glory exists beyond paste, it can emulsify with oil just like egg yolks do. As you may be able to imagine, getting garlic to this point takes time and patience, along with some coarse, kosher salt. If you are trying this out for the first time and are starting with 4-5 decent size cloves, mash them for 10 minutes and then keep mashing. At this stage, the juice of half a lemon should be added to add flavor as well as prevent any oxidizing on the now chemically-transformed garlic. After mashing some more to incorporate the juice, you can start adding the oil extremely slowly. Since you don't have a whisk (stone is a bad material for whisks, after all), this is going to take some time. But if you are patient, an off-white emulsion will form that is greater than the garlic, lemon and unctuous oil that make it up. You will have made a true aioli.
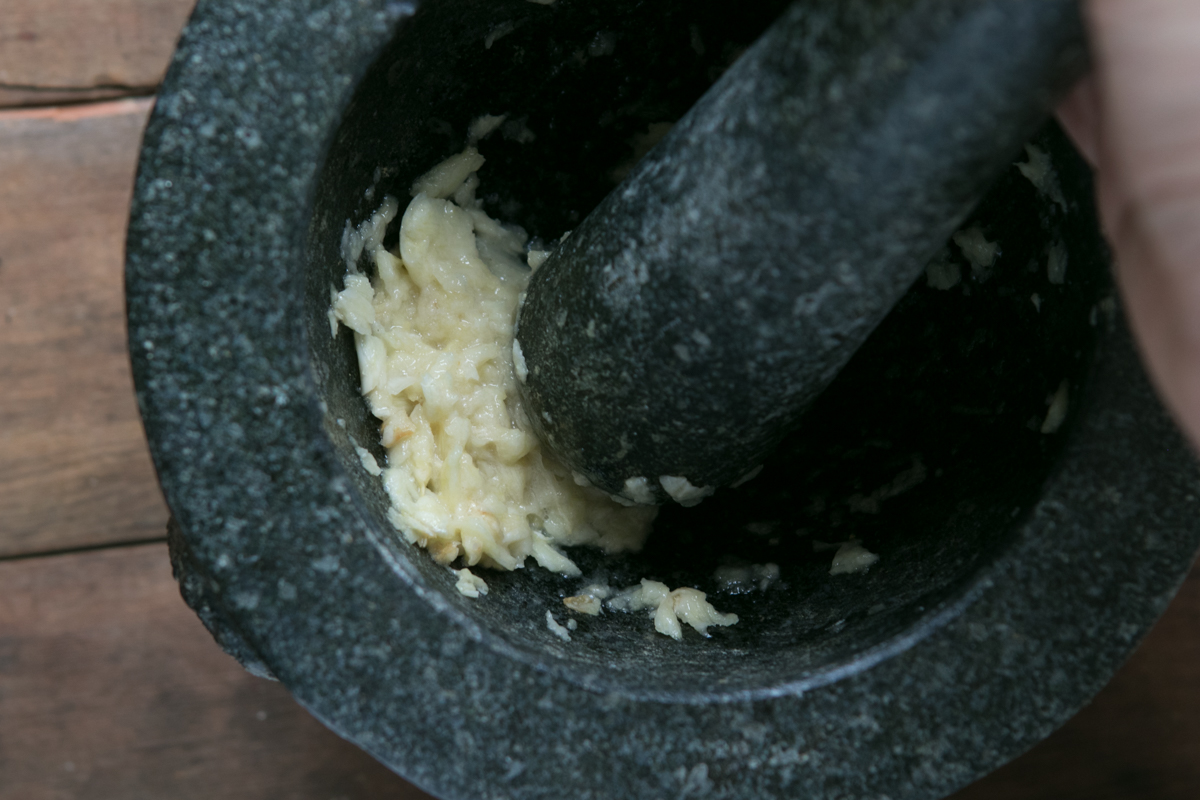
Its true, some traditional Provençal recipes do actually incorporate an egg, and if you introduced the well-mashed garlic into a separate bowl with that egg and whisked in the oil like you would a mayonnaise, you would be done more quickly. But the thing that comes out of the stone mortar is something special and unique. When you taste it––ideally on a perfectly grilled sardine alongside some fire-kissed French bread––you realize that this is not a condiment for the faint of heart. It is absurdly and unapologetically a celebration of garlic that hasn't been cooked but has been absolutely transformed by the friction of the stone.
Once you realize the power of the pestle and realize what it can do to garlic, you might gather together some classic Thai ingredients like galangal, lemongrass, green chilies (seeded if you, like me, have a realistic appreciation of spicy things), Thai basil, cilantro and shallots and get to pounding until you have a paste that is ready to add to some coconut milk, fish sauce and lime juice along with whatever animal or vegetable parts you think will benefit from an hour-long braise. After realizing that you can stop spending $100/month on take-out from your favorite Thai place, you can take your pestle in hand and realize that the culinary world is yours to command. Bases for braising, sofritos, chimichurri, Indian curries, relishes, chili pastes and powders, toasted spice mixtures––all kinds of foods that have usually come off of a cutting board or out of a food processor can now exhibit their extraordinary flavors with the fullness that comes from stony friction.
When you're ready to get started here are some recipes.
Thai Green Curry Paste
Combine the following in your mortar:
- 2″ piece of galangal or ginger, peeled and sliced into coins
- Two stalks of lemongrass slices thin
- Bunch of Thai basil
- Bunch of cilantro
- 2 seeded jalapeños
- 1 medium shallot, sliced
- 1 tbsp. kosher salt
Mash with pestle for 10-15 minutes, or until the lemongrass (the toughest ingredient in this recipe) is well processed. Add to 1 can (11.5–12 oz.) of coconut milk along with a 1/4 cup of fish sauce and the juice of a full lime to create a braising liquid that can go with chicken, pork, beef, tofu or largely chopped vegetables. (You can add up to a 1/4 cup of brown sugar if you prefer a sweeter green curry.)
Chimichurri
Wash the following herbs and pull the leaves from stems.
- 2-3 oz. flat leaf parsley
- 2-3 oz. cilantro
- 1-2 oz. mint
- 1-2 oz. fresh oregano or marjoram
- 1 oz. thyme
- 1 oz. chervil
Combine leaves together in a bowl and slowly add them to your mortar in small handfuls with 1 tsp. kosher salt. The leaves will spread and smear in the bowl. Once you have processed all the leaves add 2 tbsp. of olive oil and the juice of a half lemon (or more to taste) while still mashing the mixture. Serve on grilled flank steak or other grilled meats or vegetables.
Guacamole
If you have fallen in love with your granite mortar and pestle and wish to invest in a lava rock molcajete, you will have the tools and technique to make a traditional guacamole. You'll need:
- 2-3 fresh, ripe Hass avocadoes
- 1 large Jalapeno
- 1-2 cloves of garlic
- 1 bunch cilantro
- Juice of 1 lime
- 2 tsp. of kosher salt
First, roast the Jalapeno on the stove or grill until the skin in blackened. Remove the black skin and seeds. Begin by putting the roasted Jalapeno, the garlic and the cilantro along with the salt in the bottom of the molcajete and mash until well processed. Then, scooping out the avocado halves, mash them into the paste. Add the lime juice while processing or stir it in at the end.
Roasted Pepper and Pineapple Sauce
This one is an adaptation of a Caribbean style hot sauce––sweet and spicy. You could make this in the mortar or in a molcajete. You'll need:
- 1 red, yellow or orange bell pepper
- 1 habañero
- 1 cup of fresh pineapple chunks
- 2-3 cloves of garlic
- 3-4 allspice berries
- 10-12 whole peppercorns
- 1 star anise pod
- juice of a lime
- 1 tbsp. of kosher salt
Roast the pepper and either brown the pineapple in a saute pan or grill it well. Cut the habañero away from its seeds (use gloves for this!) Toast the allspice, the peppercorns and the star anise in a pan and add to the mortar. Crunch these into a powder. Next, add the garlic and habañero, along with the kosher salt and mash these into a paste. Add the roasted pineapple and the roasted pepper and process into a mash. Add lime and more salt if necessary. Depending on the sweetness of your pineapple, you can add a few tbsp. of honey. Slather all over a piece of grilled Mahi Mahi, or spoon into your next batch of fish tacos.