How to: Sharpen a Pencil with a Pocketknife
Let's say you've read up on the merits of woodcase pencils and you've decided to become an inveterate pencil carrier. You've sorted your B's from your HB's, you've picked your favorite finishes and ferrules. You've bought your dozen (or two) and are scribbling smoothly… until one day you find yourself with a dull point and no sharpener.
But if you've got your pocketknife, you're just a few minutes from a fresh point! Let's take a look at how to sharpen a pencil by hand.
How to Sharpen a Pencil with a Knife
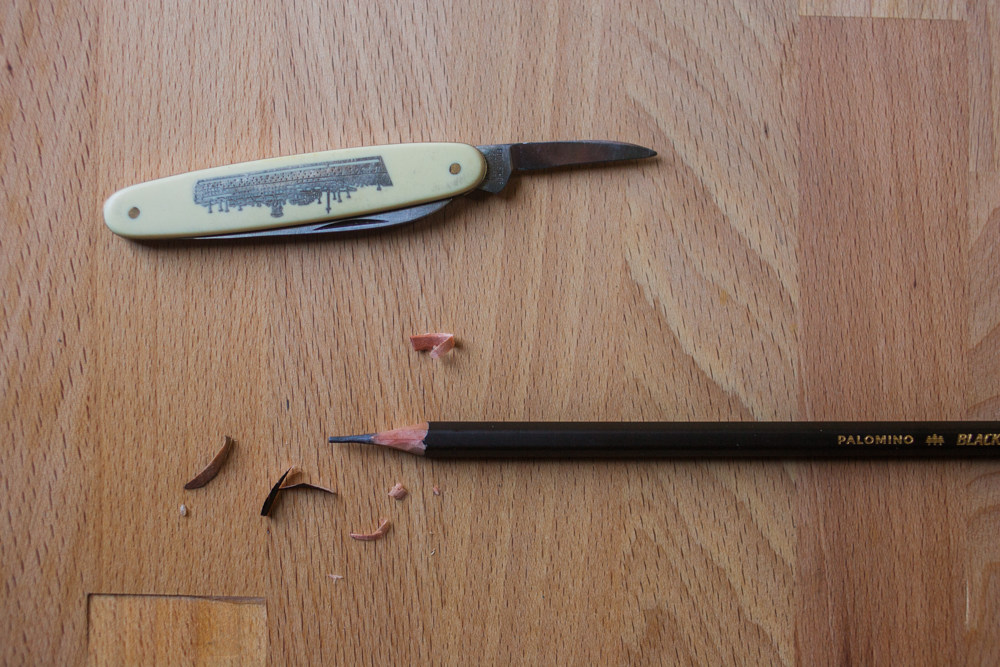
But first, some pencil parts
Here's a quick brush-up on the pencil anatomy terms I'll be using:
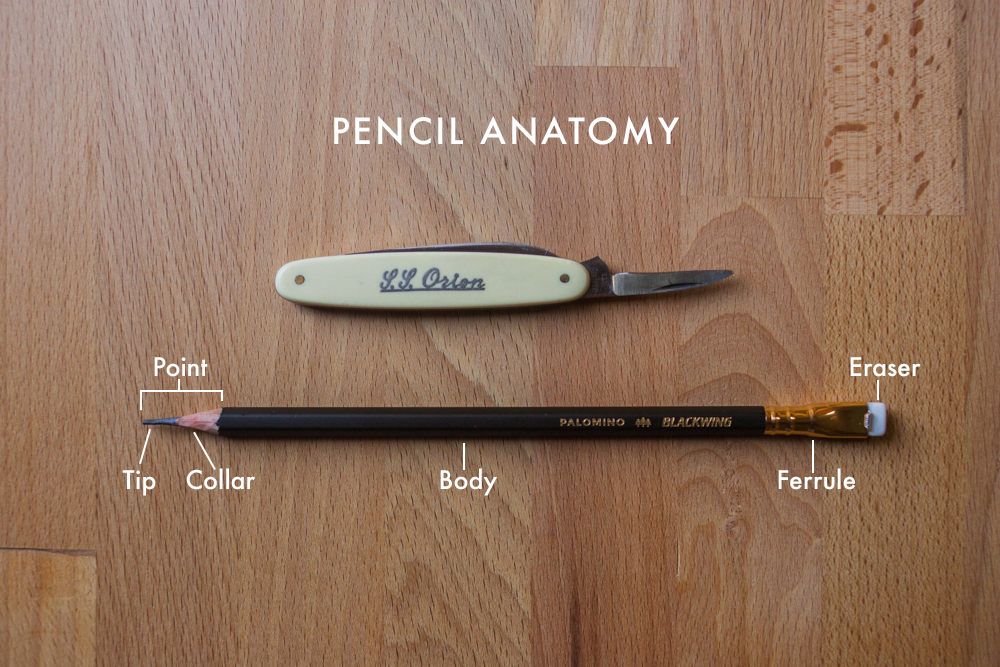
• Body: the main part of the pencil, i.e. everything between the point and the eraser. (Usually painted and/or lacquered.)
• Point: the whole cone beyond the body of the pencil, that is, all exposed wood and graphite. (I took this definition from David Rees, author of the informative and tongue-in-cheek How to Sharpen Pencils: A Practical & Theoretical Treatise on the Artisanal Craft of Pencil Sharpening for Writers, Artists, Contractors, Flange Turners, Anglesmiths, & Civil Servants.)
• Collar: the exposed wood.
• Tip: the exposed graphite.
How to shape your point
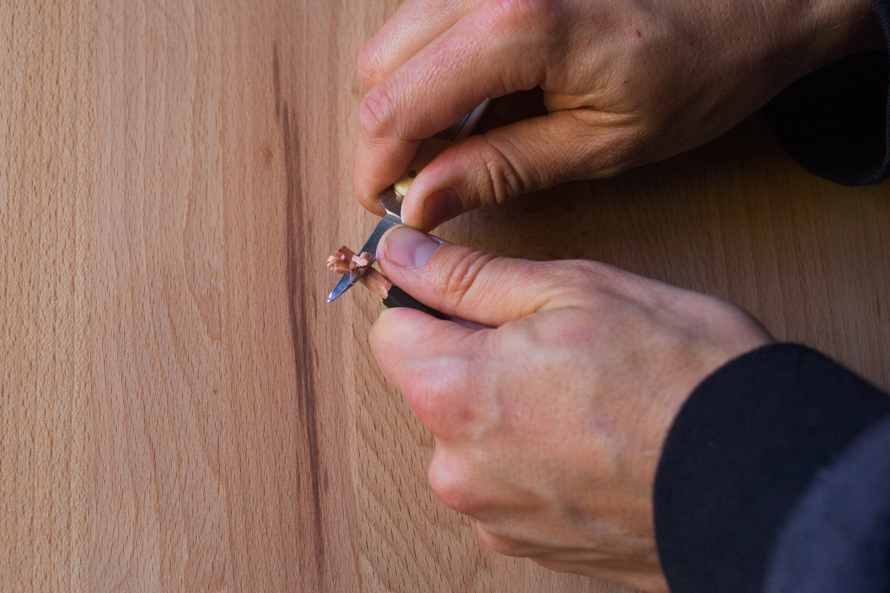
When you sharpen a pencil manually, you're working just like a sculptor, subtracting material to expose the workable point you're envisioning in your mind's eye.
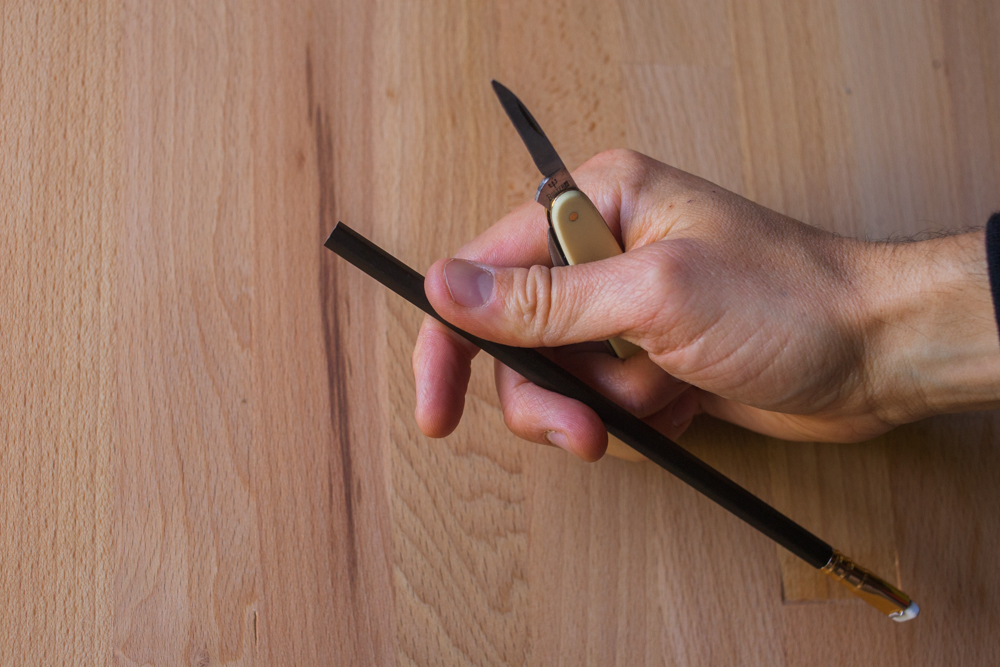
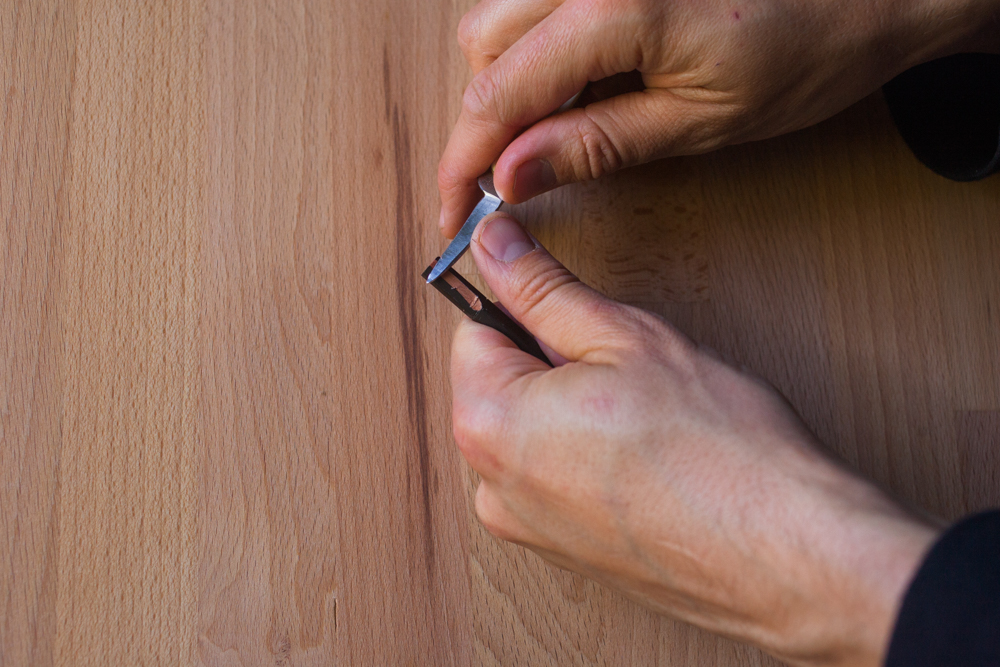
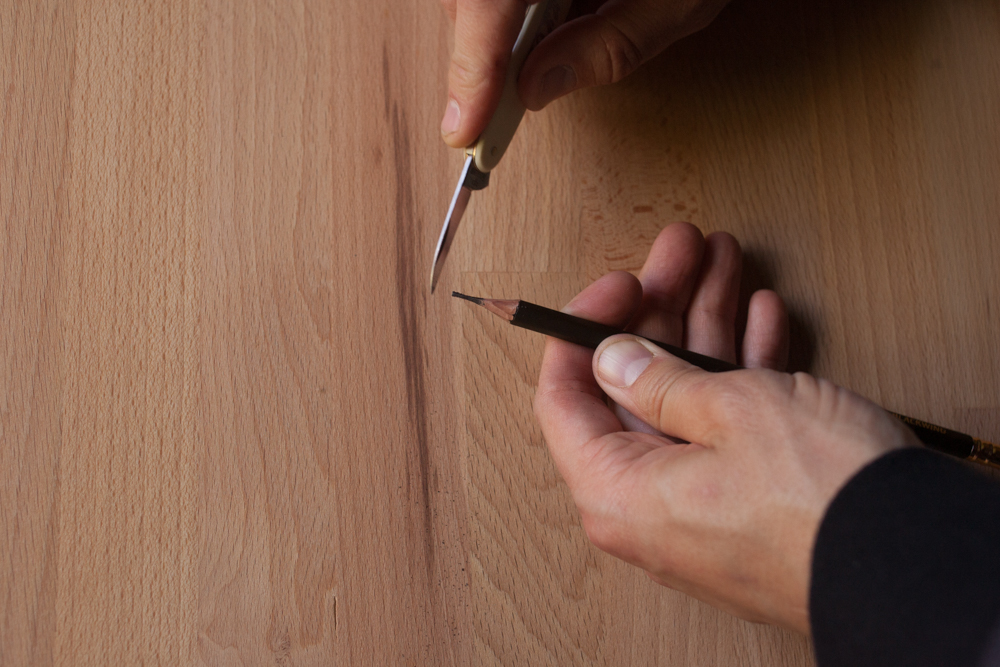
First, I like to make a guide for my collar edge. Not only does this make the base of the collar neater, but it also helps prevent the collar from creeping down the body of the pencil farther than I intended.
I do this by scoring a mark with my blade all the way around the body. I want my point to be about an inch long, so I score my mark about that far down.
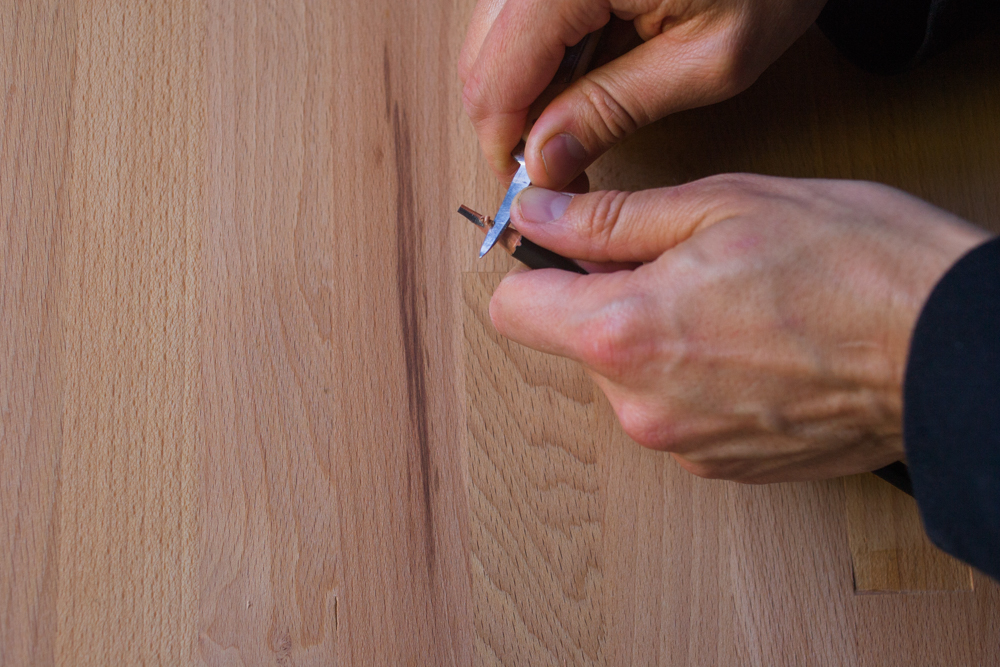
Next, I begin to expose the cedar by shaving off a little bit of the paint at a time, turning the pencil as I go as if it were on a really, really slow lathe. I'm right-handed, so I hold my knife handle with my right hand and apply pressure with the thumb of my left hand.
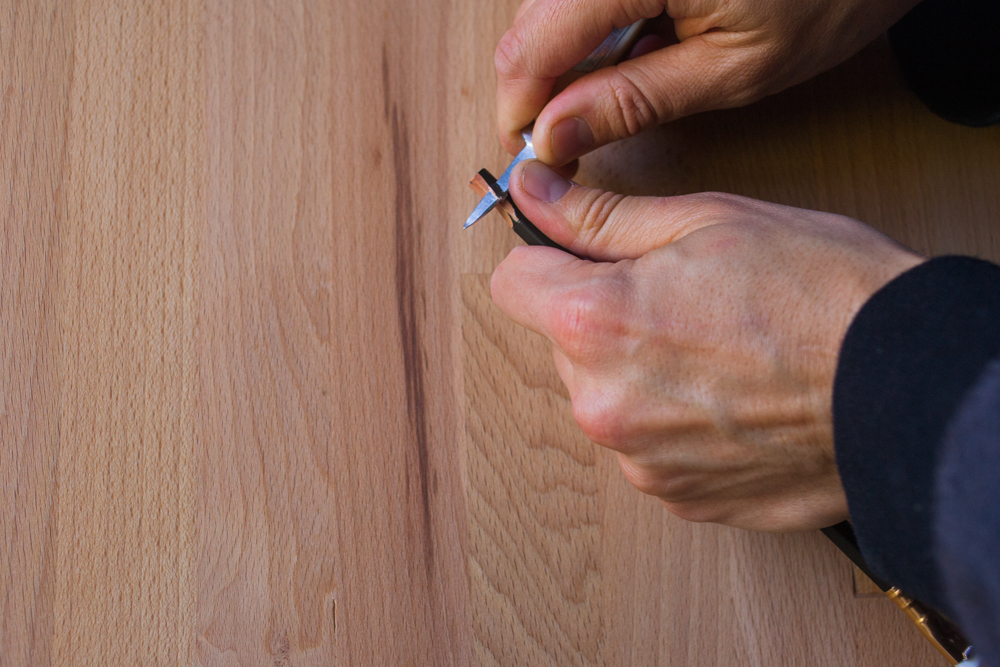
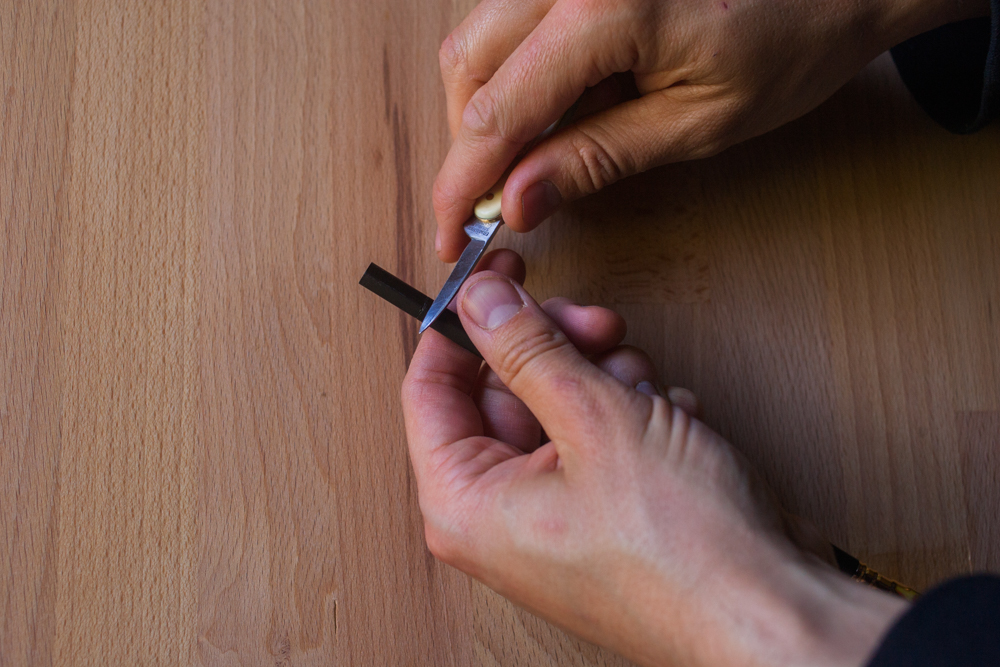
Now that I've shaved off a thin layer of paint, I'm applying just a bit more pressure to shape the cone towards the graphite. It's important not to rush this part, press too hard, or angle my blade too sharply, because this creates divots in the collar.
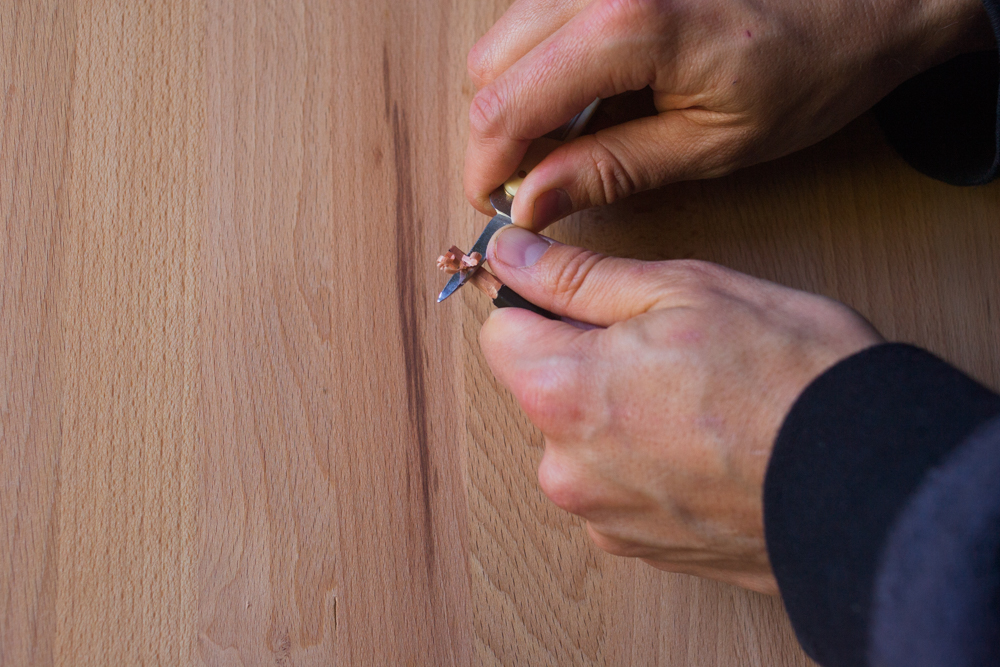
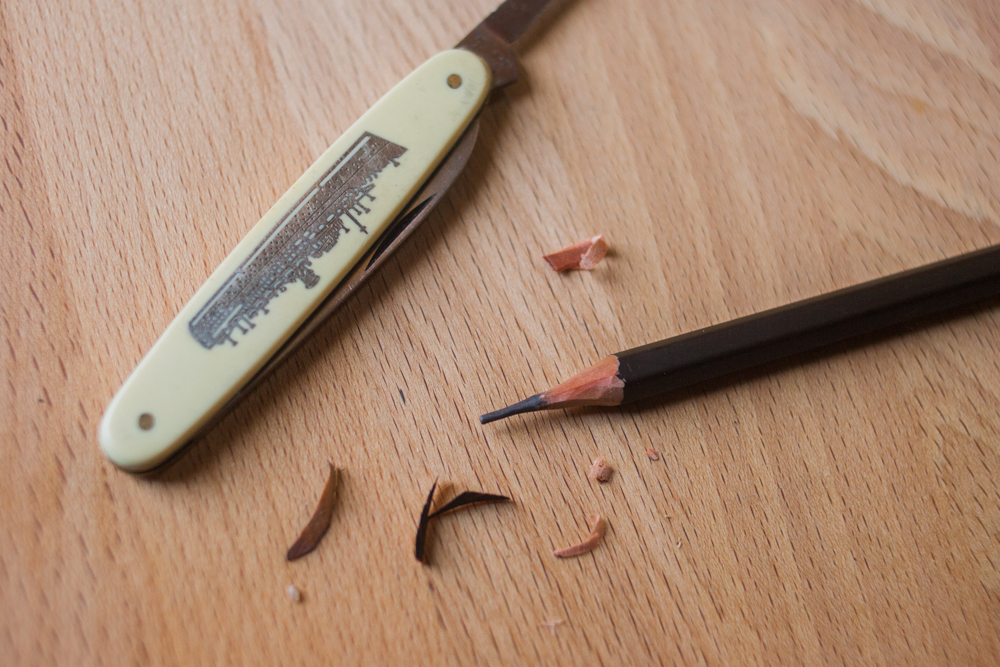
Now we're starting to see some graphite! I'll keep shaving off the cedar in little strips as I turn the pencil, making sure to ease off the pressure as I approach the tip to avoid breaking the graphite.
I like to shave it off in strips so I see a pronounced edge between the strips, then go around again and shave off the edges to make a smooth collar.
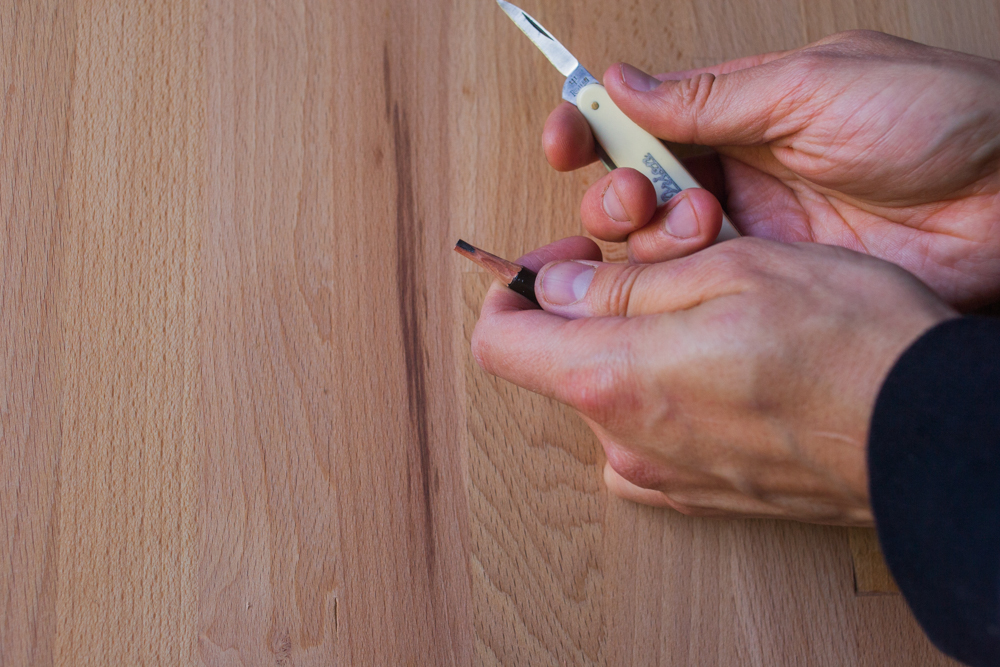
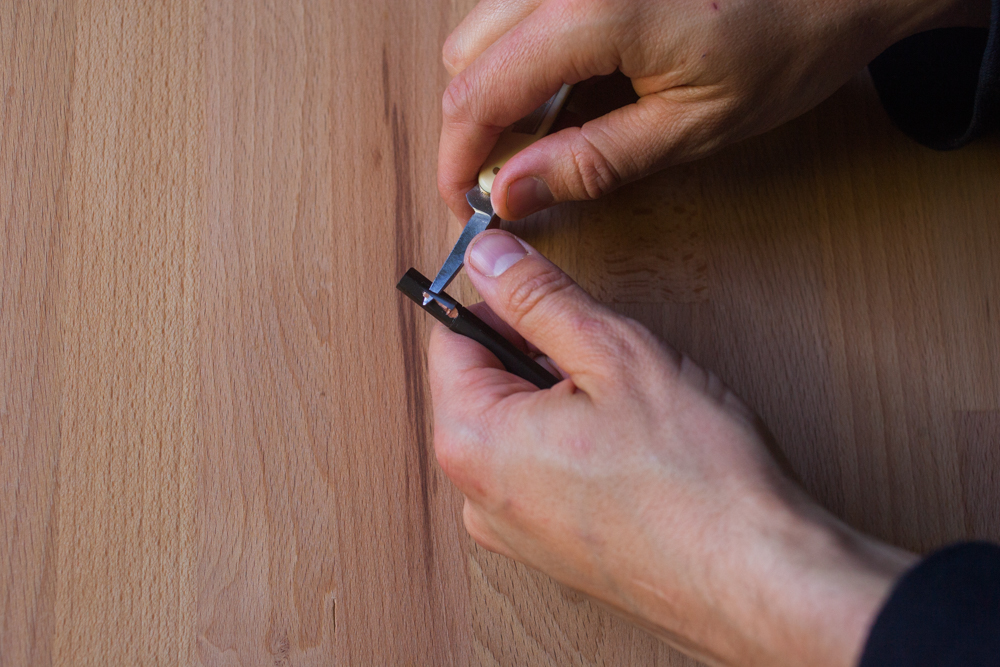
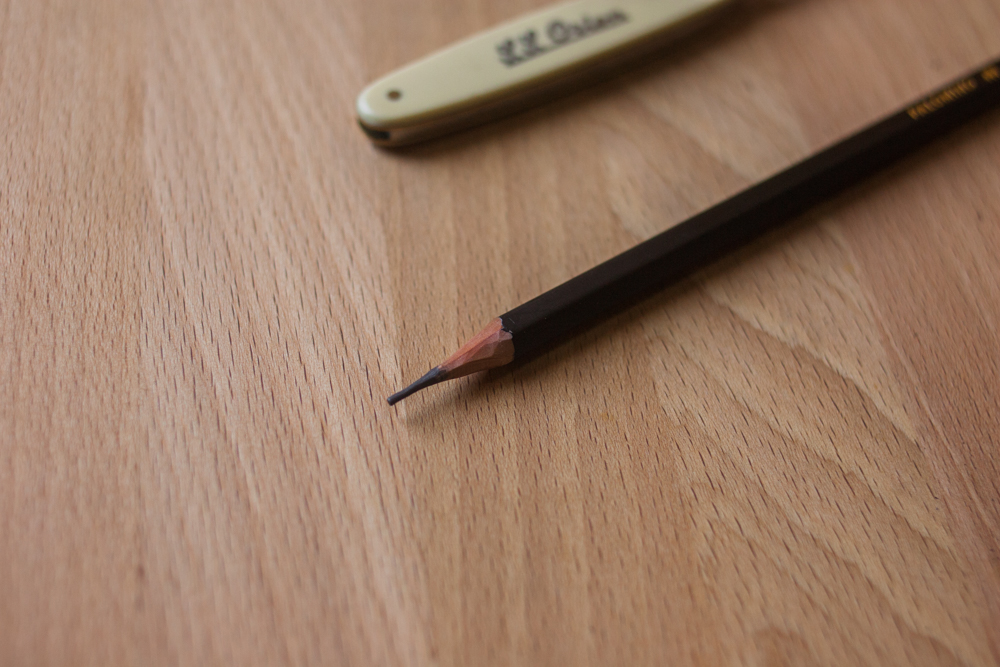
(Expose as much lead as you like! The benefit to a hand-sharpened pencil is that you can create a nice, long 3/8″ tip, which will take twice as long to wear down to the collar as a machine-sharpened pencil.)
Now that I have a nice bit of graphite exposed, I'll hold the blade at a 90-degree angle and lightly run scrape away the graphite until I have a sharp tip.
All that's left is to stand back and admire my craft, then put that pencil to work!
Some points to consider (Sorry, I couldn't resist)
• Use as sharp a knife as possible. Dull knives are just a bad idea in general!
But practically speaking, the more dull the knife is, the more pressure it needs to cut, and the more pressure you use, the more likely you are to break your carefully-crafted tip.
• Keep your blade at a really shallow angle. Start by putting your blade flat against the body of the pencil and raising it just a little bit.
• Don't rush the process! (If you want it done quickly, use a sharpener already!)

Final thoughts on the “why” of it all
I'll admit that 97% of the time, I use an electric sharpener. So, why go to all that trouble to painstakingly hand-sharpen a pencil point that's just going to get dull again within 500 words or so?
• Slowing down. I'll admit that this does not come naturally to me.
I spend my time running two businesses with my wife, an illustration studio and an artisan stationery and home goods brand, as well as raising a toddler and maintaining a lot of volunteer hours at my church. That's a lot of running around! Combine that packed schedule with being a pretty tightly-wound, type-A kind of person and I tend to get (in the words of Ferris Beuller) “a little keyed up.” Slowing down is a really healthy discipline for me, so I like taking the time to do things that I can't rush.
• Improving knife skills. I've always loved pocketknives, and good knife skills are ridiculously handy. So I'll take every chance I can get to improve my knifecraft.
• Customization and versatility. When you use a pencil sharpener, you're bound by default to whatever kind of point it was designed to make. This is fine most of the time! But sometimes it's handy to have an extra-long point, like in the case of classical drawing or writing a book longhand.
Also, with this method, you can sharpen anything that doesn't fit your standard sharpener, like carpenter pencils.
• Beauty. One of my favorite quotes on design is from R. Buckminster Fuller: “When I'm working on a problem, I never think about beauty. I think only how to solve the problem. But when I have finished, if the solution is not beautiful, I know it is wrong.”
A dull pencil is a really simple problem, and hand-sharpening it may be a really small thing in the long run, but there's something kind of beautiful about shaping a point by hand.