Messy Desk? This DIY Cable Management Setup Beats Plastic Trays For A Fraction Of The Price

Difficulty: Easy
Time: 30–45 minutes
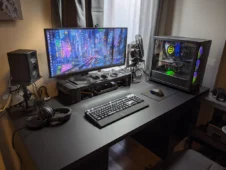
A messy desk doesn’t just look bad but it also quietly drains focus. Loose cables catch your eye, collect dust, and turn simple tasks into distractions. Yet the usual response is always the same: buy another plastic tray, another pack of clips, another roll of zip ties.
Scroll through YouTube desk setups or Reddit battlestations and you’ll see dozens of products doing the same job in slightly different ways. The irony? Most of them solve a problem that can be fixed without buying anything at all.
The solution below relies on stuff most homes already have: scrap wood, cardboard, Velcro from old packaging, and a bit of common sense. No plastic systems. No wasted money. Just clean, invisible and cheap cable management that actually lasts.
Tools Needed

- Drill (with a basic wood bit)
- Screwdriver or driver bit
Optional (nice to have, not required):
- Measuring tape or ruler
- Sandpaper (or any rough cardboard edge)
- Marker or pencil
Why Store-Bought Cable Management Usually Fails

Plastic trays look neat on day one, then slowly sag under power bricks and adapters. Adhesive clips loosen as dust builds up or temperatures change. Zip ties lock everything in place, turning future upgrades into a cutting job.
The real issue isn’t organization, it’s where the cables live. When cables hang freely or rely on glue, gravity eventually wins. Mounting cables structurally by using wood and fixed surfaces removes the stress completely.
Household Materials That Work Surprisingly Well For Cable Management

You don’t need a shopping list. Look around your house first:
- Scrap wood or an old shelf piece → becomes a cable spine
- Velcro straps from electronics packaging → reusable and adjustable
- Cardboard tubes (paper towels or wrapping paper) → perfect cable sleeves
- Binder clips → temporary cable guides
- Masking tape + marker → simple labeling system
This approach isn’t about looking clever—it’s about creating a cheap cable management system using materials that won’t fail over time.
Build a Simple Cable Spine (The Core of A Cable Management System)

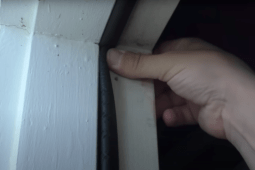
Cut a strip of scrap wood to fit along the rear underside of your desk. This becomes your cable “spine,” supporting everything above it.
Pre-drill your holes before mounting. This prevents the wood from cracking and makes the screws hold better. A quick trick: wrap tape around your drill bit to mark depth so you don’t drill too far.
Once mounted, this single piece replaces trays, clips, and adhesive mounts entirely.
Under Desk Cable Management: Let Gravity Do the Work

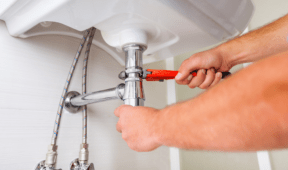
Mount your power strip to the wood spine if possible, or rest it securely on top of it. The pre-drilled holes can also double as anchor points—simple screw-in hooks or bent wire let you hang and guide cables exactly where you want them.
Route monitor, PC, and accessory cables over the spine instead of letting them hang below. Secure everything loosely with Velcro, not zip ties, so cables can move and adapt over time.
If cables pass through the desktop, smooth the edges with sandpaper or cardboard—friction slowly destroys insulation.
Label Once, Save Time Later

Wrap masking tape around cable ends and write directly on it. For bundles, slide cables through a cut paper towel roll and label the outside.
It takes one extra minute now and saves real time the next time you swap a monitor or move your desk.
Why This Cheap Cable Management System Actually Works

This cheap cable management system holds up because it avoids the failures built into most cable management products. There’s no plastic to bend, no glue to loosen, and nothing that forces you into a permanent setup. You can adjust, upgrade, and re-route without starting over. This isn’t something you buy and need to work around. It’s something you build and upgrade later if you ever need to.