DIY Irrigation System: Create a DIY Sprinkler System for Watering Your Garden
What’s not to love about a vegetable garden at the zenith of the growing season? More than a sum of its parts—a patch of dirt with some roots sending shoots out of it—a garden gives more than it takes. The average American spends 90% of his or her day indoors, and I use my garden to beat that statistic. I revel in its smells and textures and the satisfaction that comes from the results of tangible work. However, there are certain tasks I find needlessly tedious, and when I expanded my garden by about a hundred square feet this year, I began to count manually watering it with a hose as one of those tasks to eliminate with a timesaver.
But after I decided to set up my own DIY irrigation system, I quickly figured out that I didn’t want to use soaker hoses (too expensive for the quantities I’d have to buy) or a rigid structure of PVC pipes (too permanent for the constantly changing set up in my current plot).
The solution was a pleasant surprise:
The trick to a DIY irrigation system on a budget? PVC clear vinyl tubing.
Why?
1. It’s really cheap: roughly 13 cents per inch, with inexpensive plastic couplings.
2. It’s really easy to use: snip it off, snap together. (No need for the hacksaw.)
3. It’s really flexible: easy to replace (pop it off and cut a new line), easy to arrange and rearrange.
Here’s how I set up my irrigation system.
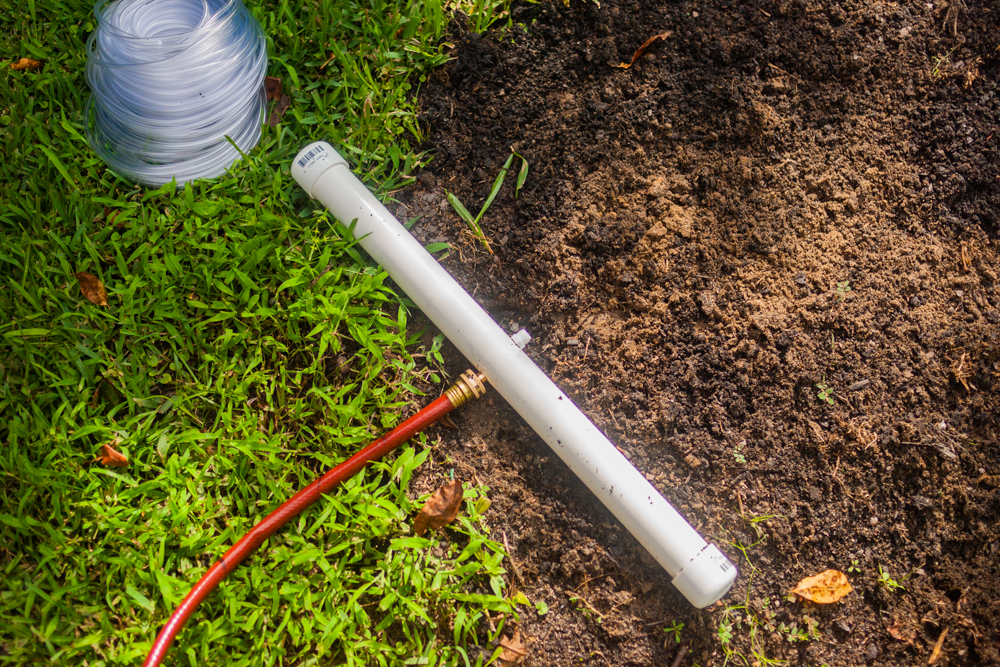
You’ve got two essential parts to a irrigation system: a reservoir, which will be a small length of larger pipe that you’ll connect to your water source via a hose, and the lines of clear tubing that will deliver small amounts of water directly to the root system of your plants.
1. The reservoir
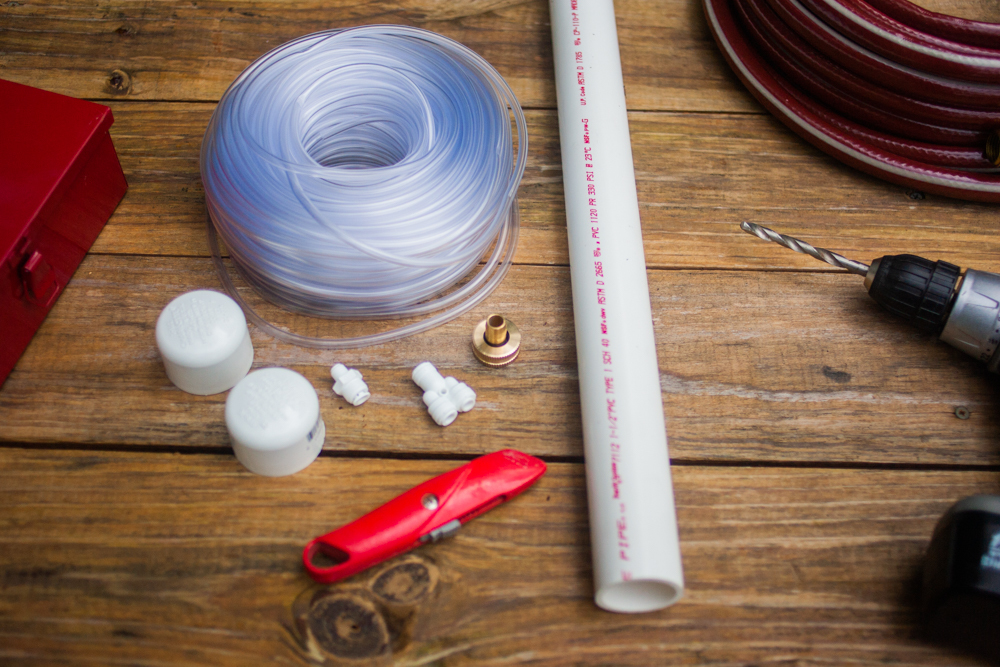
You’ll need:
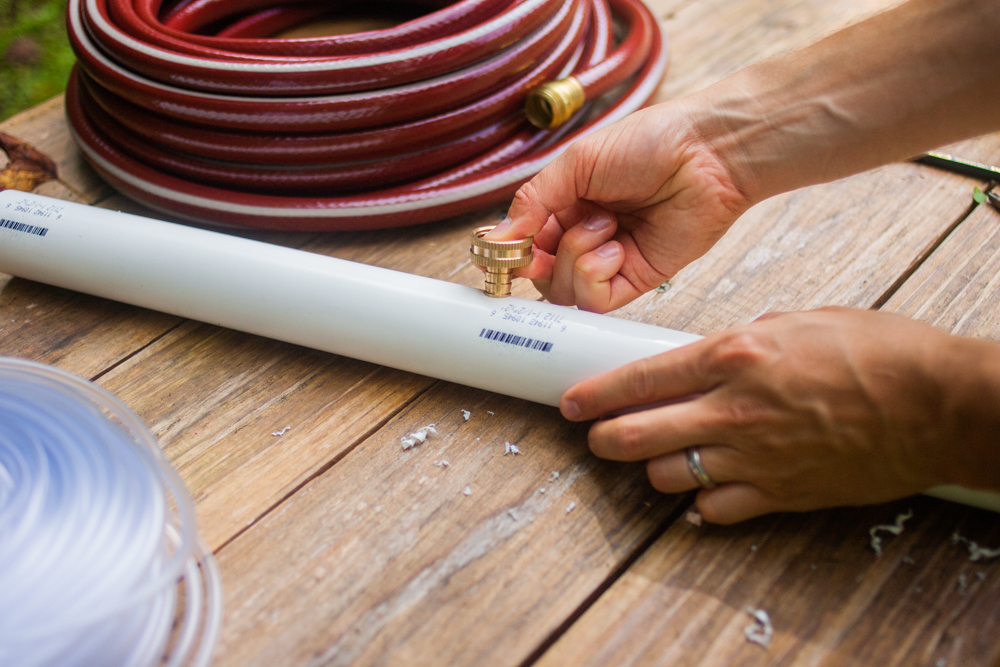
• 2-foot section of 2″ diameter PVC pipe with caps for both ends
• Swivel hose adapter (brass): 3/4″ FHT (female hose thread) x 1/2″ barb end
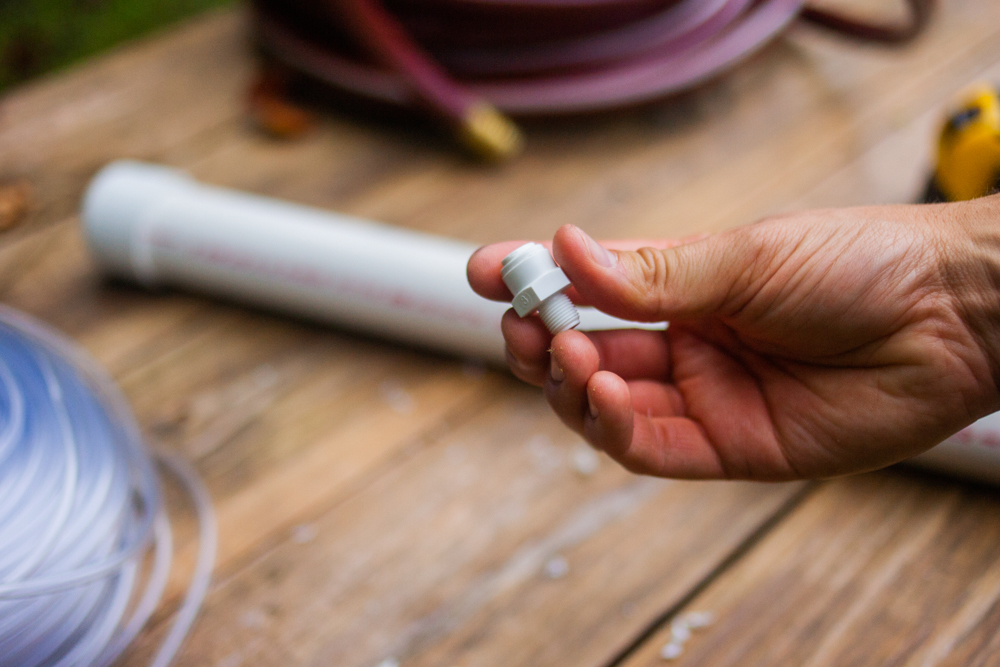
• Pipe reducer coupling (plastic): 1/4″ FIP (female international pipe) x 1/8″ FIP
• Drill with 1/2″ bit and 1/4″ bit
• Rubber mallet
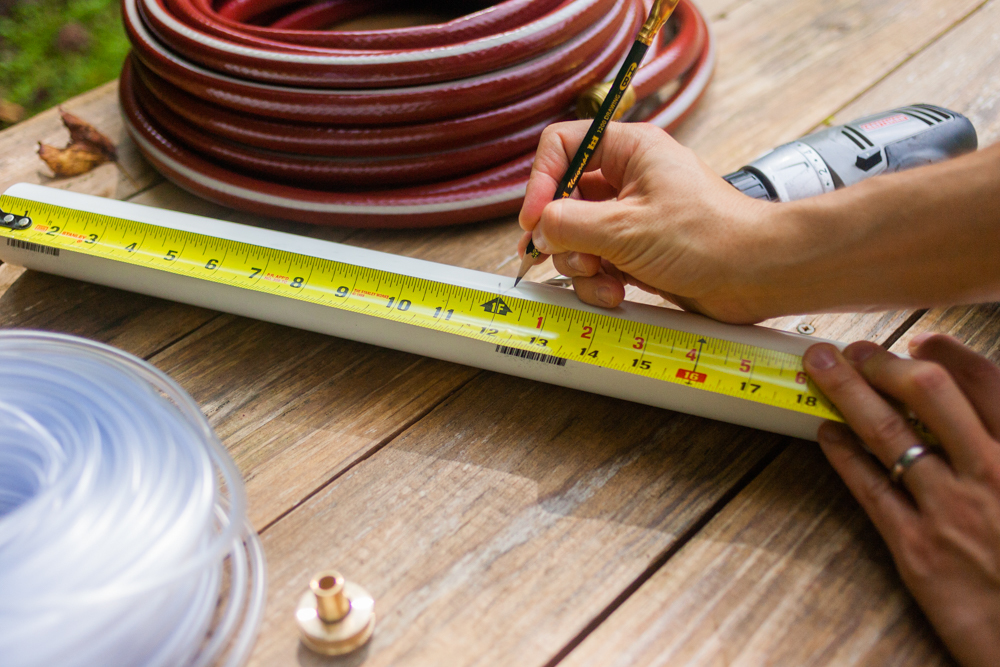
• Tape measure and pencil
• Silicone caulk
Measure halfway and drill a 1/2″ diameter hole. Use your rubber mallet to fit the barb end of the swivel hose adapter snugly.
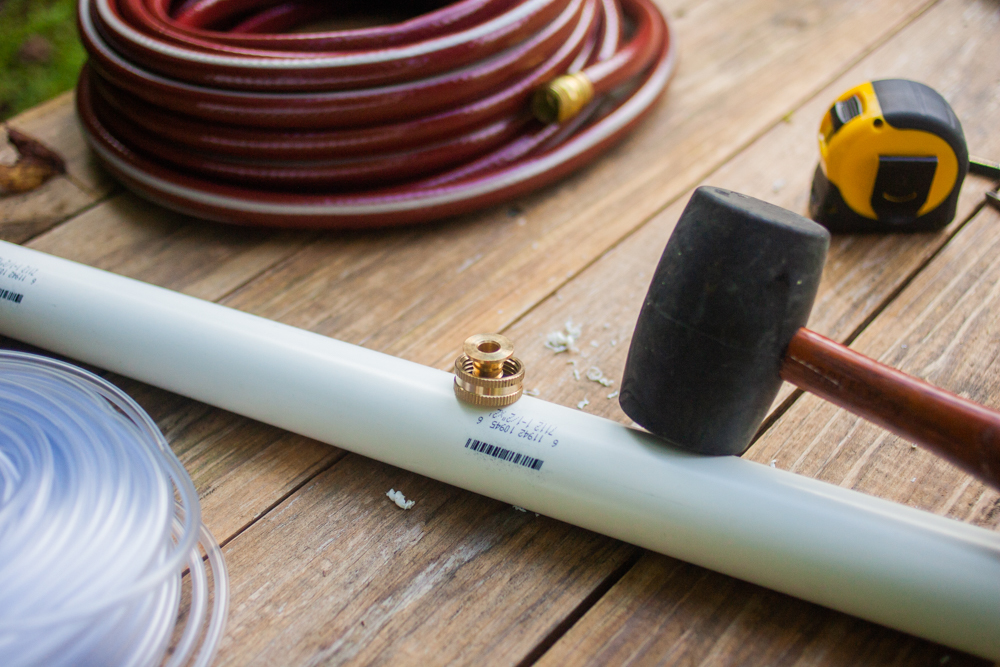
Drill a 1/4″ hole and screw the pipe reducer coupling in snugly, then fit the caps on either end of the pipe.
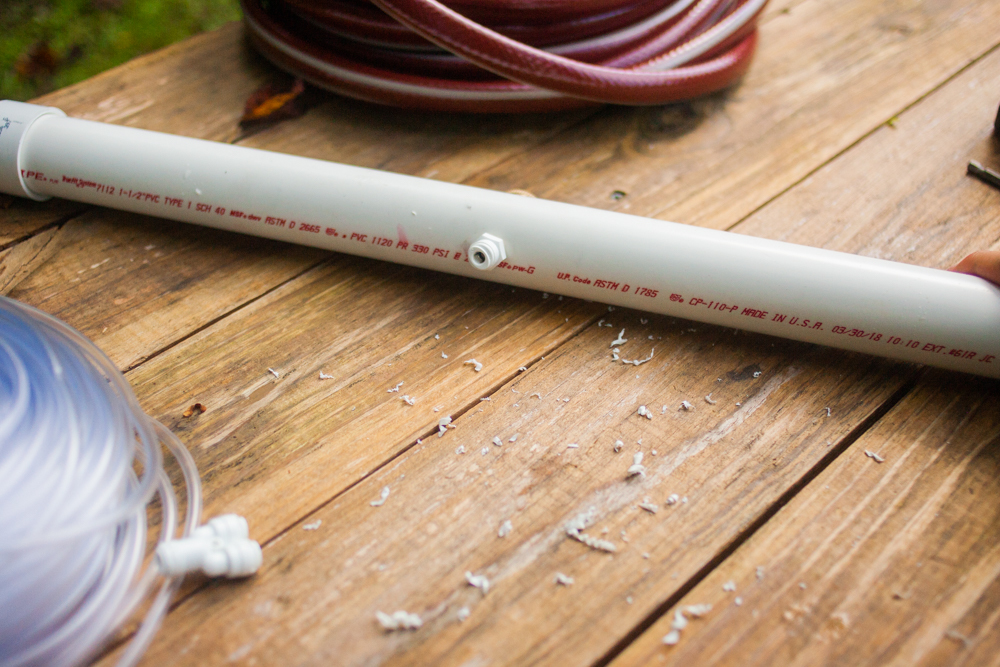

Seal the seams with silicone caulk as needed.
2. The line
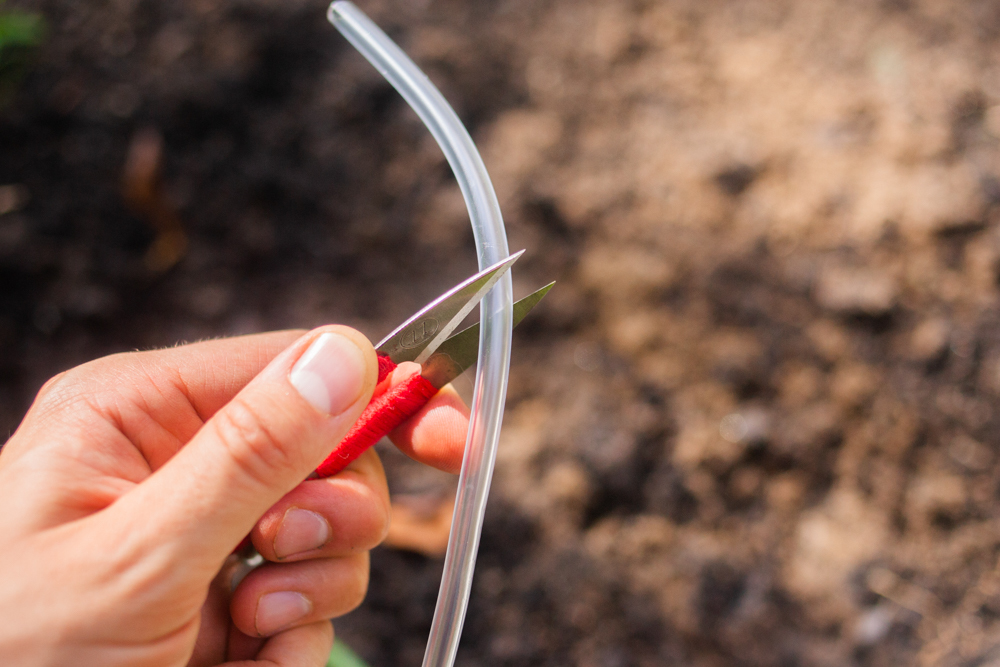
You’ll need:
• 1/4″ OD (outer diameter) PVC clear vinyl tubing
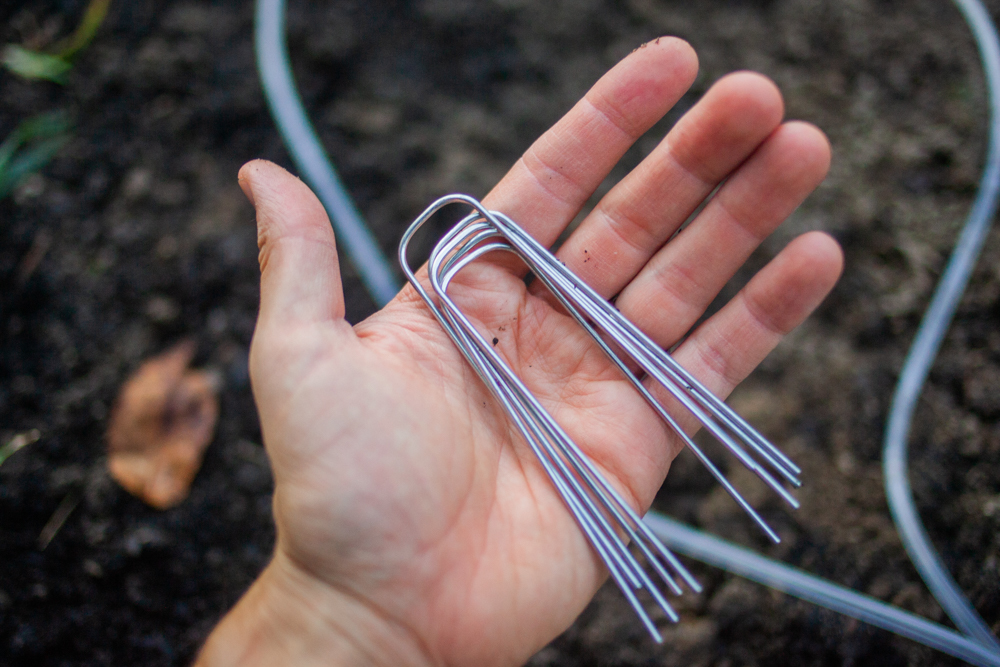
• Landscape fabric pins
• 1/4″ OD couplings and splitters, if necessary
• Scissors
Hook up your hose to the pipe reducer coupling and you’re ready to get cracking!
Now, here’s where my hard-and-fast plans will likely diverge from yours.
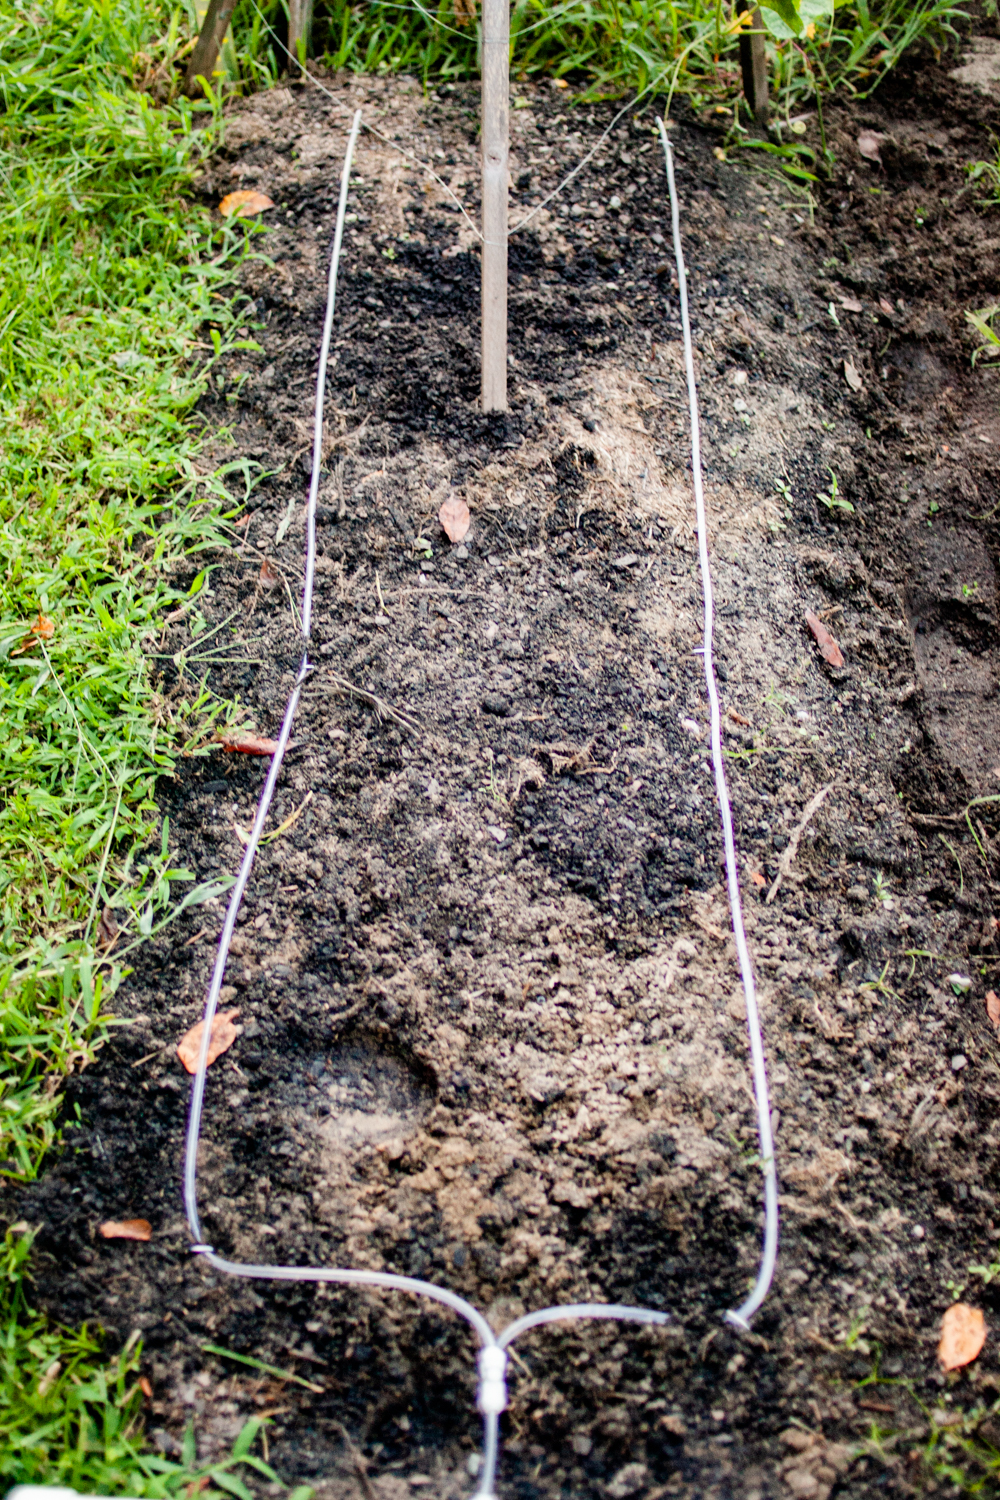
At the time of this article, I only need to set up irrigation for one prepared bed—that is, two rows of drip irrigation—so I cut a small section of tubing, attached it to a two-way splitter, and ran my two lines down the length of the bed.
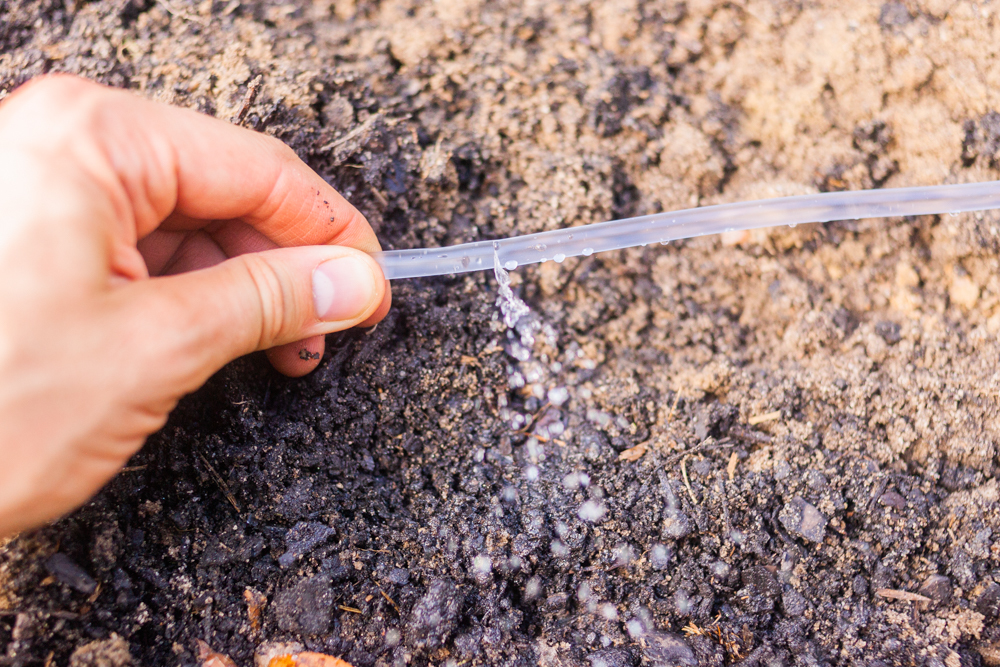
The final step is to poke small holes along the length of the tubing where I want the garden watered. The spaces between the holes will be slightly different in each bed based on how far apart each plant will be.
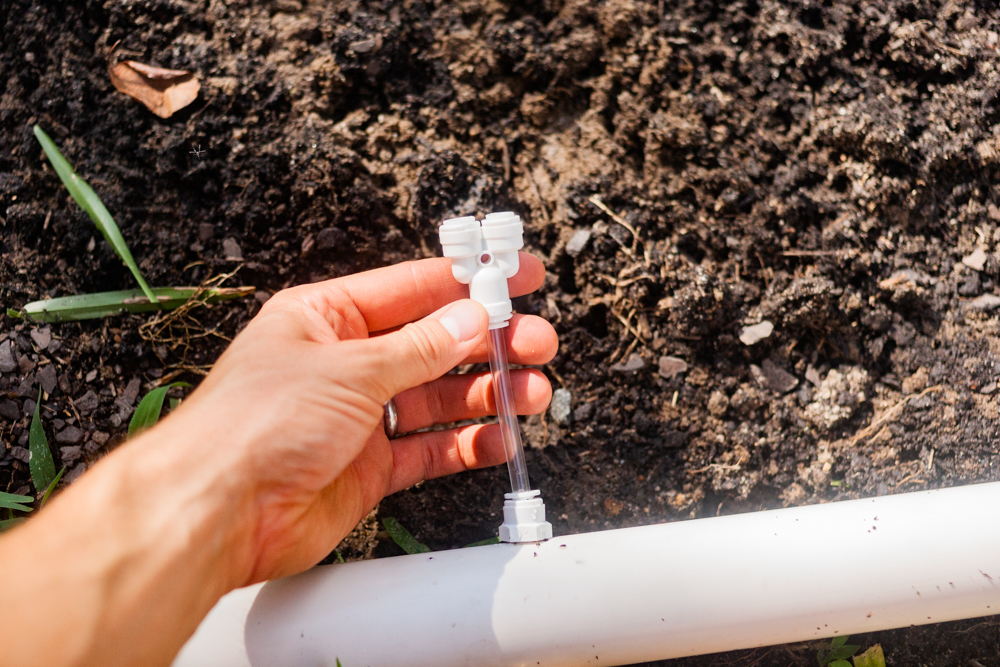
In order to keep the lines to stay where I want them, I used landscaping fabric pins:
Expansion will be easy: I’ll most likely move my reservoir closer to the middle of the garden (it’s attached to a 20-foot hose to help facilitate this) and install more pipe reducer couplings in the reservoir from which to run more clear tubing lines. I’ll add couplings with spigots to lines where I want to occasionally halt the flow to beds with crops that don’t need as much watering, like beans.
A final note:
This drip irrigation system does have a limit to the length of tubing you can use before it becomes too long for your water pressure to reach the farthest extent of the line—but it’s a bit beyond my grasp of physics to know exactly where that limit is.
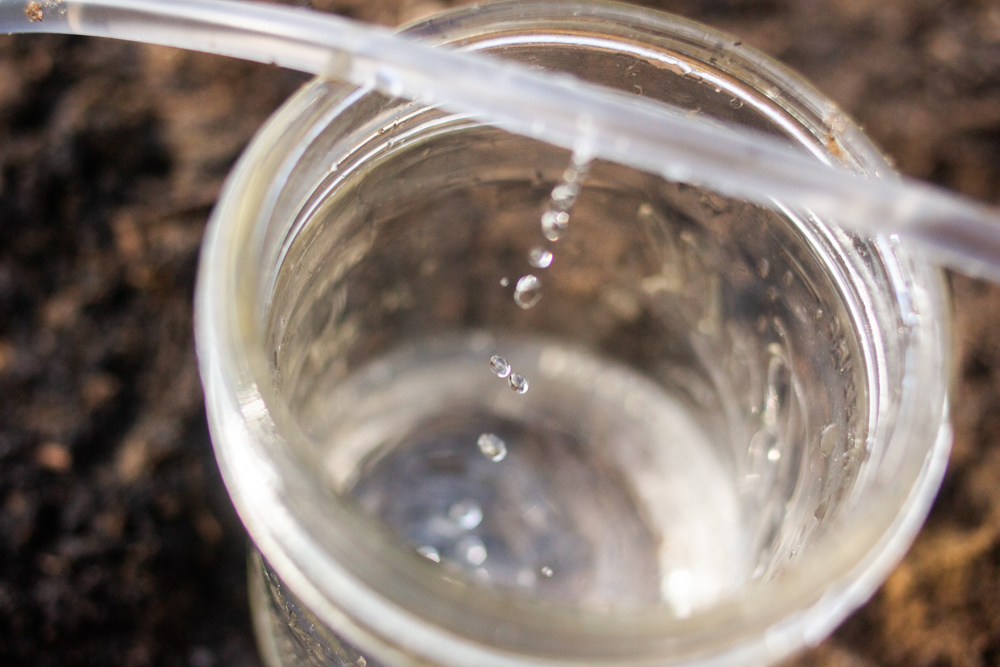
However, I will say that this worked very well with my relatively low-pressure rain barrel, which I plan to use in my expanding drip irrigation system until I’m forced to use my higher-pressure hose spigot. As a test, I hooked up my rain barrel to this system and it filled up this mason jar to the 1 cup line in just over three minutes. That ain’t too shabby, and it definitely beats watering manually with the hose every day during a dry spell.