How to Remove Silicone Caulk
Silicone caulk is used in many different home renovation and construction projects. It is built to be a strong adhesive, to hold two surfaces together with durability and stability. Though its toughness is a great trait, it can present issues when it comes time to remove the caulk.
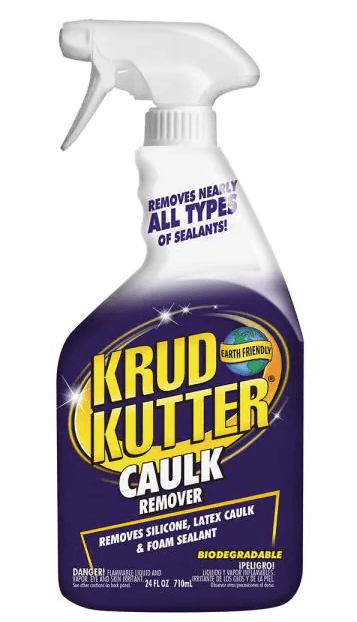
There are two schools of thought on how to handle silicone caulk. The first is to use a commercial product to loosen the caulk so that it can be scraped away. Then there are products that actually dissolve the silicone entirely.
Depending on which method you choose, the impacts can be quite impactful. Because of the strength of silicone, it helps to know what the best methods for removing it are.
Why is it so Tough to Remove Silicone Caulk?
To understand the strength of caulk, we must first understand the chemistry behind the silicone. Oxygen and silicon are the primary elements and they form the backbone of the compound called siloxane polymer. The polymer combines other elements like hydrogen and carbon to form a matrix.
Depending on which elements get mixed in with that siloxane polymer, the resulting silicone can be processed into liquid and solid forms. When the caulk cures, the polymer chains will cross-link. It is important to know that there is no solvent that will dissolve polyurethane, so the same is true for silicone caulk.

How a Silicone Solvent Works
For the most part, you would want to use a silicone solvent to do the job. When a solvent tries to dissolve a solute, it actually breaks down the solute into molecules or atoms that disperse in the solvent itself.
Because those cross-linked bonds within the caulk are so strong and can’t be dissolved, there are some chemicals that leave those bonds alone and actually break the polymer chains into much shorter molecules. Think of it as a digestion, not a dissolution.
Basically, digested silicone caulk can be emulsified, similar to the way fats work in water. When it comes to removing caulk from a surface in your home, this method will work just fine.
How to Remove Silicone Caulk
There are two methods that we are going to explore here. The first will be to soften the caulk and then remove it thereafter. The second method will be to use a digester to break down the silicone caulk. Let’s go over how to use a softener first.
Step 1: Apply the Softening Agent
One of the most effective ways to remove silicone caulk is to soften it and then peel or scrape it off. There are a few different softening substances out there. The most affordable and easiest to implement include alcohol, vinegar, and WD-40. Should you need something a bit stronger, you can either go with isopropyl alcohol or contact a professional.
When you have made your choice on which one to use, apply the agent thoroughly and ensure that you cover the entire area of the silicone caulk. This method requires some patience as well. You will need to let the softener work at the caulk for a few hours in order to work properly.

When you have let the solvent sit for the requisite amount of time, test it out by feeling its softness. Give it a poke; if it feels soft and loose to the touch, you should be able to effectively scrape and remove it.
Step 2: Scraping with a Sharp Edge
After allowing the silicone the proper time to soften, you will need to use a sharp edge to get the caulk up. You can get away with using a pocket knife, a utility knife, or any other kind of sharp blade. That said, there are more effective tools for doing the job.
A putty knife is probably the most effective tool for getting the job done. It has a much wider, flat blade that can get under a wider swath of silicone. You want to apply a good amount of force but make sure that your blade doesn’t gauge the surface beneath. Remember, you want to remove the silicone caulk, not damage what lay beneath.
You can also try to peel back the silicone with your finger. That gives you a good starting point in which to scrape. Just start at one end, peel back slowly, and work your way over the entire strip patiently. There is one more thing that you can do if this method doesn’t quite work.
Step 3: Heating the Silicone Caulk
If you are dealing with particularly difficult silicone, there is one final solution: heat. Again, heat will not break down the silicone but it should work to effectively soften and loosen it. If you don’t want to use a digestor, solvents and heat make for an effective combination.
A heat gun is the most effective means for implementing heat. Should you not have access to a heat gun, a hairdryer will work just fine. Just make sure that you keep the device moving evenly across the silicone and for no more than two minutes at a time.
Test the softness and pliability of the silicone after those two minutes. If it still isn’t soft enough, you can keep trying. Or, if you want a safer route, bring in a professional to ensure the safest possible removal.
Step 4: Remove Any Residue
When you have successfully removed the silicone, there should be a bit of residue beneath. Be aware that the residue may include some of the adhesive material that helps the caulk into place. You may also come to find grime, dirt, and even worn-out paint underneath.
It is important that you remove the residue as it can create an uneven surface. Uneven surfaces make it extremely difficult to apply new caulk should you need to.

You can scrape some of that residue off using your putty knife, utility knife, or chisel. Just make sure not to gauge the surface beneath. When you have scraped away the residue, it is time to use some old-fashioned soap and water. Continue to scrub until you find no traces of the silicone leftover. Should you notice signs of black mold growth, call a professional immediately.
Method 2: Using a Digestant
The more practical method is to soften the silicone and scrape it up. But there are some manufacturer-grade silicone digestants out there as well. This method is not necessarily recommended but can be highly effective.
Step 1: Find a Digestant
The first step would be to find an effective digestant. The most common is Dicone NC6. They tend to come in either one- or five-gallon containers. Moreover, it is suitable for use on metal, plastic, glass, masonry, ceramic, and most painted and synthetic surfaces.
You should not use it on nylon finishes nor on finished or unfinished would. It can do damage to those types of surfaces. Also, make sure that you only use silicone digestants in dry conditions.
Step 2: Apply the Digestant
Apply the silicone digestant to the area that you want to clean. Unlike the aforementioned softeners, digestants work pretty quickly. You only need to let the digestant sit for about 20 minutes or so before testing it out.
You will likely need to apply the digestant more than a few times to effectively break down the caulk. Just be patient and observant each time that you go to apply the digestant.
Step 3: Wipe Away the Caulk
Keep an observant eye on the caulk as the digestant works. When it has done its job, the silicone caulk will break away from the surface that it once adhered. You can typically wipe away the caulk with a rag that has been soaked in warm water.
What is the Most Effective Way?
For household applications, digesters are a last resort. Not only are they harder to find, but they’re also a bit tougher to manage, especially for amateurs. Softening the silicone caulk and then peeling or scraping it free is the most effective method.
Of course, it also depends on your skill level and experience. If you are completely new to doing DIY activities, calling a professional may be the better solution. They can apply quicker, more effective solutions for getting the caulk free from your surface of choice. Besides, calling a professional is easier and ensures that the surface beneath does not become damaged throughout the course of removing the caulk.


