How to Remove Painted Wallpaper
Contrary to what the average DIY home show will tell you, not everyone is buying a completely modern home. As a matter of fact, a lot of homebuyers are getting older homes. Part of those old homes include things like outdated floors or painted wallpaper.
The latter in particular can be quite the pain. It is the result of the previous owner having difficulty removing the wallpaper and simply painting over it instead. The result is another layer that needs to be removed on top of the outdated wallpaper that should have been removed ages ago.
So, if you have bought a home with painted over wallpaper, there are tips to be followed. Soon you can have that old wallpaper stripped away. There is an important note: when you start, you might realize there are several more layers than you realized. The process may ultimately require a new drywall installation.
A Quick Note Before Starting
You should know that there is a moderate level of skill required to perform this task. While it is not the most complicated task, it is also a bit more complicated than simply removing old wallpaper. There are various layers involved that can complicate the process.
The difficulty of the job depends on a few factors. The age of the paint/wallpaper plays a factor. The older the layers, the more difficult they will be to remove. Furthermore, the number of layers complicates things. If there are more than a few layers, you may have to perform a new drywall installation instead.
The Tools for the Job
Because this process is not as simple as straightforward wallpaper removal, there are tools needed to do the job. Keep in mind that, due to the complexity of the issue, there are more tools needed than a scraper.
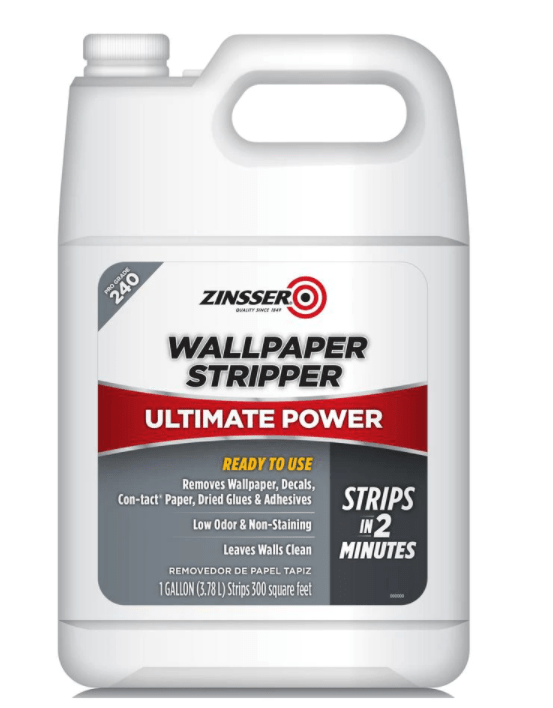
You will need a wallpaper steamer, pump sprayer, wallpaper scoring tool, scraper, putty knife, and some scouring pads. The steamer and sprayer should be available to rent at your local home improvement store for a reasonable fee. Without these tools, you may be hard-pressed to do the job at all, so come prepared.
How to Remove Painted Over Wallpaper
Now that we have the tools for the job, it is time to begin. This process will take a little bit of elbow grease to get done. In an ideal situation, it should take a few hours. That said, don’t be surprised if it takes a few days or even a few passes to finish the entire process.
Step 1: Scoring Tool
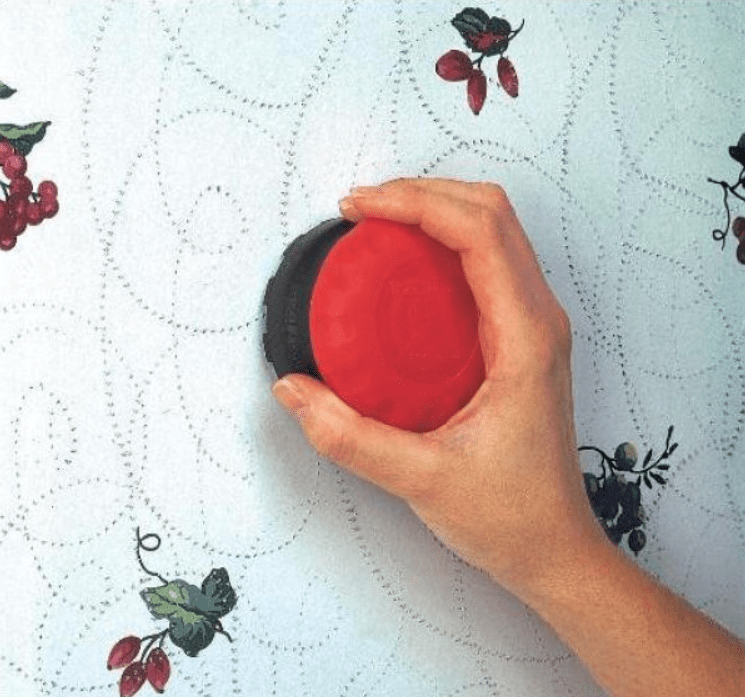
To start, we will need to break out the scoring tool. Depending on which one you get, these can look quite a bit different than the next. The idea being scoring is quite simple. Scoring creates a number of small holes in the wallpaper.
With the small holes in place, the stripping liquid now has a better path for getting behind the wallpaper. When the stripping liquid is able to properly do its job, it should make things far easier for you and your scraper.
Step 2: Liquid Wallpaper Stripper
Now that the wallpaper has been properly scored, it is time to implement the liquid wallpaper stripper. Start by mixing hot water and liquid wallpaper stripper in a sprayer. A garden sprayer will work just fine for this task.
Make sure that you follow the manufacturer’s instructions. Too little of the liquid won’t do an effective job. Too much could possibly damage the drywall, which would facilitate installing new drywall entirely. Don’t stray from the manufacturer’s instructions and you should be just fine.
Spray evenly over the wallpaper. For optimal conditions, avoid spraying too heavily in any area. Depending on the type of liquid wallpaper stripper that you have, it may take a bit of time to allow it to soak. The wallpaper stripper will ultimately separate the wallpaper from the adhesive beneath, allowing you to properly strip it away.
Step 3: Scraping
It is time for a little good old-fashioned elbow grease. The liquid wallpaper stripper should make the job easier, but it won’t do it for you. That is why a good scraper is needed to remove that old, painted-over wallpaper.
Work the scraper over the entirety of the wallpapered area. It should start coming up in big chunks. During the initial pass, don’t be surprised if there are patches of wallpaper that do not come up easily, if at all.
Step 4: Steaming
If you are truly lucky, you won’t need the electric steamer at all. Knowing the stubbornness of painted over wallpaper, it is unlikely that you will be so lucky. The electric steamer should help to get the more stubborn patches loose enough to scrape again.
The best idea, though it may take quite a bit more time, is to spray with the electric steamer and then immediately scrape. Getting at the wallpaper while it is still warm may make it easier to ultimately remove.
Step 5: More Wallpaper Stripper
Depending on the severity of the issue, you may have to perform a second spraying of the wallpaper stripper. When multiple layers of paint are involved, the wallpaper stripper may not be able to permeate beneath all of those layers.
After spraying the wallpaper stripper again, get back in there with the paint scraper. Make sure that you remove every last bit of the old wallpaper. Leaving patches can create an uneven look when you paint later on, if the paint adheres at all.
Step 6: Scrubbing Clean
When all of the wallpaper has been removed, the wall needs to be cleaned. Using the coarse rubber pads, scrub the wall clean with a bit of warm water. There may still be some residue left over from the wallpaper and the coarse rubber pad will help to pull that up.
For patches where there is more than a little adhesive, you may need to break the scraper out again. The good news is that the water and the scrubber pad should soften them enough to be easily removed with your scraper.
Step 7: The Next Steps
Repeat the aforementioned steps as many times as necessary to ensure that all wallpaper and adhesive have been stripped away. Depending on the severity of the issue, the timeframe can range from a few hours to even a few days.
It is imperative that all of the wallpaper and adhesive be removed. Leaving patches can create an uneven painting or wallpapering experience. Even if the material adheres to the spot, the aesthetic may look completely uneven.
When you are confident that all of the wallpaper has been properly removed, you can move on to the next step. Whether that be painting or simply applying new wallpaper, your walls will be ready to take on the new layer properly.
Where New Drywall is Required
The number of layers involved is important for two reasons: difficulty of removal and condition of the wall. Not only will several layers make the task all the more difficult, but it may leave the wall in a condition that isn’t fit for painting or wallpapering.
While there is no set number of layers to signify that new drywall will be needed, there are telltale signs that your drywall needs replacing.
Holes. The most obvious sign that your drywall needs replacing is if you notice a variety of holes. They may be small, but too many small holes should be a concern. In the worst-case scenario, there will be medium-sized holes or bigger. Some patchwork is normal, but too many holes can compromise the integrity of the drywall.
Cracks/splinters/bumps. Another indication that the drywall is damaged beyond repair is a large allotment of cracks, bumps, and splinters. Cracks can indicate that there is a misplaced seam, which illustrates a potential underlying problem. Bumps and bulging are the result of potential water damage or excessive exposure to humidity. Finally, splintering is indicative of a larger structural issue and should be addressed by a professional immediately.
Water Damage. When you pull up the wallpaper, there is also the possibility of finding water damage. Water damage does not necessarily indicate that the drywall needs replacing. That said, you will need to keep an eye on the area of damage. Smaller areas can be dried out and then repainted. But if there is a leak behind the drywall, the drywall will have to be opened up and the leak fixed before the drywall can be replaced.

