The Ultimate DIY Backyard Ice Rink: A ManMade Guide to Building Your Own NHL Arena

The NHL is officially on pause for the Milano Cortina 2026 Winter Olympics, leaving a hockey-sized hole in your evening schedule. But while the pros are over in Italy, your backyard is sitting idle.
Don’t spend the Olympic break scrolling through scores on your phone. If you have a flat patch of grass and a weekend, you can build a backyard ice rink that’s better than any arena seat. This isn’t about professional-grade refrigeration; it’s about raw, DIY hockey at its roots.
A Note on Safety and Property
Before you grab the drill, remember: water is heavy. A standard 20×30 rink with 4 inches of ice holds roughly 1,500 gallons of water—that’s over 12,000 lbs.
- Structural Integrity: Ensure your stakes are deep. If a board fails, that volume of water can flood your (or your neighbor’s) basement.
- Ice Thickness: Never skate until you have at least 3 inches of solid, uniform ice.
- Power Tools: Always use GFCI-protected outlets when using power tools or lights near water or melting ice.
1. Choosing a Level Spot for Your Rink

The biggest rookie mistake is chasing square footage over level ground. A 20×30-foot rink is plenty for 3-on-3 or stickhandling drills.
The Golden Rule: Your yard needs to be level. If you have a slope of more than 6 inches across the span, the water pressure will blow out your boards before the first puck drops.
- Pro Tip: Use a string level or a laser level to find the “low” corner. That’s where you’ll need your strongest bracing.
2. Gathering Your Rink Materials

You don’t need a specialized kit. Head to the local lumber yard and grab these essentials:
- 2×8 Douglas Fir Boards: Provides the mass needed to hold the weight of the water. Avoid thin plywood; it will bow and snap.
- 6mil White Poly Liner: Always choose white. Darker colors absorb solar heat and will melt your ice from the bottom up.
- 2×4 Wood Stakes: Place these every 4 feet. Water is heavy, and these are the only thing preventing a total blowout.
- 3-inch Exterior Screws: Use coated screws rather than nails. The vibration of pucks hitting the boards will wiggle nails loose over time.
- The “Home-boni”: A simple T-frame of PVC pipe with a dragged towel. It’s the secret to a professional, glass-like finish.
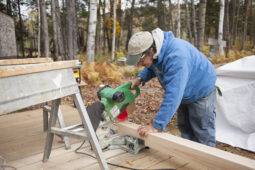
3. How to Build the Rink Frame

Lay your boards and drive your stakes on the outside. When 2,000 gallons of water start to freeze, they expand.
- Frame it up: Screw your corners tight.
- The Liner Tuck: Lay the white poly over the frame. Do not staple it to the inside; the water needs to pull the liner into the corners naturally.
- The Fill: Check the forecast. You need at least three nights of sub-freezing temps.
ManMade Lesson: Patience is a tool. Do not flood the rink all at once. If you dump 6 inches of water, the bottom will stay liquid while the top freezes, creating “shell ice” that cracks instantly. Flood in 1/2-inch layers.
4. Maintaining Your Ice Surface

Good ice is earned, not given. After a skate, the ice will be “chewed up.”
- Shovel Immediately: Never let snow sit; it acts as an insulator and turns your ice into “slush-puppy” mush.
- The Hot Water Hack: If you can hook your hose to a utility sink, use hot water for your final thin “flood” layer. It melts the top layer of existing ice and bonds for a glass-like finish.
Avoid These Common Rookie Mistakes
- The Walking Trap: Never walk on the liner with boots on. One tiny pebble stuck in your tread will create a leak that is impossible to find once the water starts flowing.
- The “Yellow Ice” Blunder: Keep leaves and sticks off the ice. They absorb sunlight, heat up, and melt holes deep into your surface.
Why This Matters

When the NHL takes a break, the spirit of the game moves to the backyard. There are no commercial breaks or expensive concessions out here—just the sound of tape on a puck and the crisp winter air.
Build it now. The league comes back Feb 25th, but your season starts tonight.