DIY Rain Barrel: How to Make a Cheap Rain Barrel With a Spigot at Home

One of the first big projects I completed when I bought my house was digging a large garden in the backyard, and we just barely made it in time for a summer full of tomatoes, cucumbers, okra, eggplant, peppers, and squash. The 20 x 30′ patch somehow wasn’t big enough for both eating and canning, so when spring rolled around again, I set out to expand our patch. Gardens are never finished, after all! (Check out our tutorial on how to hand-dig a garden here.)
The only thing I wasn’t interested in expanding, though, was my water bill. Since we get on average 4 inches of rain per month during the growing season here in North Carolina (Apr–Nov), it was time to let the clouds handle the water supply rather than the city. Since this is mostly a money-saving project, I kept my budget really low because I preferred to have the materials pay for themselves as quickly as possible.
The basic building blocks of a rain barrel are 1. a water storage area, and 2. a way to drain the rainwater from the barrel into a hose. That’s it.
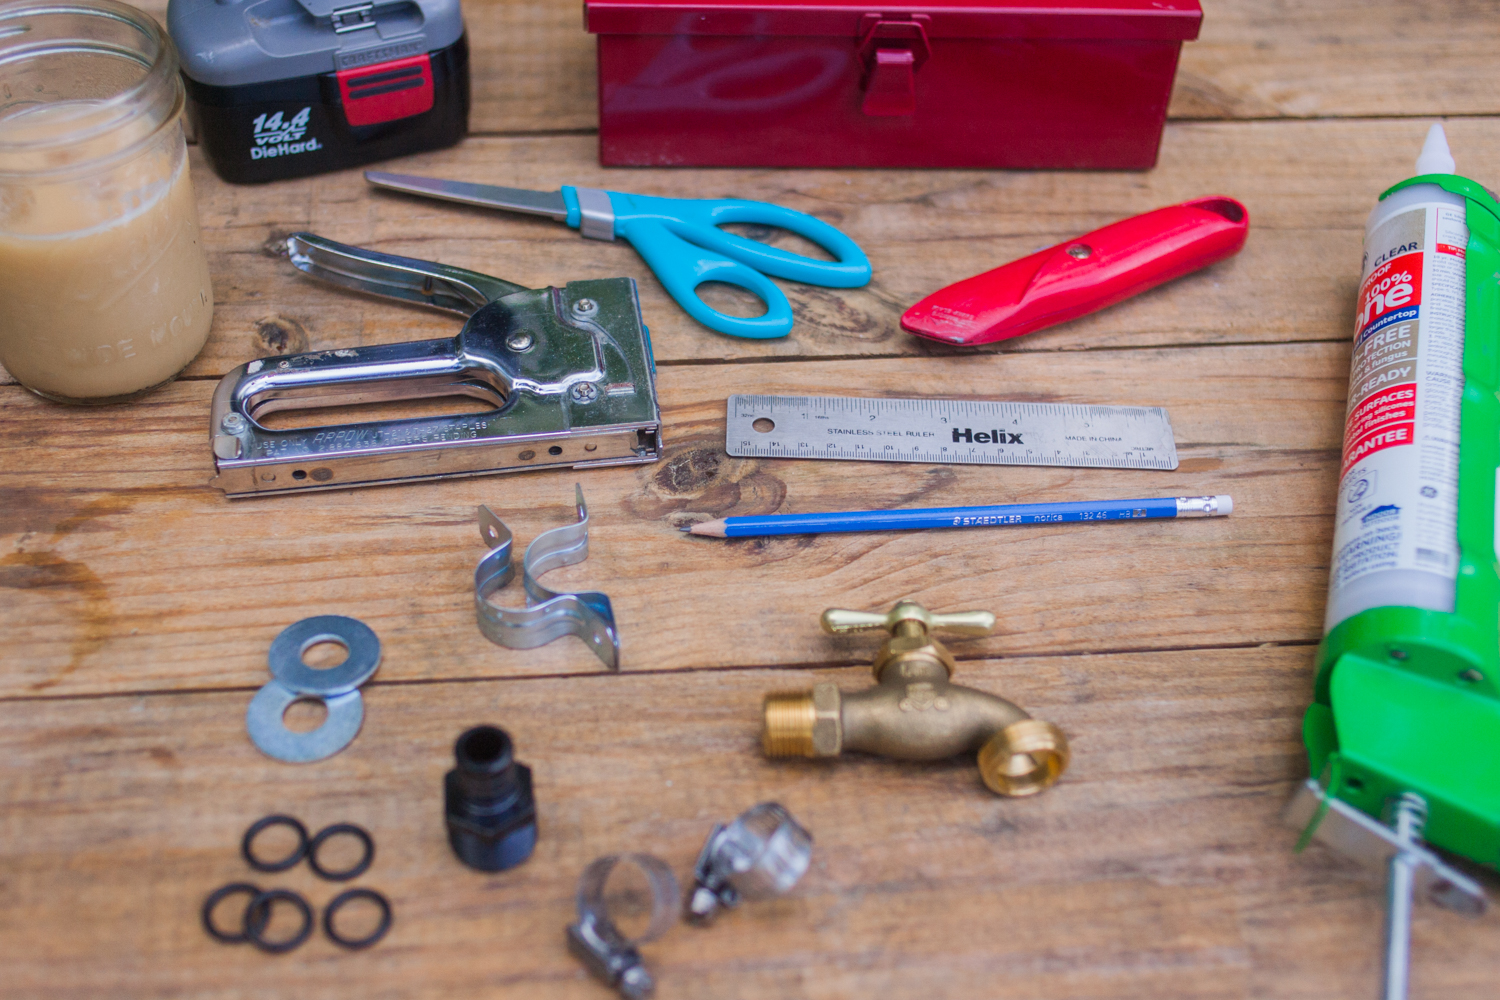
DIY Rain Barrel — Supplies
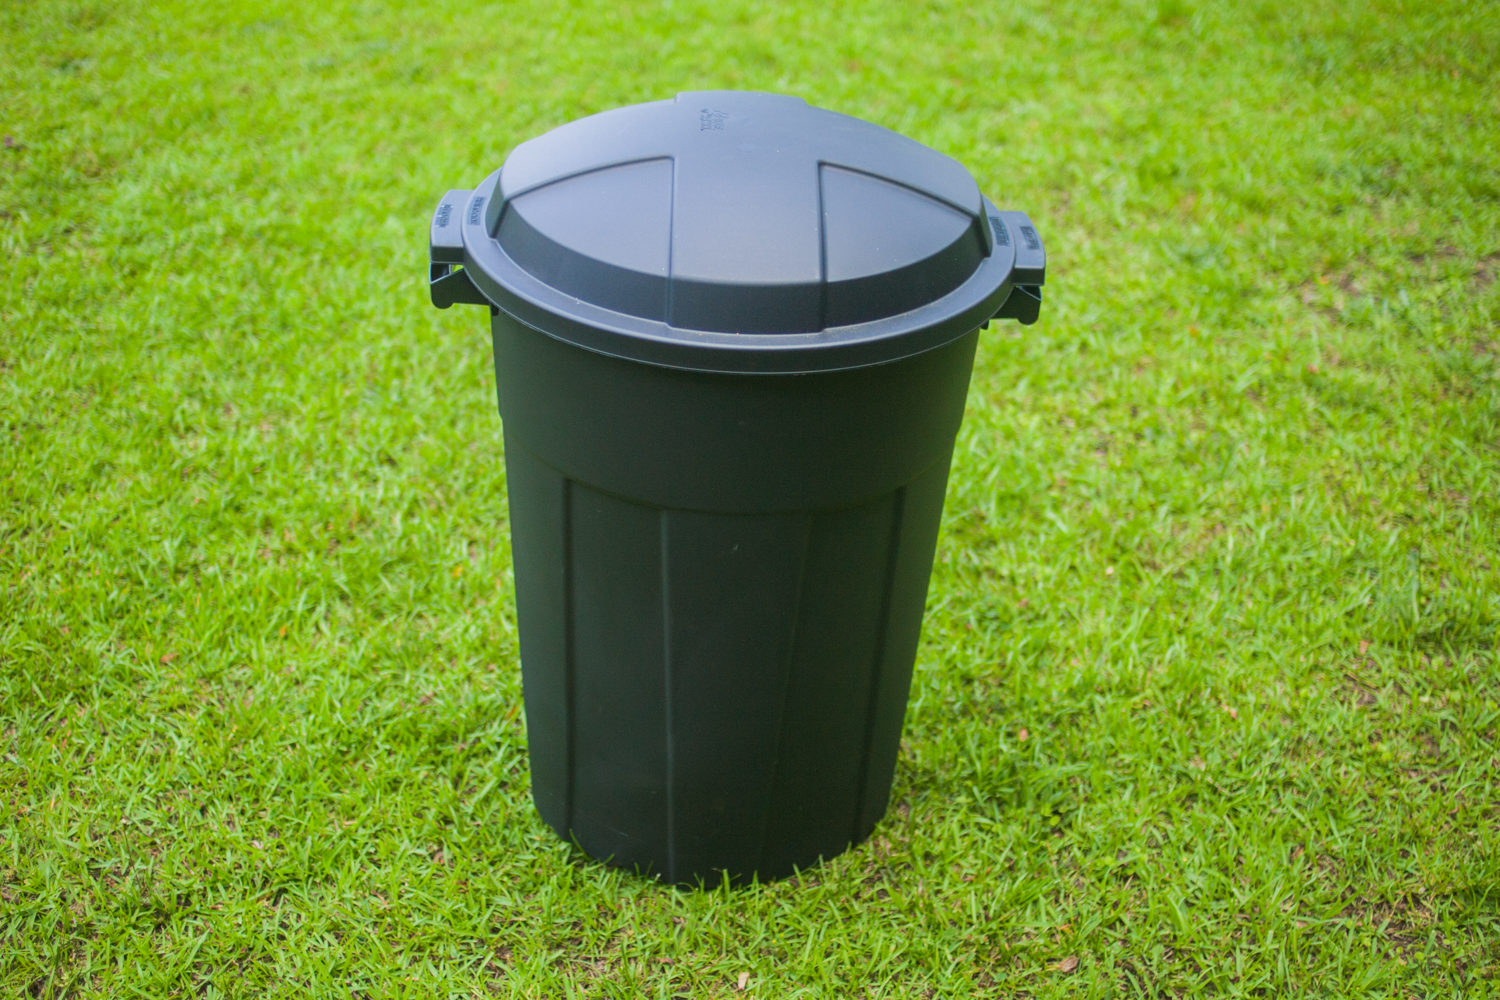
- Plastic garbage can — I used the cheapest one I could find, which was this 20 gal Rubbermaid on Amazon.
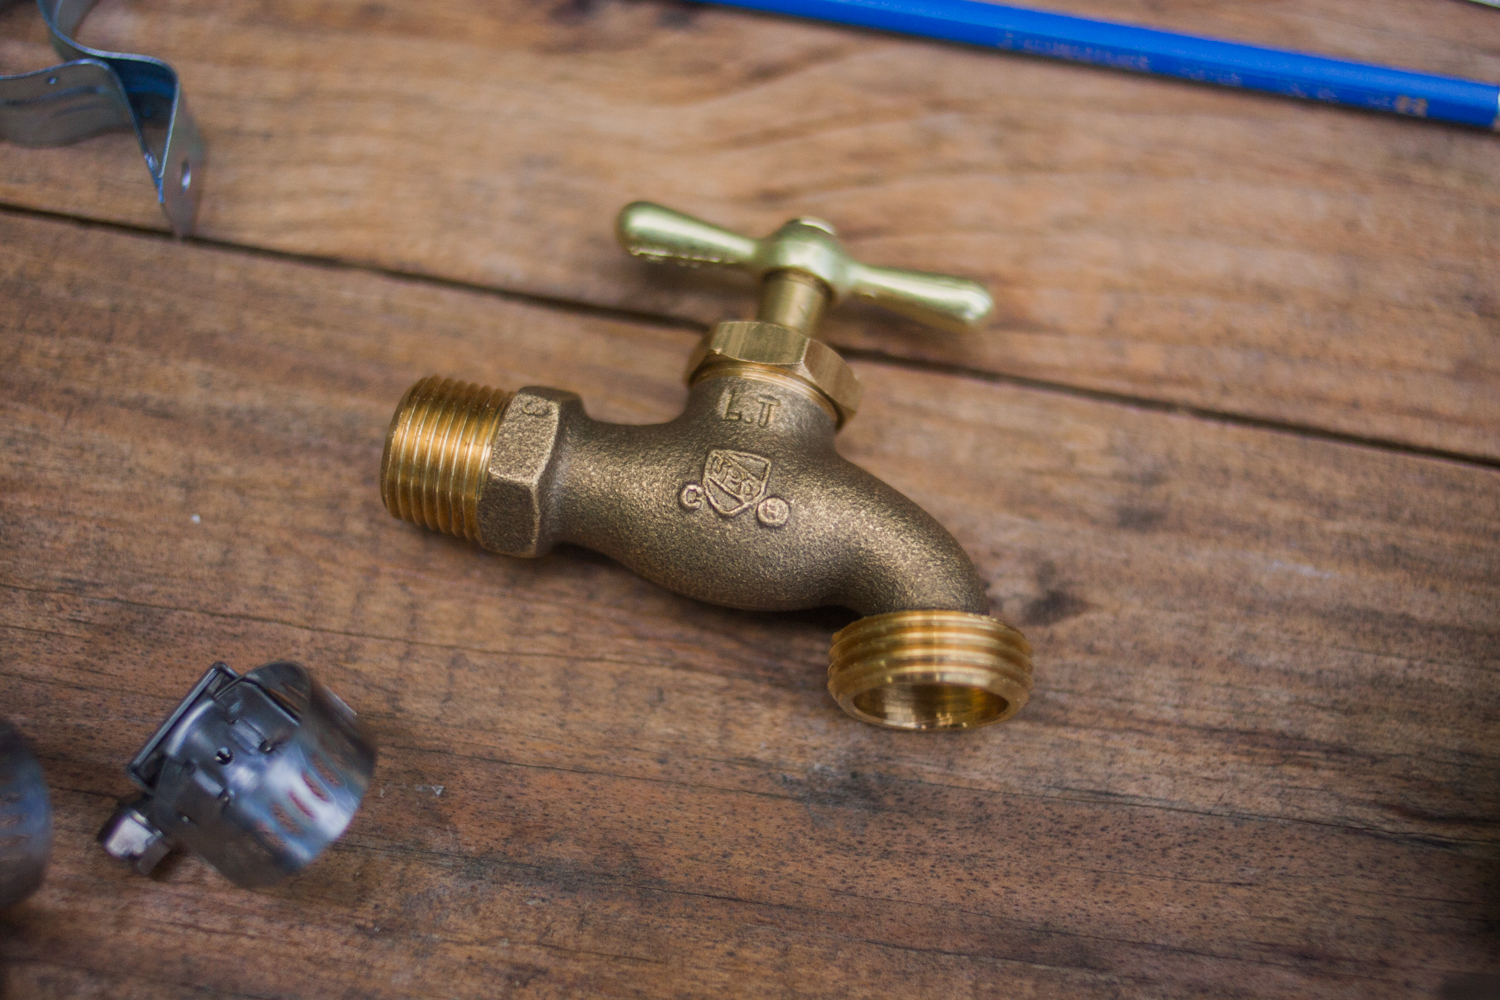
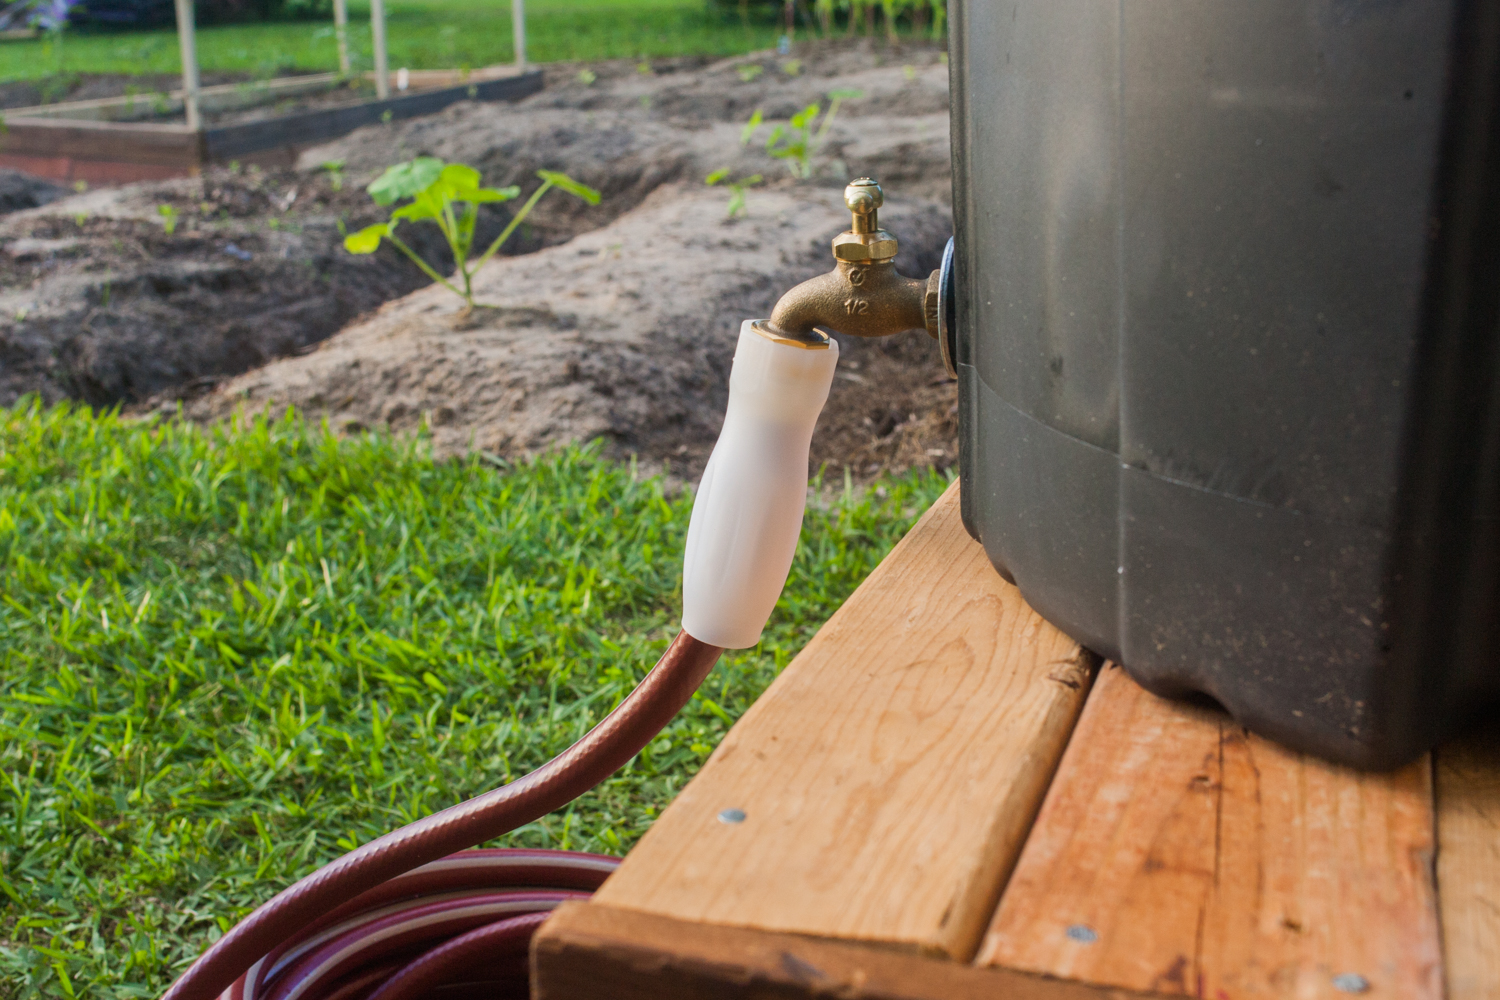
- Hose bib — None of the hose bibs I could find local were certified lead-free, so I ordered this one on Amazon.
- 3/4″ washer (1 qty.)
- #11 rubber o-ring (1 qty.)
- Clear silicone caulk
- Cinder blocks (6 qty.)
- Caulk gun
- Drill with 3/4″ spade bit
- Utility knife
- Steel cork-backed ruler
- Hose
- Iced coffee — Especially if it’s in the upper 80’s with 90%+ humidity.
DIY Budget Rain Barrel — How-To
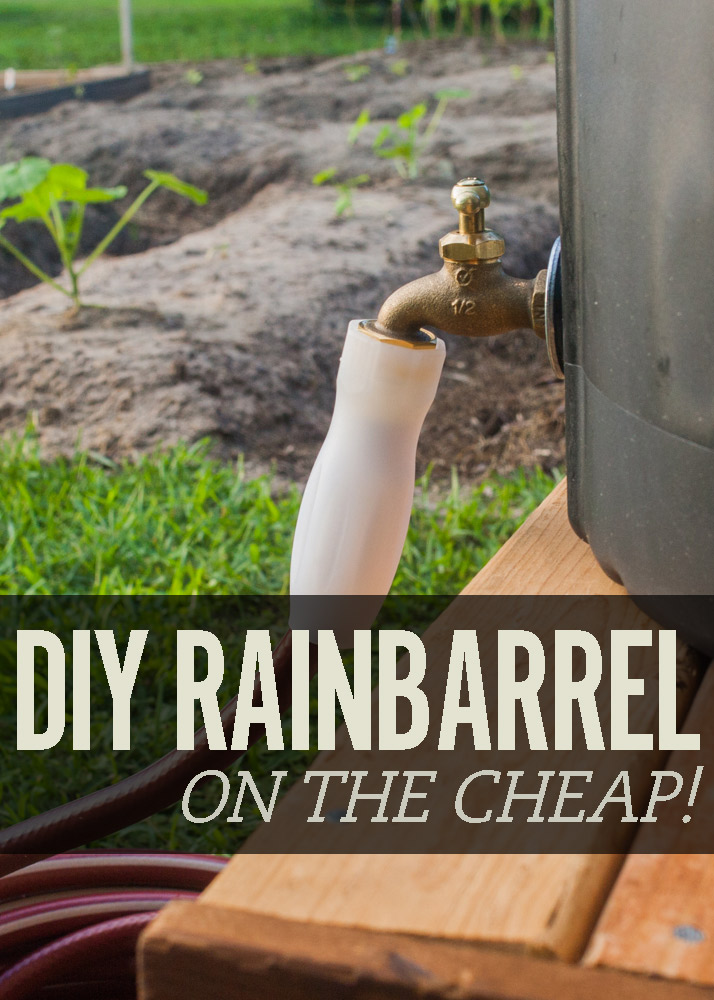
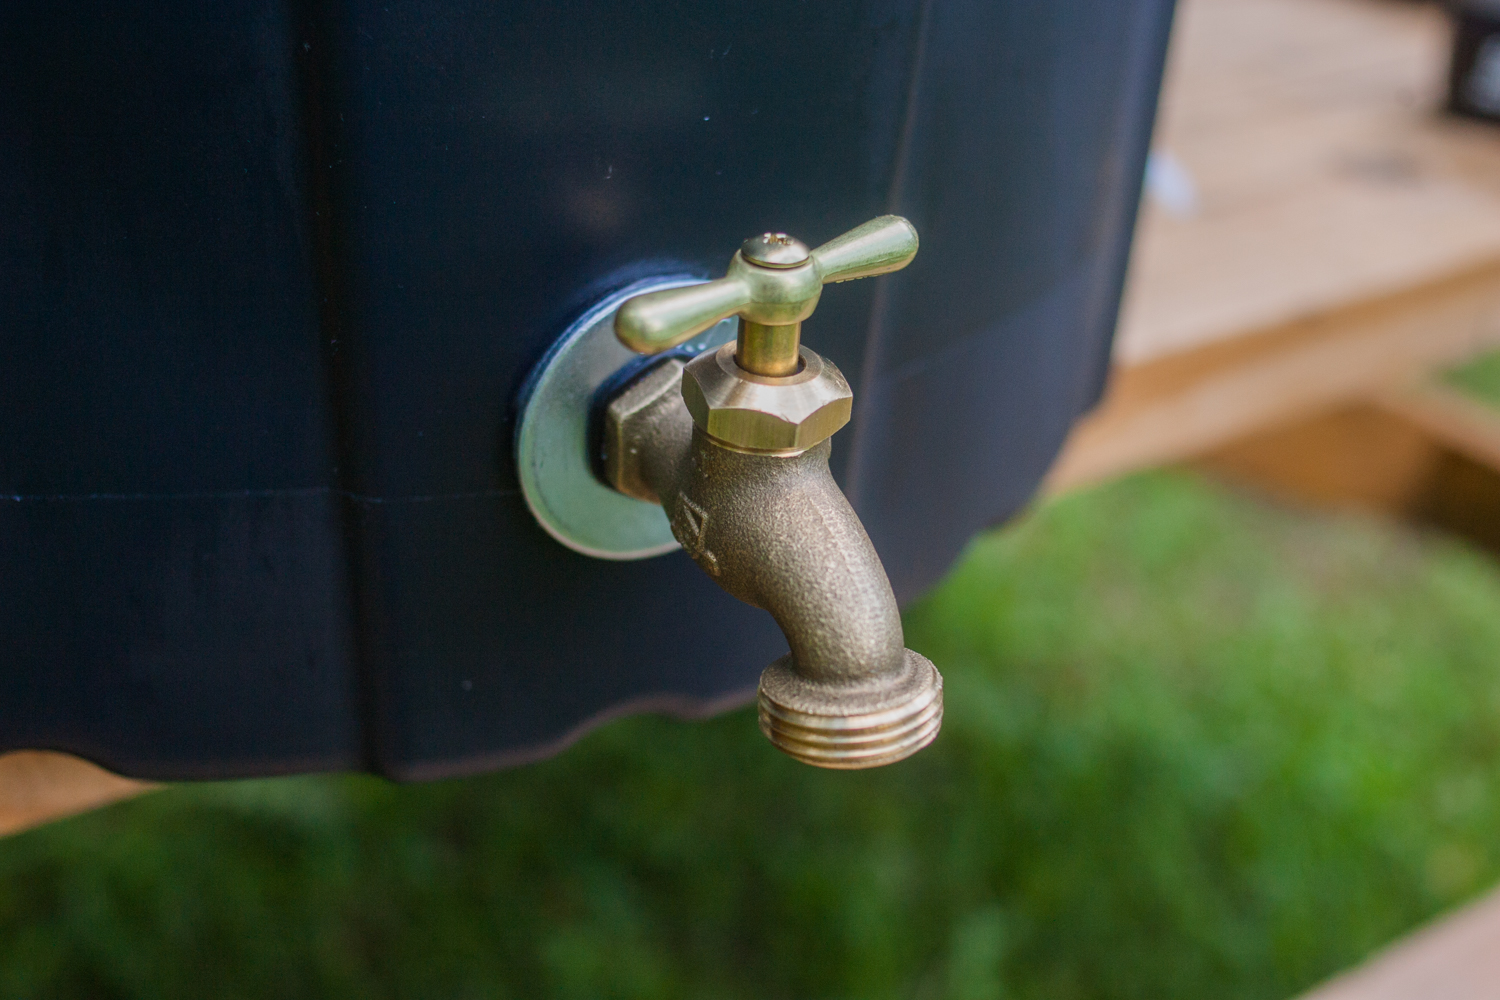
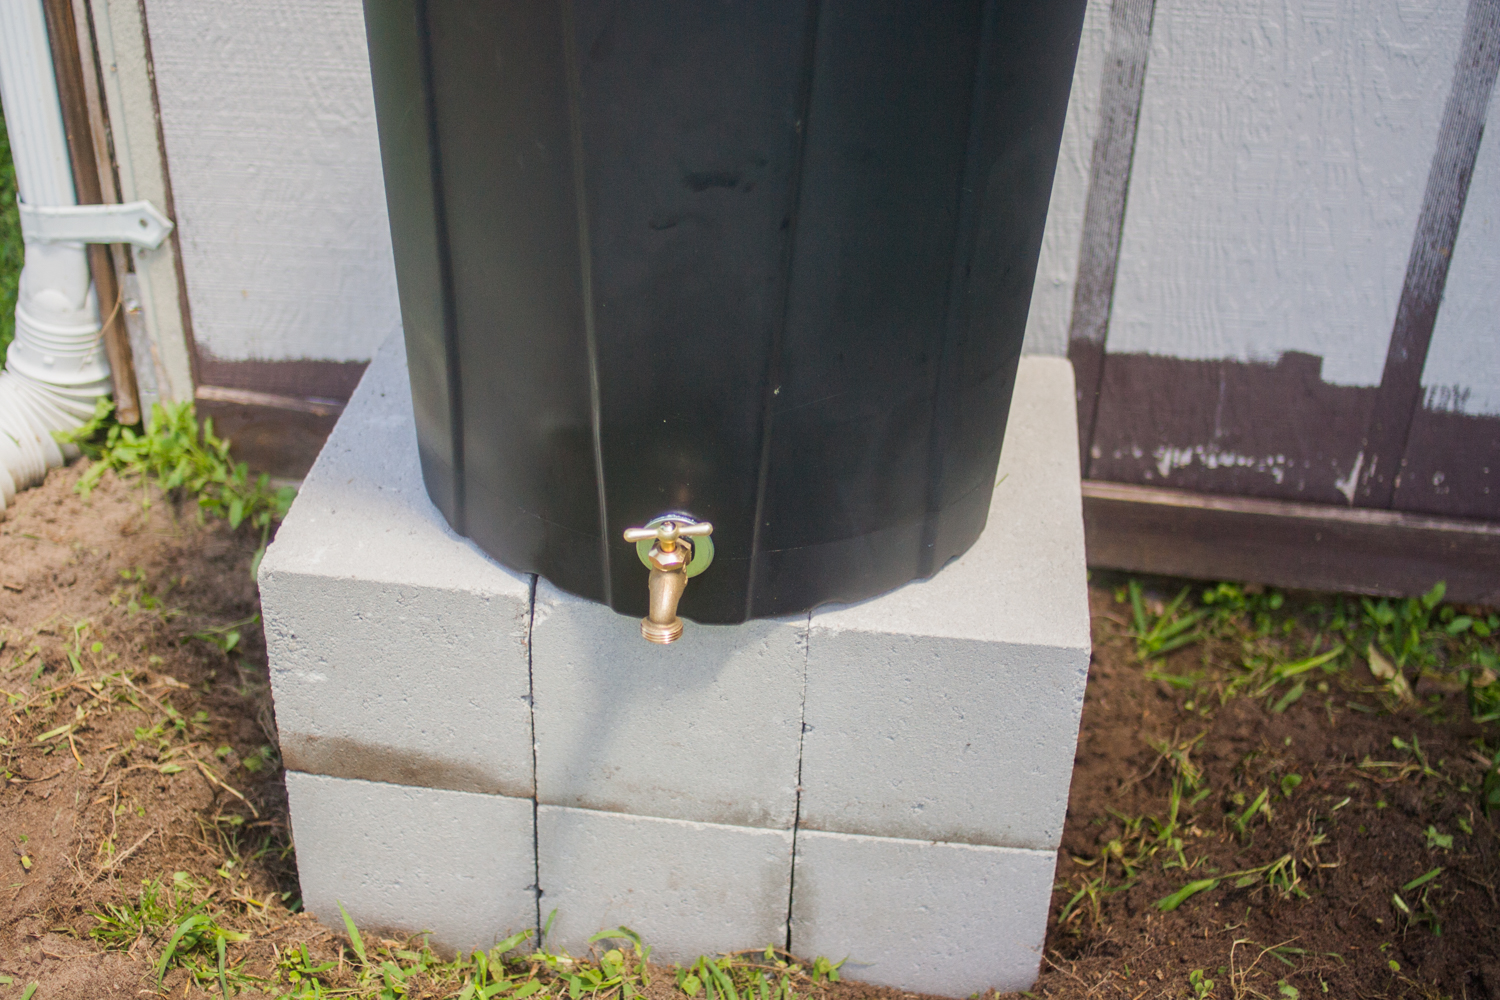
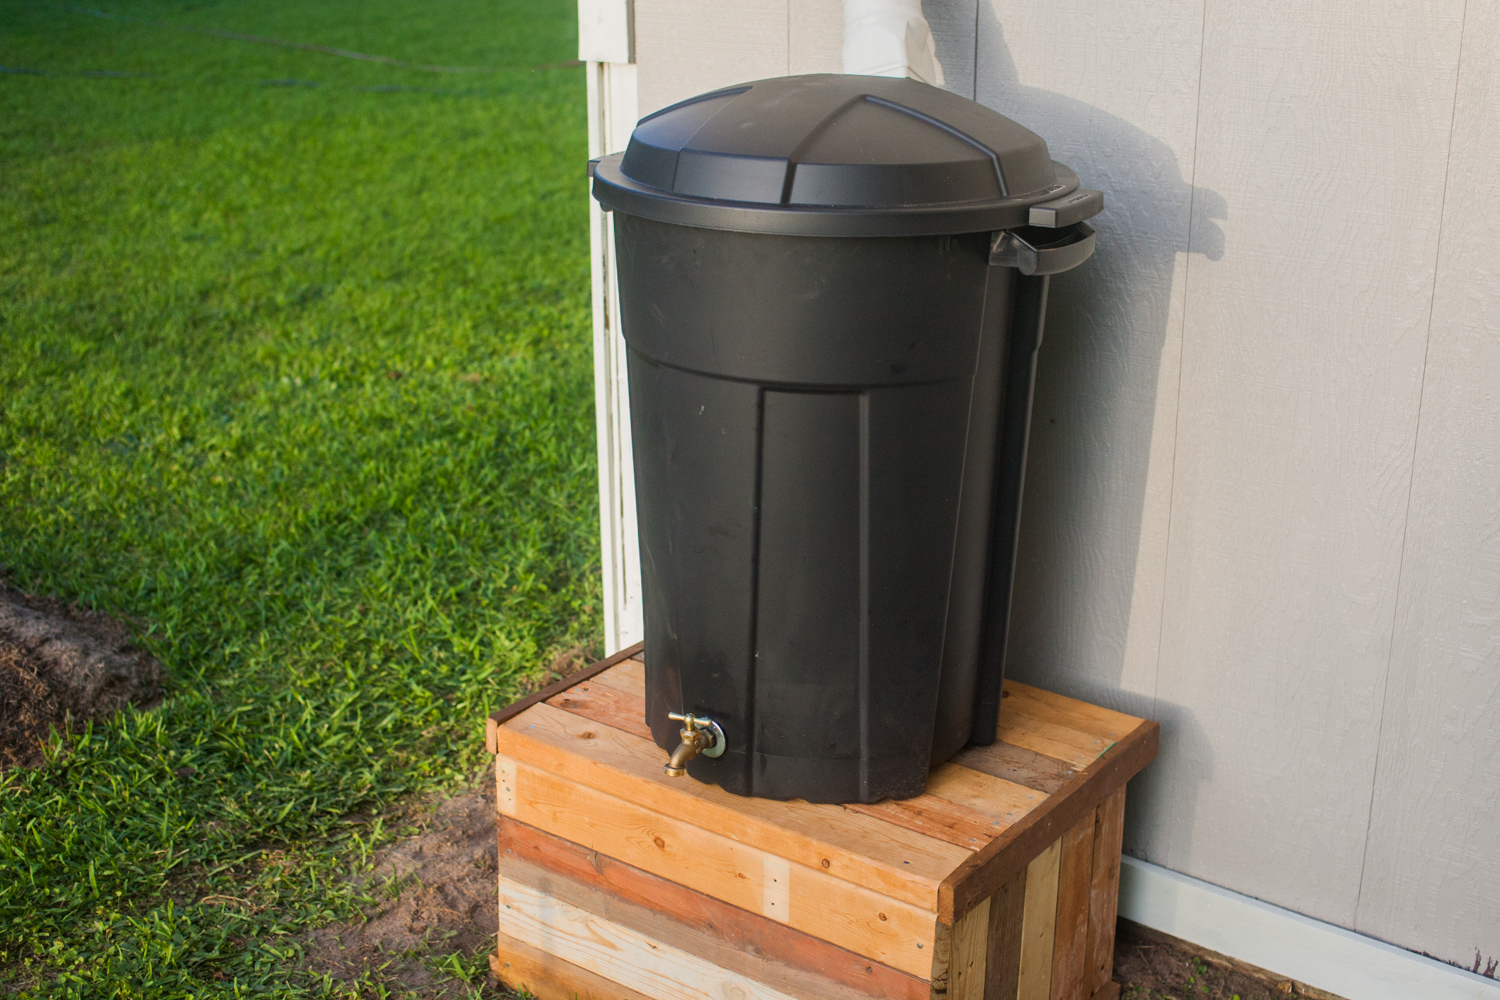
1. Install spigot
Determine where you want the spigot. I measured about 3 inches above the base to avoid clogs from the sediment that’s inevitably going to build up. (Don’t worry about setting it too low for access, since you’re going to elevate the barrel with cinderblocks.)
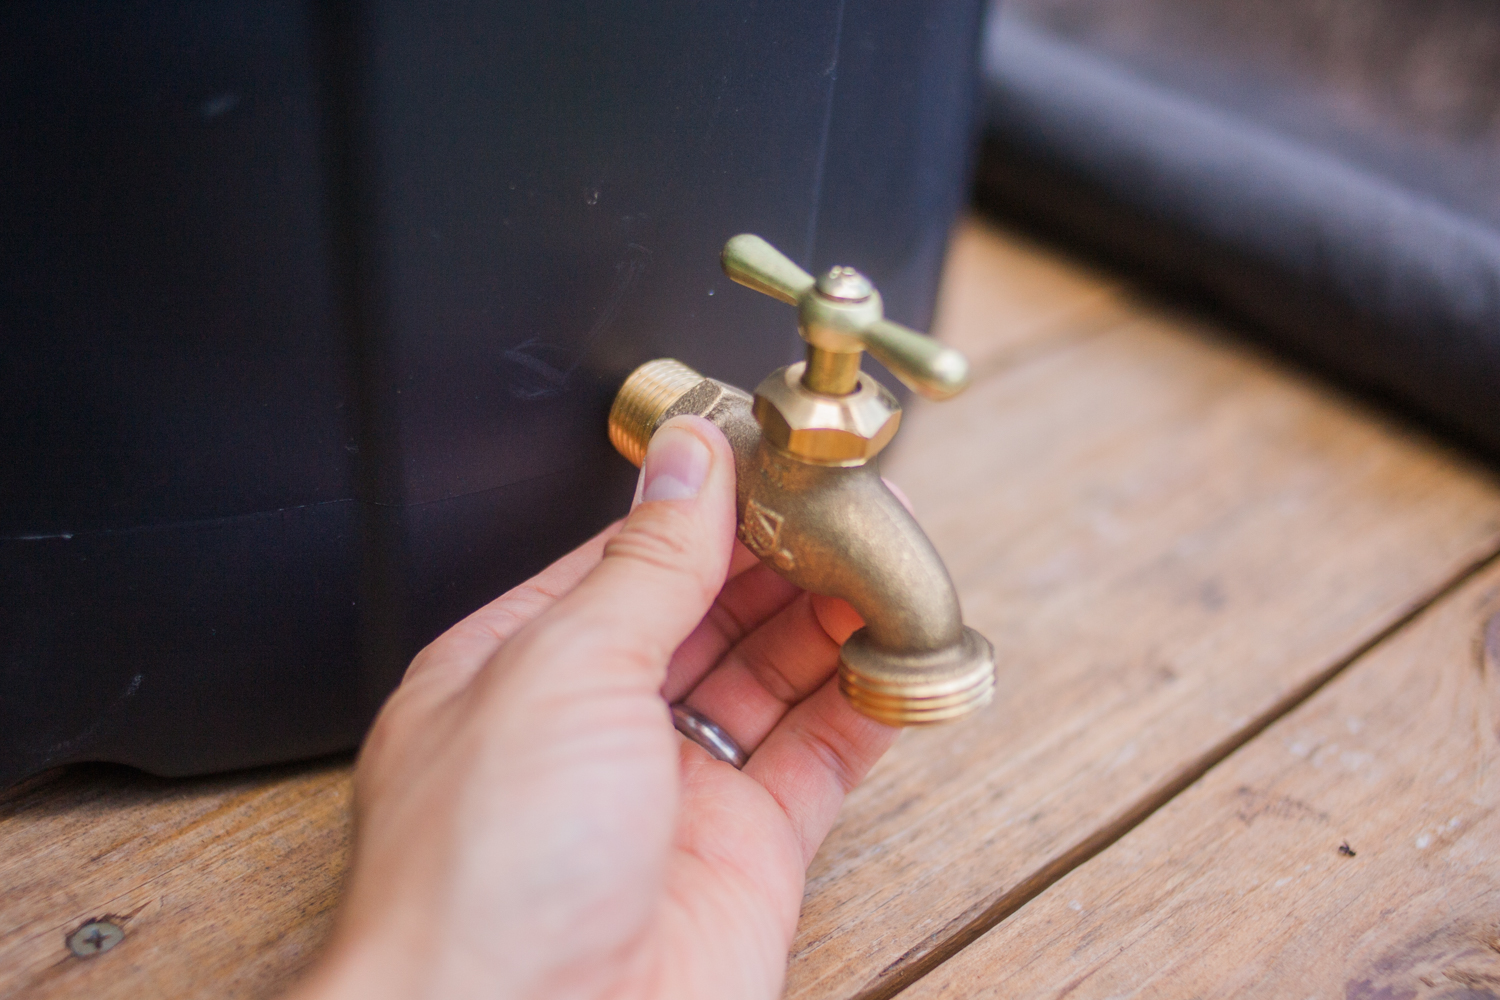
• Drill a 3/4″ hole with a spade bit.
• Slap an o-ring and washer on your spigot end and screw it in. Add a bead of caulk under the washer to make it watertight.
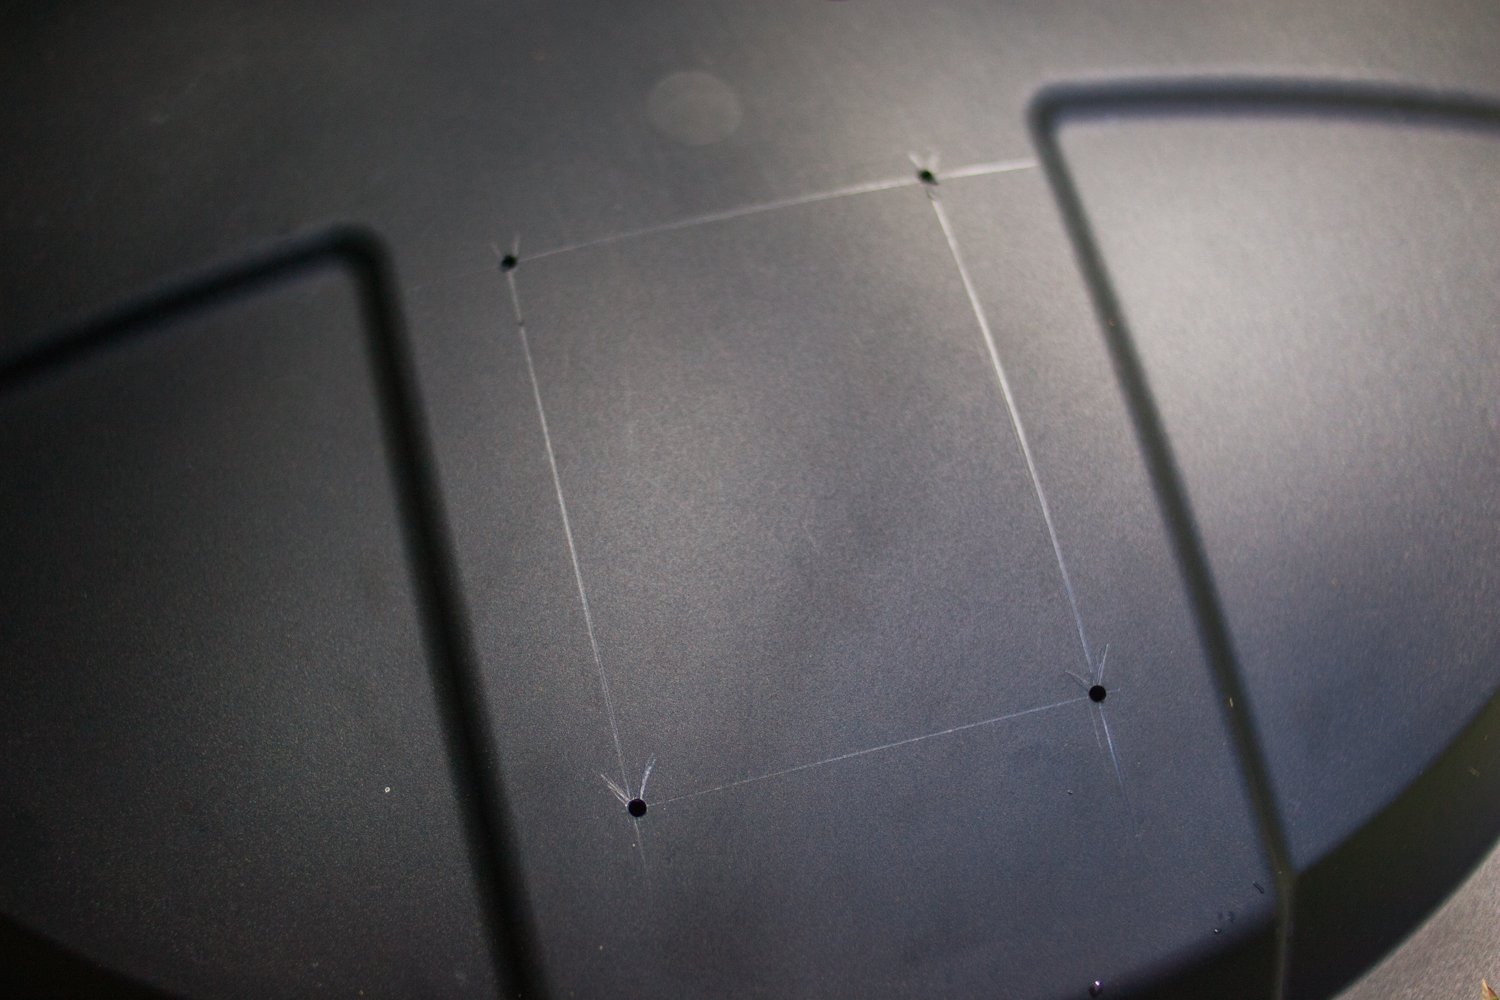
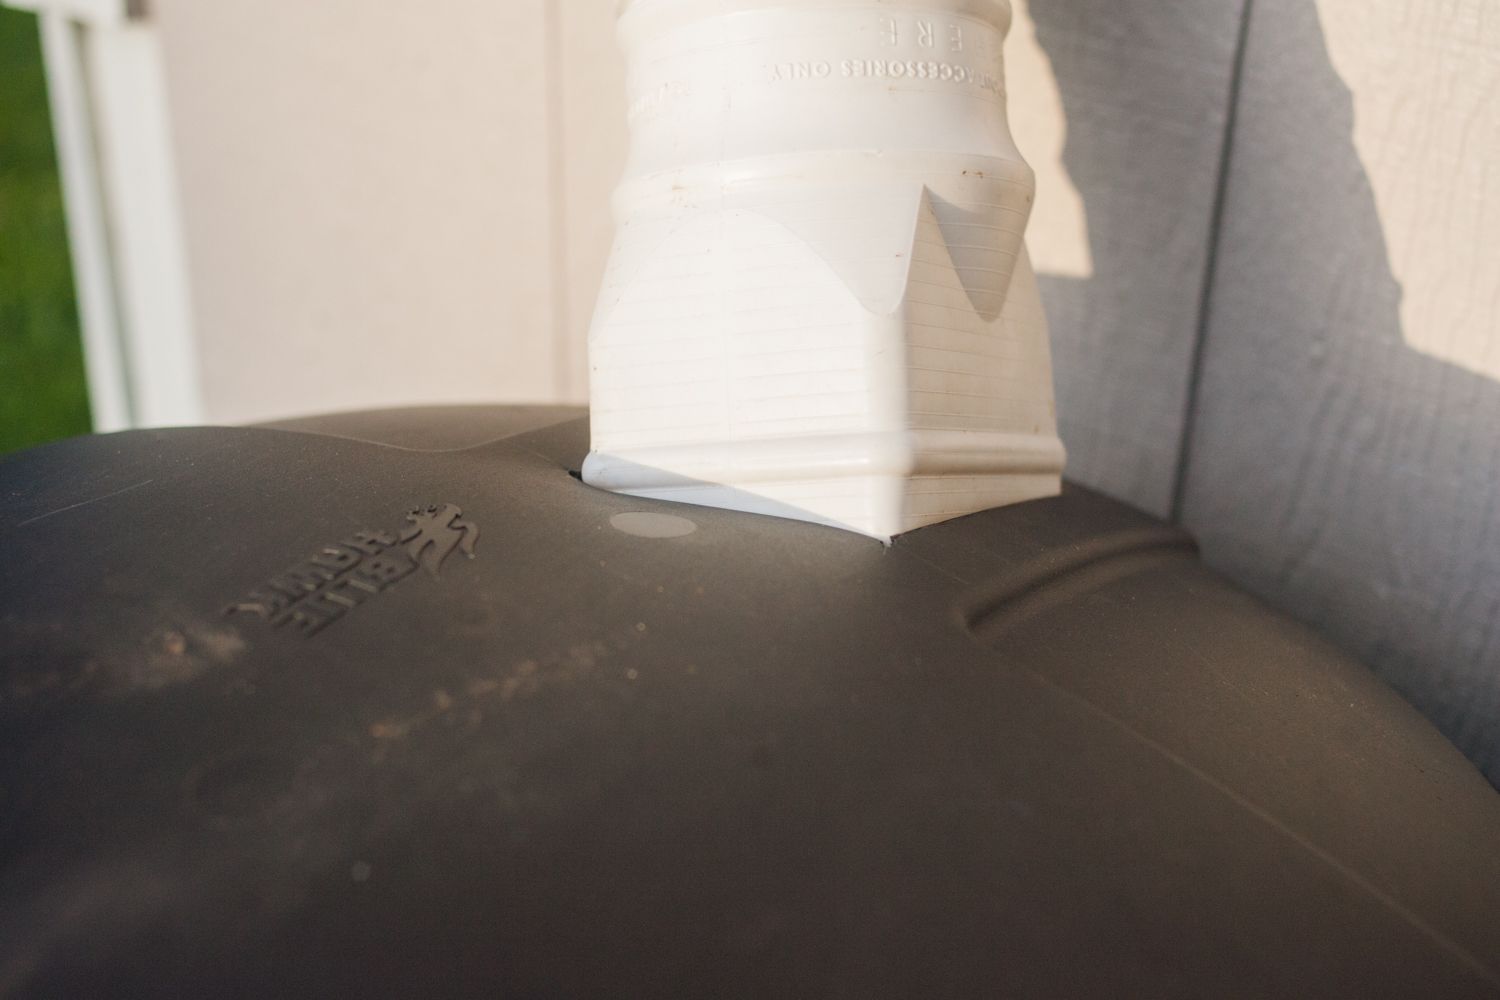
2. Cut a hole in the lid.
Measure the end of your downspout and cut a hole slightly smaller than its outer dimensions. I drilled pilot holes on the corners and used a box cutter with steel cork-backed ruler to keep the lines straight.
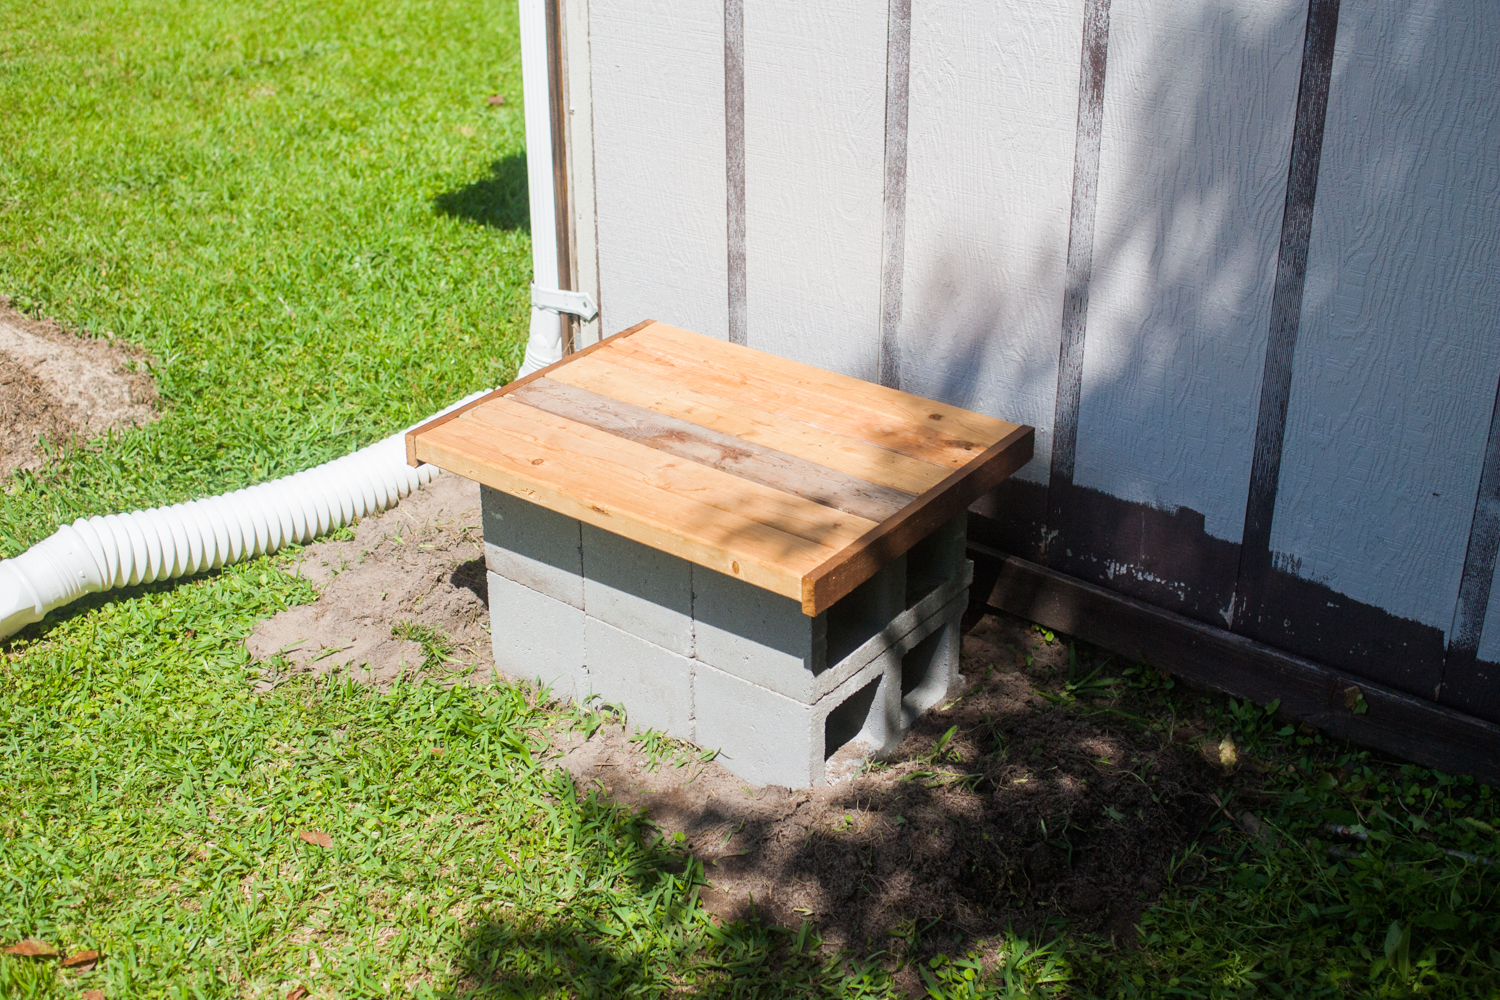
3. Elevate your barrel.
• To increase water pressure and make access easier, you’ll need to elevate your barrel. (This is tapping into the forces of hydrostatic pressure, which is the same gravity-based principle that requires water towers’ storage tanks to be high up.) I used two stacks of 8″ tall cinderblocks. Use a shovel or hoe to level out your area.
• I’m not really a big fan of the cinderblock look, so I used some scrap wood from a demolition project to make an open-backed platform. (Please excuse the shabby paint job—we’re in the middle of renovating our backyard studio and it’s taking forever.)
4. Final installations
• Install your downspout—I used my existing flexible downspout extension to wrap around the building corner and reach the barrel lid.
• Set up your hose. Now all you have to do is wait for rain!
How to Upgrade Your Rain Barrel
I approach work based on one of my favorite Theodore Roosevelt quotes: “Do what you can, with what you have, where you are.” This afternoon project was meant to be on a really low budget. But there is always room for improvement once you get your starter barrel finished! Here are some suggestions:
• Filter: I really don’t want to have to fish out rotten leaves from my barrel every year, so I’m going to install a screen somewhere—either at the top or bottom of the downspout, over the entire gutter system, or at the top of the barrel lid. (Not to mention, mosquitos aren’t an endangered species, so I’m not interested in building a backyard bloodsucker breeding bin.)
• Barrel: At some point, I’m probably going to replace the entire trashcan with a proper rain barrel, then spray paint it to blend into the building.
• Downspout: The flexible downspout will do just fine for now, but I’m not a giant fan of the look, so I’ll probably replace it with something sleeker later. But my to-do list is about a mile long, so for now, ain’t nobody got time for that.
• Overflow valve: If you’re in a heavy rainfall area and your barrel doesn’t have a big capacity, it’s a good idea to build in a way to control spillover. The easiest way is to drill a hole at the top of your barrel, install an insert male adapter like this one, and (optionally) attach a short leader hose.
• Landscaping: I’d like to mulch or pea gravel around my base to make things tidier.
How Much Rain Can You Save?
Interested in seeing how much rain you’re actually collecting? Here’s a simple formula: 1″ of rain on a 1,000 ft² roof yields 623 gallons.
This gives you an equation to work with:
Roof area (ft²) x precipitation amount (in) x 0.623 = amount collected (gallons)
So in my case:
• Roof area of my workshop: roughly 150 sq. ft.
• Avg. rainfall: 4 inches/month during the growing season (Apr–Nov)
Which tallies to roughly saving 375 gallons per month or 3,000 gallons for my growing season. My water bill is roughly 1.25¢/gallon, so I’d be saving on average $27 for the growing season. That’s not a gigantic saving, but that’s just one part of my frugality arsenal. And the way I see it, by making use of something that’s totally free, it frees up about $30 for something I’d rather be buying.