How to: Make a One-Hour Walnut Cutting Board
There are numerous cutting board kits out there that provide you the wood and leave all the gluing, planing and cutting to the consumer. You can also cut up random pieces to create your own glued up cutting board. Both of those options and can result in a gorgeous cutting board that will be adored by the recipient; however, that also requires buying or making several pieces that need to be glued together, a planer and loads of extra time. The simple solution – find a beautiful piece of solid wood that you can make into a cutting board. Using one solid piece of walnut, maple or the hardwood of your choice will be cheaper, less time consuming and easier to do. Making a simple cutting board can be made in an afternoon with minimal finishing work required.
Tools and Materials
- Hardwood of choice (we used eastern walnut)
- Jig saw, or handheld coping saw
- Flush cut pull saw
- Sander or sandpaper
- Mahoney’s walnut oil
Select Your Hardwood: Step
You’ll want to choose a hardwood because of the closed grain and smaller pores, which allows less absorption and bacteria to get into the wood. Softwoods should be avoided. I chose walnut because it’s my favorite wood and it fits into the category of acceptable hardwoods for a cutting board. Maple, cherry and teak are other popular options in North America. I went to the local lumber yard and searched for a piece with a lot of variation in both color and grain. I purchased 2 board feet so I’ll have some extra lying around the shop.
Choose Your Pattern: Step
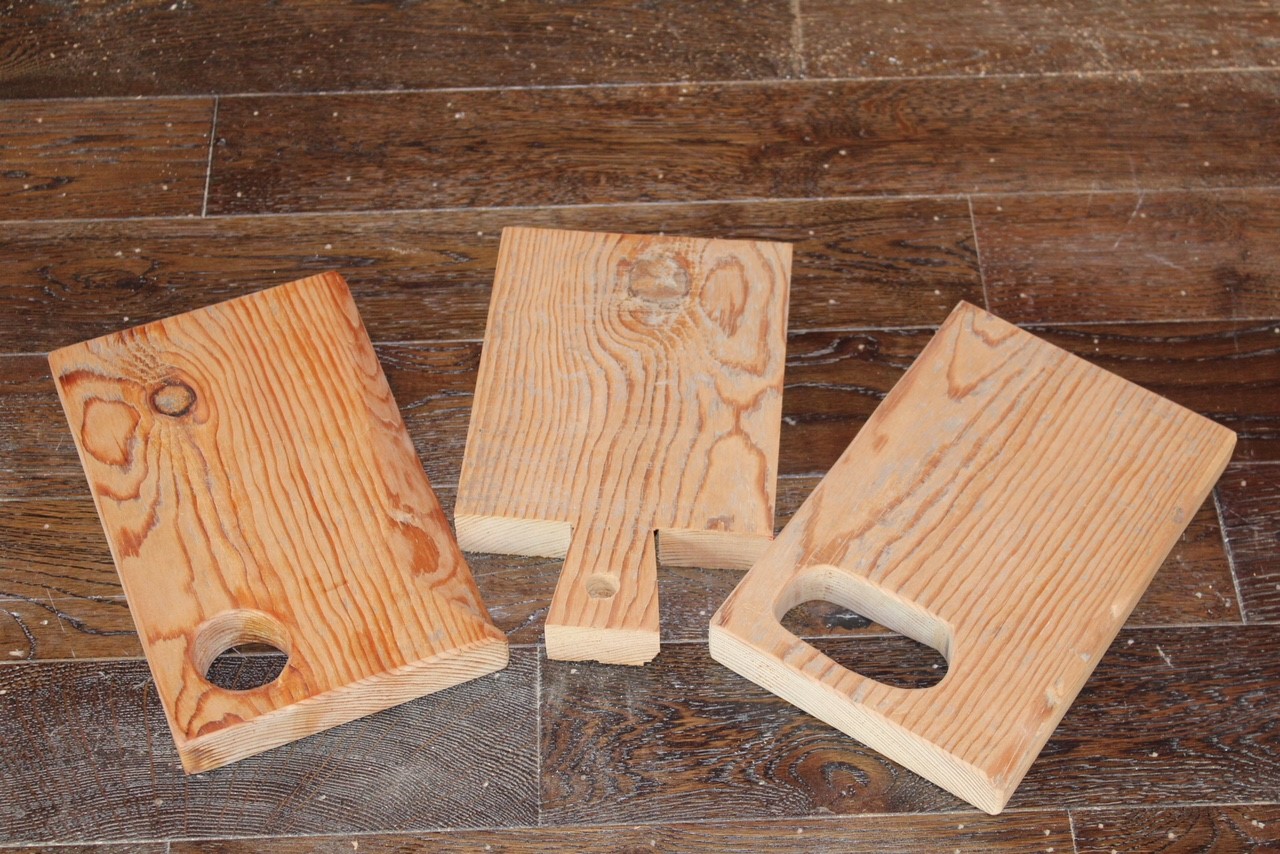
There are an abundance of different patterns that you can make with your cutting board and picking a winner is all based on personal preference. I used some scrap softwood lumber in the shop to design three different styles in order to see what I liked best. If you already have a style in mind, you can skip this step.
Cut to Size: Step
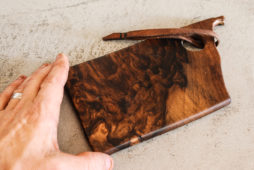
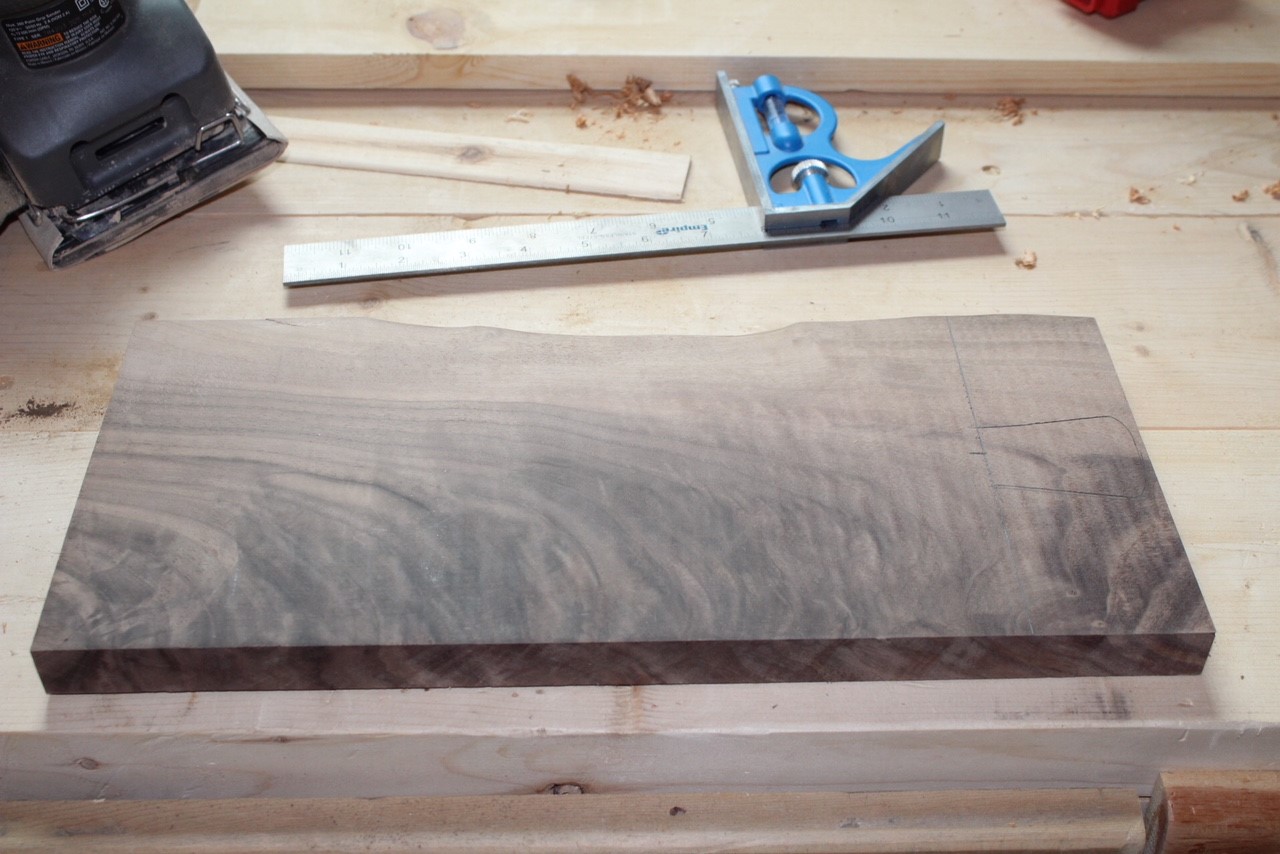
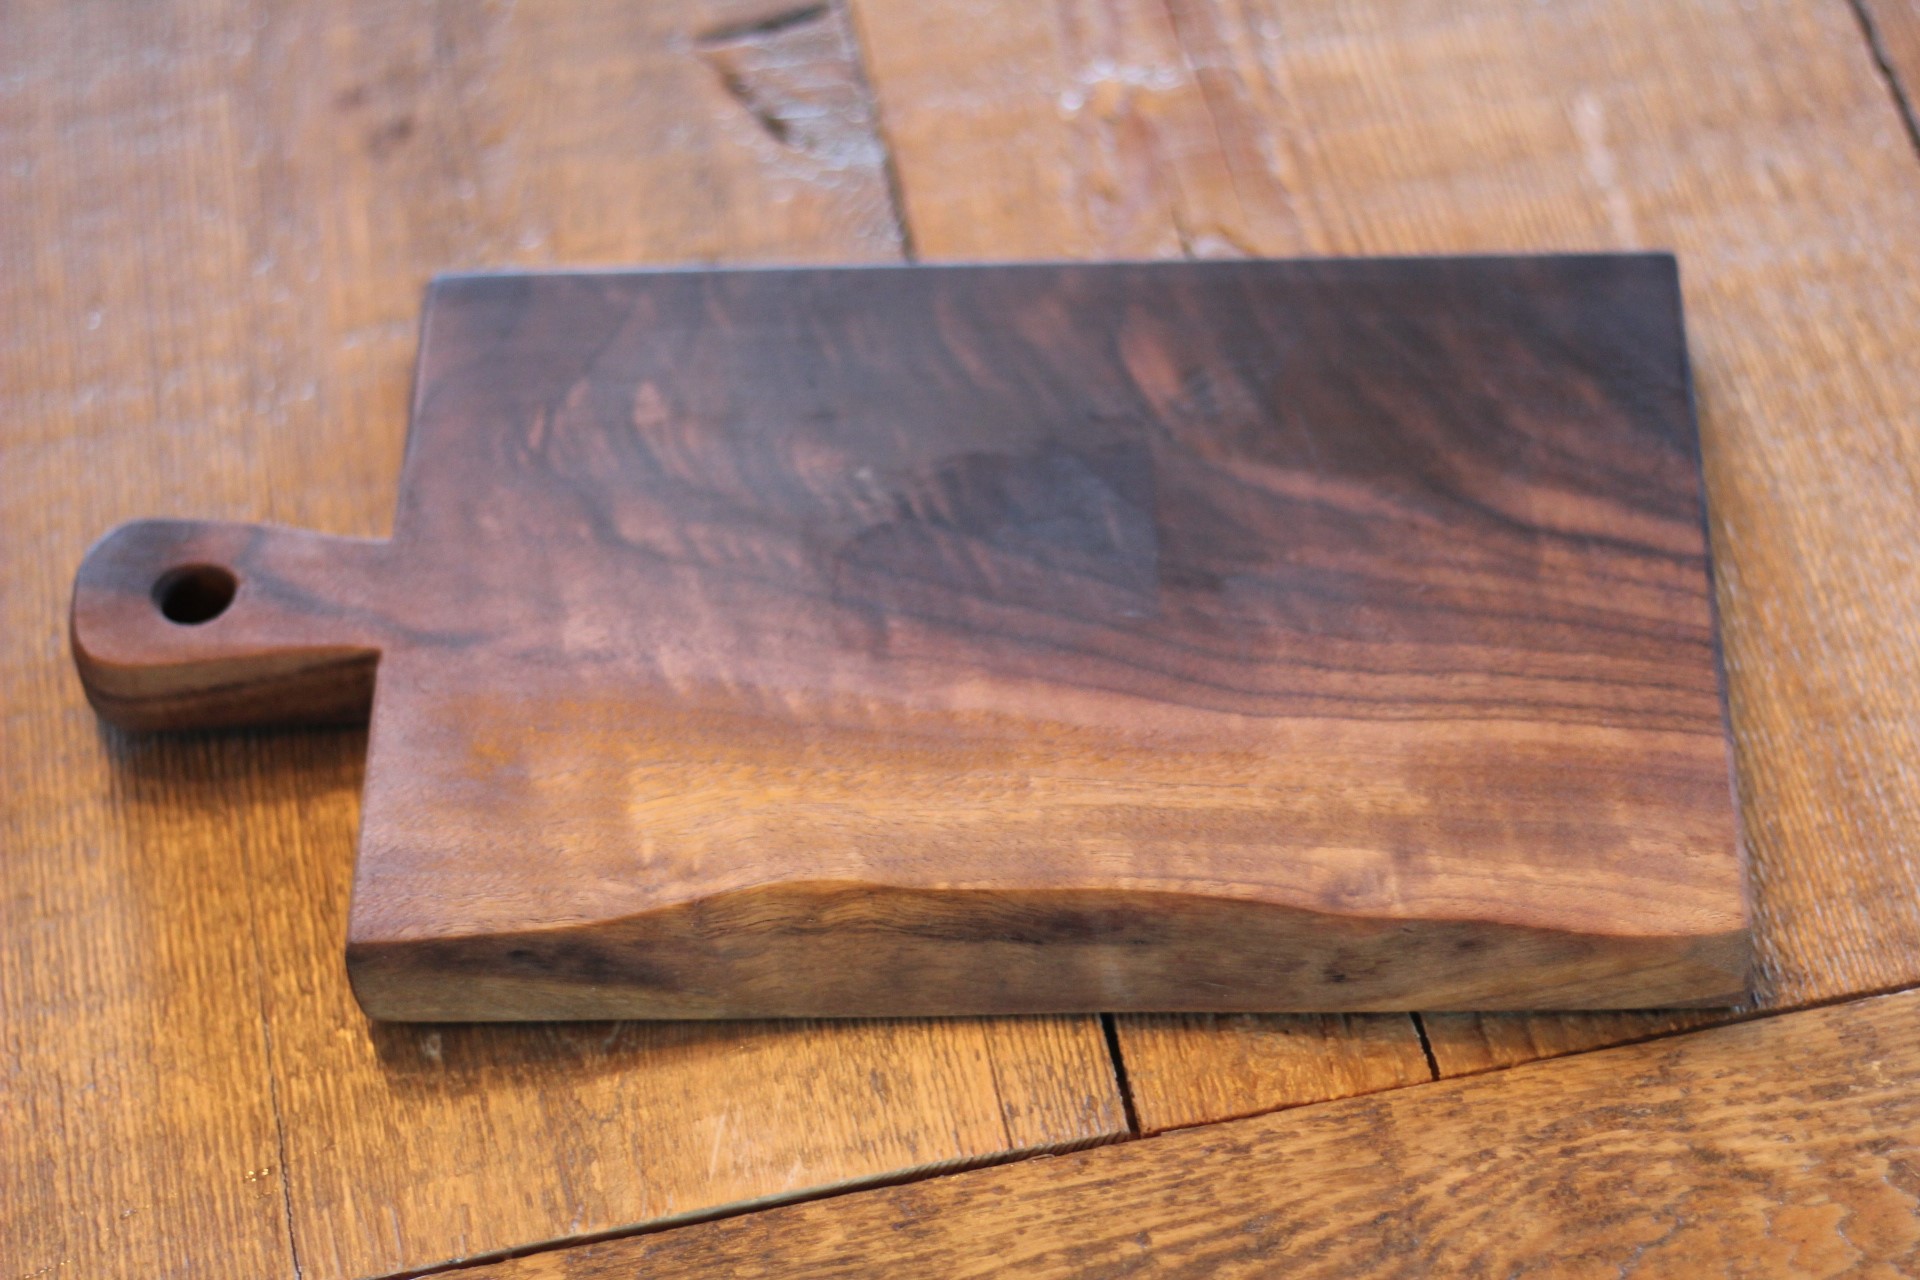
I purposefully selected a board about 7 inches in width so I didn’t have to rip it down to size. The board I chose had one live edge and decided to keep that instead of squaring all sides. I think the live edge is a classic look and adds to the handmade beauty. Then I crosscut the walnut down to approximately 12 inches in length with the table saw.
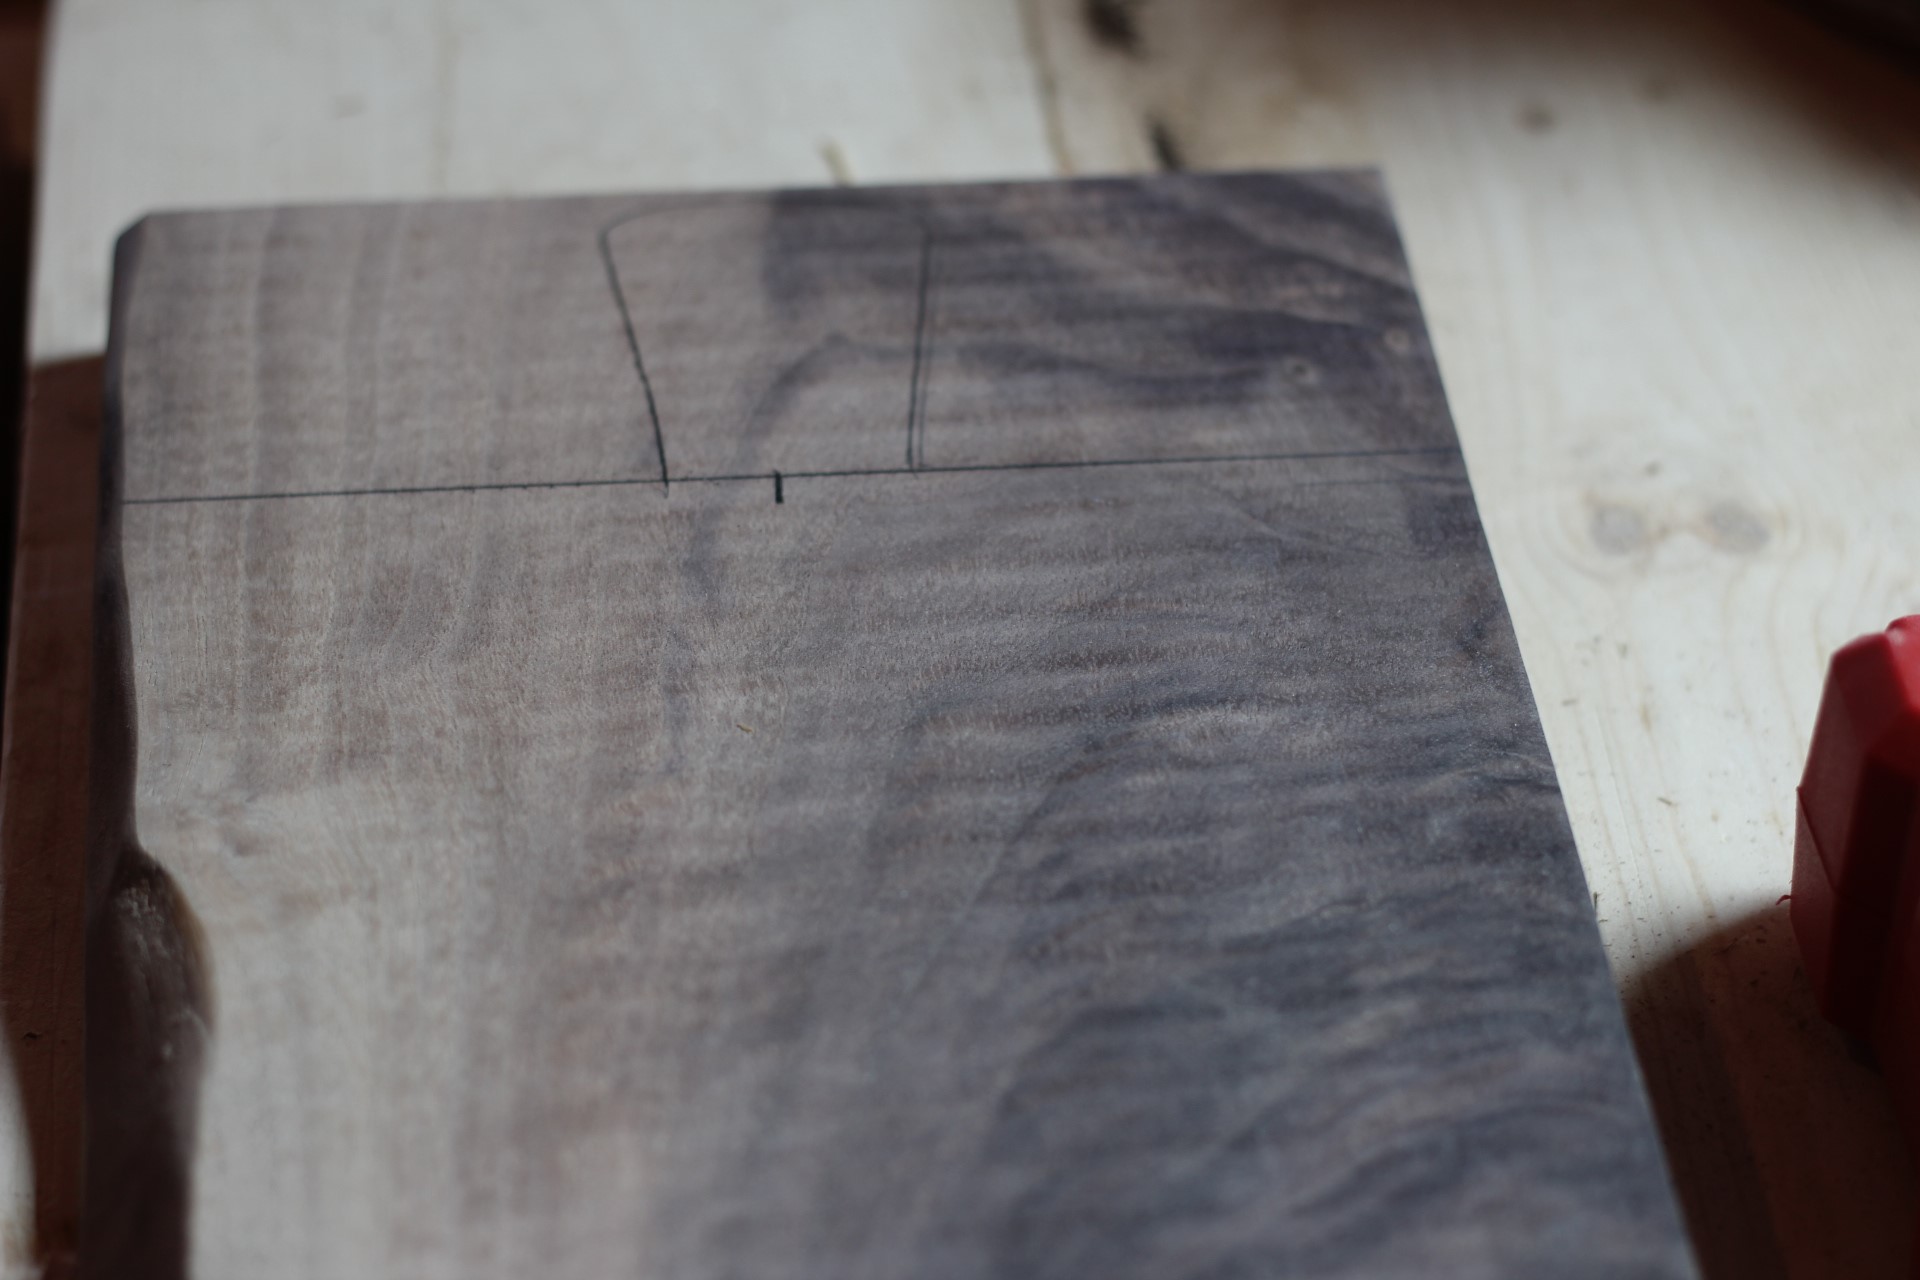
Draw Your Pattern: Step
It’s much easier to visualize and make your cuts if you draw directly on the wood. You’ll be doing plenty of sanding so you don’t have to worry about the marks showing up on the finished product. I decided to have a small handle on my cutting board so that was all I needed to draw and cut out. I marked the center of the board and then freehanded the handed. My goal was to end up with a cutting board the was handmade that didn't look like it was straight from the store, so if my handle wasn't perfectly symmetrical, that was okay with me.
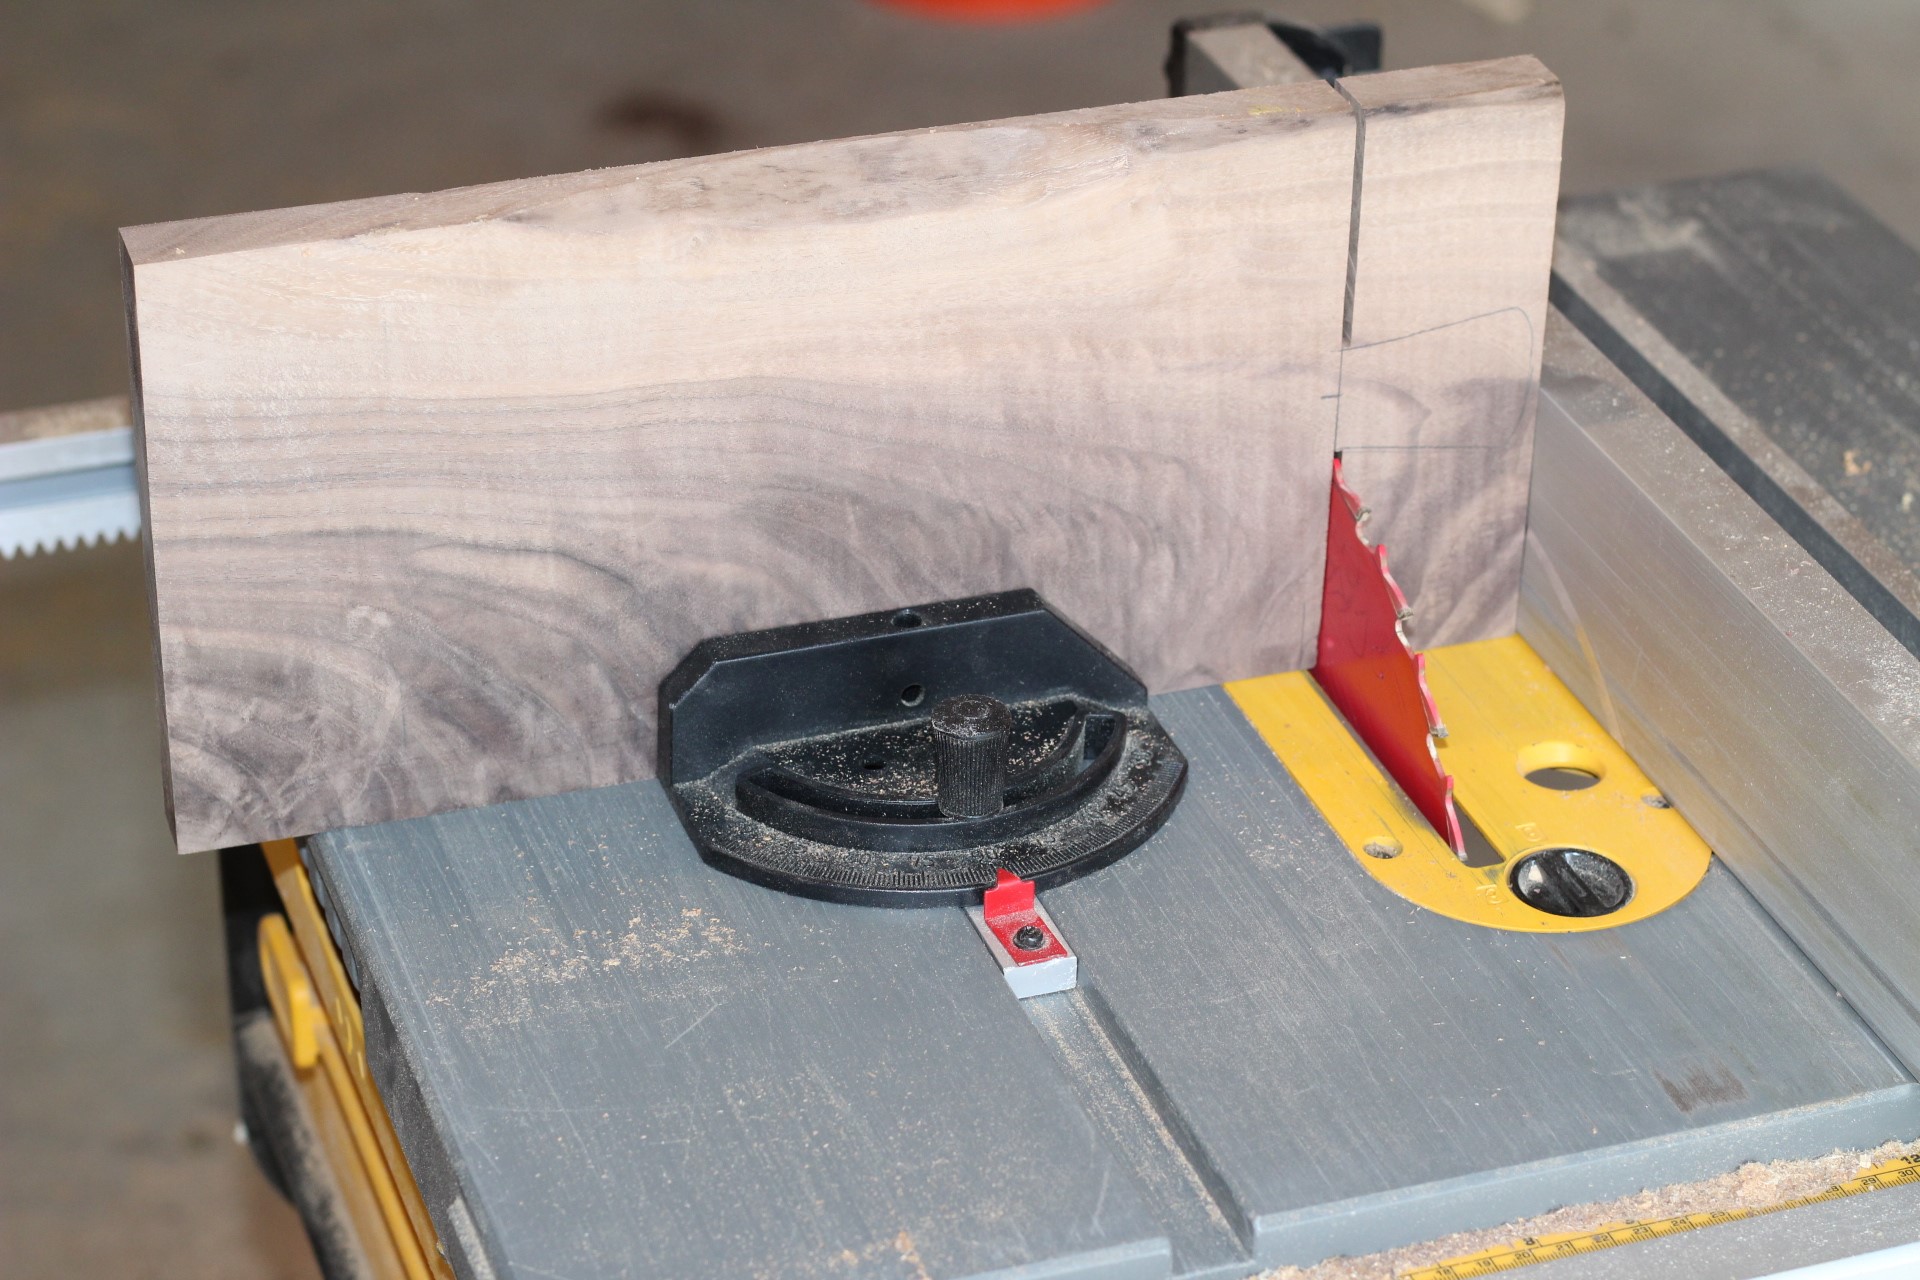
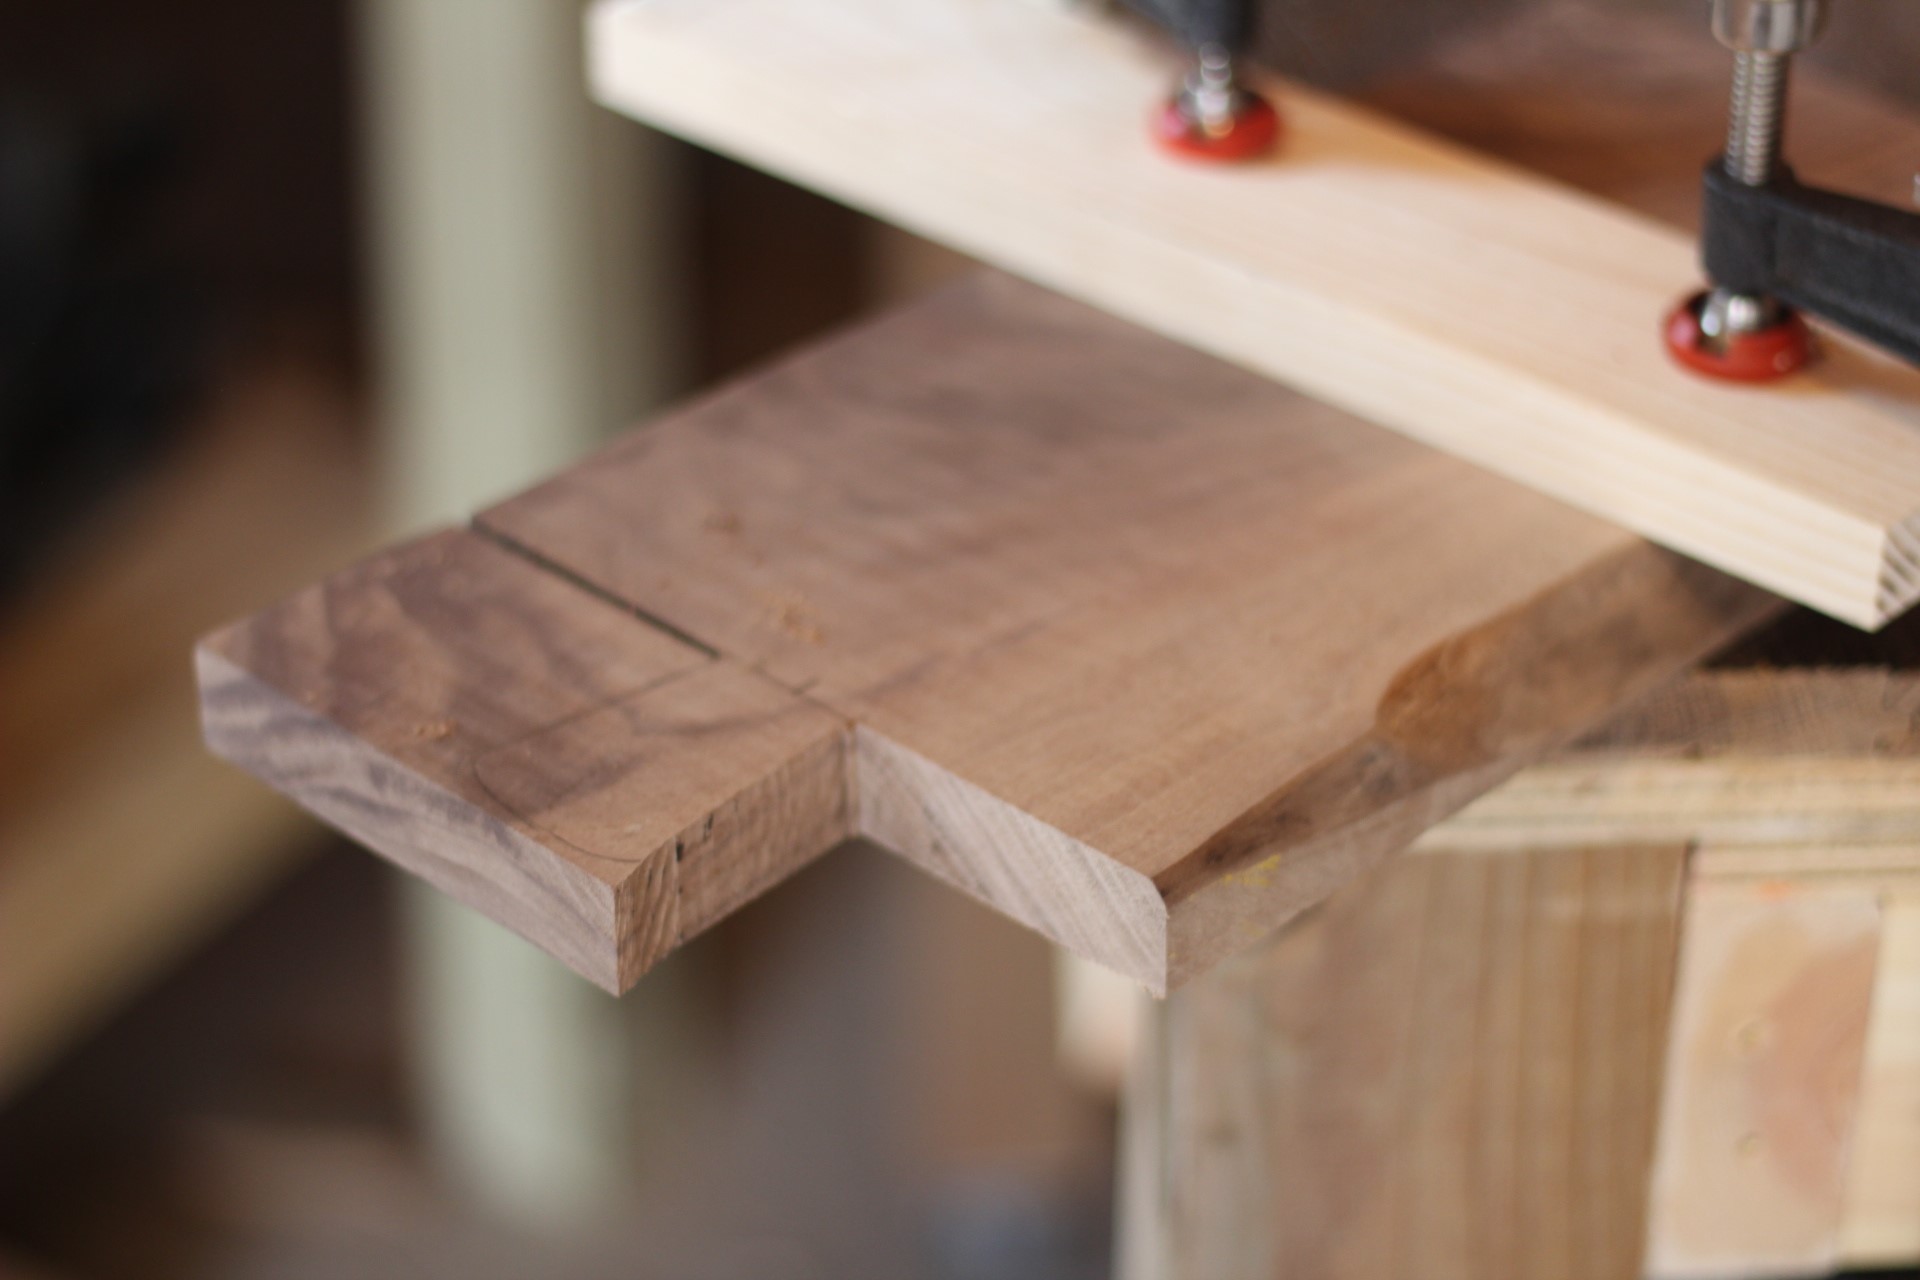
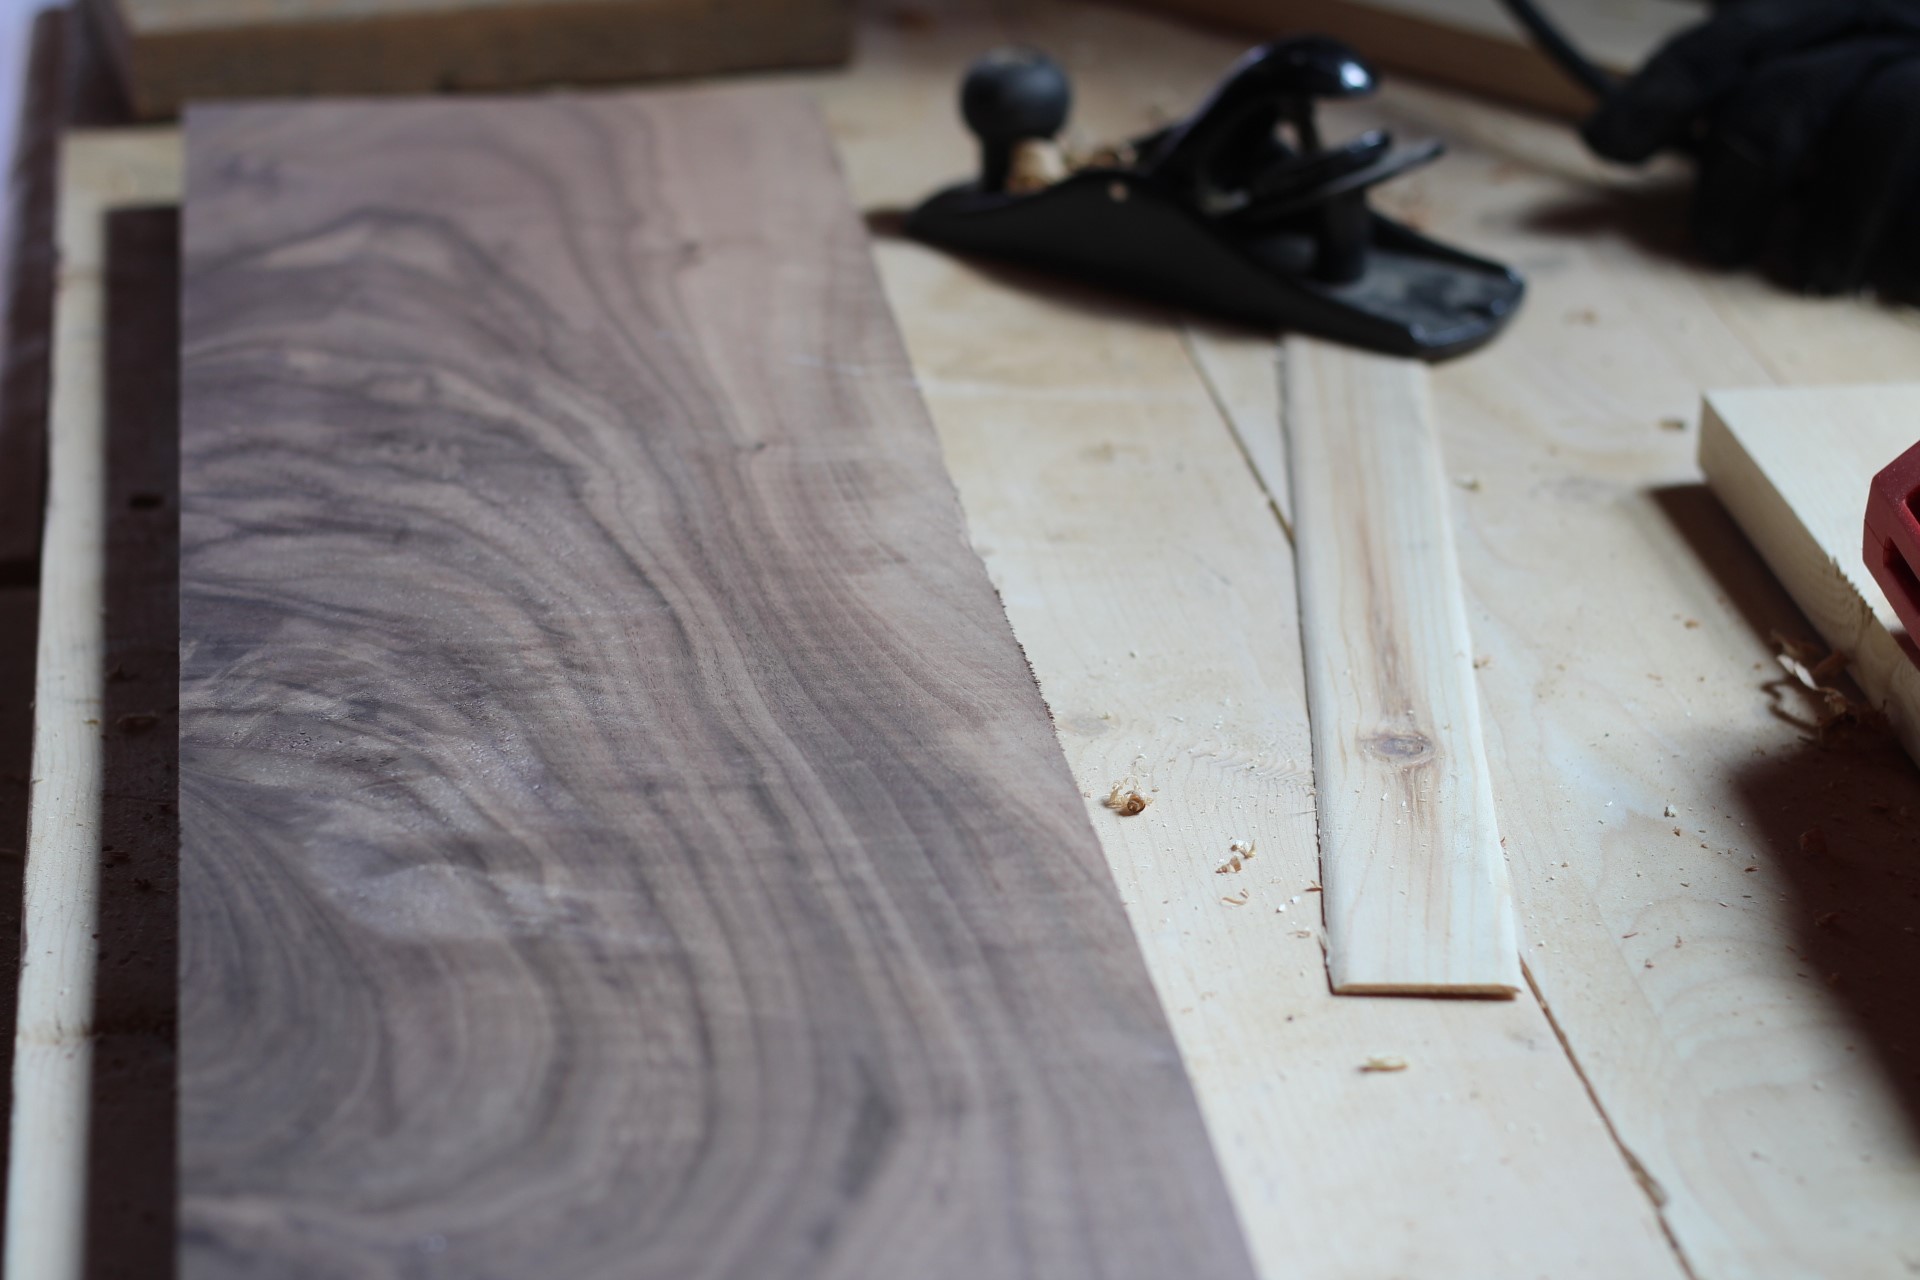
Cut Your Design: Step
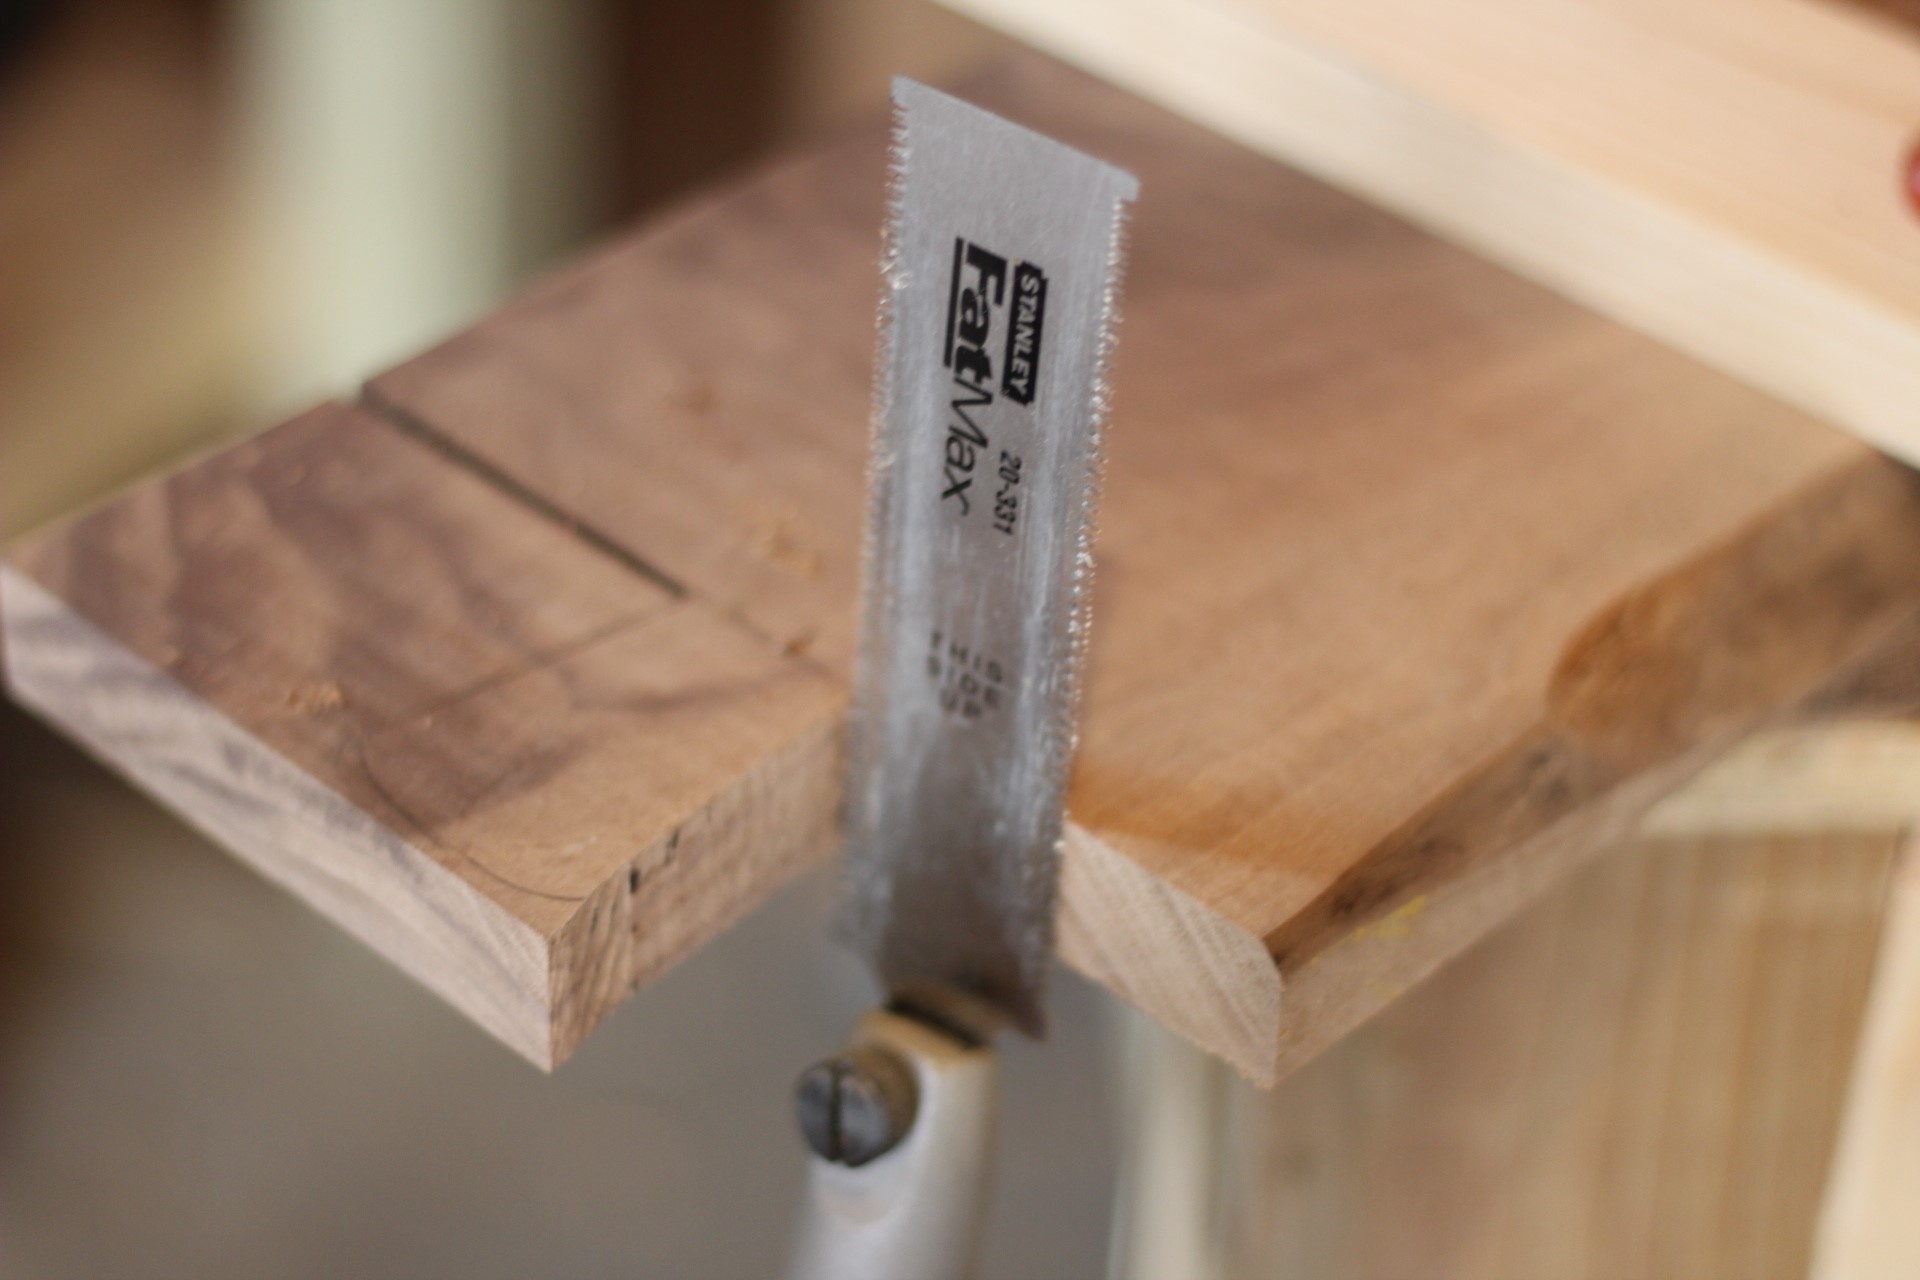
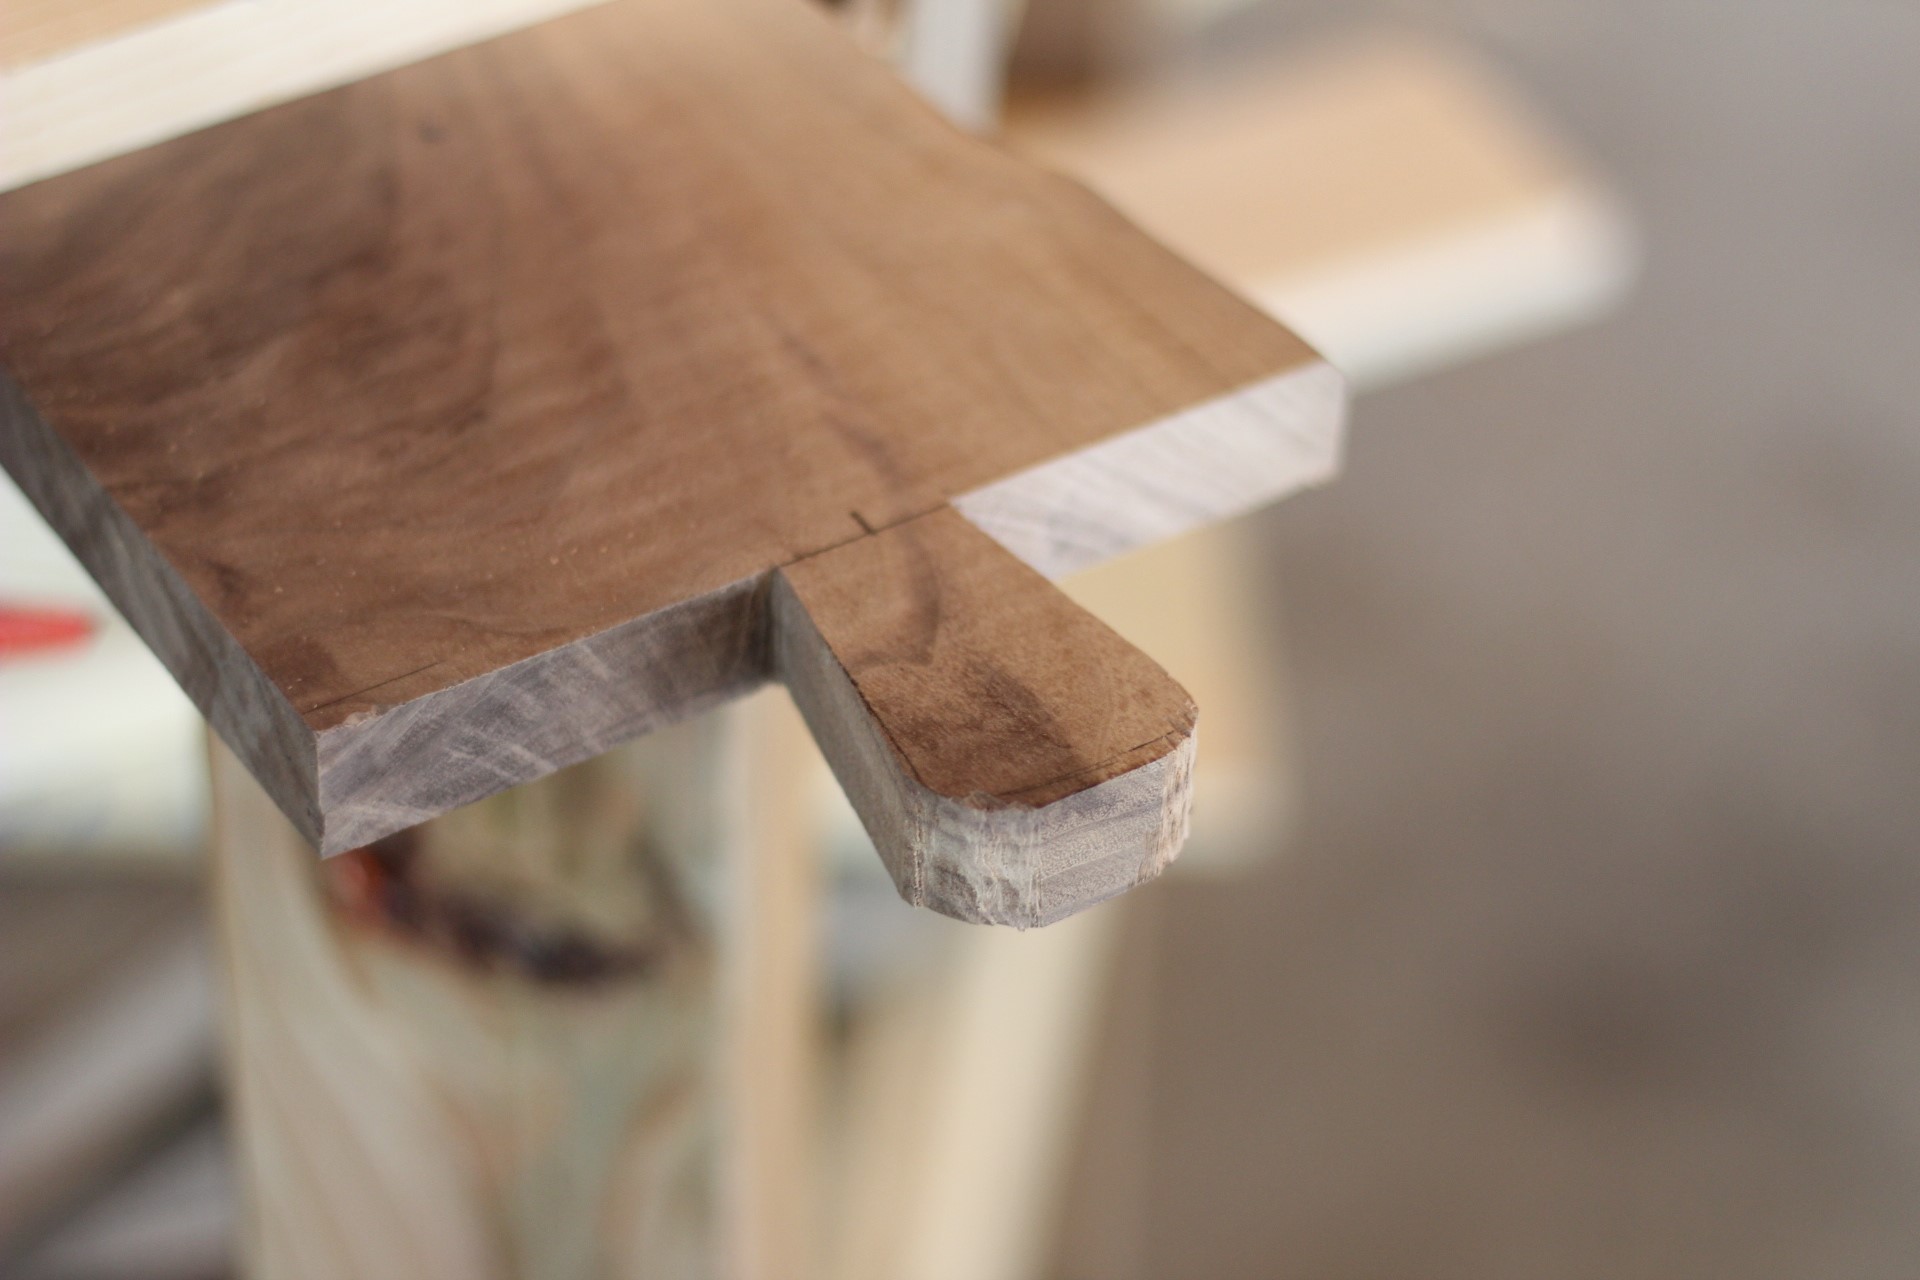
I used the table saw to get the handle width cut to the appropriate size. Then I used the jig saw to shape the handle. Finally, I cleaned up the cut with a flush cut pull saw. You can also use a bandsaw or a Japanese pull saw.
Sand, Sand, Sand: Step
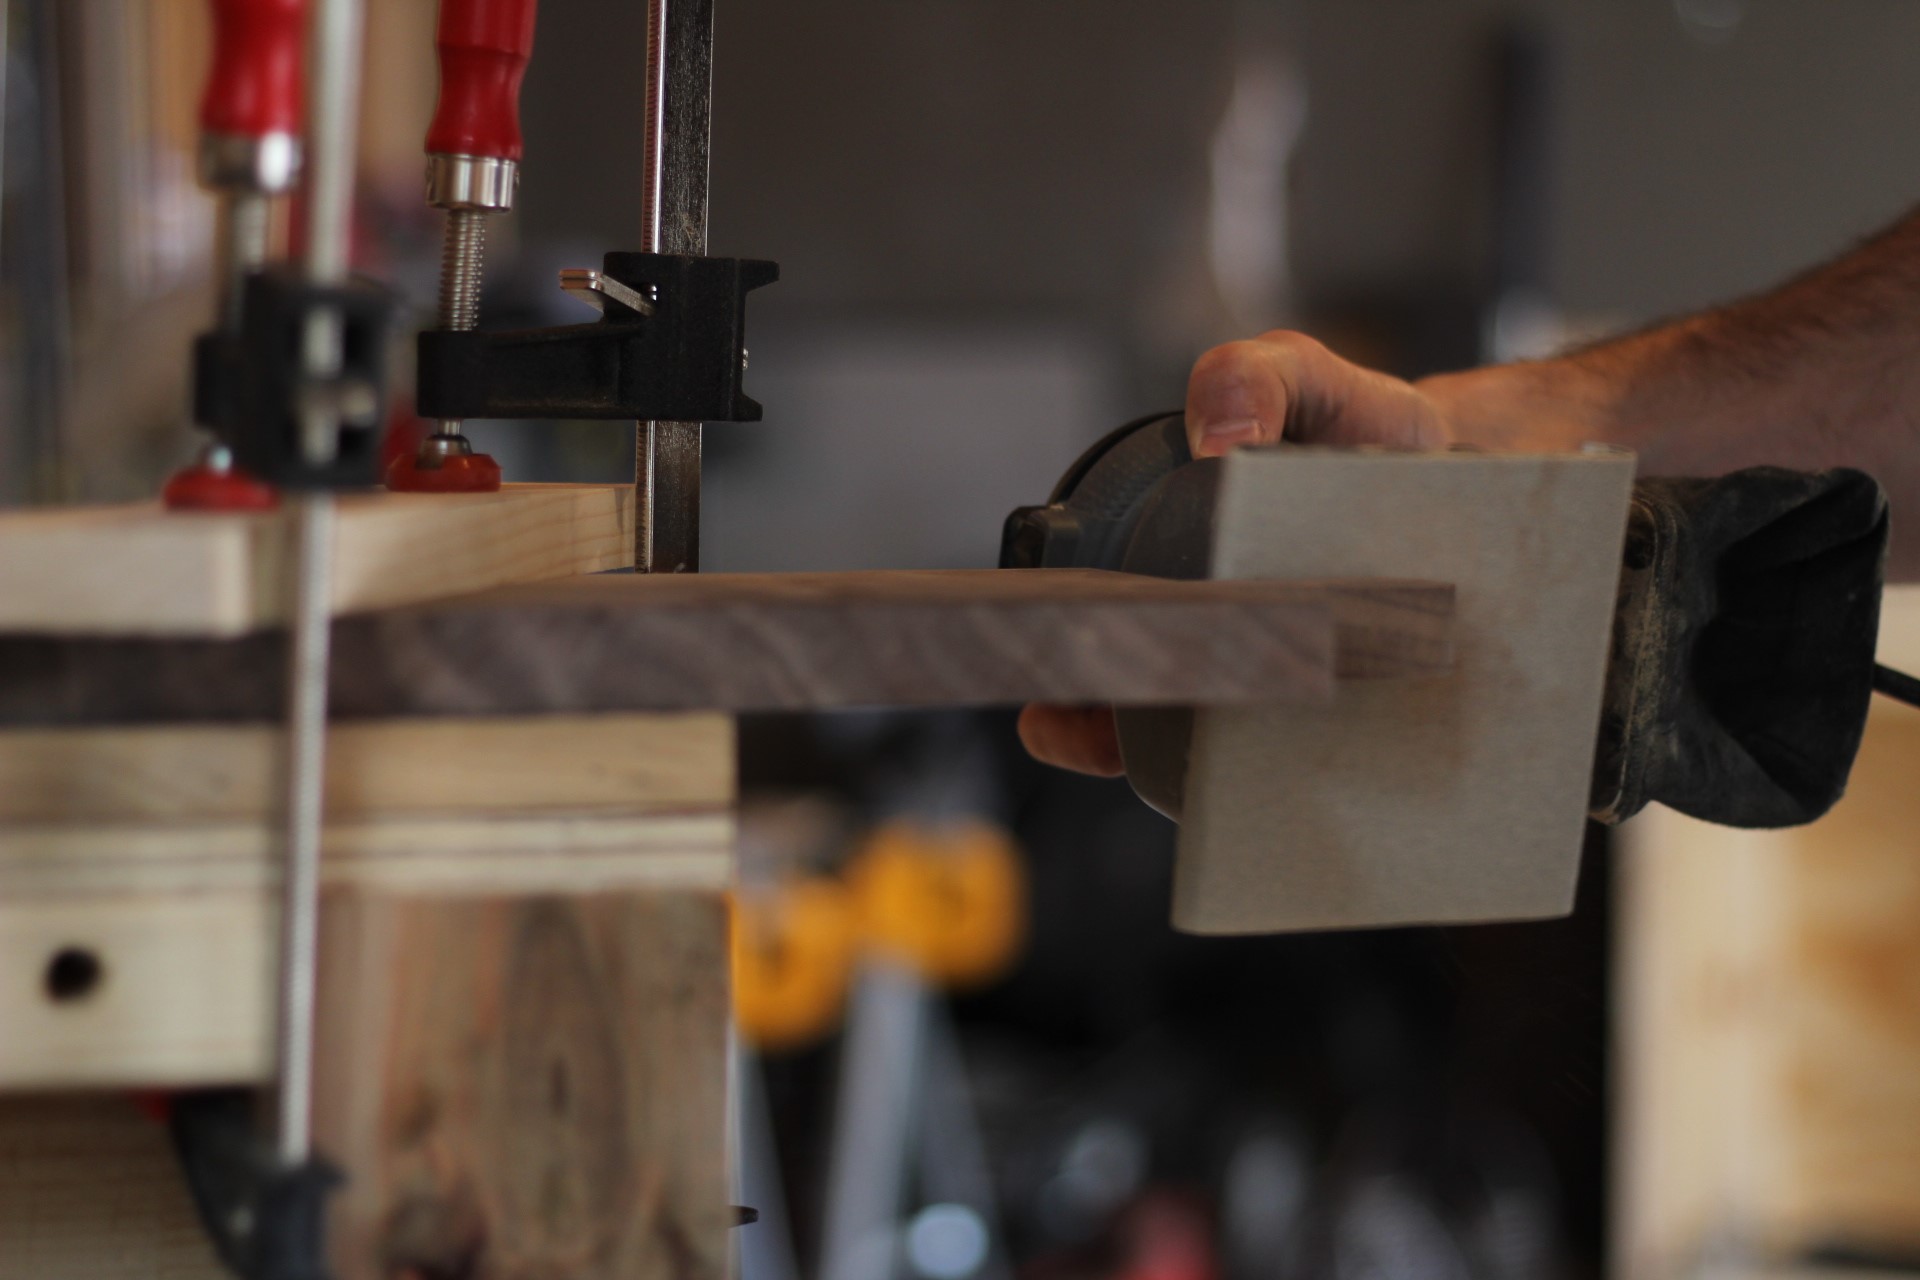
At this point, your cutting board is fully shaped and is ready for sanding. I started with a 100 grit on my palm sander to knock down any rough spots. Then I moved to a 120 grit using my palm sander for a little smoother finish. I also beveled all the edges with my sander to give it so everything wasn’t square. Again, I think this adds more of a handmade touch. You can certainly pull out the router and use a roundover or bevel bit, but the point of this project was to be simple. Finally, I hand sanded with 400 grit sandpaper.
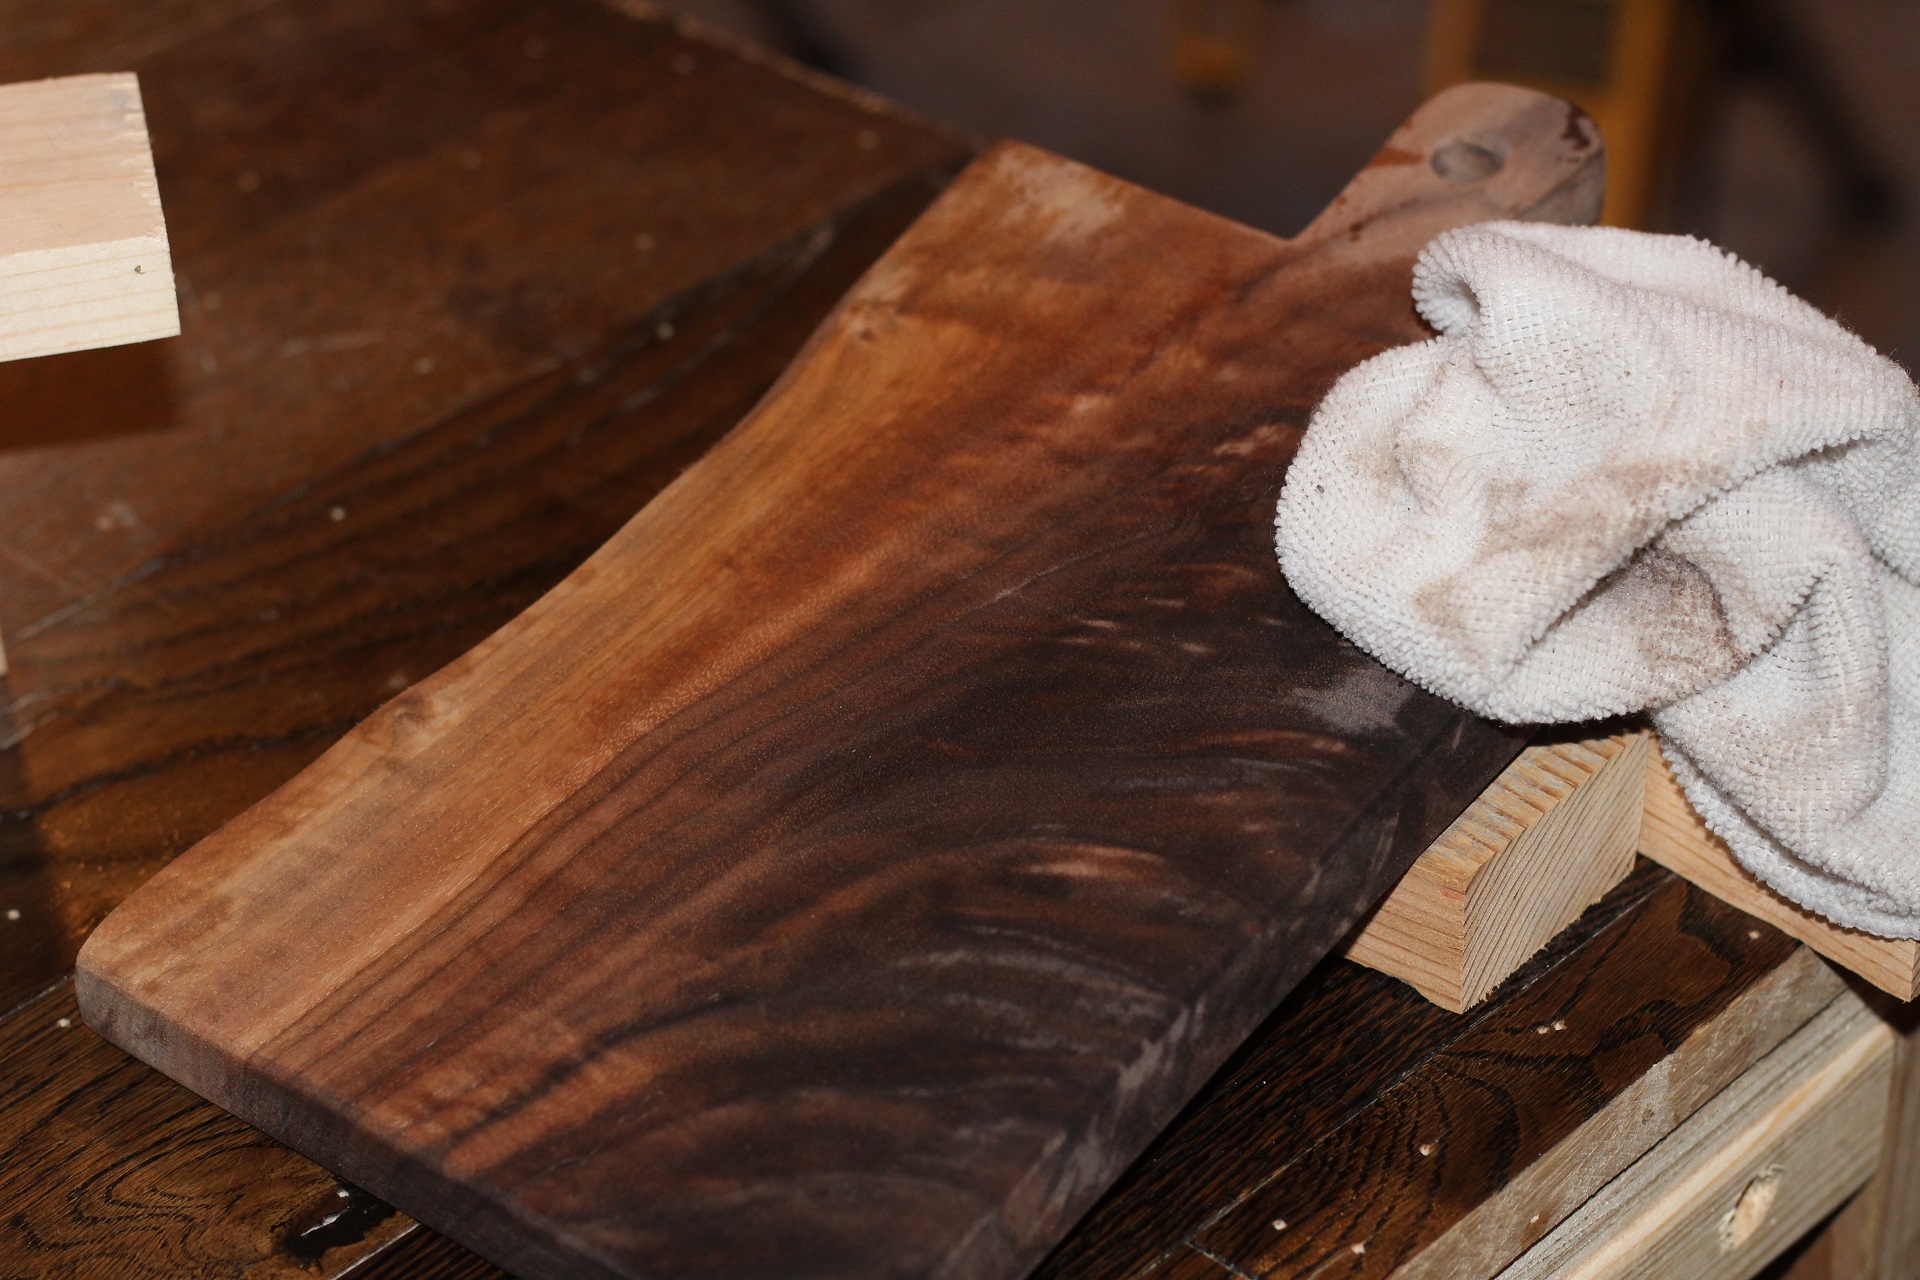
Wipe Clean with a Wet Cloth: Step
This does multiple things: it cleans off all the saw dust, but it also raises the fibers of the wood. Since your cutting board will be getting wet, you’ll want to raise the fibers of the wood now and then re-sand to prevent this from happening after it’s finished. Wipe the entire board down with a wet cloth, let it dry, and then re-sand with 400 grit sandpaper by hand (or any grit above 220 will work). Then use a dry cloth or air compressor to clean off all the sawdust. This should leave your cutting board with a smooth, ready to finish product.

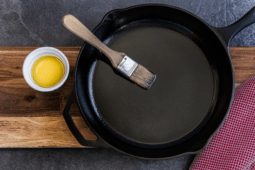
Apply Your Finish to the Cutting Board: Step
The first time that beautiful piece of walnut soaks in the food safe finish it is transformed into a sexy cutting board. Sexy probably isn't a term that most people would use in this situation, but any woodworker knows when finish is correctly applied it truly makes the grain pop and accentuates the raw beauty of walnut.
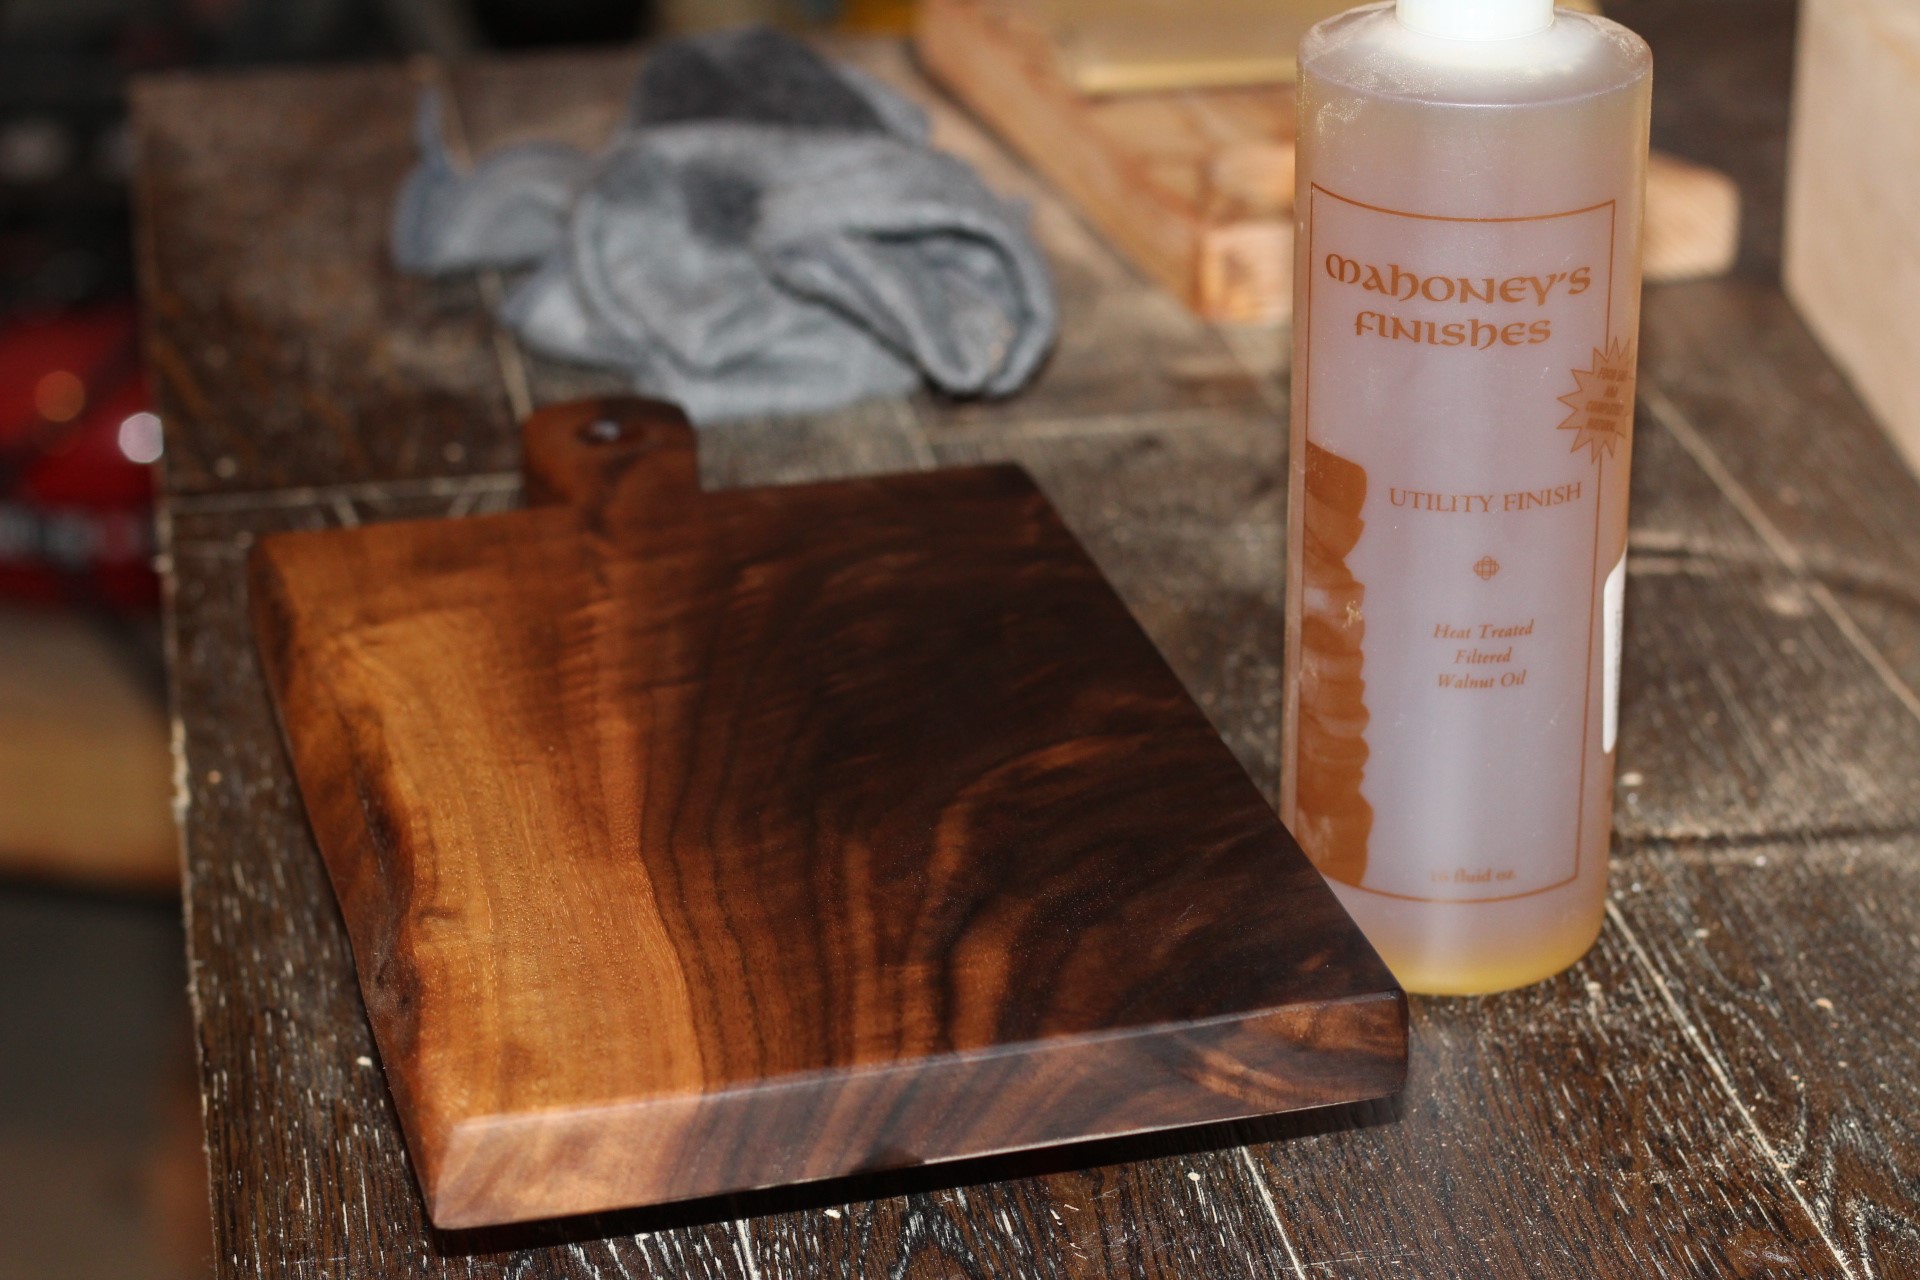
I used Mahoney’s walnut oil to finish my cutting board. Apply a generous portion of the food safe oil with a soft cloth. It’s recommended to let the oil soak and dry out for approximately 24 hours at room temperature. Apply 4-5 coats of the oil on the entire board.
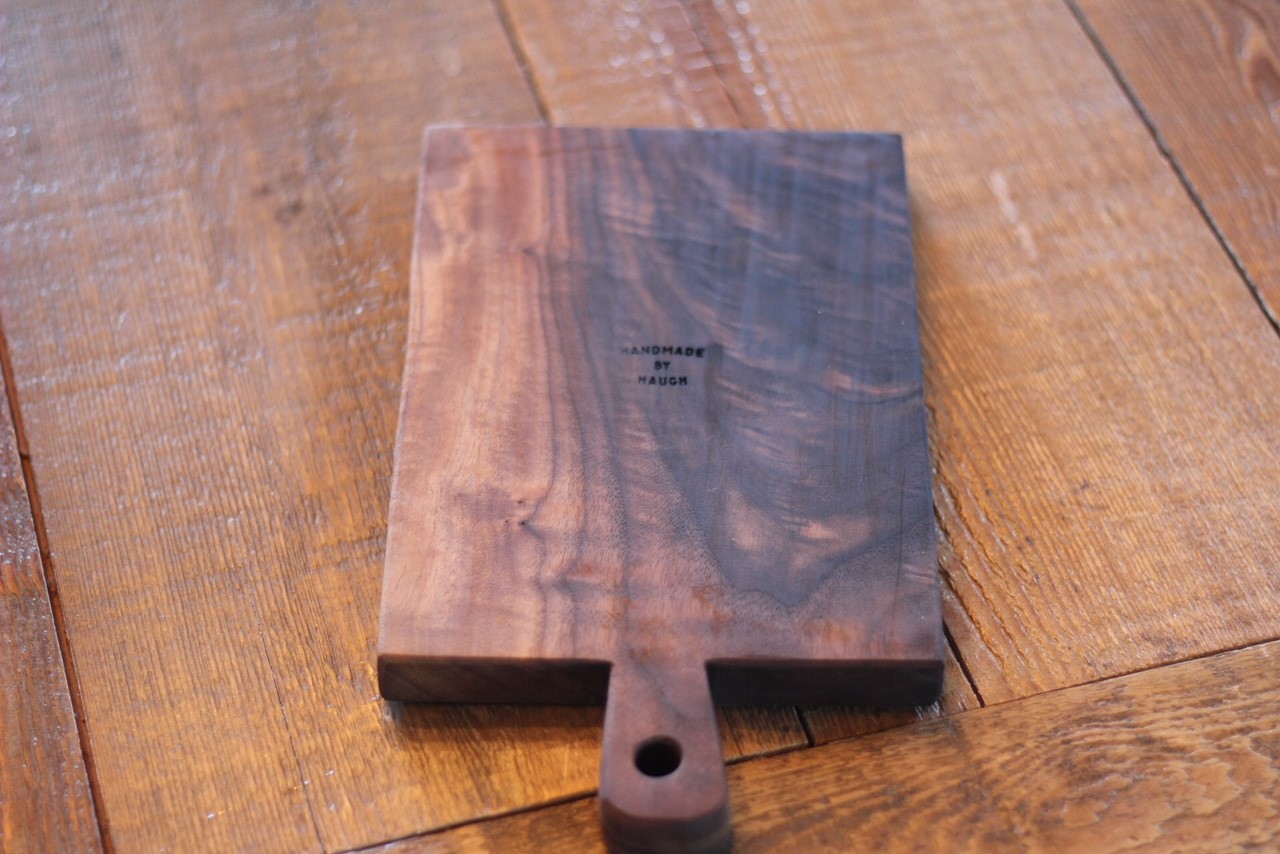
I used my branding iron to personalize the back side of the cutting board. You could also a standard wood burning tool to burn in your name, logo or year. Not only does this add an additional personal touch, but it also looks really cool with the finished applied.
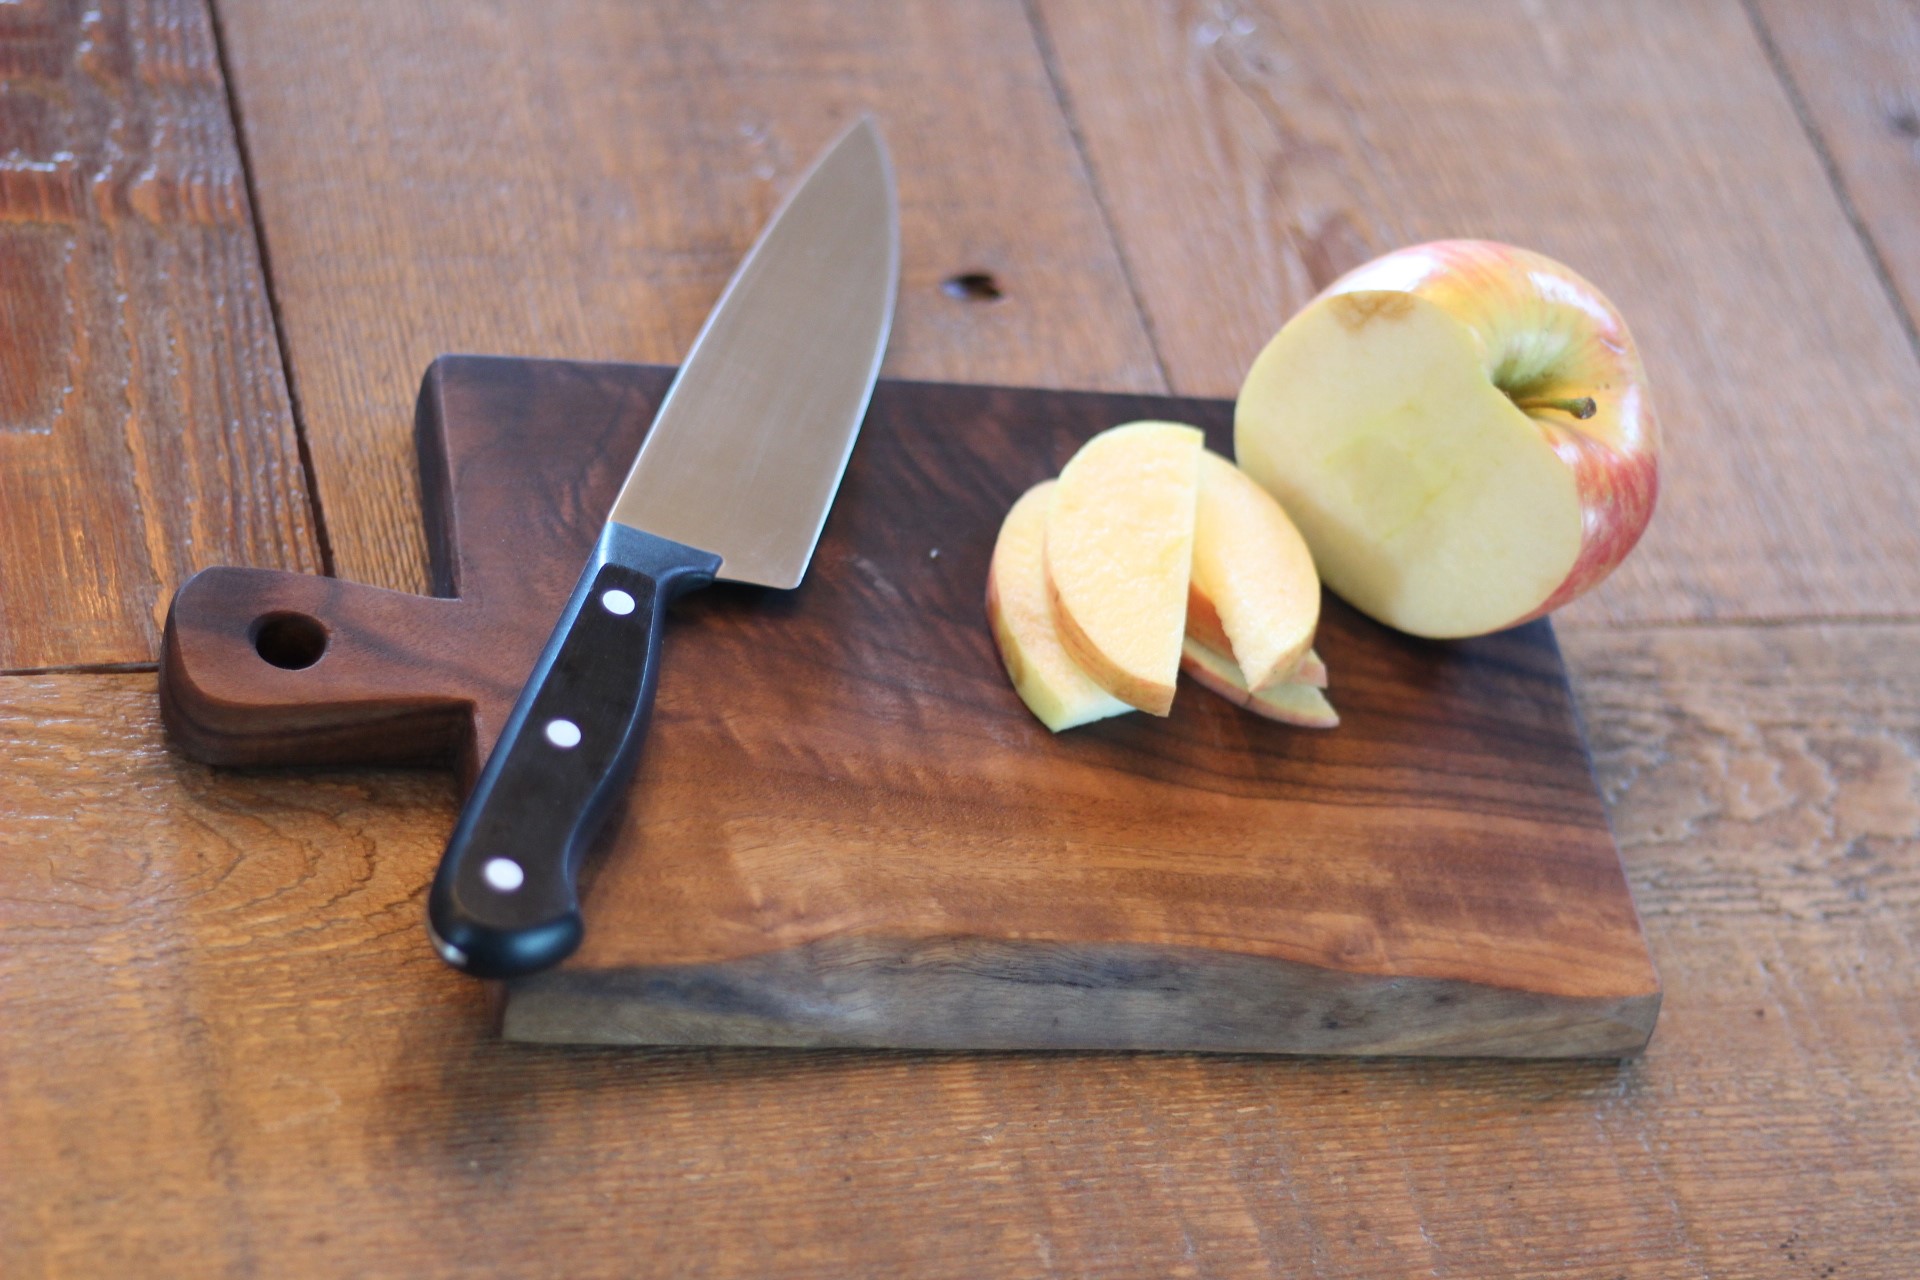
There you have, a simple and sexy cutting board. Enjoy!