How to: Make a Cast Iron Apple Pie
 Apple pie. For my money, it’s the best dessert to grace our tables and slide down our gullets in the past bazillion years. Sweet, tart, warm, gooey, and crumbly… it’s no wonder it’s an American icon. But why limit this goodness to your oven? Let’s take a journey with the recipe, step out of the kitchen, and head into the great outdoors (or your backyard) to create a rustic cast iron apple pie cooked over an open flame.
This is a pretty basic apple pie recipe; one that you can absolutely bake in the oven if you choose. Here in west-central Florida, we have the gift of mild weather all-year-round, so it’s a no-brainer to take a classic, apple pie, outside and bake it over some coals. Enough talk – let’s create!
First: this pie will be baked in a cast iron dutch oven. If you don’t have one, you can use a cast iron skillet, but you’ll need a lid for it (we don’t want ash and coals invading dessert space). Even then, if you just have a skillet and no lid, the recipe works the same, you’ll just stick the skillet in the oven to cook. The goal is, of course, a delicious, browned crust, and for that, the pie needs heat on top as well as the bottom.
Materials
- Cast Iron Dutch Oven – I’m using a 5 quart/10 inch Lodge Dutch Oven that I picked up at a local outdoor shop. They’re available on Amazon for under $30, but you can save cash if you pick one up at a garage sale. My cast iron dutch oven is prepared for pie!
- Charcoal or Seasoned Fire Wood – I used hard wood lump charcoal
- Tongs – long ones to move around coals (we like these)
- Oven mitts or fireproof gloves
- Mixing bowls, cutting board, and sharp knife
- Parchment paper (optional)
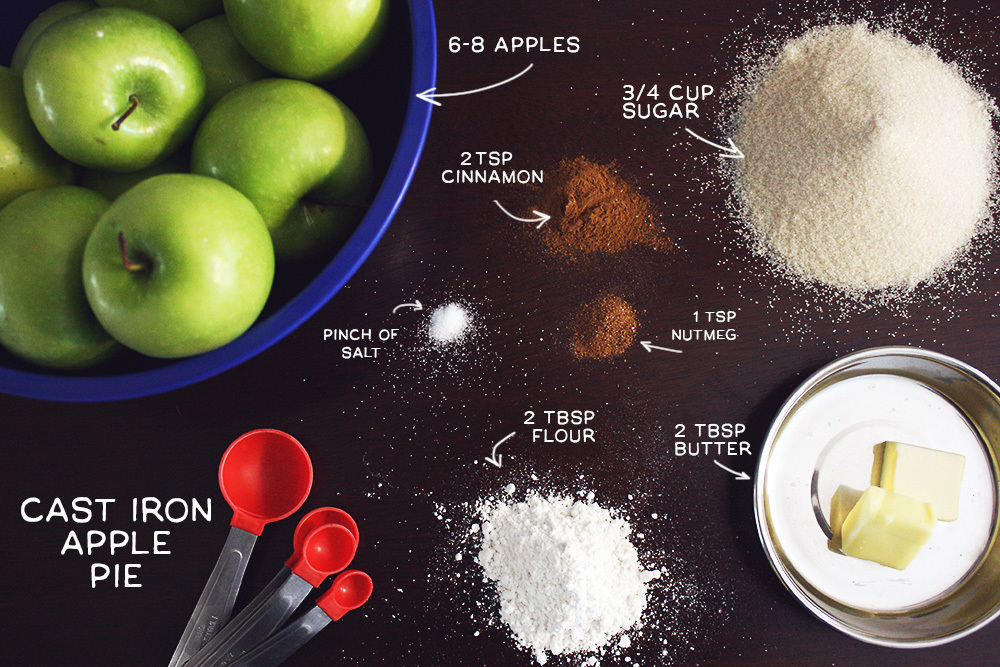
INGREDIENTS
Pie Filling
- 6-8 tart apples, depending on size (I used granny smith)
- 3/4 cup sugar
- 2 tsp cinnamon
- 2 Tbsp flour
- 2 Tbsp butter
- 1 tsp nutmeg
- pinch of salt
Pie Crust
You have two options here: make a super simple homemade crust, like this one found on the Montana Homesteader website, or…
Snag a premade crust at the store. No one is judging. I often do both… because who’s only making one pie!? Around here, it’s one for the chef and one for everyone else.
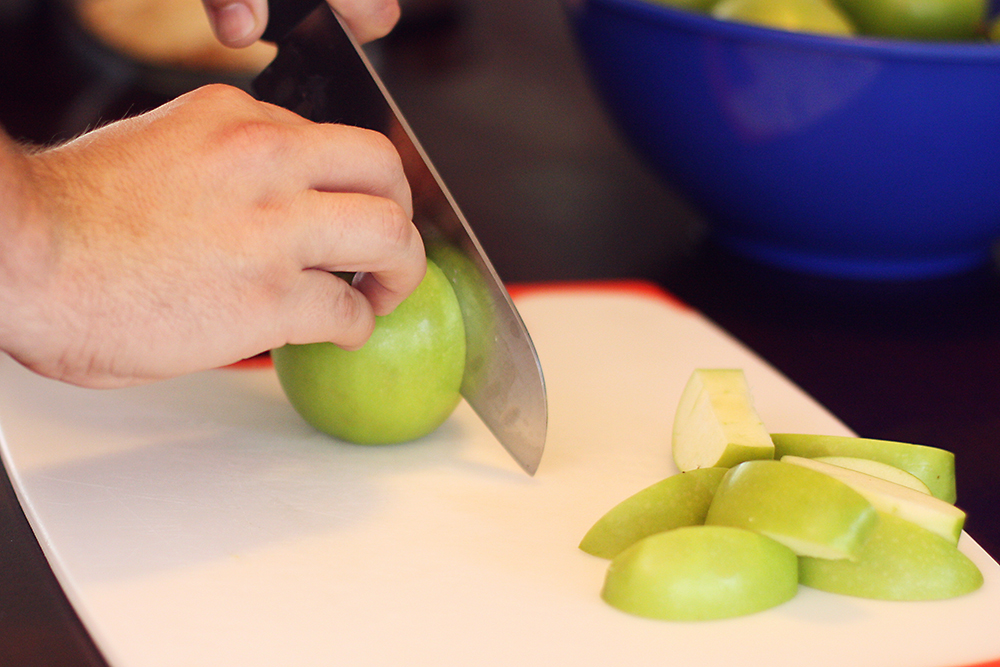
Step One:
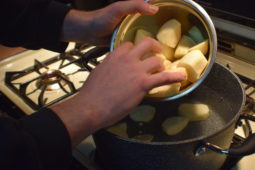
Get those apples sliced. Cut them in half and then each half into 3rd’s. You can leave the skin right on.
Depending on the size of the apples, you’ll need about 6-7 – we want them to be piled into the pie, not a flat layer, so don’t be too stingy. (Buy extra, and slice as needed)
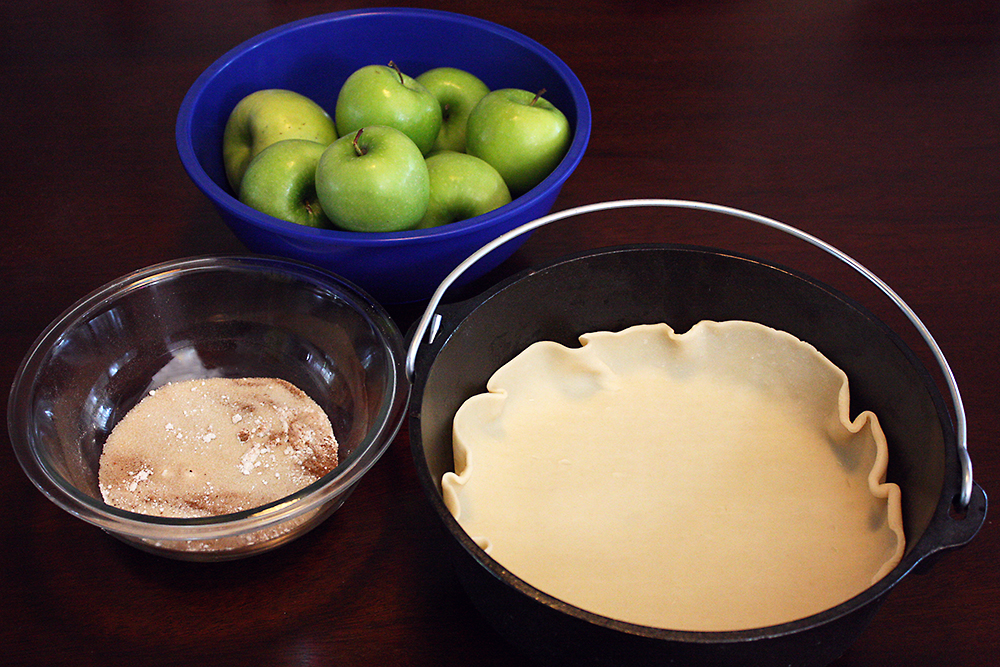
Step Two:
Mix all those dry ingredients together and put your pie crust into the dutch oven. Remember, whether you’re making a homemade crust or using a premade crust, you’ll need two layers – one for the bottom and one to cover the top.
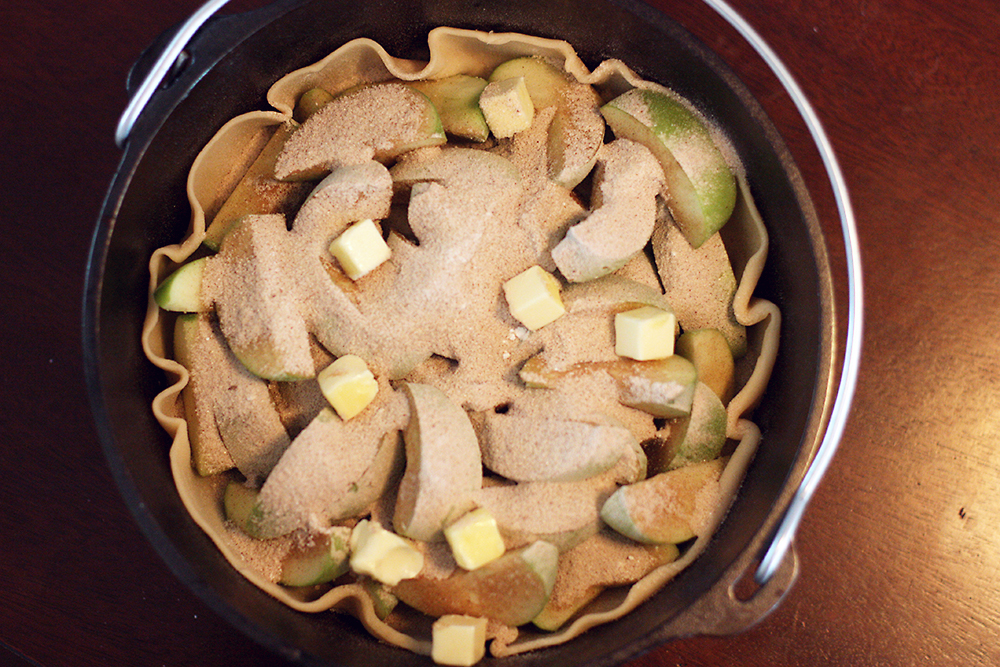
Pour your cut apples into the crust, then cascade those sweet dry ingredients right on top.
Cut up the butter into small chunks, and place them at top the filling.
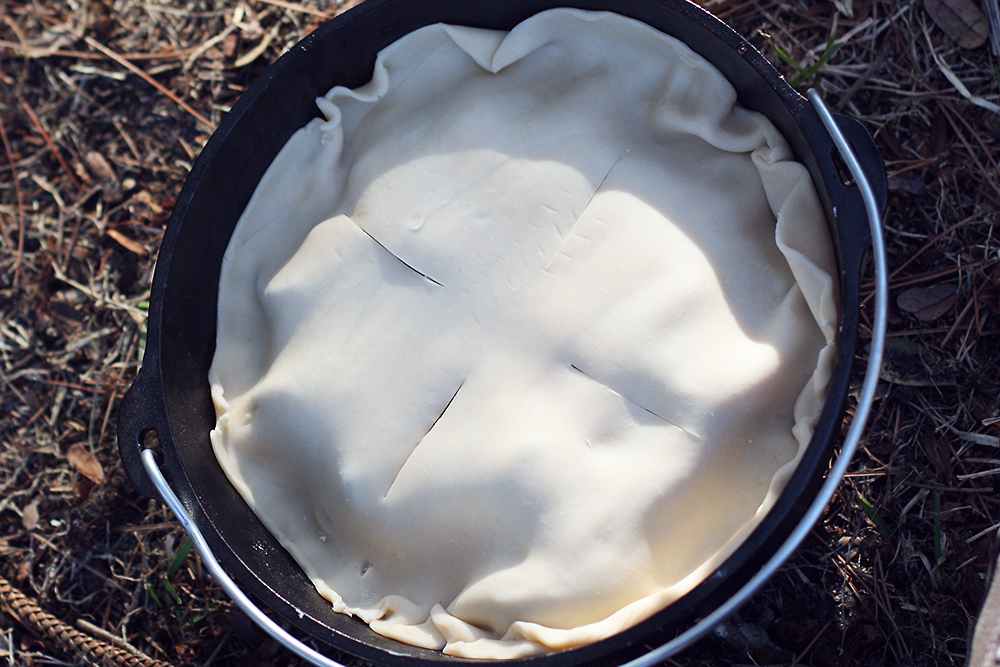
Place your second pie crust on top of the goodness. Make a few slices with a sharp knife so steam can escape.
Step Three:
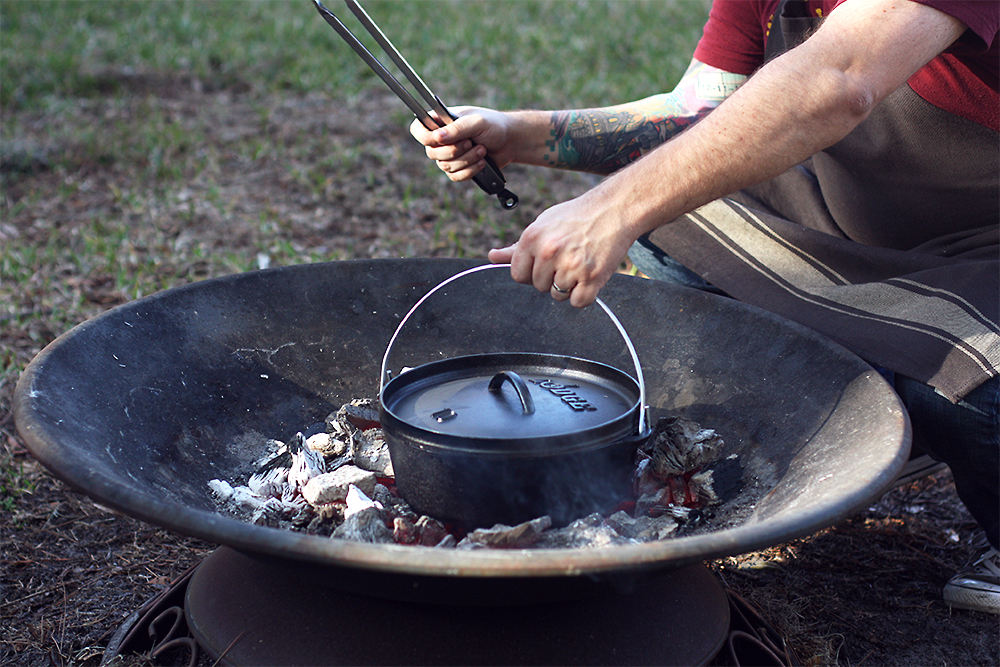
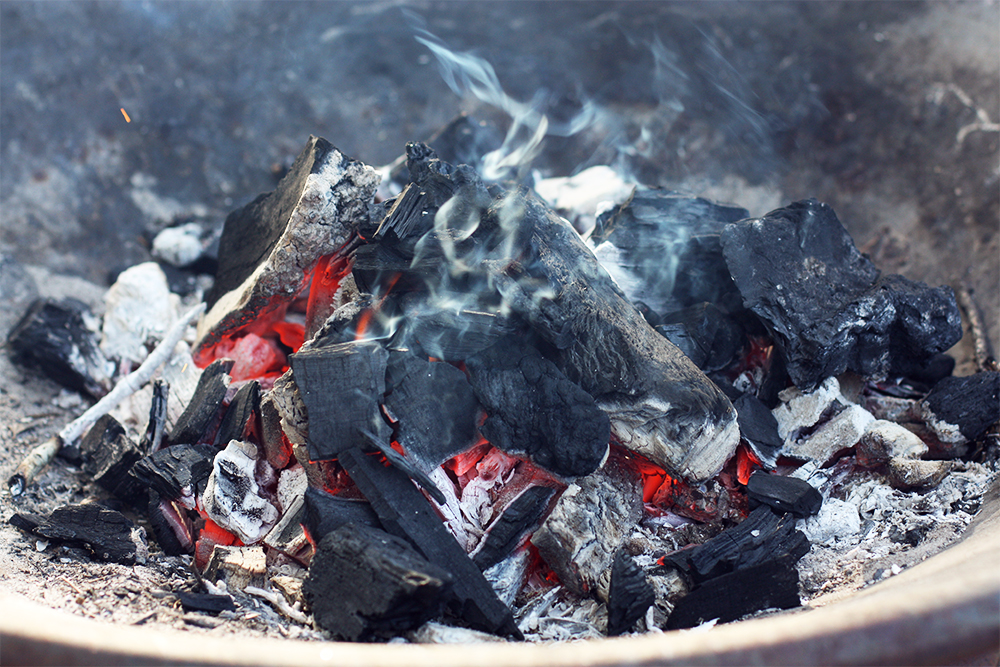
Get those coals ready! Here I’m using hardwood charcoal. To prep your heat, check out the ManMade guide on how to nail open fire cooking every time. If using firewood, wait for flames to die down until you just having glowing coals.

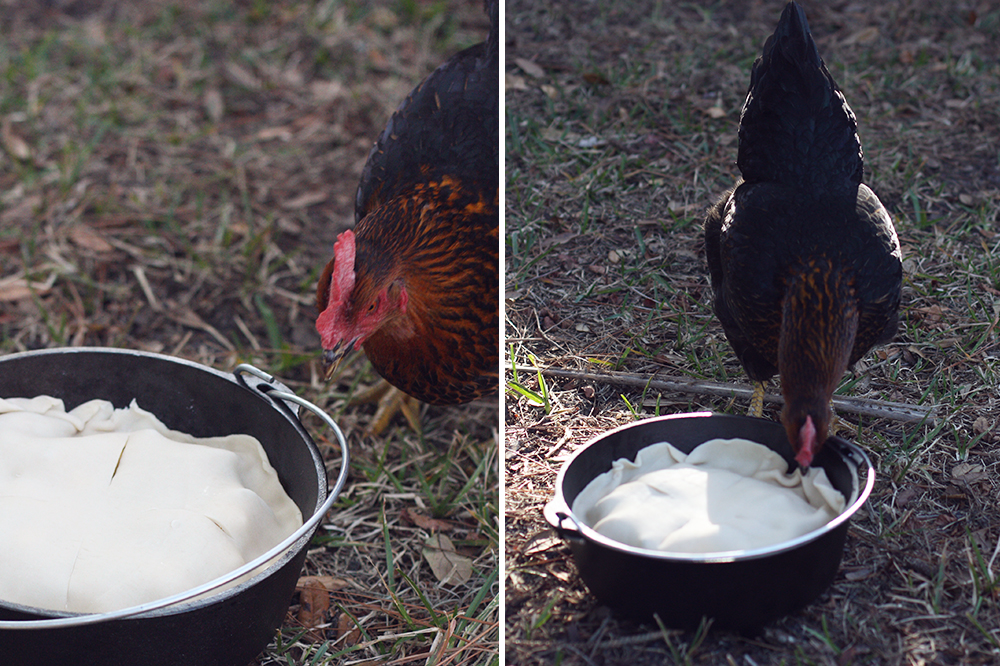
This photo is really a warning. Creatures from all over are going to want get a piece of that pie – cooked or uncooked. Watch out for the chickens.

Step Four:
Prepare coals and put in the pie.
A note about baking on coals: There’s a little learning curve on getting the right temperature. Unlike frying, sauteing, grilling, etc, baking needs more precision. Too much heat and you burn the crust (which I’ve done.) The wood chunks may not seem like enough heat, but, trust me, they are. Cast iron retains a lot of heat, so start slow.
What worked for me was spreading the coals and pushing them into a circle with the dutch oven in the middle. I didn’t even have coals directly underneath it.
I used ~6 coal briquettes/chunks on the lid. You’ll need to watch, listen, and smell: watch your coals and make sure they’re spread evenly around; listen to the pie cooking. You’ll hear sizzling and bubbling – that’s good. If you hear burning/crackling inside, it’s too hot and your crust is burning/crackling. Since this is campfire cooking, the smell of smoke is normal, but shortly after starting, the smell turns into spices and bread (crust) smells. Smell burning? It is. Keep monitoring, adjusting the temperature – push coals away, take some of the lid, add more, etc.

Don’t open the lid if you can help it. If you see a lot of steam/smoke coming from inside, hear a lot of sizzling/crackling, or smell burning, you can use your tongs (or some other long, strong, metal) to lift the lid slightly and check scene. The crust should be turning golden brown and the pie filling should be bubbly. Too much heat? Take off some coals and push them away.
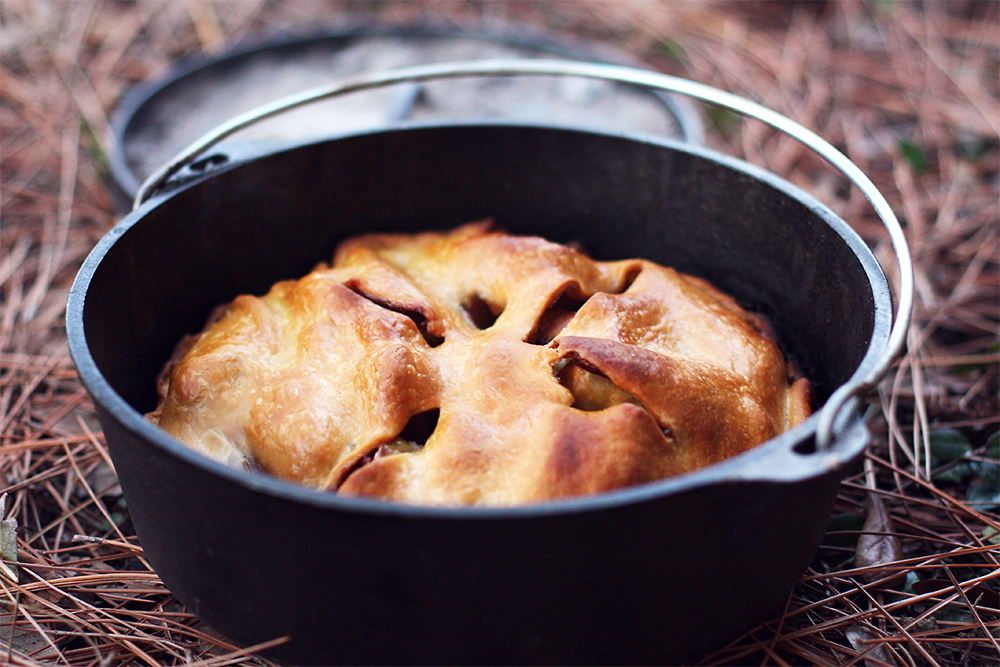
After about 30 minutes of baking, check on your pie. Again, be careful with the lid and coals. You don’t want ash spilling into this beautiful creation.
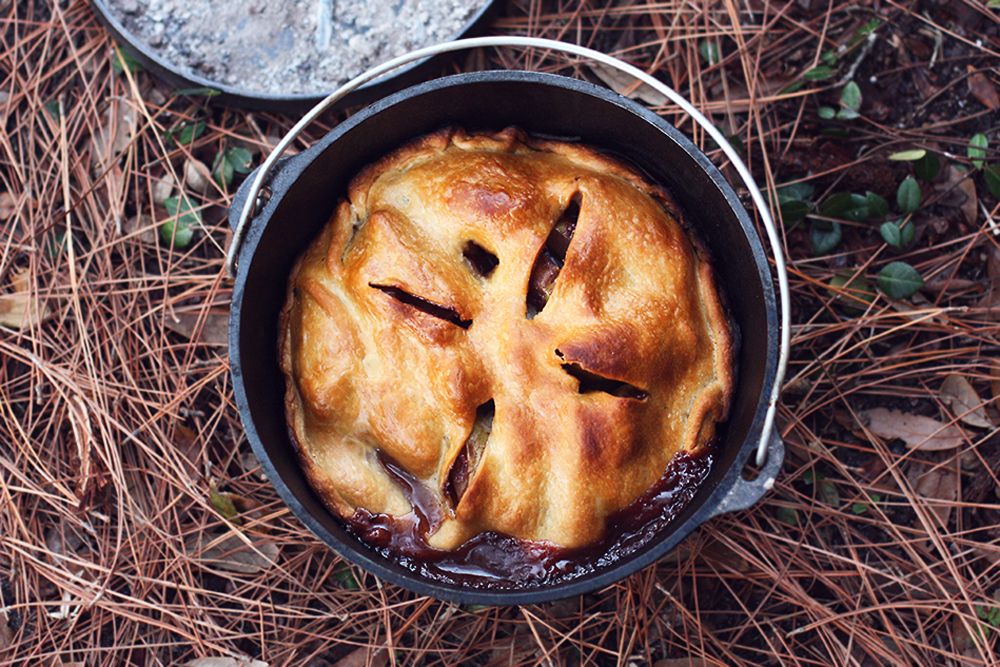
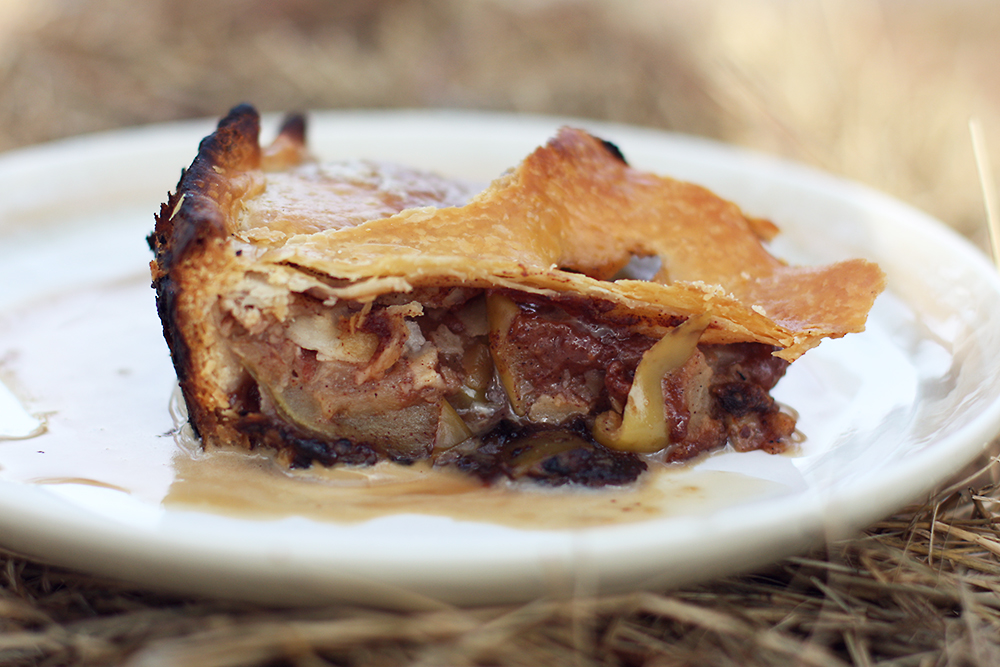
Golden crust, crispy edges, and a bubbly filling. Check!
Step Five: (The Hardest Part)
Wait for everything to cool off. It’s going to take a while as that cast iron keeps heat so well. About 30 minutes or so.
Once cool, you have two options:
Option 1: Cut a slice, place it on a plate, take a fork, eat. This is what some people call ‘civilized’ and that’s all well and good, but you also have…
Option 2: Take a fork, scoop out morsel of pie directly from cast iron, eat. This is what I call the ‘proper’ way, but you do you.
Add a dollop of ice cream or even a drizzle of coffee liqueur.
And there you have it – cast iron apple pie. As mentioned, the most complicated part of this cooking adventure is maintaining a good temperature. Once you have that down, it’s just a matter of enjoying the outdoors and a delicious dessert. This apple pie comes out looking, smelling, and tasting like campfire confection. It’s definitely a meal that’ll impress friends and family… and chickens.