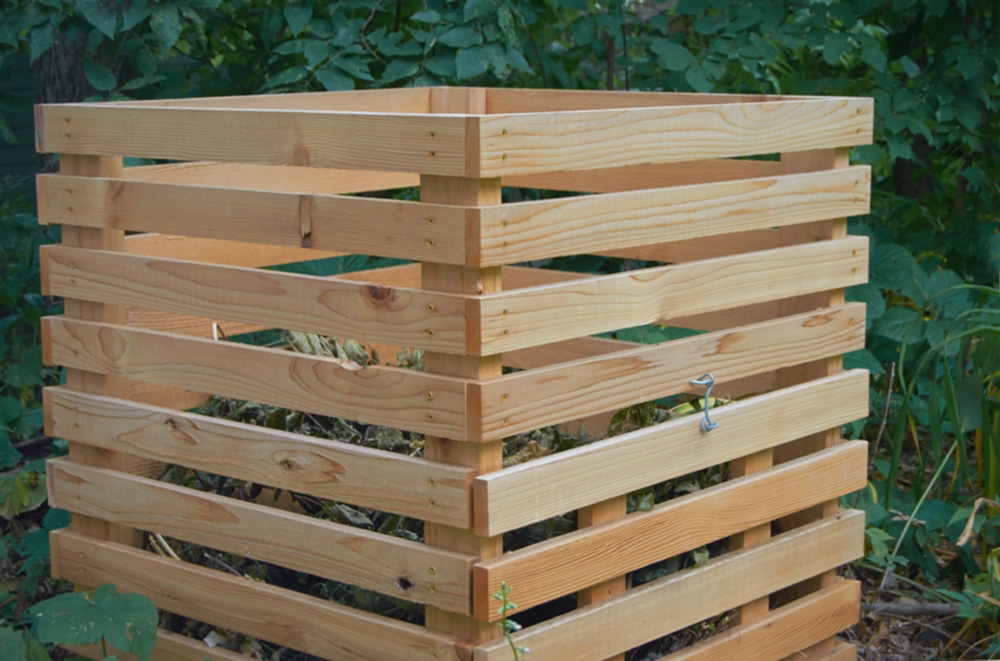
Make a Modern Cedar Slat Composting Bin for Your Backyard
This post is sponsored by the DIYZ® app.
Composting. Maybe you've heard of it? It's kind of a thing. It's no longer the sole purview of hippies, weirdos, and 7th-grade science teachers Composting has gone mainstream, and that's a good thing. Don't worry, we're sure your 7th grade science teacher will find another weird hobby to call their own.
Anyway, if you've been looking to get into composting, but don't love the look of boring, plastic composting bins, then this is the post for you. We're going to make an elegant, functional, totally-not-weird-looking compost bin. And we're going to have fun doing it! Pay attention, because at the end of class there will be a quiz! Oh, wait, no, that's something else. Let's get started!
We teamed up with our friends at the DIYZ app for this and several other projects this year. DIYZ gives you access home improvement and DIY instructional videos right on your phone; it's cool!
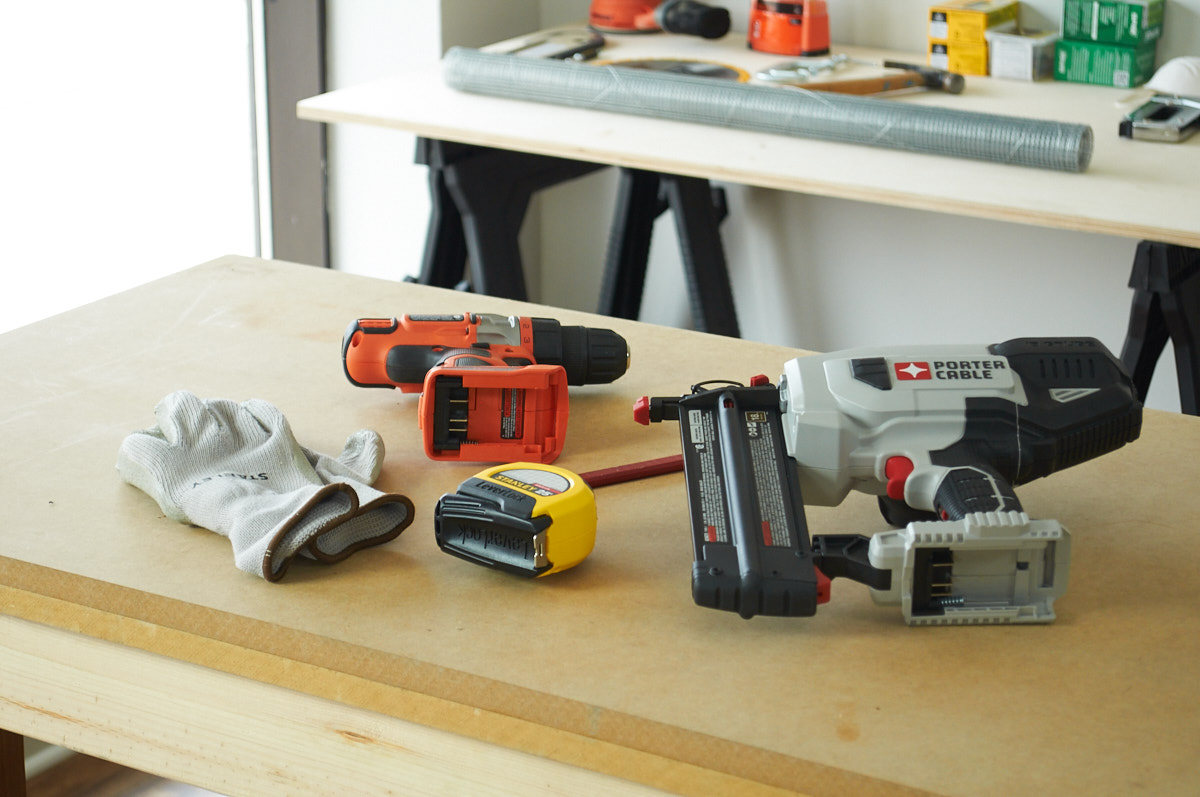
Tools and Materials:
- Dimensional cedar or redwood lumber:
- Two 2x4s, 8' long
- Twelve 1x3s, 8' long
- Galvanized screws, #8 x 1 1/4”
- Galvanized screws, #10 x 4”
- Galvanized hinges
- Hook & eye latch
- Miter saw
- Cordless drill and drill bits
- Brad nailer (optional)
- #2 Phillips screwdriver
- Tape measure
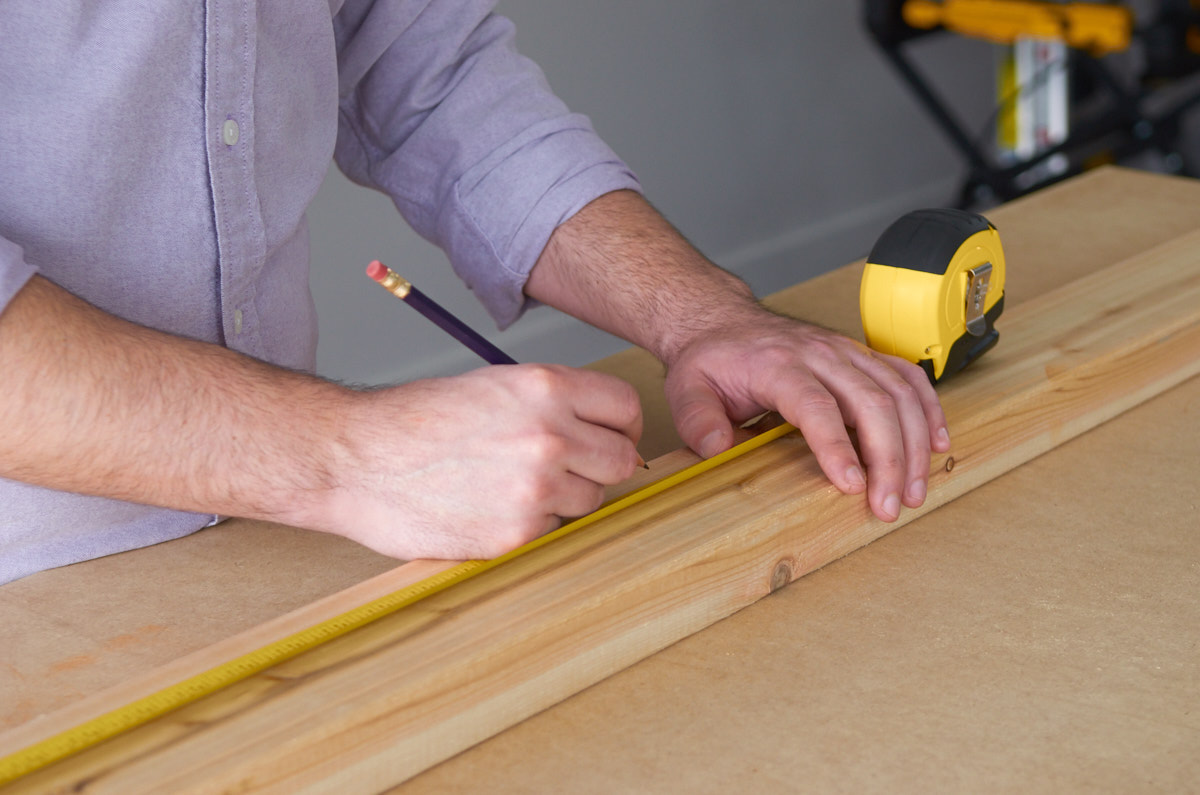
Step 1: Cut your parts
Grab your tape measure, pencil, and a crosscut saw, and mark and cut all parts to length.
From the 2x4s:
- Cut four pieces at 32 1/2”
(vertical supports) - Cut one at 27″
(cross support at the base)
From the 1x3s”
- Cut eighteen pieces at 31”
(front & back slats) - Cut eighteen pieces at 29 1/4”
(side slats) - Cut two pieces at 13 1/4”
(door brackets)
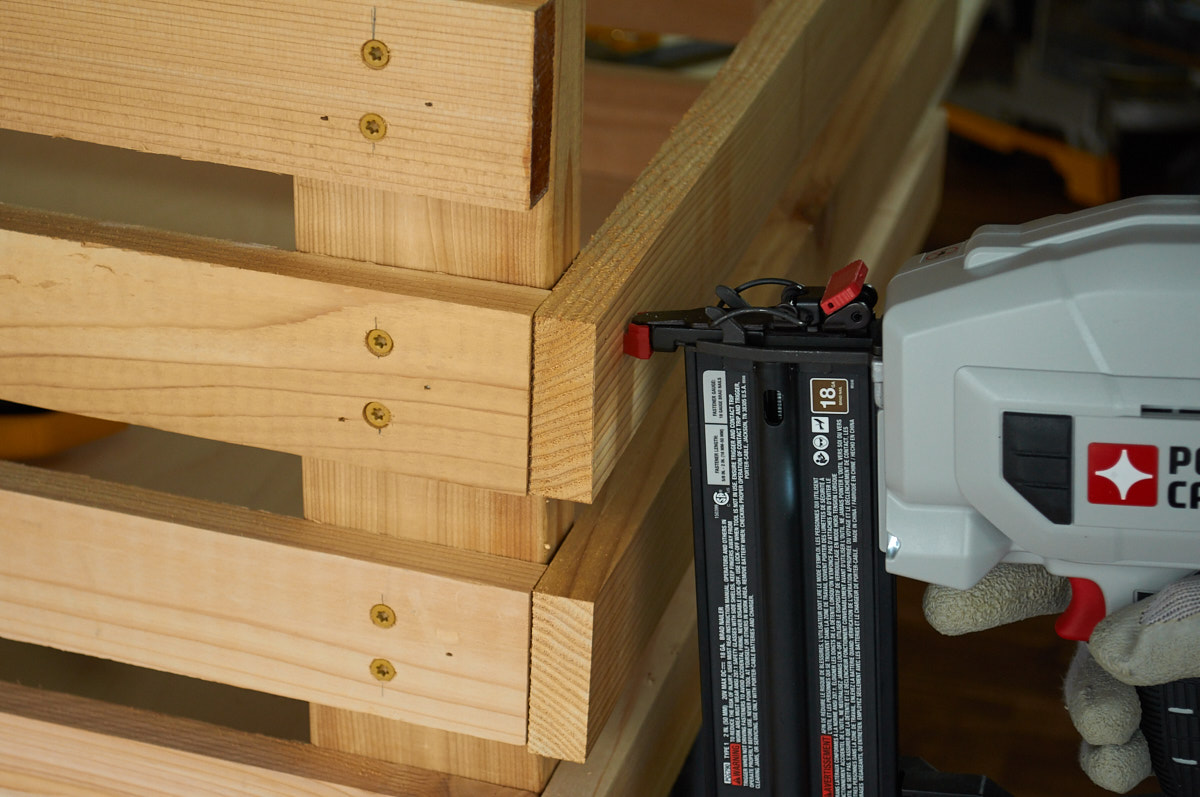
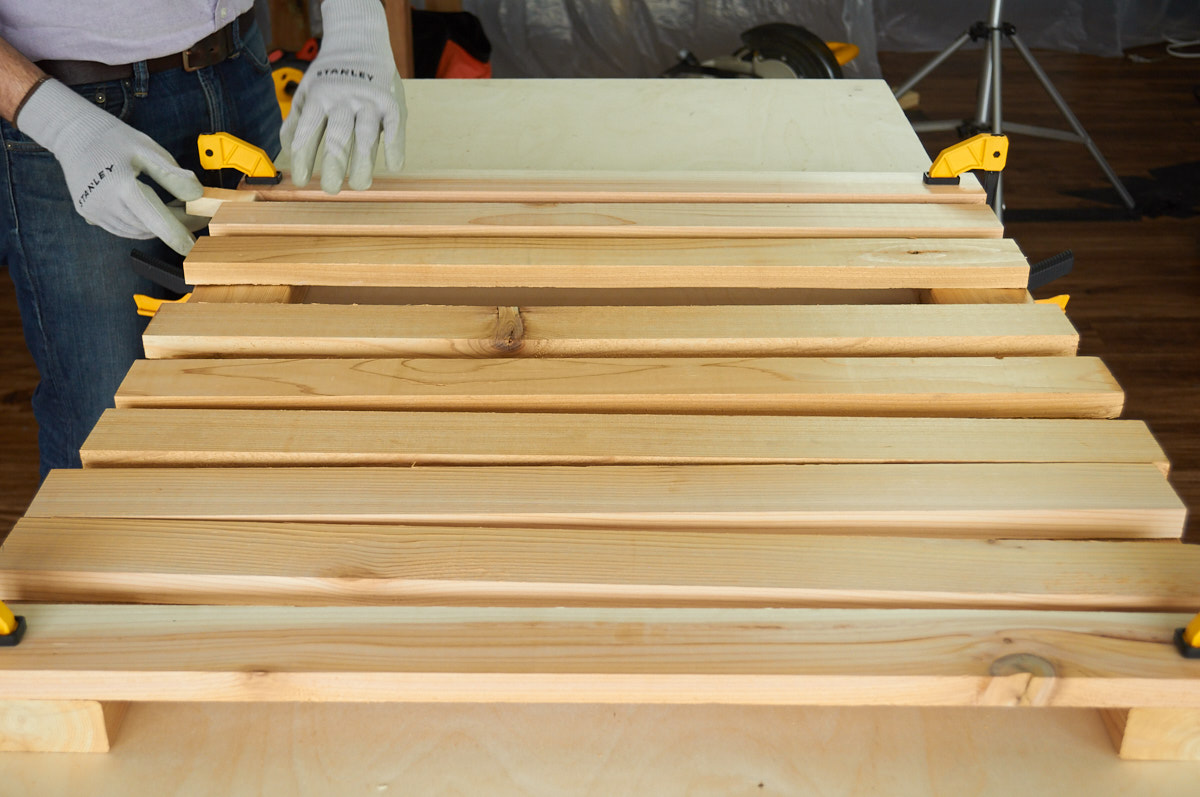 Step 2: Assemble the sides
Lay two of your vertical supports flat on your work surface. Take nine of your side slats (29 1/4″) and place one flush with the top, and one flush with the bottom. Then, evenly space the remaining slats along the height. A spacer block can help (ours was about 1 1/4″), but don't be too exacting. Your eyes are your best tool here.
If you have a brad nailer, use it to tack the slats into place. If not, clamps can help a lot. Now mark your pilot hole locations. Make two points on each end of each slat, 2 1/2” from the outside, and one 3/4” from the top, and 3/4″ from the bottom. Drill a pilot hole at each mark using a #8 countersink bit. Attach the slats using the 1¼” galvanized screws.
Repeat the process for the second side.
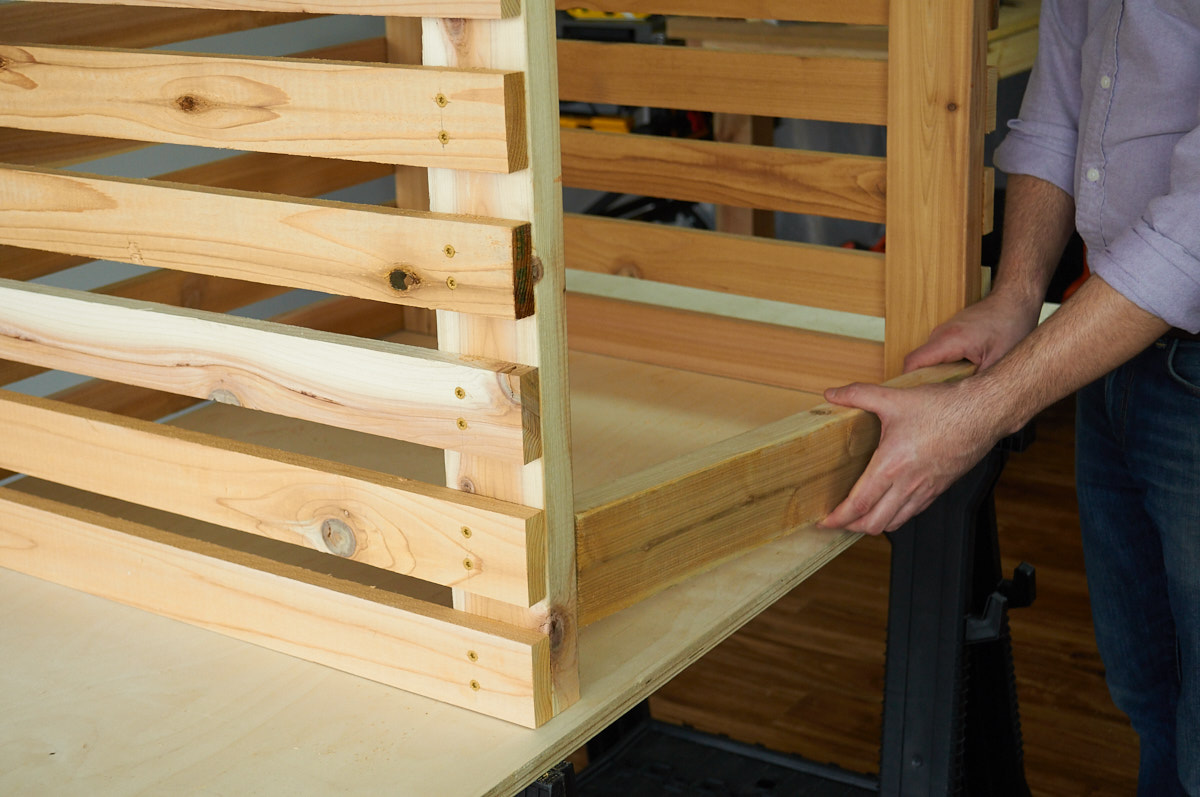
Step 3: Add the back
With the sides assembled, we'll connect them via the back slats. Stand the sides up on end, and prep nine of your 31″ slats. Using the spacing on your sides as a guide, attach the back slats one at a time. They will be flush with the face of the side slats, covering the end grain. Nail them into place, then mark and drill two countersunk pilot holes on each end of each slat, following the process in step two. Attach the slats with galvanized screws.
Step 4: Install the bottom cross support
Take your final piece of 2×4, 27″ long, and lay it in between the two vertical members of the front. You'll probably have to wedge it in there. That's a good thing; it should bring the whole frame into square.
Drill pilot holes through the slat, the vertical support, and into the end grain of the cross beam using a #8 countersink bit. Then attach the cross beam using 4” galvanized screws.
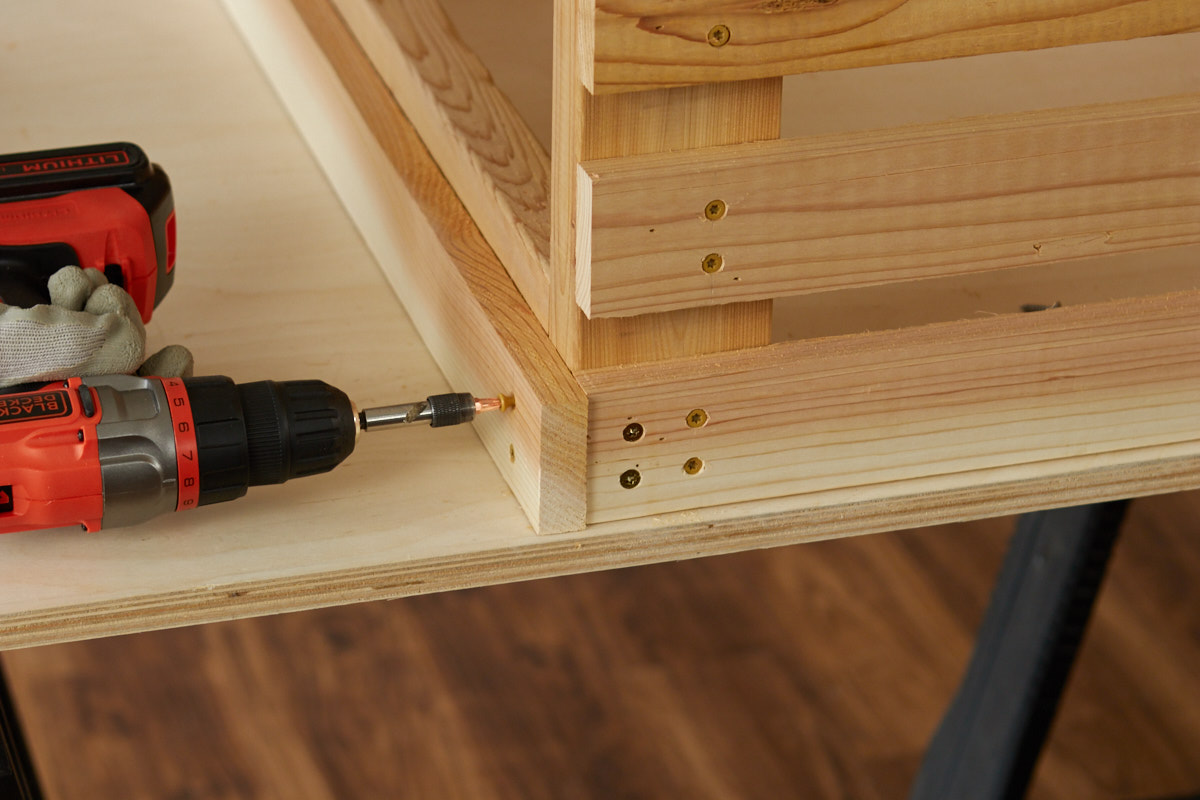
Then, add a slat to the cross support, flush with the bottom.
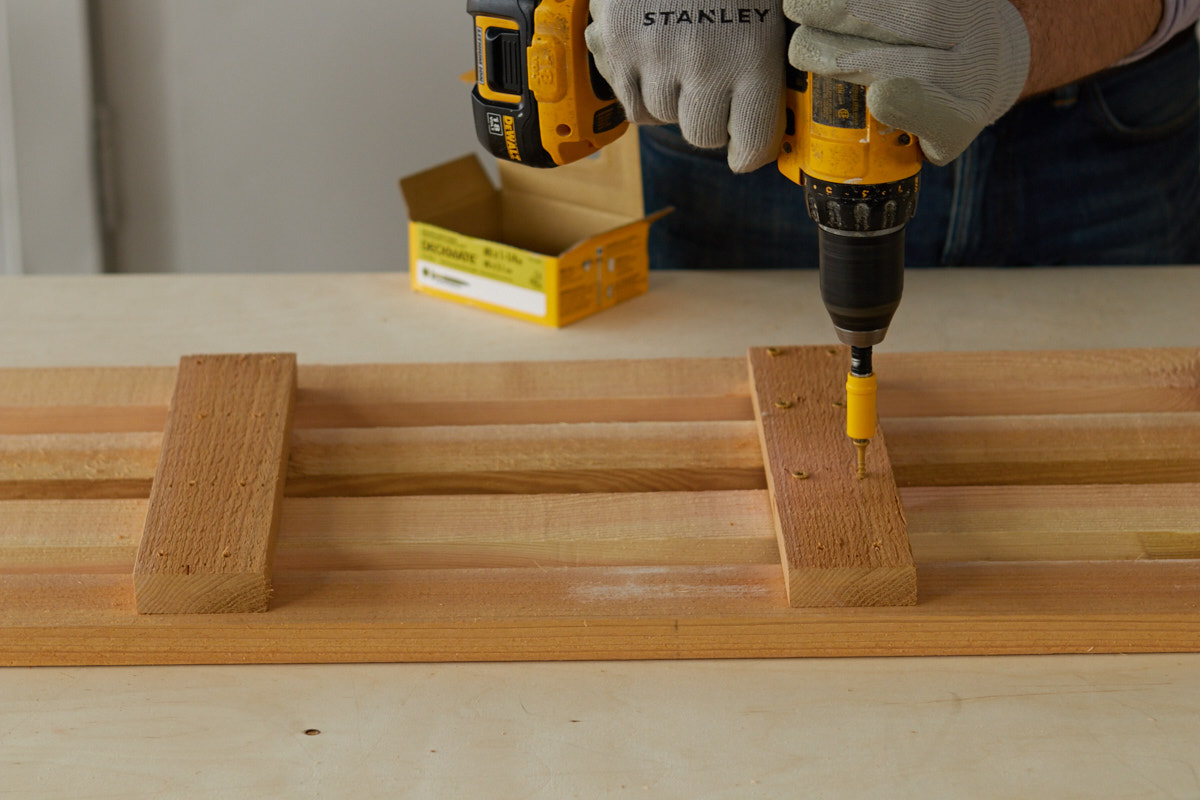
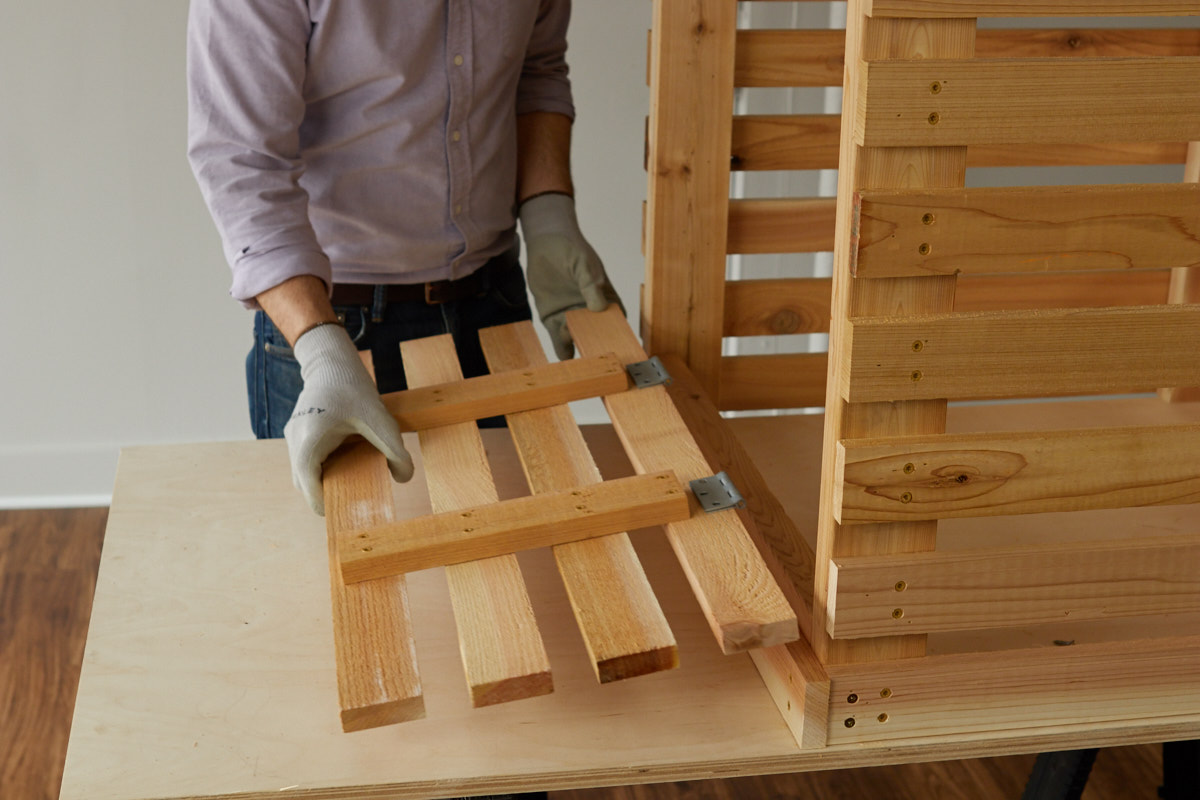
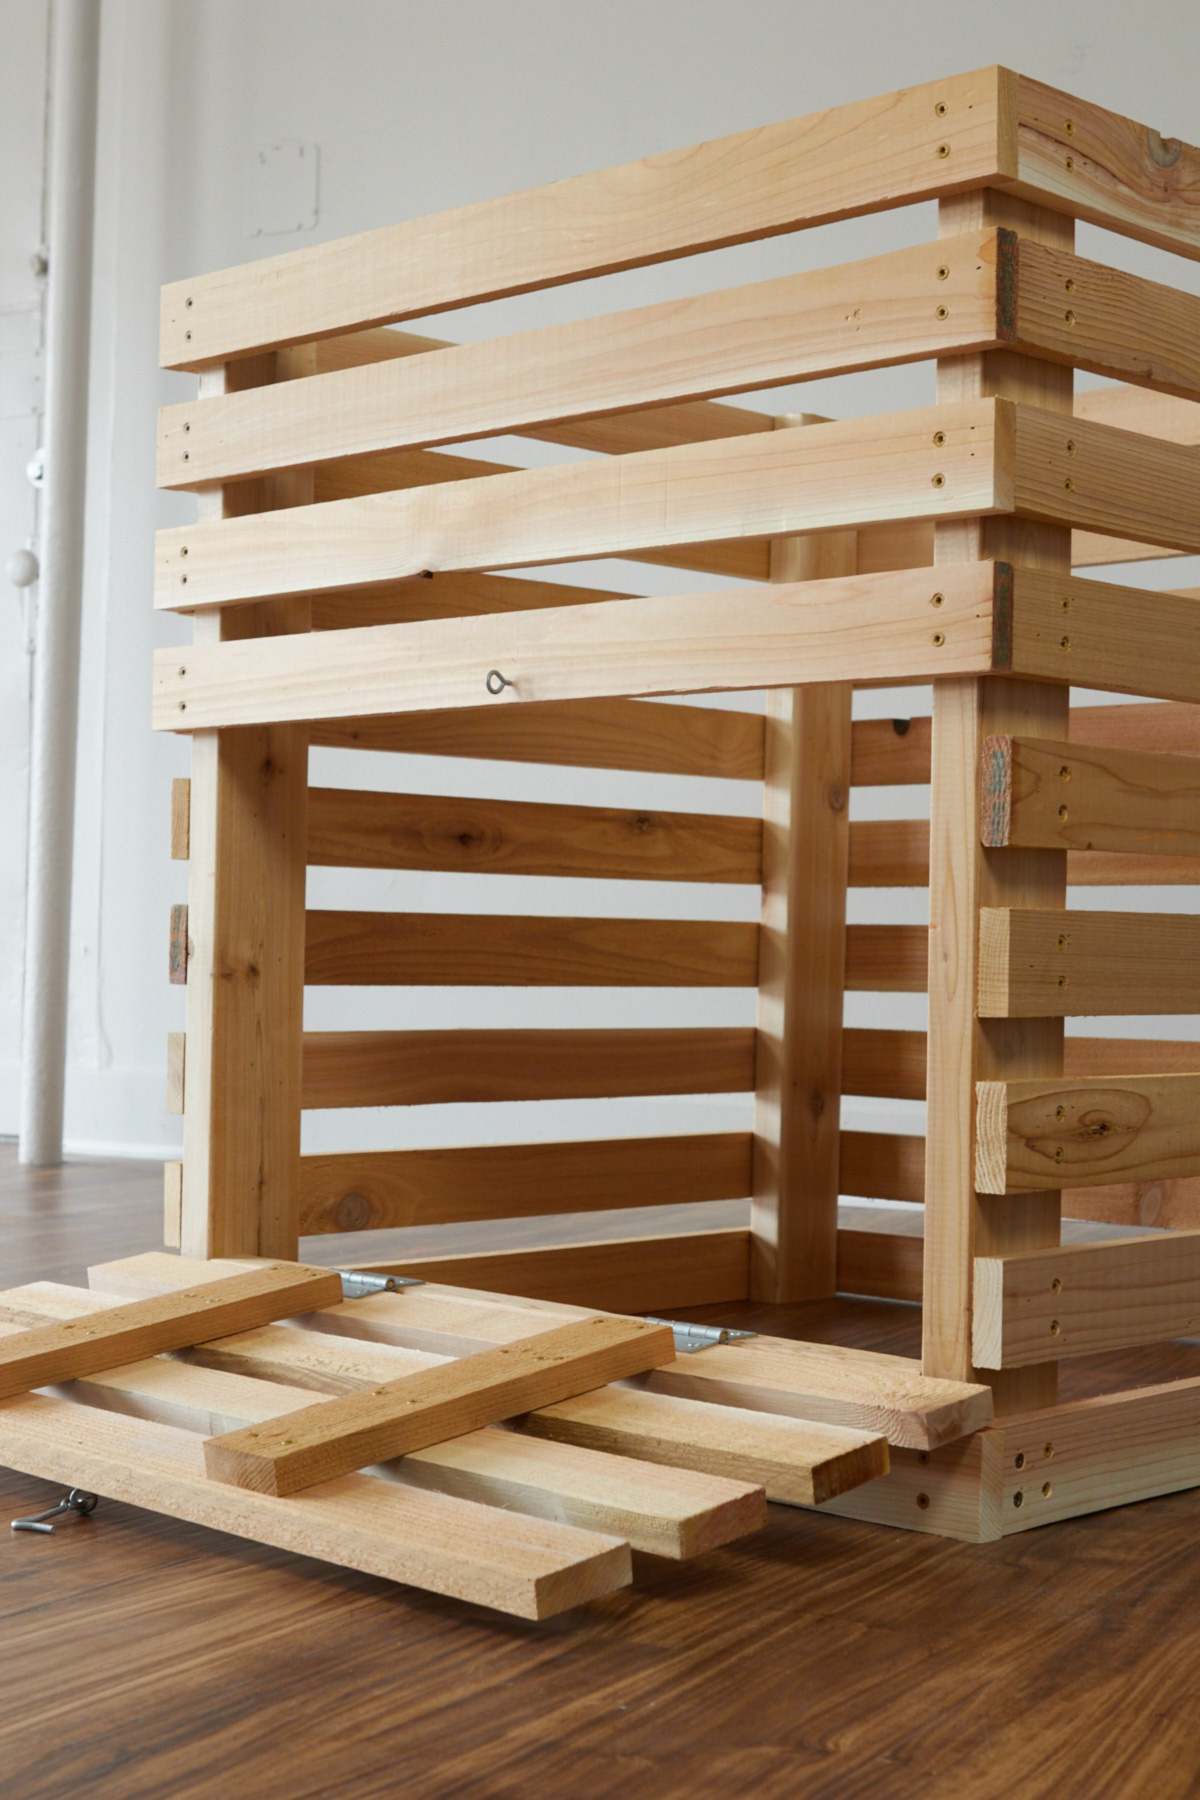
Step 5: Assemble the door
Okay, now let's build the door. This gets added to the bottom, so you can access the compost that has broken down further inside the pile — the really good stuff.
Lay out four front slats, with the same spacing as the rest of your project. Then, place the two door brackets across the slats. Tack into place, then secure the bracket into each slat with two screws per slat (sixteen in total).
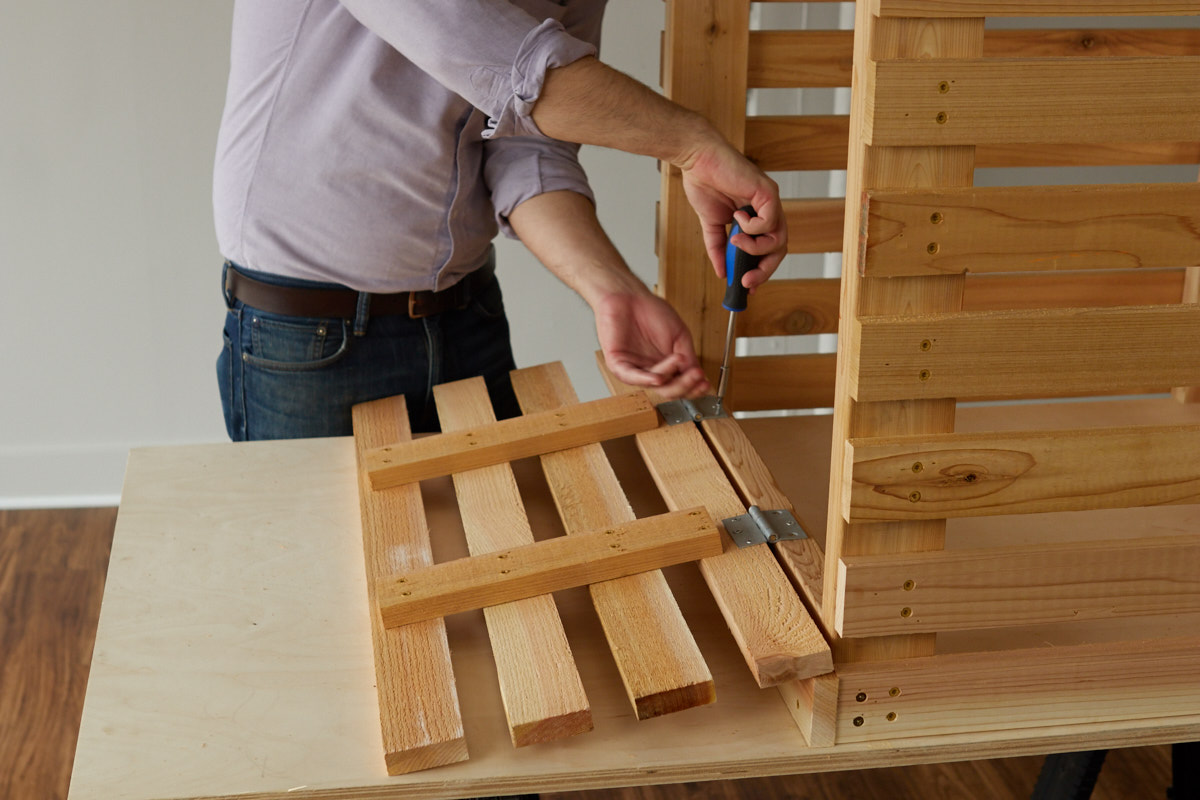
Step 6: Attach the hinges to the door
Place the two galvanized hinges, spaced the same as the vertical door brackets, onto the bottom slat of the door. Mark the location of the screws, drill pilot holes, and attach using the provided hardware.
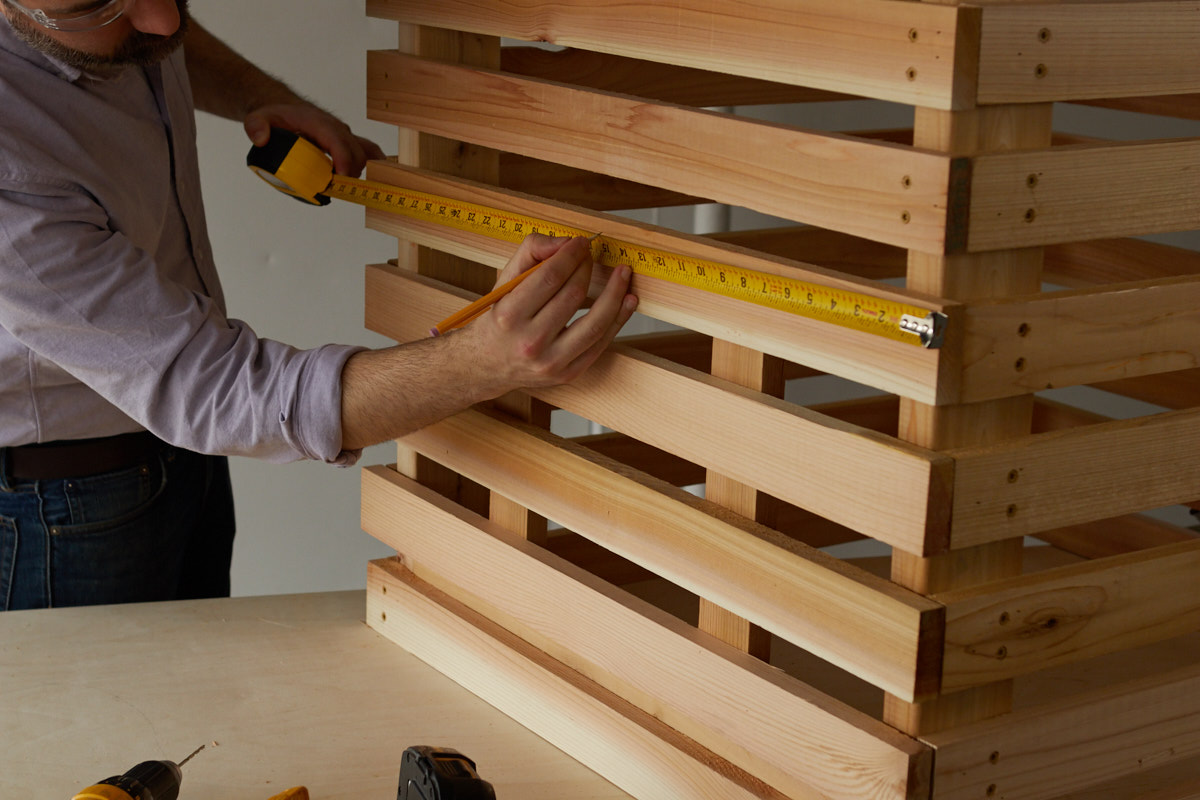
Step 7: Attach the door to the cross support.
Place the door with the remaining hinge plate on the 2×4 cross support. Space the hinges so the bottom slat of the door lines up with the second slat of the sides. Mark, drill, and attach with screws.
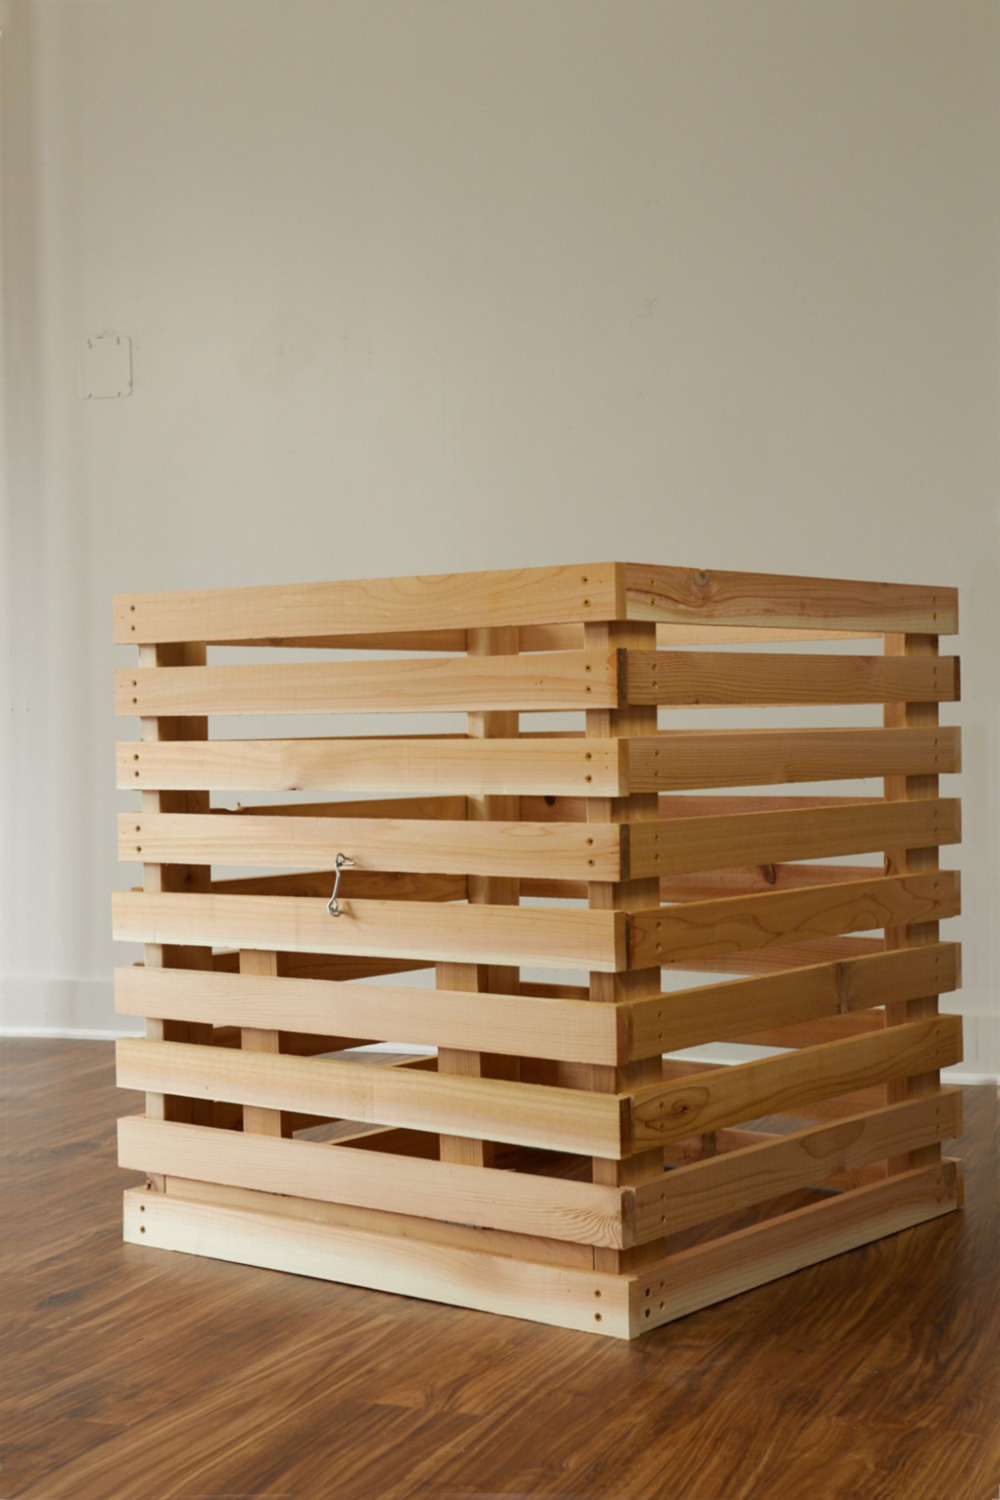
Step 9: Finish the slats
Screw on the remaining slats in the top four positions on the front.
Step 10: Add the door latch
With the door in its closed position, mark the center point of the top door slat (the center slat across the whole face). Using your hook and eye latch as a guide, lay out your attachment points for each side of the fastener.
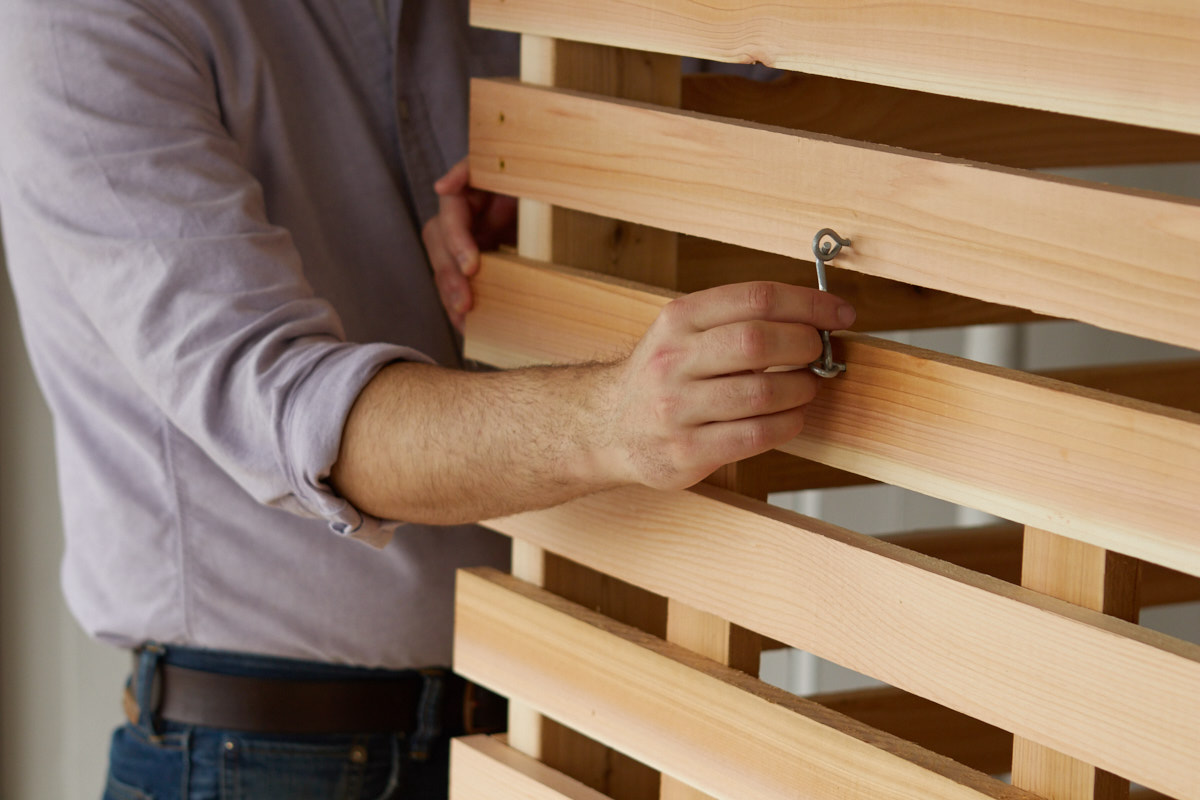
Drill matching pilot holes, then screw the latch into place.
Now your compost bin is ready to go out in the yard. The cedar is naturally water and weather resistant, so you don't have to worry about it rotting. You can fill this up with yard clippings, leaves, and even kitchen scraps. The bottom door makes it easy to unload the composted material for use on your garden, flowerbeds, or lawn.
Hey! Guess what? This is a sponsored post on behalf of DIYZ, but all opinions are very much my own. We think DIYZ is a great app for helping people get projects done right, and we thank you for supporting the brands that make ManMade possible.


![How To Find a Good Mechanic [6 Signs To Look Out For]](https://www.manmadediy.com/wp-content/uploads/2026/05/pexels-cottonbro-4489721-25704-scaled-1-23155.jpg?width=300&height=160)
