How to Make a Parallel Jaw Clamp Rack
When I finished my basement workshop makeover earlier this year, I couldn't have been more excited, or proud, about how far it'd had come. What was once two dark, dingy rooms full of plumbing pipes, exposed studs, and our family's household junk, was now a bright, clean, inspiring single workspace full of tools and materials. But to get it to that condition was a ton of work, and the truth is, my house still hasn't totally recovered. Examples include, but not limited to, the plywood sheets stored in the guest bathroom, the dust collector in the hallway, and the piles of clamps in our home office.
Oh, those clamps. They've been all over the lower level of our house for nearly six months. I used them for projects, of course, but mostly, they just stood against the wall or inefficiently piled on the floor, falling down every so often, scraping the paint as they went and startling all of us in the process.
I'd had enough. It was time to stop dreaming about what my shop was going to be and time to start making it a functional workspace. First up, a DIY parallel jaw clamp rack.
Design:
I built my rack out of 3/4″ Baltic birch plywood. Plywood is important here since the plys alternate grain direction, making it strong in across both its length and width. When coming up with the size, I worried less about overall length and more about how to organize the parallel clamps as efficiently as possible, which meant determining the spacing between the clamps.

So, after some test cuts, I came up with this design. There's a 1″ buffer on the end (which represents half a clamp head) and then a slot for the steel bar. The bars on my Bessey clamps are 3/8″ thick, so I made this slot 7/16″ wide to include a little wiggle room. Then, there's 2 3/16″ space between the center points of these slots. That makes the tongues in between the slots about 1 3/4″. If you design your own, it's less important to figure out how much wood will be in between your slots (the 1 3/4″) and more about how the center of your slots will get spaced out. Although it might sound complicated to explain, it makes the lay out of your project much, much easier.
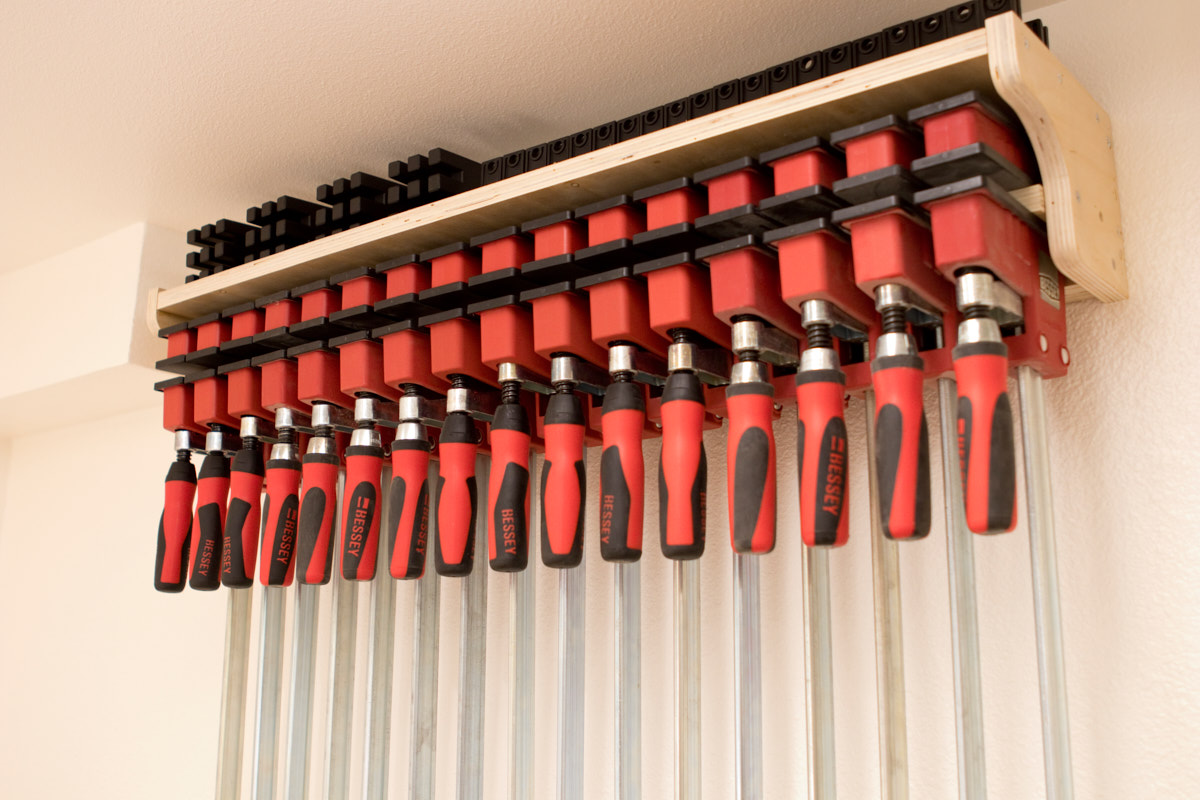
One other essential for the clamp rack: a solid shelf on top to store my clamp pads, cauls, and accessories.
Building the Slotted Rack
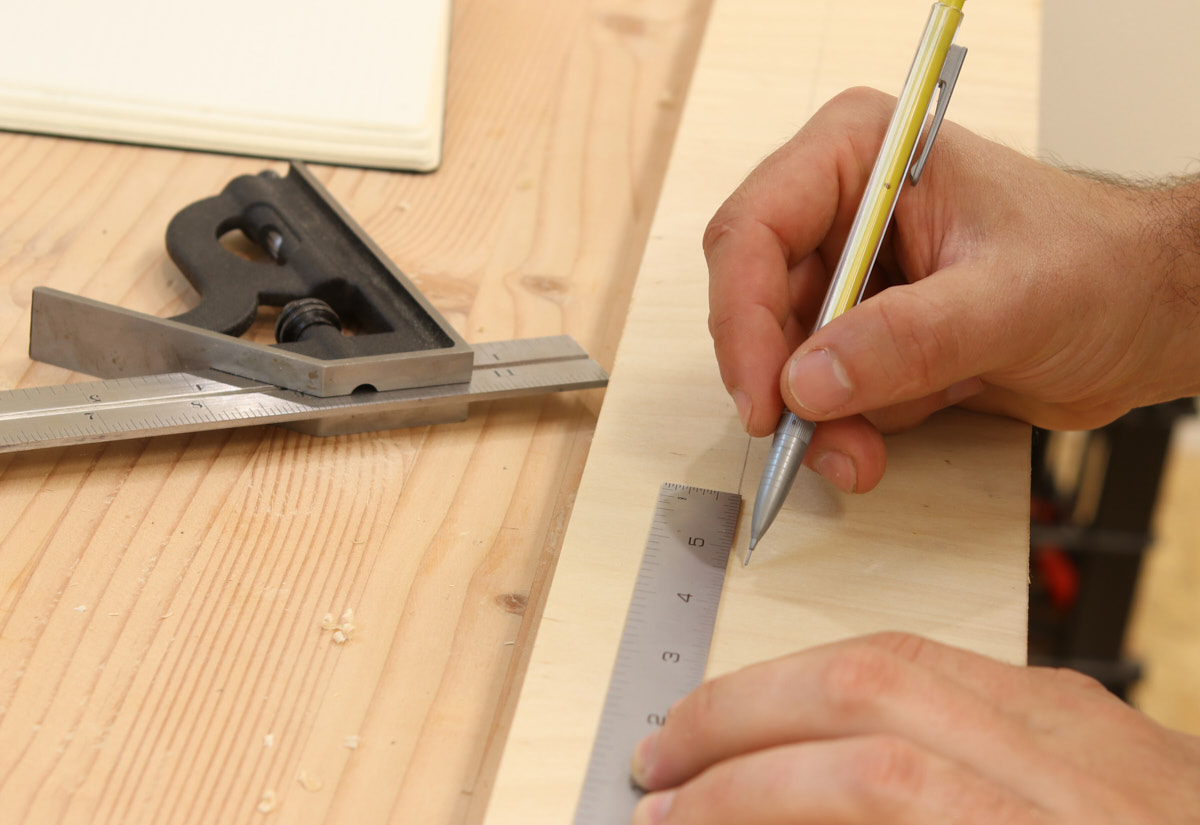
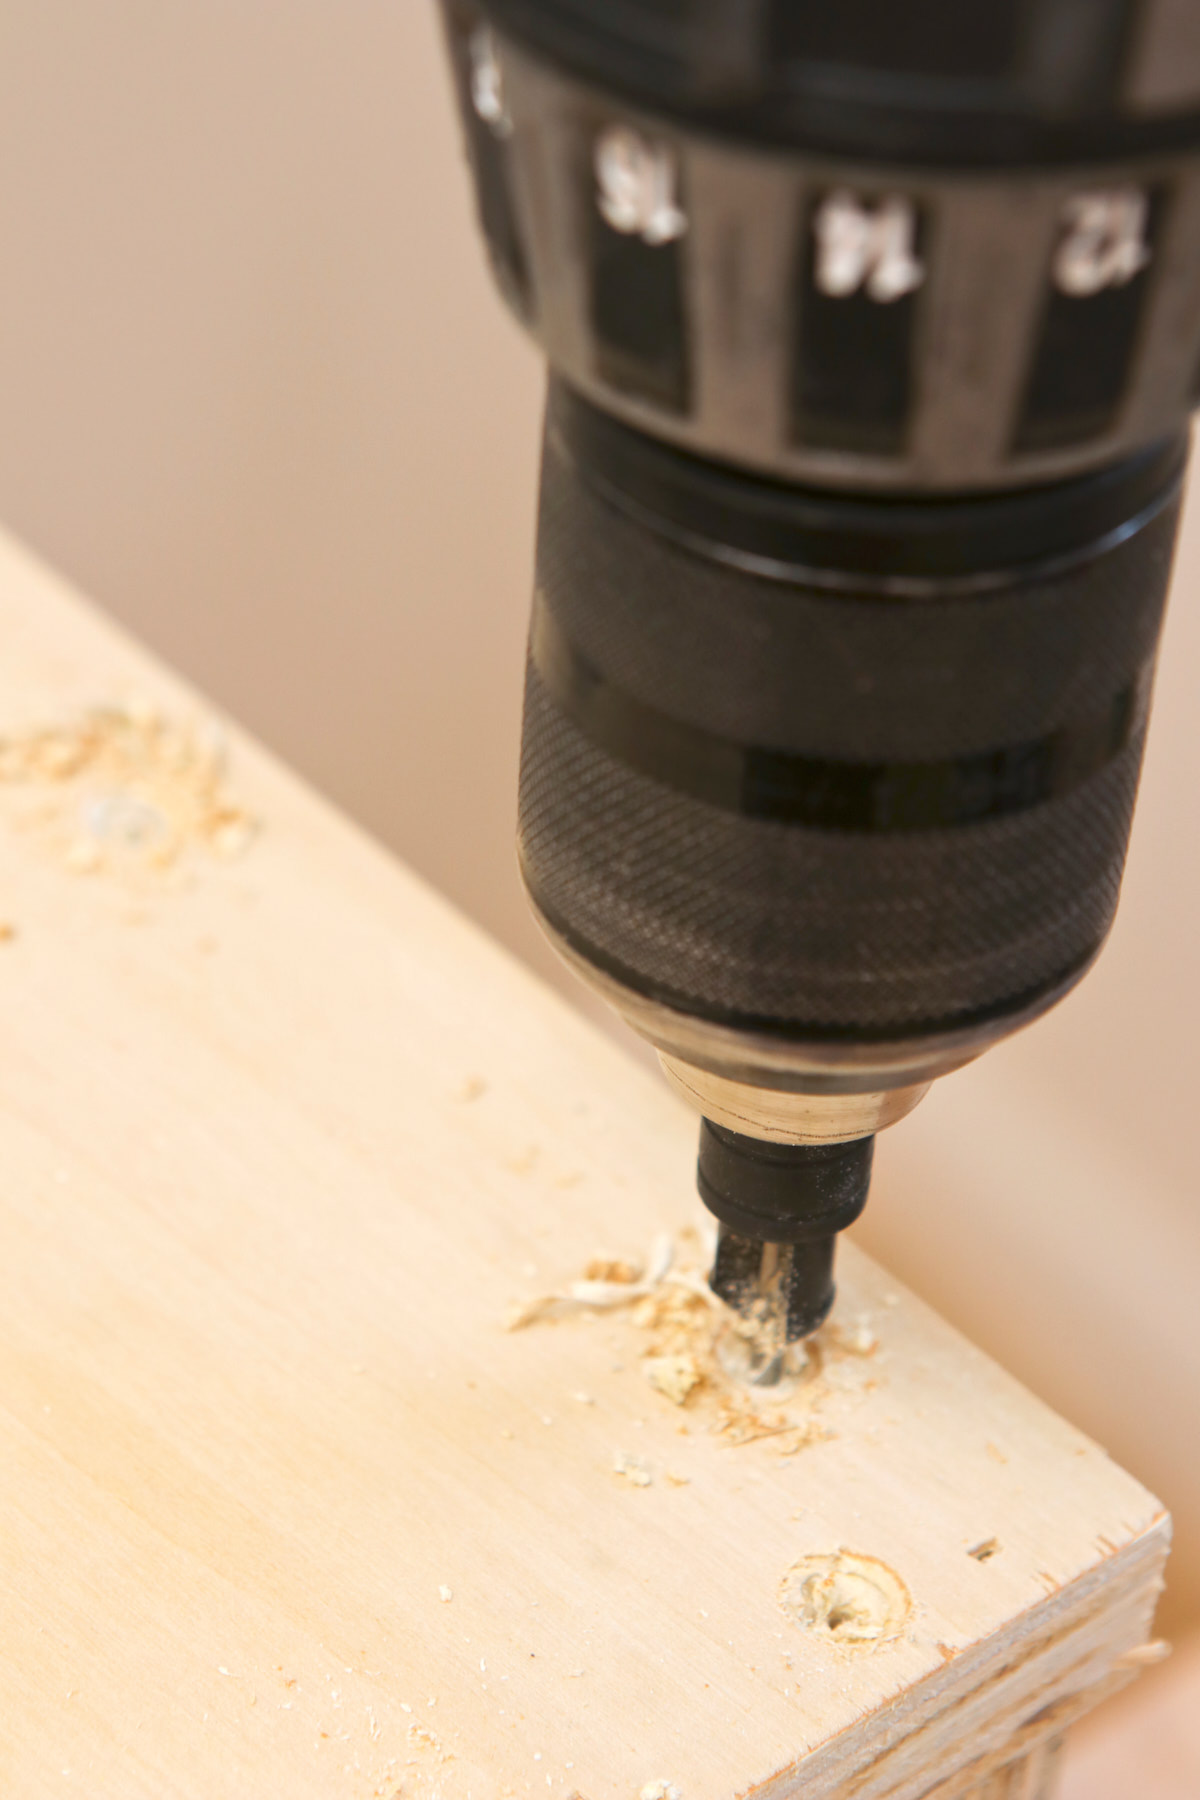
I cut the rack shelf at a 4″ long. At this point, my plywood was still 36″ wide; I'll trim to to size once all the slots are in. I drew a baseline 1 3/4″ from the edge (to leave room for the upcoming dado and the space behind the bar on the clamp jaws), and then made sixteen marks (one for each clamp) 2 3/16″ apart. I used this trick to simplify layout.
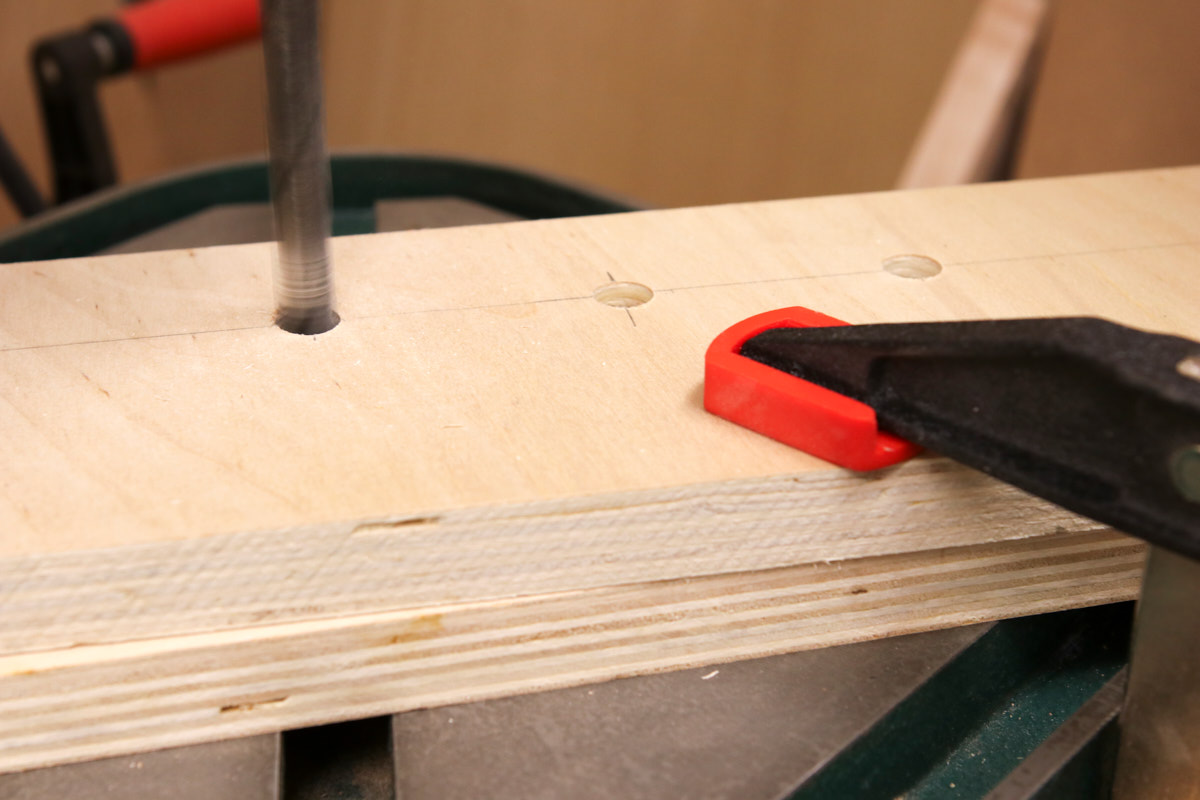
Then, I used a 7/16″ drill bit and drilled out each hole.

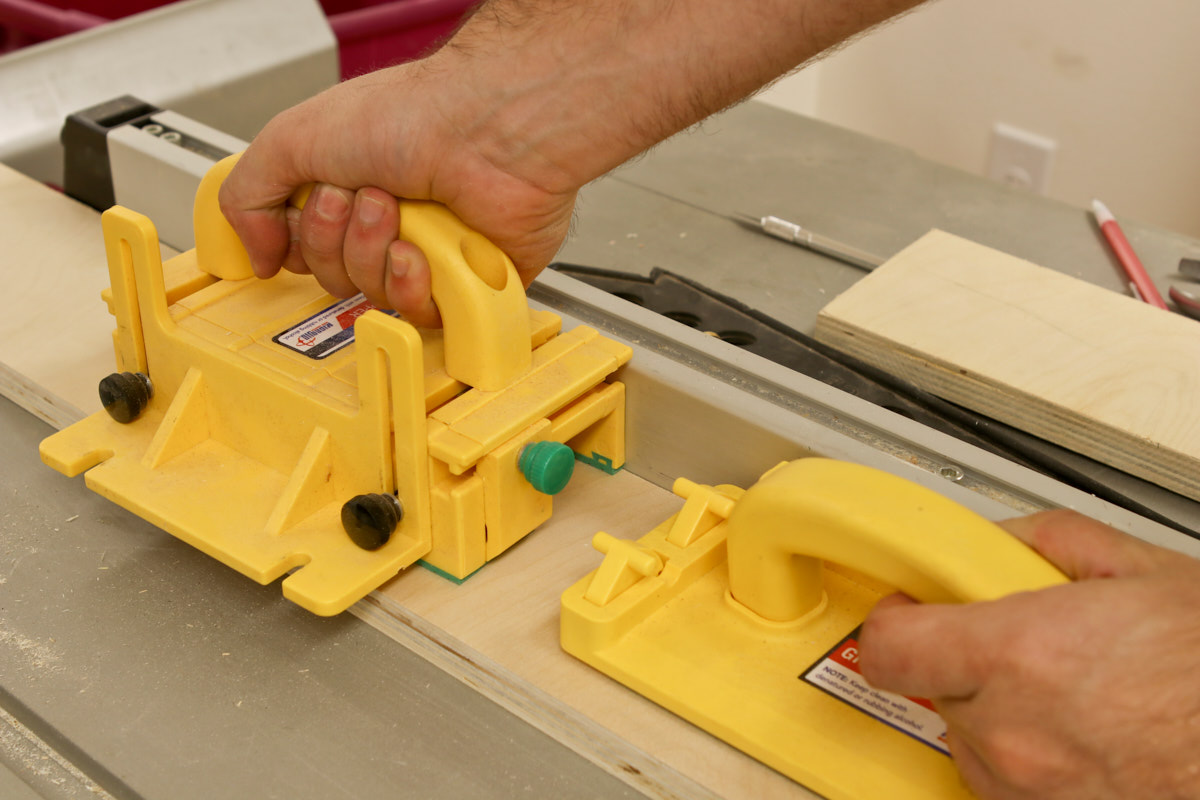
Next, I extended the sides of the whole down to the front edge of the rack shelf…
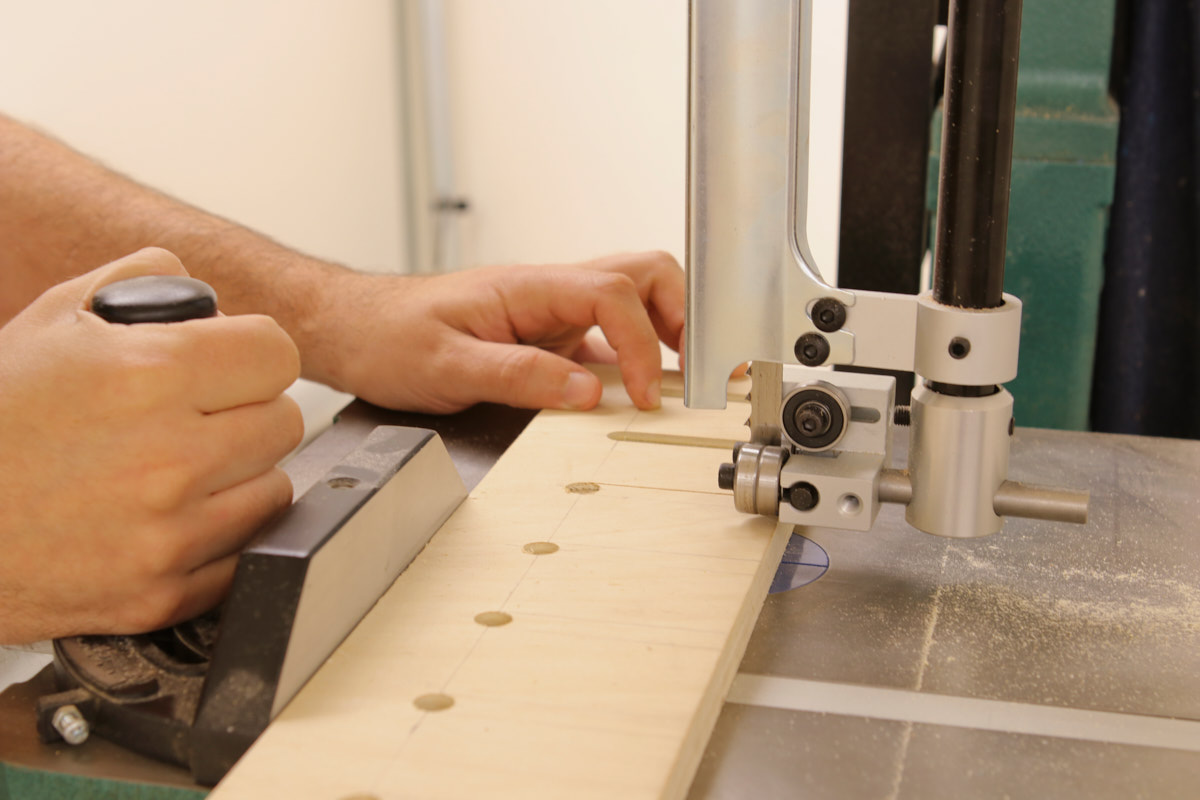
… and completed the slots with the band saw and jig saw.
Once the last slot was complete, I added 1″ and then cut my shelf to final length, 35 1/8″.
Finishing the Shelf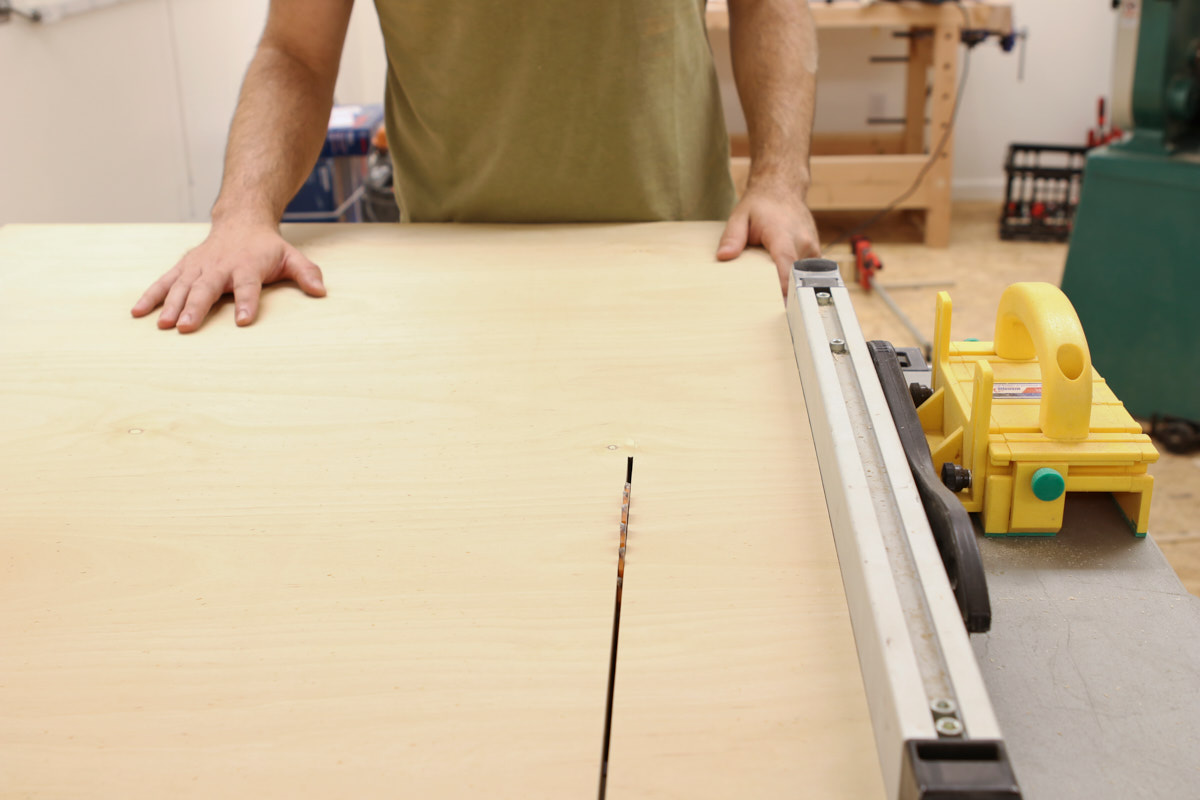
I cut the back to be 5 x 35″. Because I was crosscutting the plywood, I scored my line first with a craft knife to prevent tearout.
I then cut a 3/4″ wide dado, 3/8″ deep to help support the shelf. I have no idea if this was really necessary, but it only took me 5 minutes and provides extra insurance. Rather than loading up a dado blade, I simply established the outsides of the cut, then took repeated passes to clear out the waste.
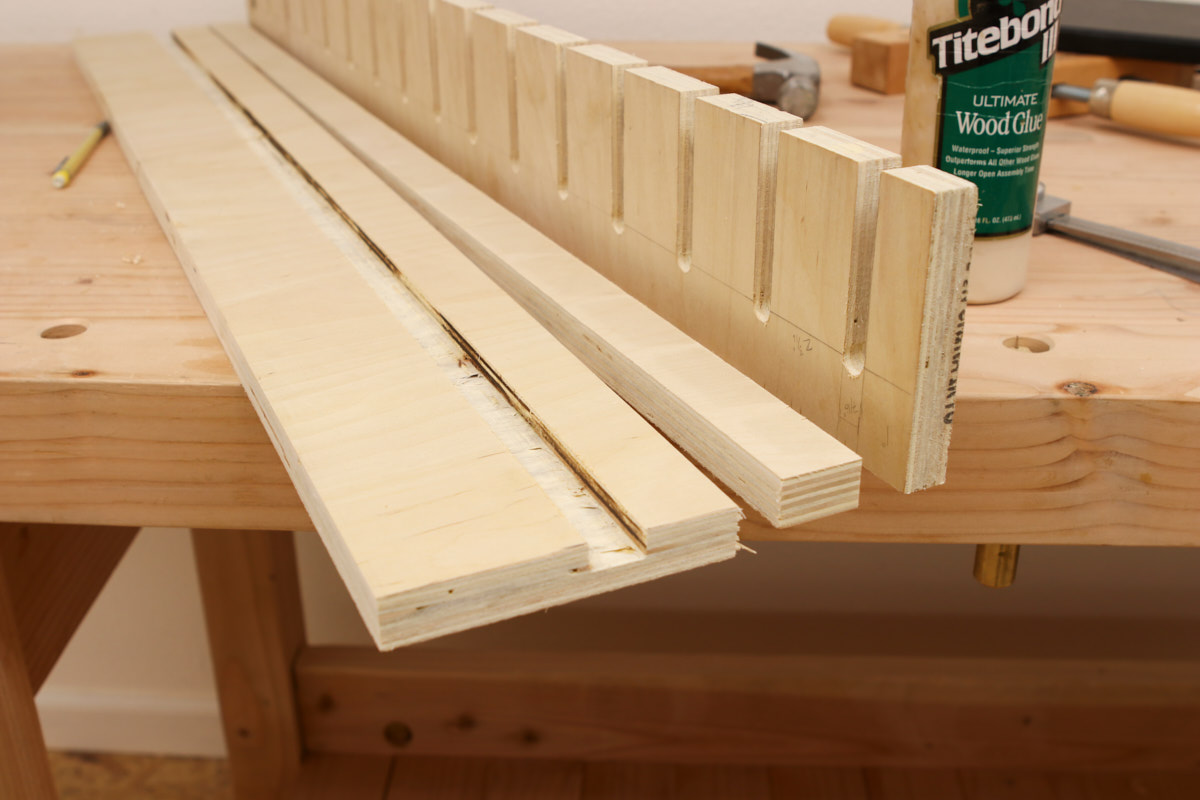
To provide extra support for all the weight of the clamps, I cut an extra 1 1/4″ plywood strip to sit under the shelf.

I spread my glue then clamped the whole thing together. After the glue set up, I drove in lots of screws from behind, making sure to place them so they didn't poke through the slots.
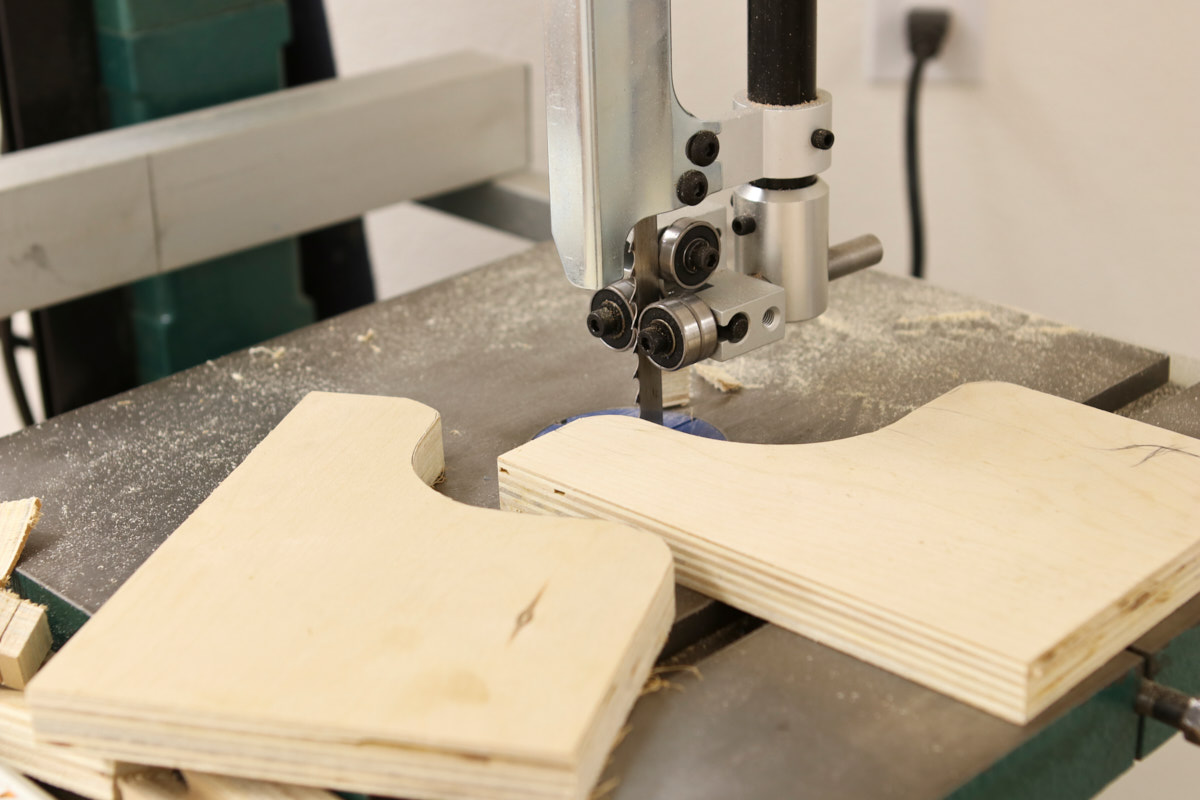
Then I cut a top shelf and the sides out of the remaining scrap. I simply tacked the top on, and then traced the outline onto the sides. Then I turned them into curves and cut them out at the bandsaw.
 Lastly, I reinforced all the butt joints with countersunk screws…
… and then secured the rack into the studs with 3 1/2″ long screws, two in each stud.
Completed!
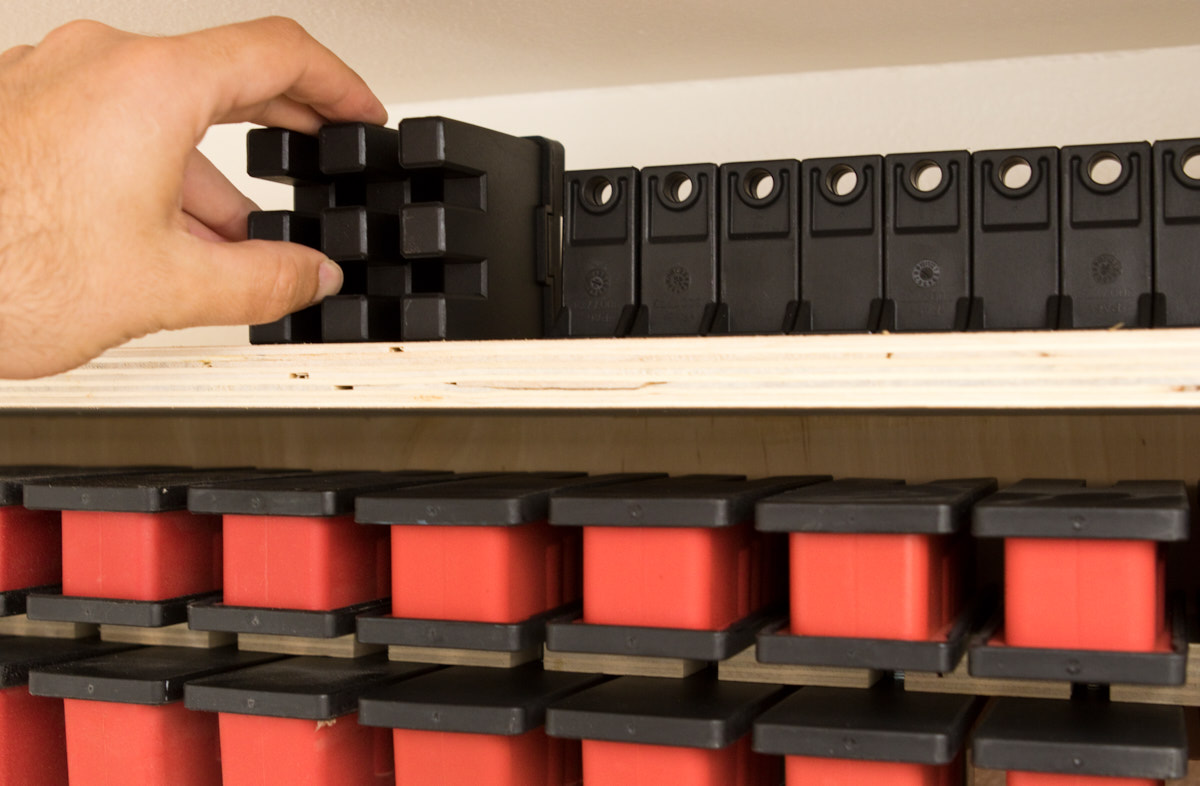
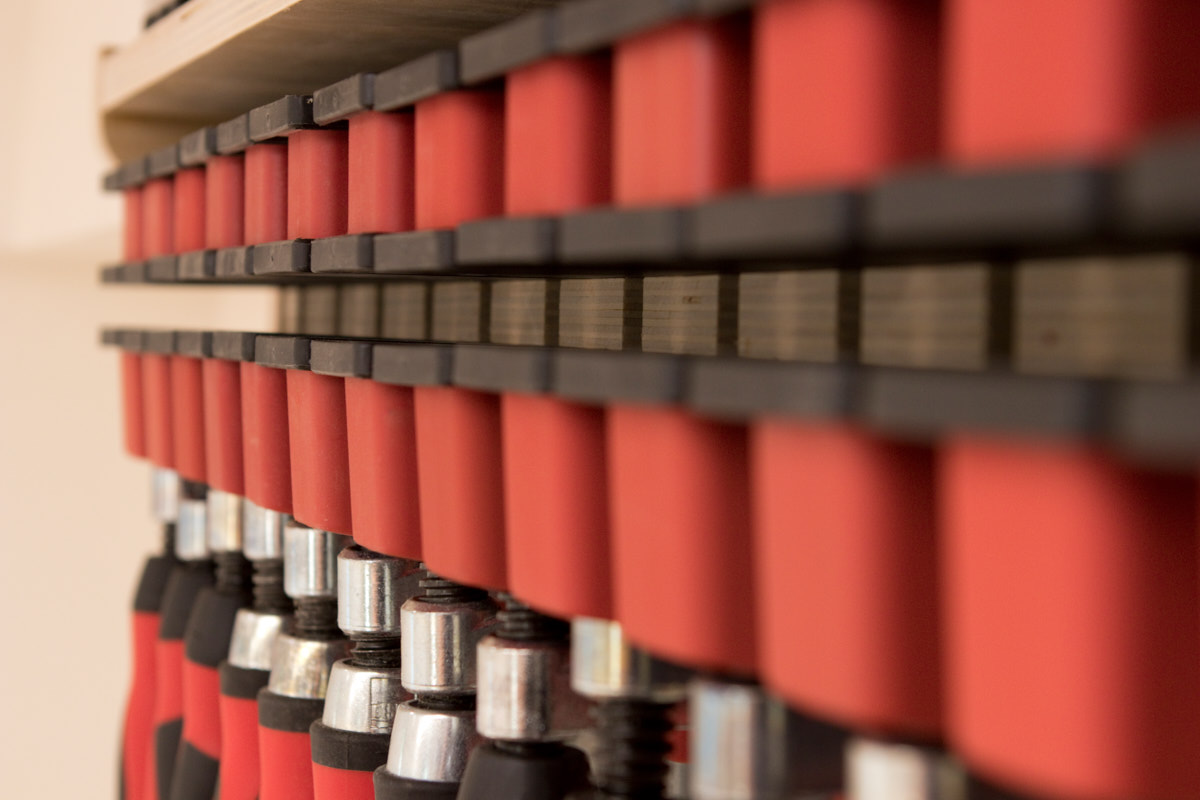
I placed my clamps in the slots, and added the accessories.

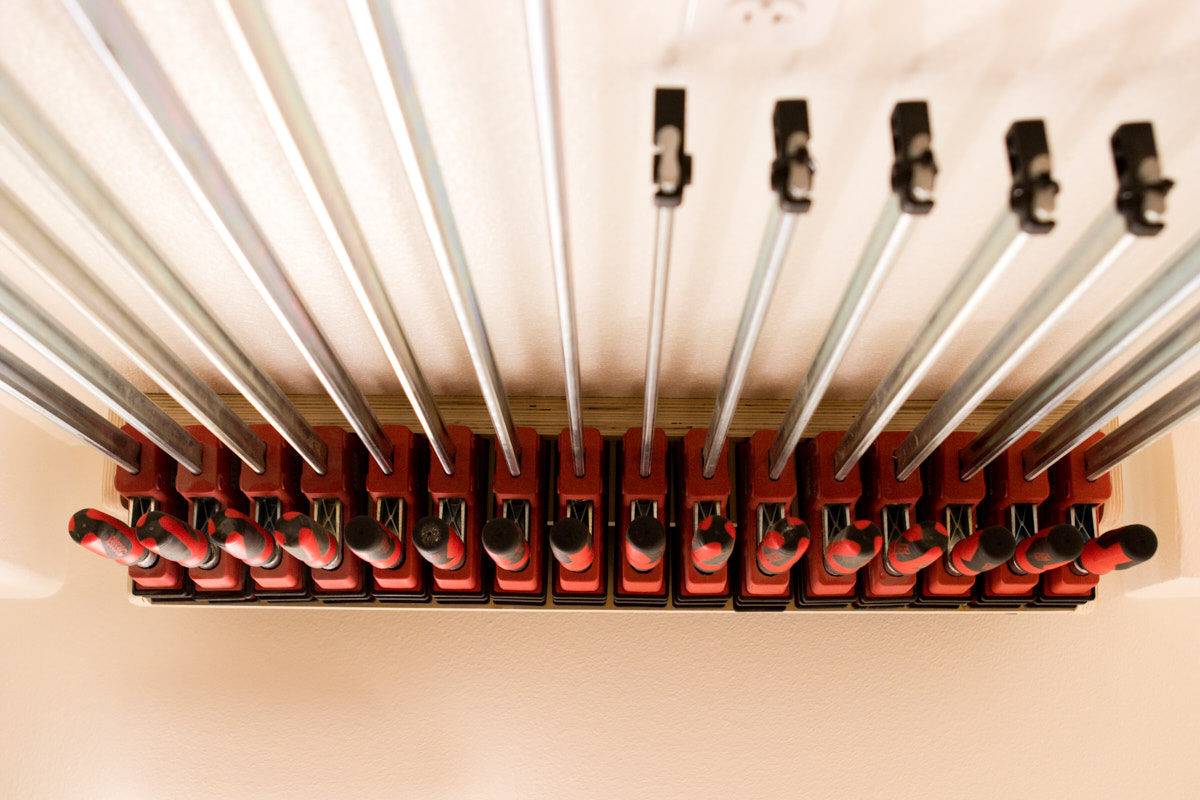
You'll see that I sized my rack so that the shelf sits in between the jaws of the clamps. I did that intentionally. One, I like the neat, arranged look, and two, I want the clamps to be secured into this fixture. This sits at the end of my workbench, and I'm regularly moving around them. In case I bump into them, I don't want them to fall out and hit me. This only takes a second or two more to insert them; worth it to me. If I'm the middle of a project and don't want to clamp and unclamp them, they still hang by their heads with the jaw/handle assembly anywhere along their length.
If you'd like, you can simply size the back and sides so that both clamp jaws sit above the shelf.
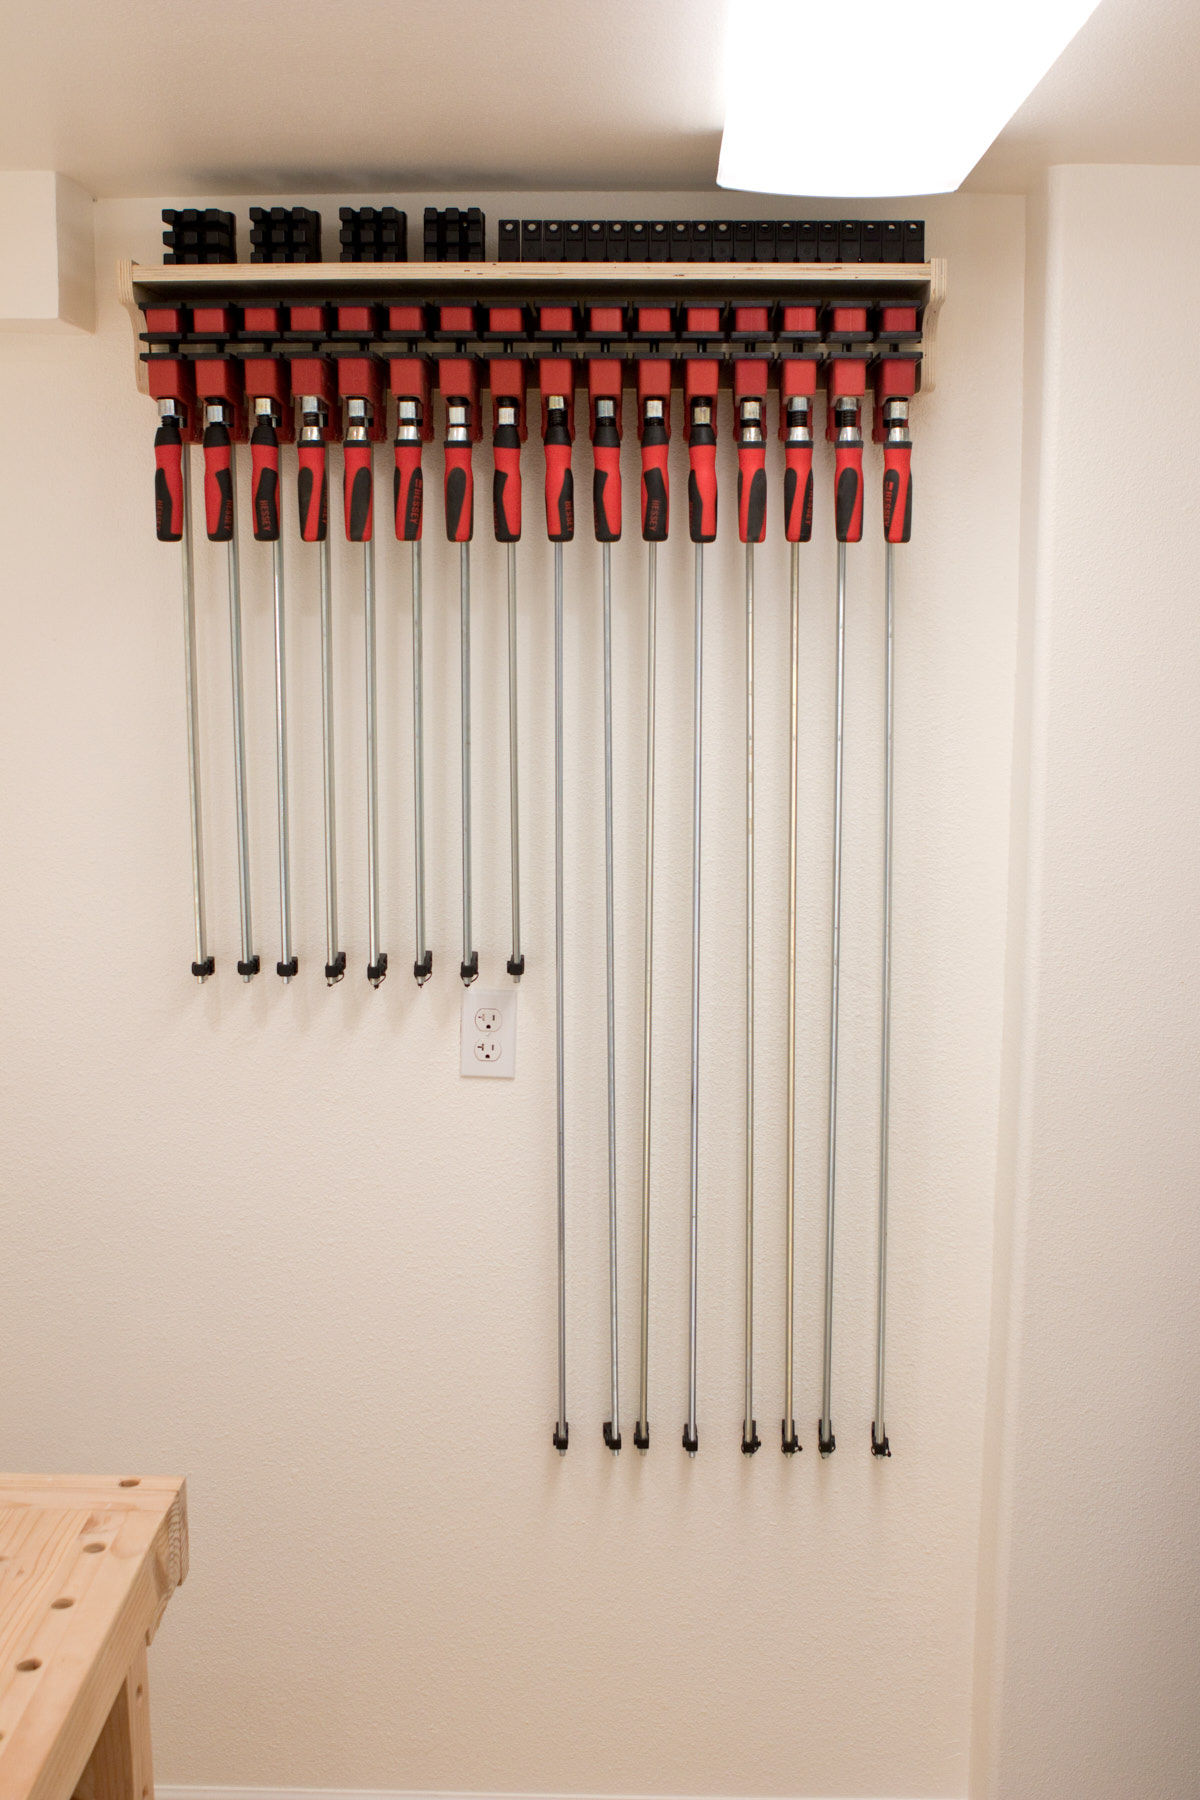
If you're still building your collection, makes sure you add a few extra slots for future clamps. For me, eight 24″ and eight 50″ clamps are more than enough for the one-off work that I do, and I hope to never have to spend money on long bar clamps again.
Next week, I'll share the rest of my clamp rack design for smaller F-style clamps. Stay tuned!


