How to Make a Rustic Phone Charging Stand from a Slab of Hardwood
Sponsored by the DIYZ® app
I love the idea of combining modern technology with natural textures. I keep my tablet in a case made from an old linen-covered notebook, and my sleek and shiny DSLR in a worn brown leather bag. So, I wanted to make a simple place to house my smartphone, while warming it up a bit. I went with the most natural thing I could think of: a big slab of forest tree.
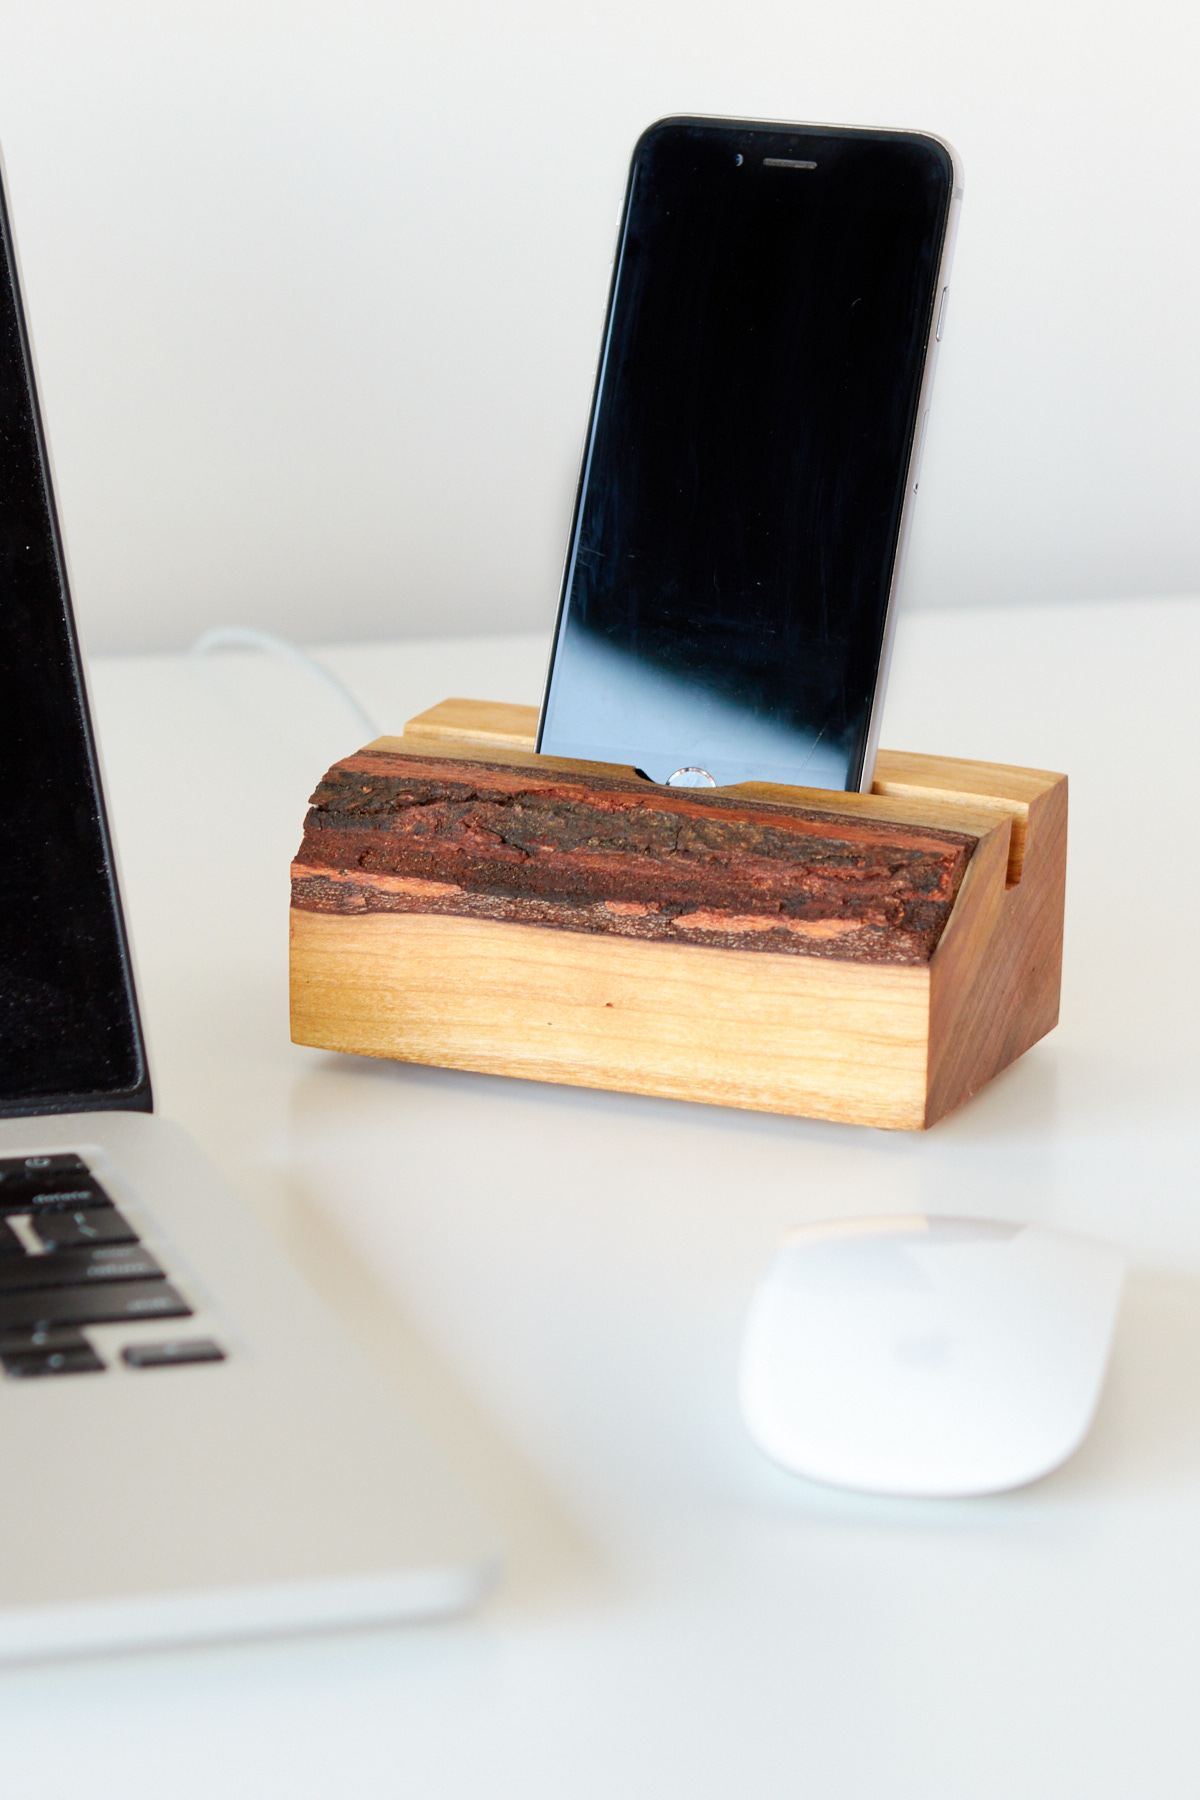
I like this design for a DIY wooden smartphone charging station because it fits the charging cable nicely, but it isn't stuck in place, so you can remove and use it elsewhere without the stand.
Enough talk! Let's make one!
Tools & Materials:
- Wood slab, at least 1 1/2” thick and 3″ long
- Table saw with flat-bottomed blade
- Long, thick scrap of wood to use as miter gauge extension fence
- Clamps
- Cordless drill
- Forstner bits – ⅜” and ⅞”
- Self-adhesive rubber bumpers
- Smartphone charging cable
- Oil finish (we used Danish Oil)
Step 1. Select a wood for your project. Choose something that's at least 1 ½ “thick and a piece that’s beefy enough to support a phone while charging. We're using a piece of 8/4 live-edge cherry. Crosscut your wood around 5”, or slightly wider than your phone.
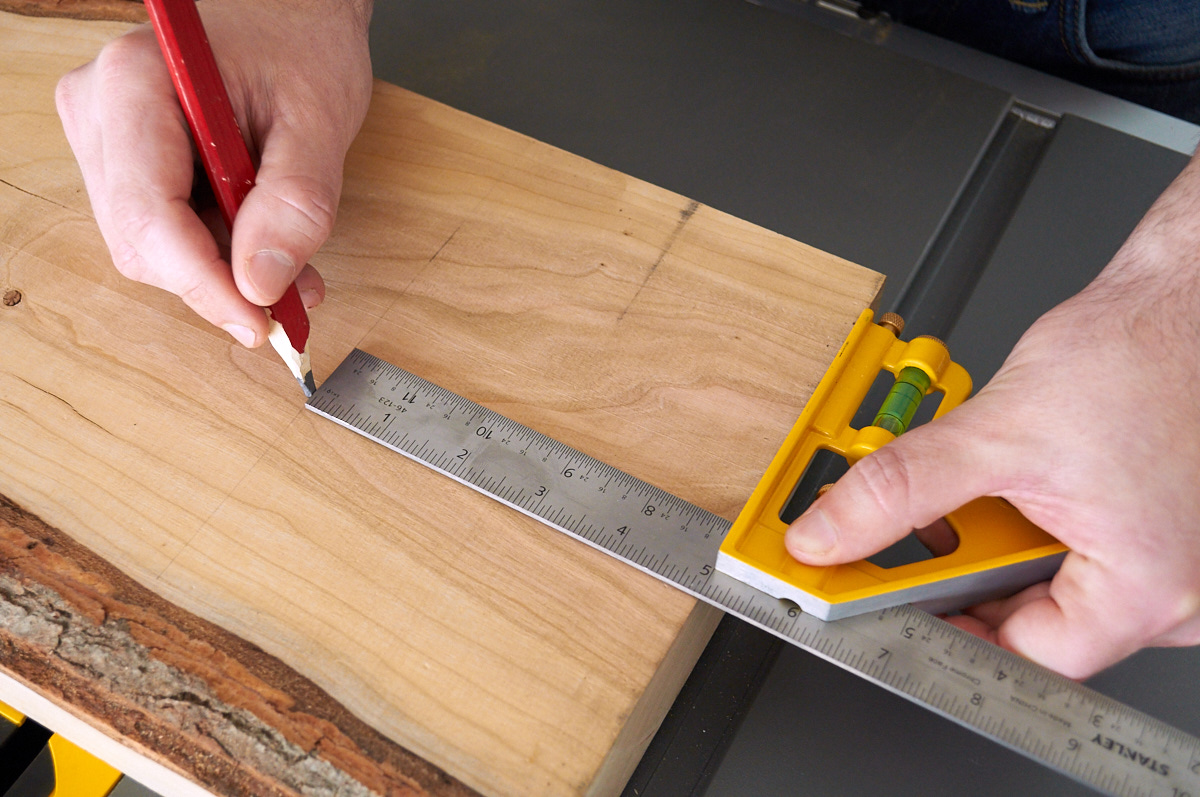
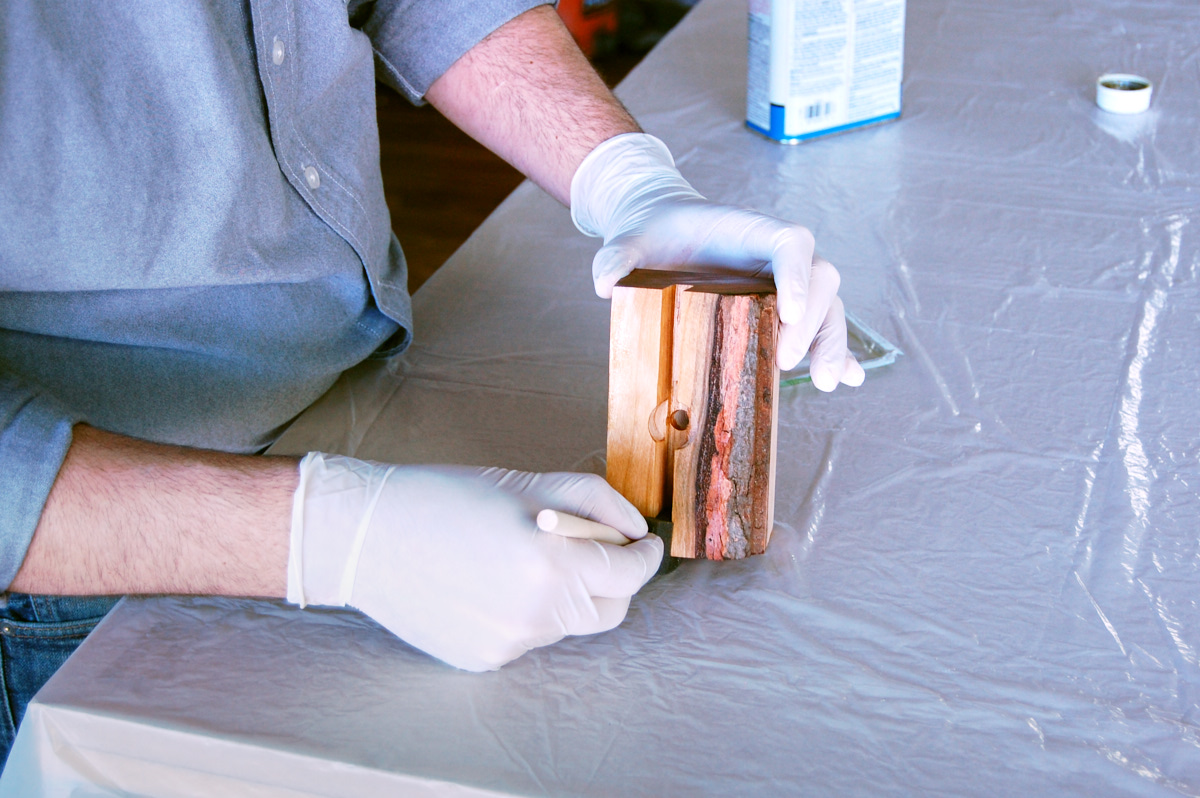
Step 2. Next, draw a line across the center of the width of the wood. This will eventually line up with your charging cable jack in your phone. Then, mark 1 ½ inches back from the front edge. Use this cross-hatch as your center point to drill a stopped hole with the 7/8″ Forstner bit, 1″ deep. This will become the thumb hole for your charging station.
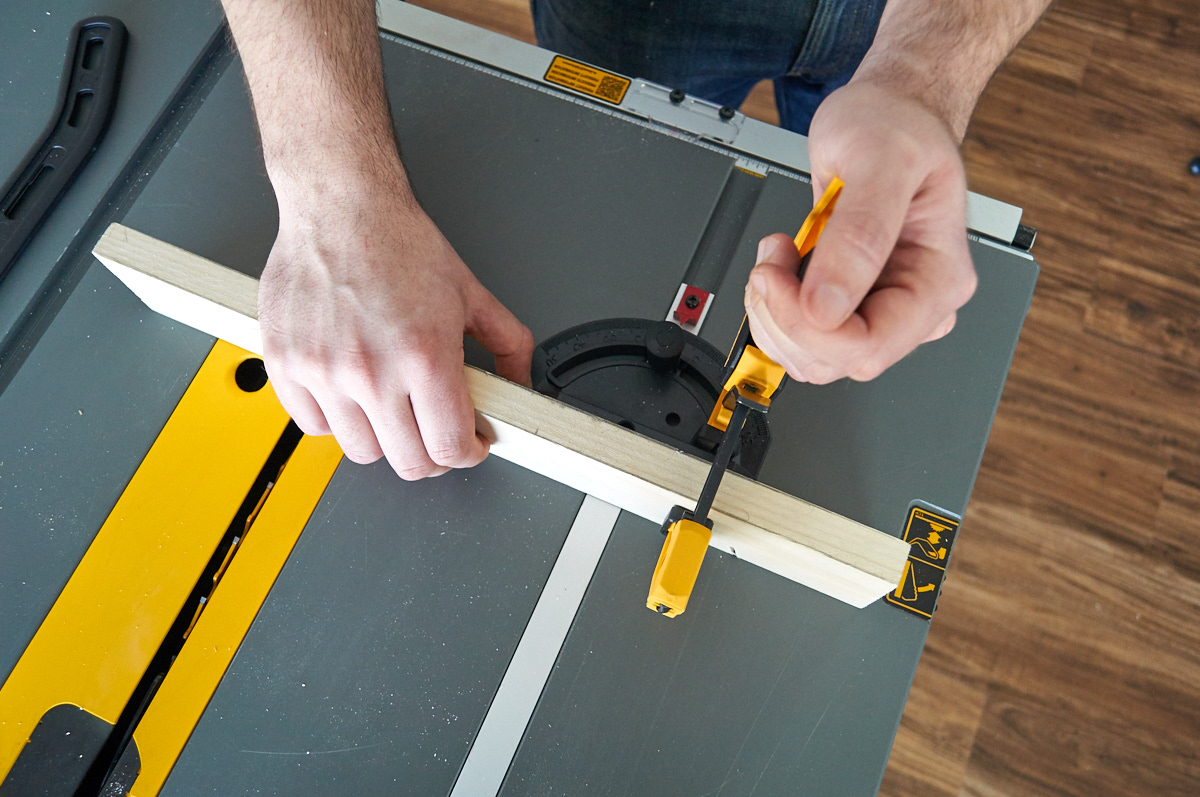
Step 3. Unplug your table saw, and load up a table saw blade with a flat-bottomed tooth pattern. Tilt the blade to 15° and replace the throat plate.
Clamp or screw a long piece of scrap wood to your table saw's miter gauge. This will allow you to accurately make a series of cuts into the wood, while keeping your hands safely away from the blade.
Step 4. Clamp your charging station to the wooden miter gauge extension. Set the blade height so it cuts 1″ deep into the wood, matching the depth of the thumb hole. Carefully make an angled pass one inch deep, aligning the cut to the center of the hole you drilled in Step 2.
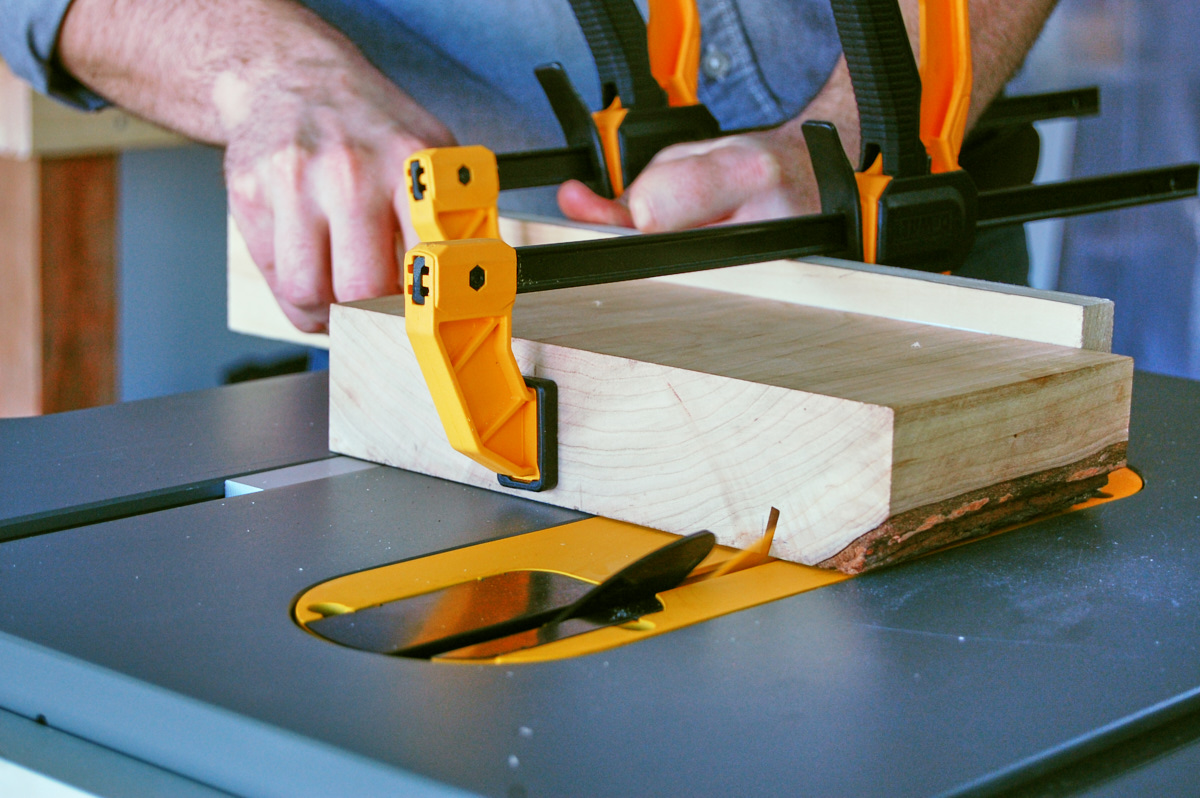 Adjust the position of the work-piece along the fence and make another angled cut, aligned to the back of the thumb hole. Then, make several repeated passes and clear out the remaining waste. Before moving on, ensure this slot is wide enough to hold your device.

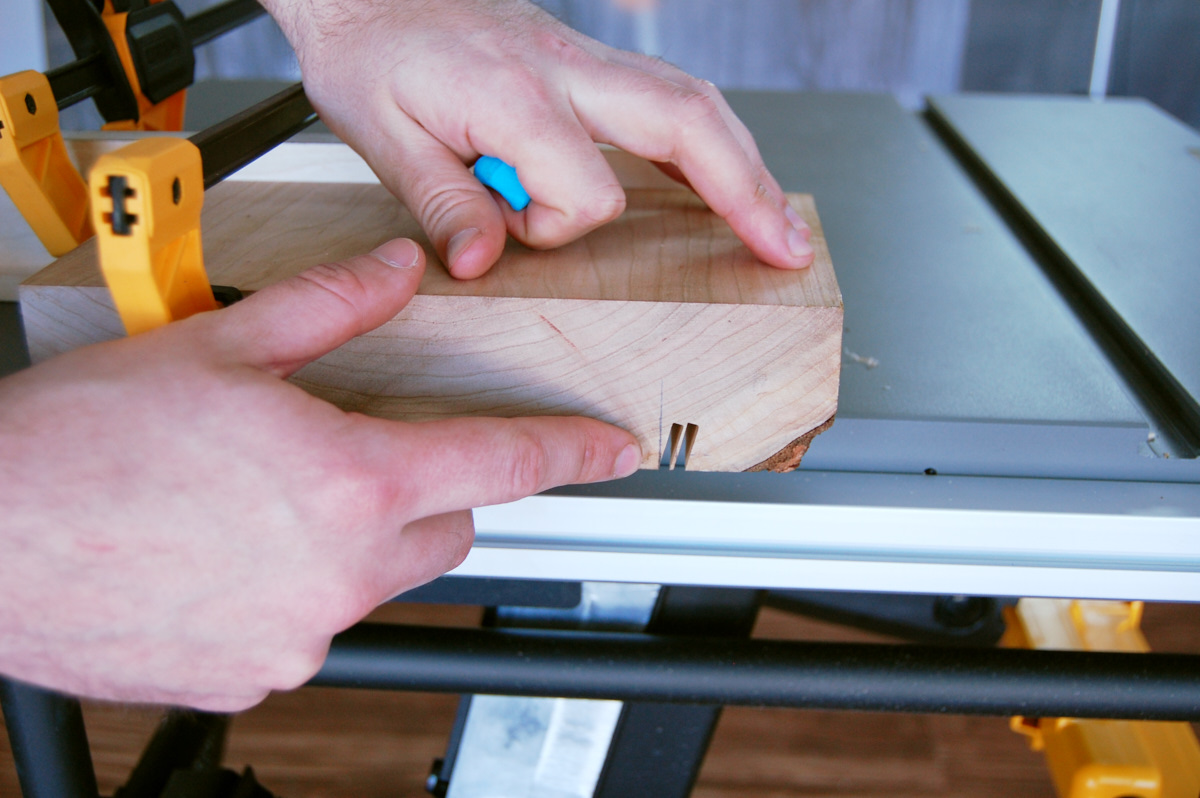
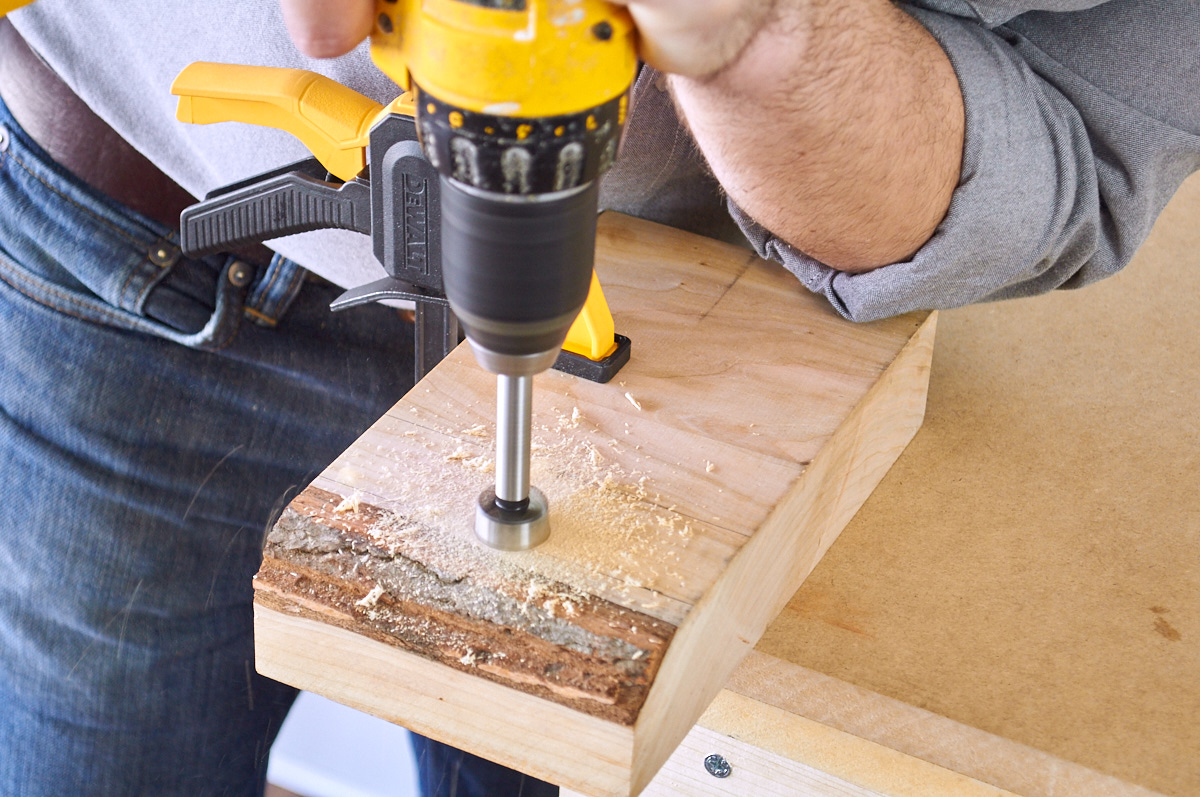
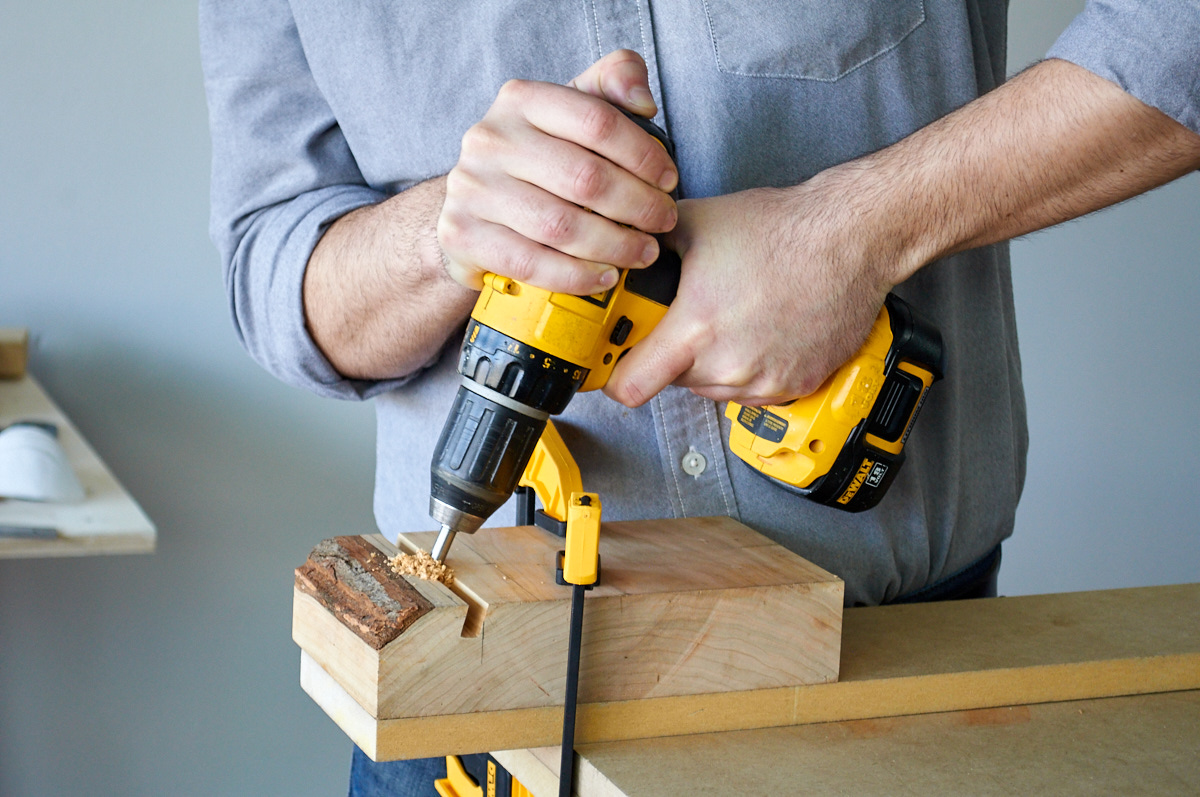
Step 5. Chuck a 3/8″ bit into your drill, and place it in the angled slot, matching the 15° angle. With a scrap piece underneath, drill a hole through the slot through the bottom of your wood. This will allow you to insert the Lighting or Micro USB end of your charging cable.
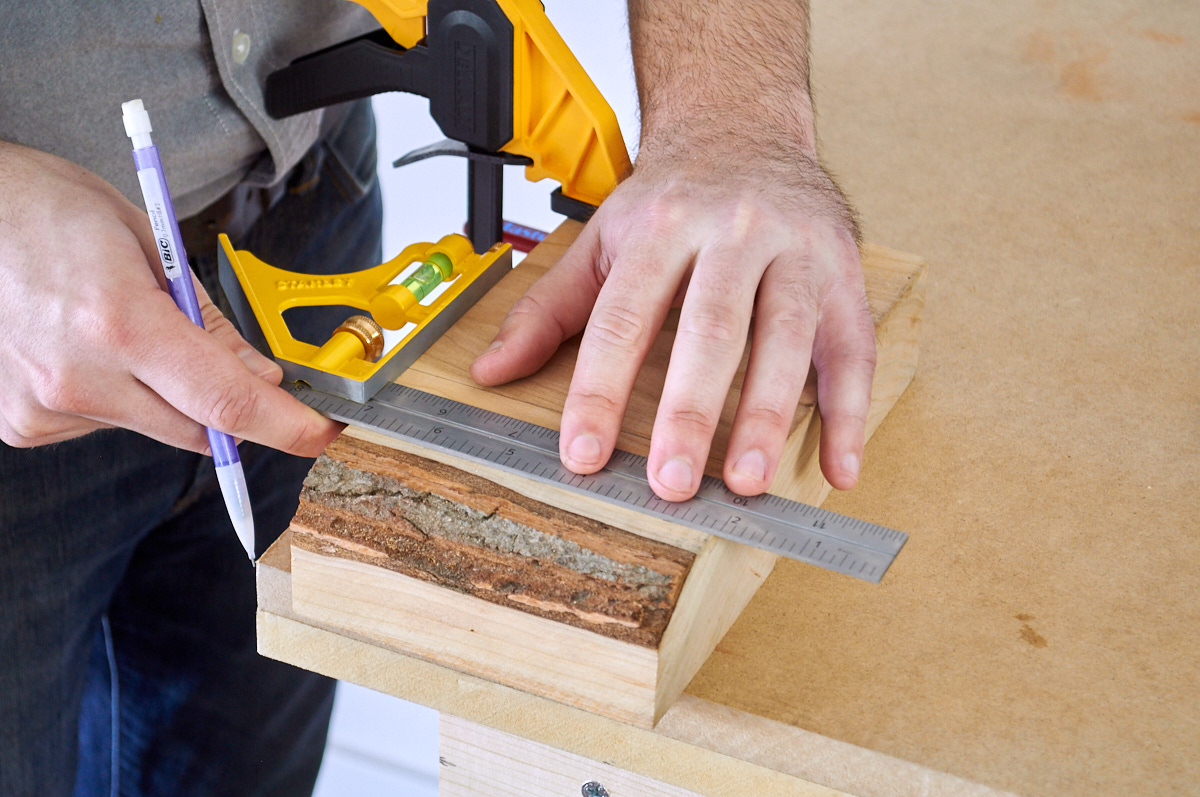
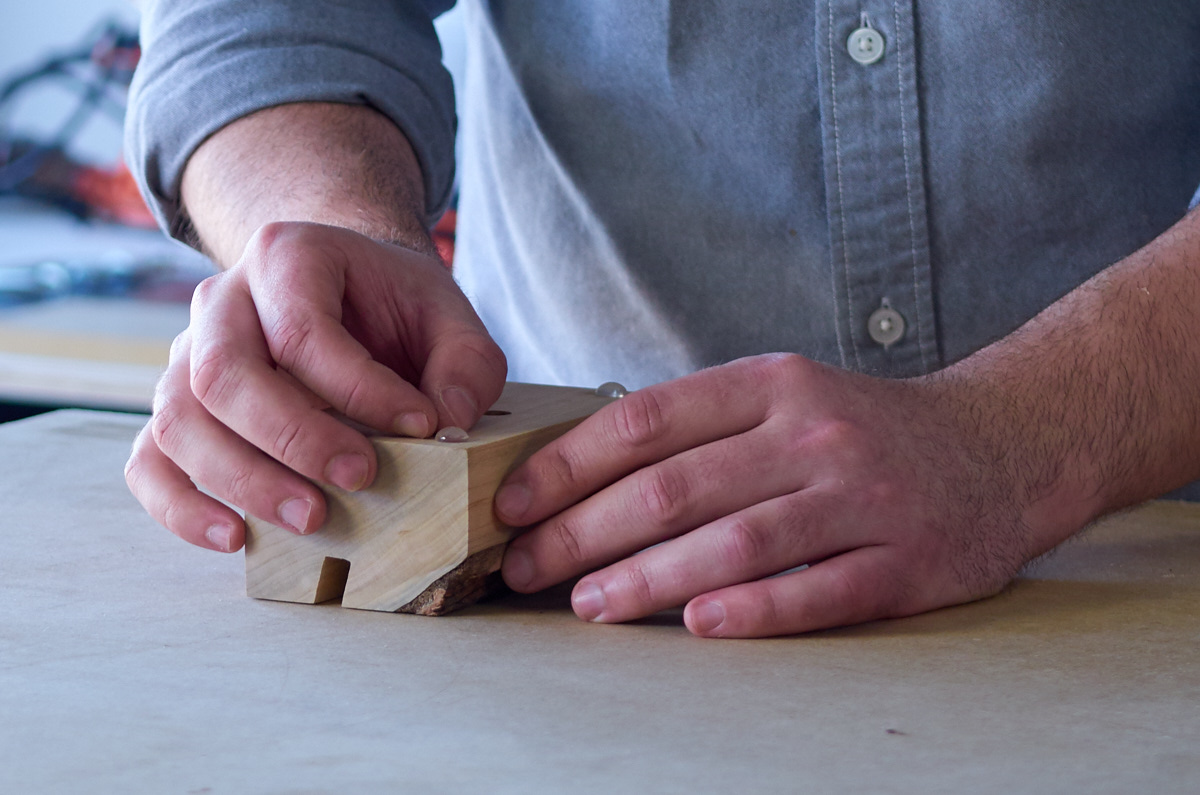
Step 6. Depending on the size of your workpiece, you may want to trim it for a more proportionate look. We cut ours to 3″ deep.
Step 7. Sand the entire piece up through 220 grit, and finish with Danish oil, following the manufacturer's directions. After allowing your project to cure, add 4 rubber feet to the bottom. This allows you to raise the charging station up a bit, so the cable can slide underneath without any wobble.
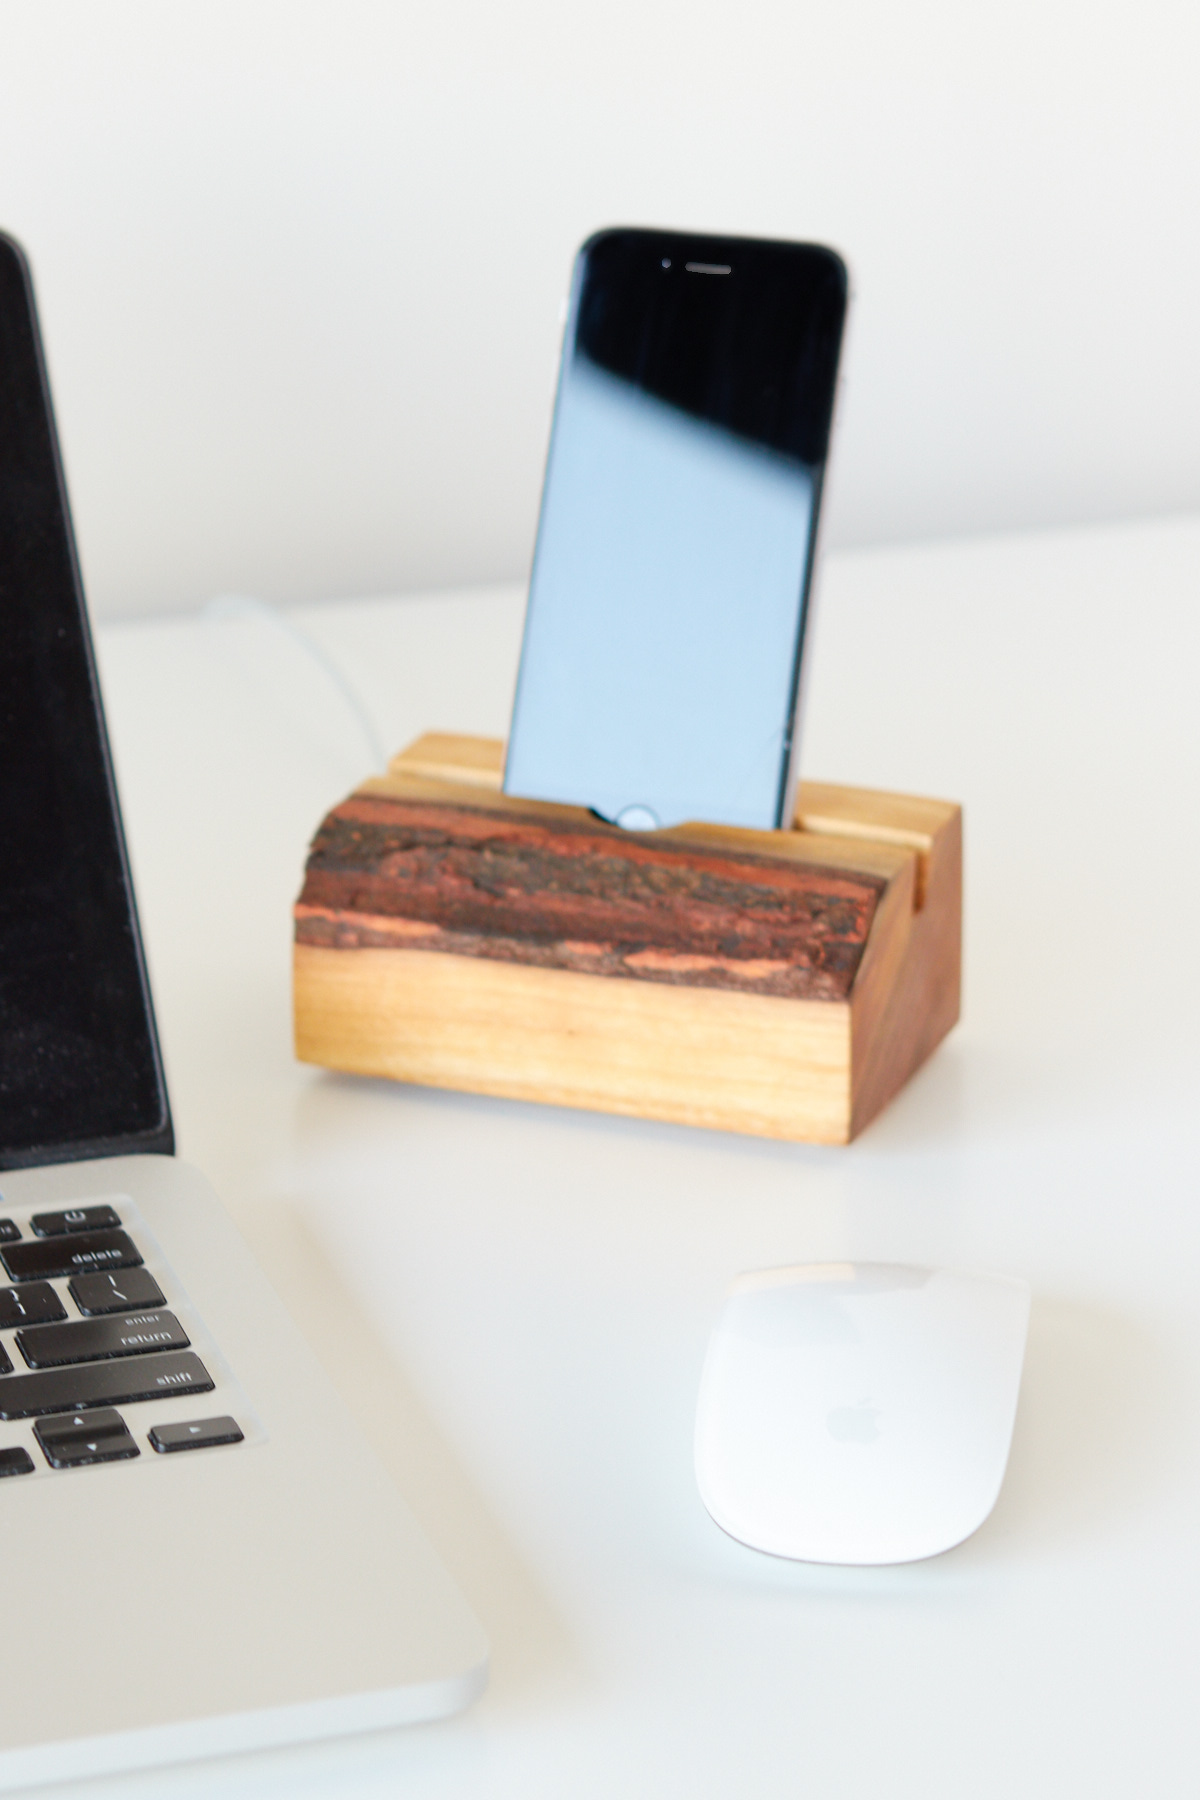
Boom! You're done. Check out how sweet this thing looks:


This post is sponsored by DIYZ, but all opinions are mine alone. Thanks for supporting the brands that make ManMade possible.


