Make This: DIY Fire Brick Blowtorch Forge
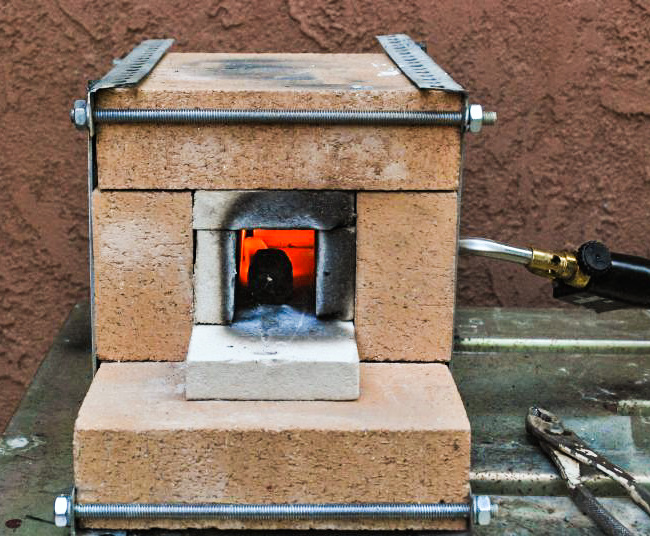
I've been looking at making a small forge for a while now. The main goal is to dip my toe into metal working just a little bit, so something that can heat up about 6″ stock is all I want. This weekend, I gathered up some basic materials and made myself a small forge.
A small propane forge is useful when working on shaping and tempering knives, and other small items of metal. It's important to keep the fuel usage efficient, so the smallest space possible helps to conserve that spendy gas. Also, I plan on working on all of my metal outside, because I like to keep my house unburnt, so something that can be moved around without too much heft is the way to go. Here are the steps I took:
Materials
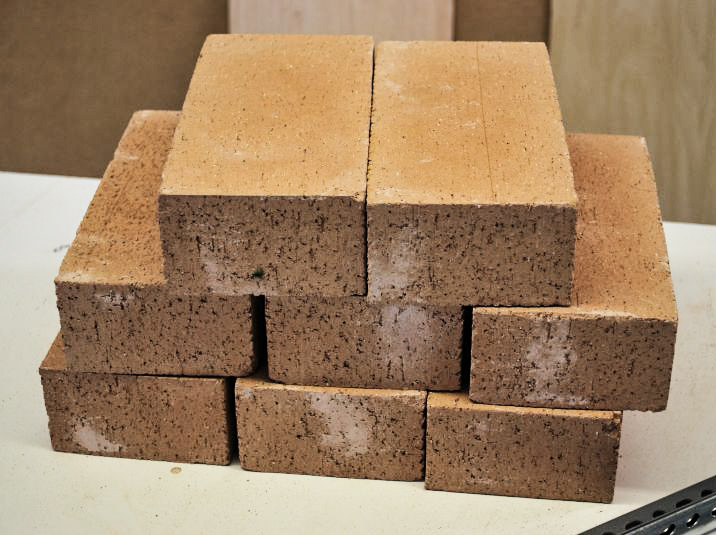
1. Fire Bricks ($3 each)– I used 9 of the standard hard fire bricks (9″x 4.5″) for the forge because I wanted something that could take a beating, and stay outside. The hard bricks are a beast to drill through, (use a masonry bit) and don't insulate as well as the soft, but they're durable enough to hold up to just about anything.
2. Vermiculite Insulation ($12 each) – Two 12″ square pieces of 1″ thick vermiculite was great to really insulate the inside of the forge, I used one of them to line the forge, and will use the next when it wears out. This can be cut with a razor blade, avoid breathing any of the dust while cutting.
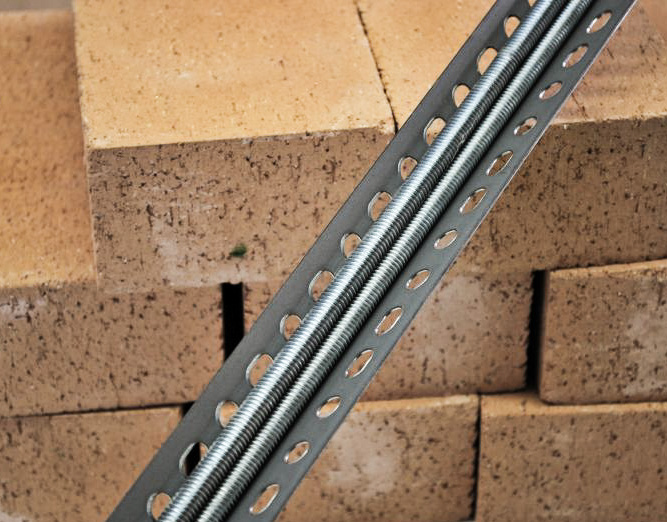
3. Perforated Steel Angle ($10)– I used two pieces of this steel angle, with 2 cut into 12″ pieces, and two cut to about 14″. I used threaded rod to attach them together.
4. Threaded Rod and Bolts – I used standard threaded rod and bolts with washers to pinch the whole thing together, make sure to check the holes in your steel angle to be sure they fit.
5. Blowtorch and Fuel ($50) – I have a Bernzomatic TS8000 that uses MAPP gas, so I sized the hole to fit. I'll likely upgrade to a homemade forced air propane burner in the future for the economy of the gas and faster heat times, but for now this is convenient and easy to use. Make sure that the air intake holes in the torch burner are outside of the hole, so air can mix with the gas.
The Steps
1. Stack the bricks – I stacked three bricks on the bottom (one extra to rest the metal stock on while heating), one on each side, two in the back, and then two on top. This gave me about a 4″ opening inside. The bricks should all fit tight without mortar, but keep an eye out for any irregularities, I had to swap around a few slightly bowed bricks to make sure it was a tight fit where it mattered on the top and sides.
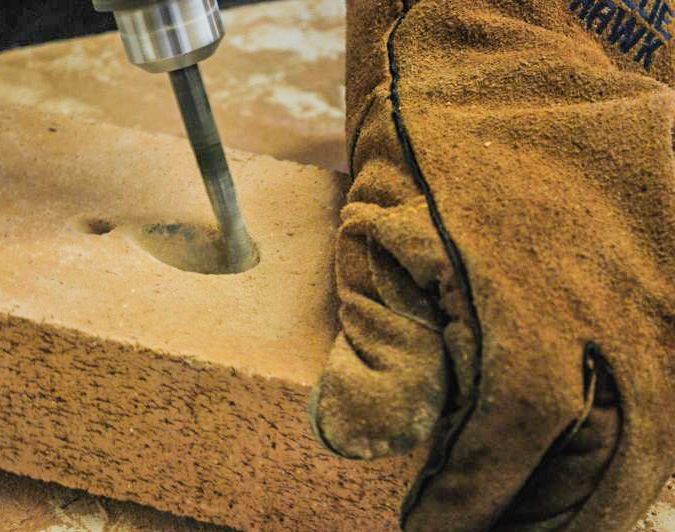
2. Drill the burner hole – I used a masonry bit to drill the proper sized hole for my burner to fit through, about halfway down one side of the opening. Keep in mind that the added Vermiculate liner will be in there and plan accordingly.
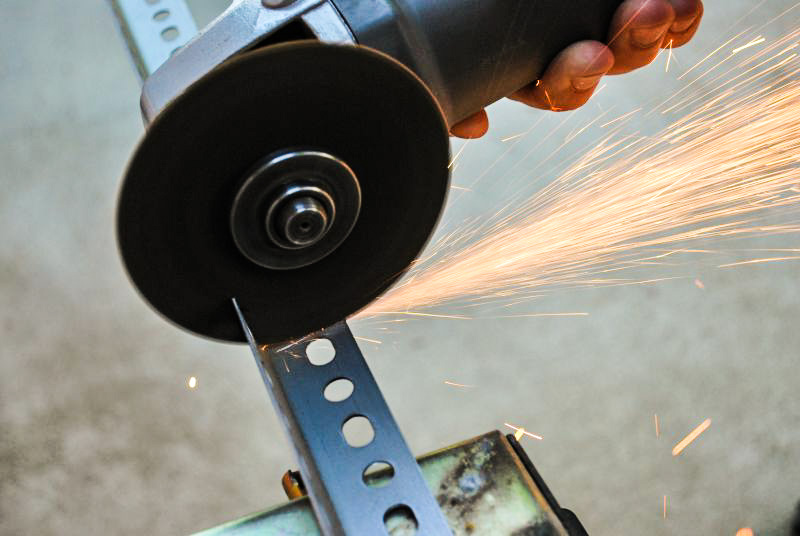
3. Lay out and cut the steel angle – I cut the steel angle into about 12″ pieces for the top, and 14″ for the bottom. Be sure to measure as your bricks may be a bit different. A single hole should stuck out of the front and back for the threaded rod. Once the steel was cut to size, I measured and cut the threaded rod to fit.
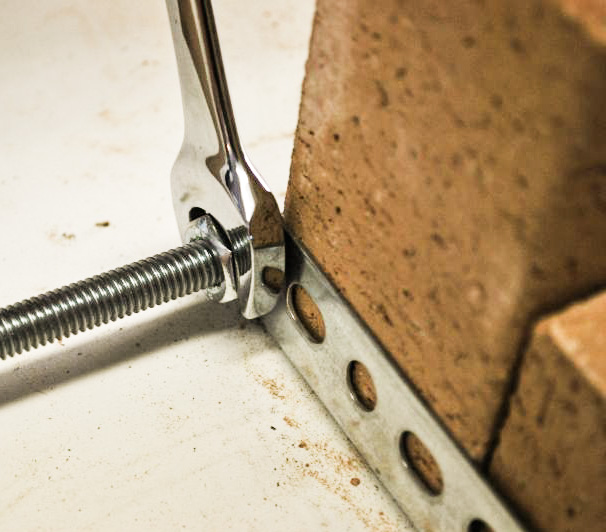
4. Thread it together – The threaded rod stretches from side to side and pinches the blocks together. I cinched it down with washers and bolts. Now, the top and bottom should be tight together. From here, I welded flat stock on each side to hold the top and bottom tight, but the leftover angle steel could be used to bolt it all down as well.
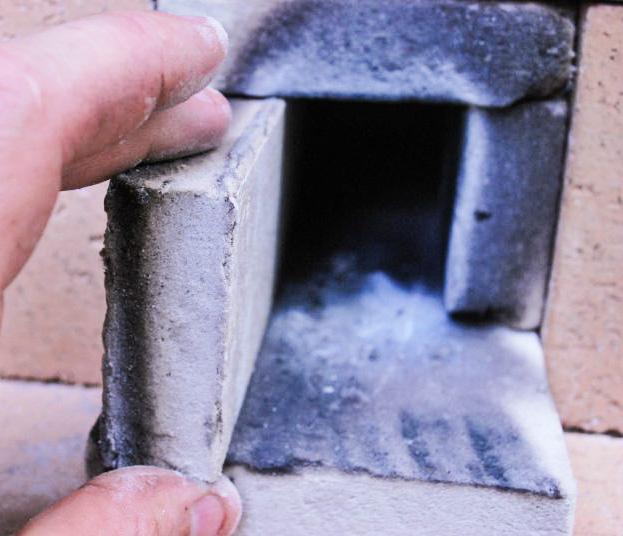
5. Cut and install the liner – The forge can be used without the liner, but the liner reflects the heat better for a faster heat up cycle. Cut it to fit and slip into place, there's no need to secure it, as you will want to replace it as it wears out.
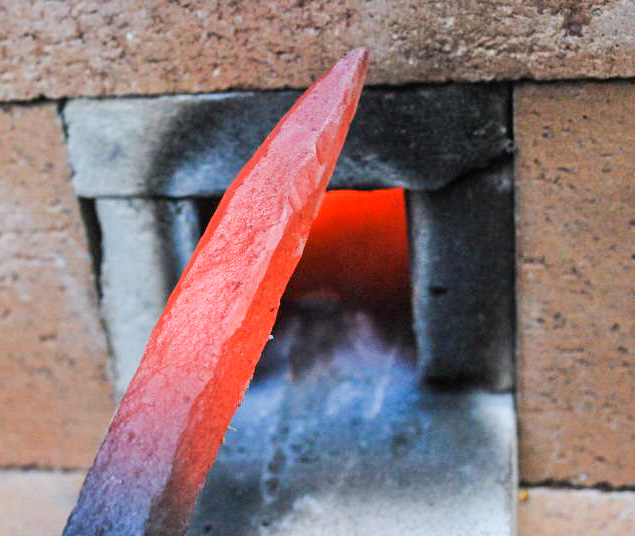
6. Fire up and test – At this point, the forge is ready to heat up and use. Please be aware that you're heating up metal to 1000+ degrees so protect yourself and everyone around you with proper safety gear and a well ventilated area. Always have a fire extinguisher close and never leave it unattended.
Did you make one yourself? I'd love to see it, and if you see anything I should do differently, let me know!


