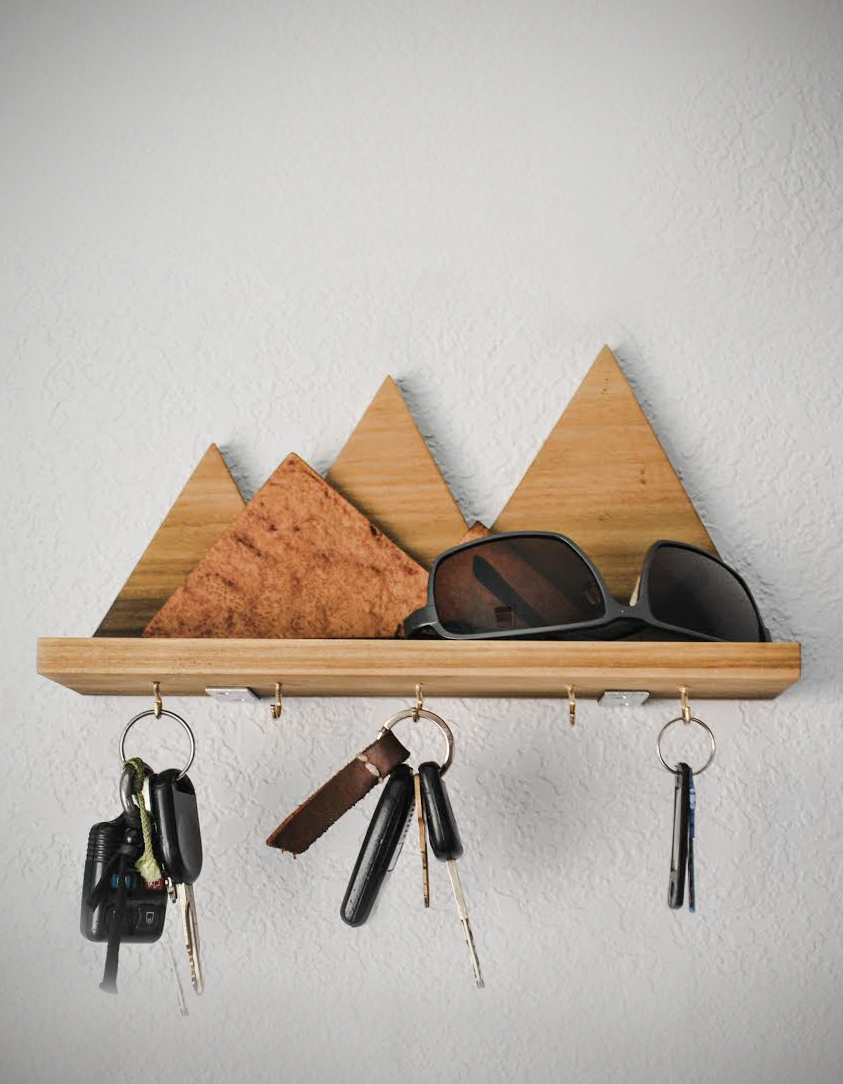
Make This: Wooden Mountain Key Rack
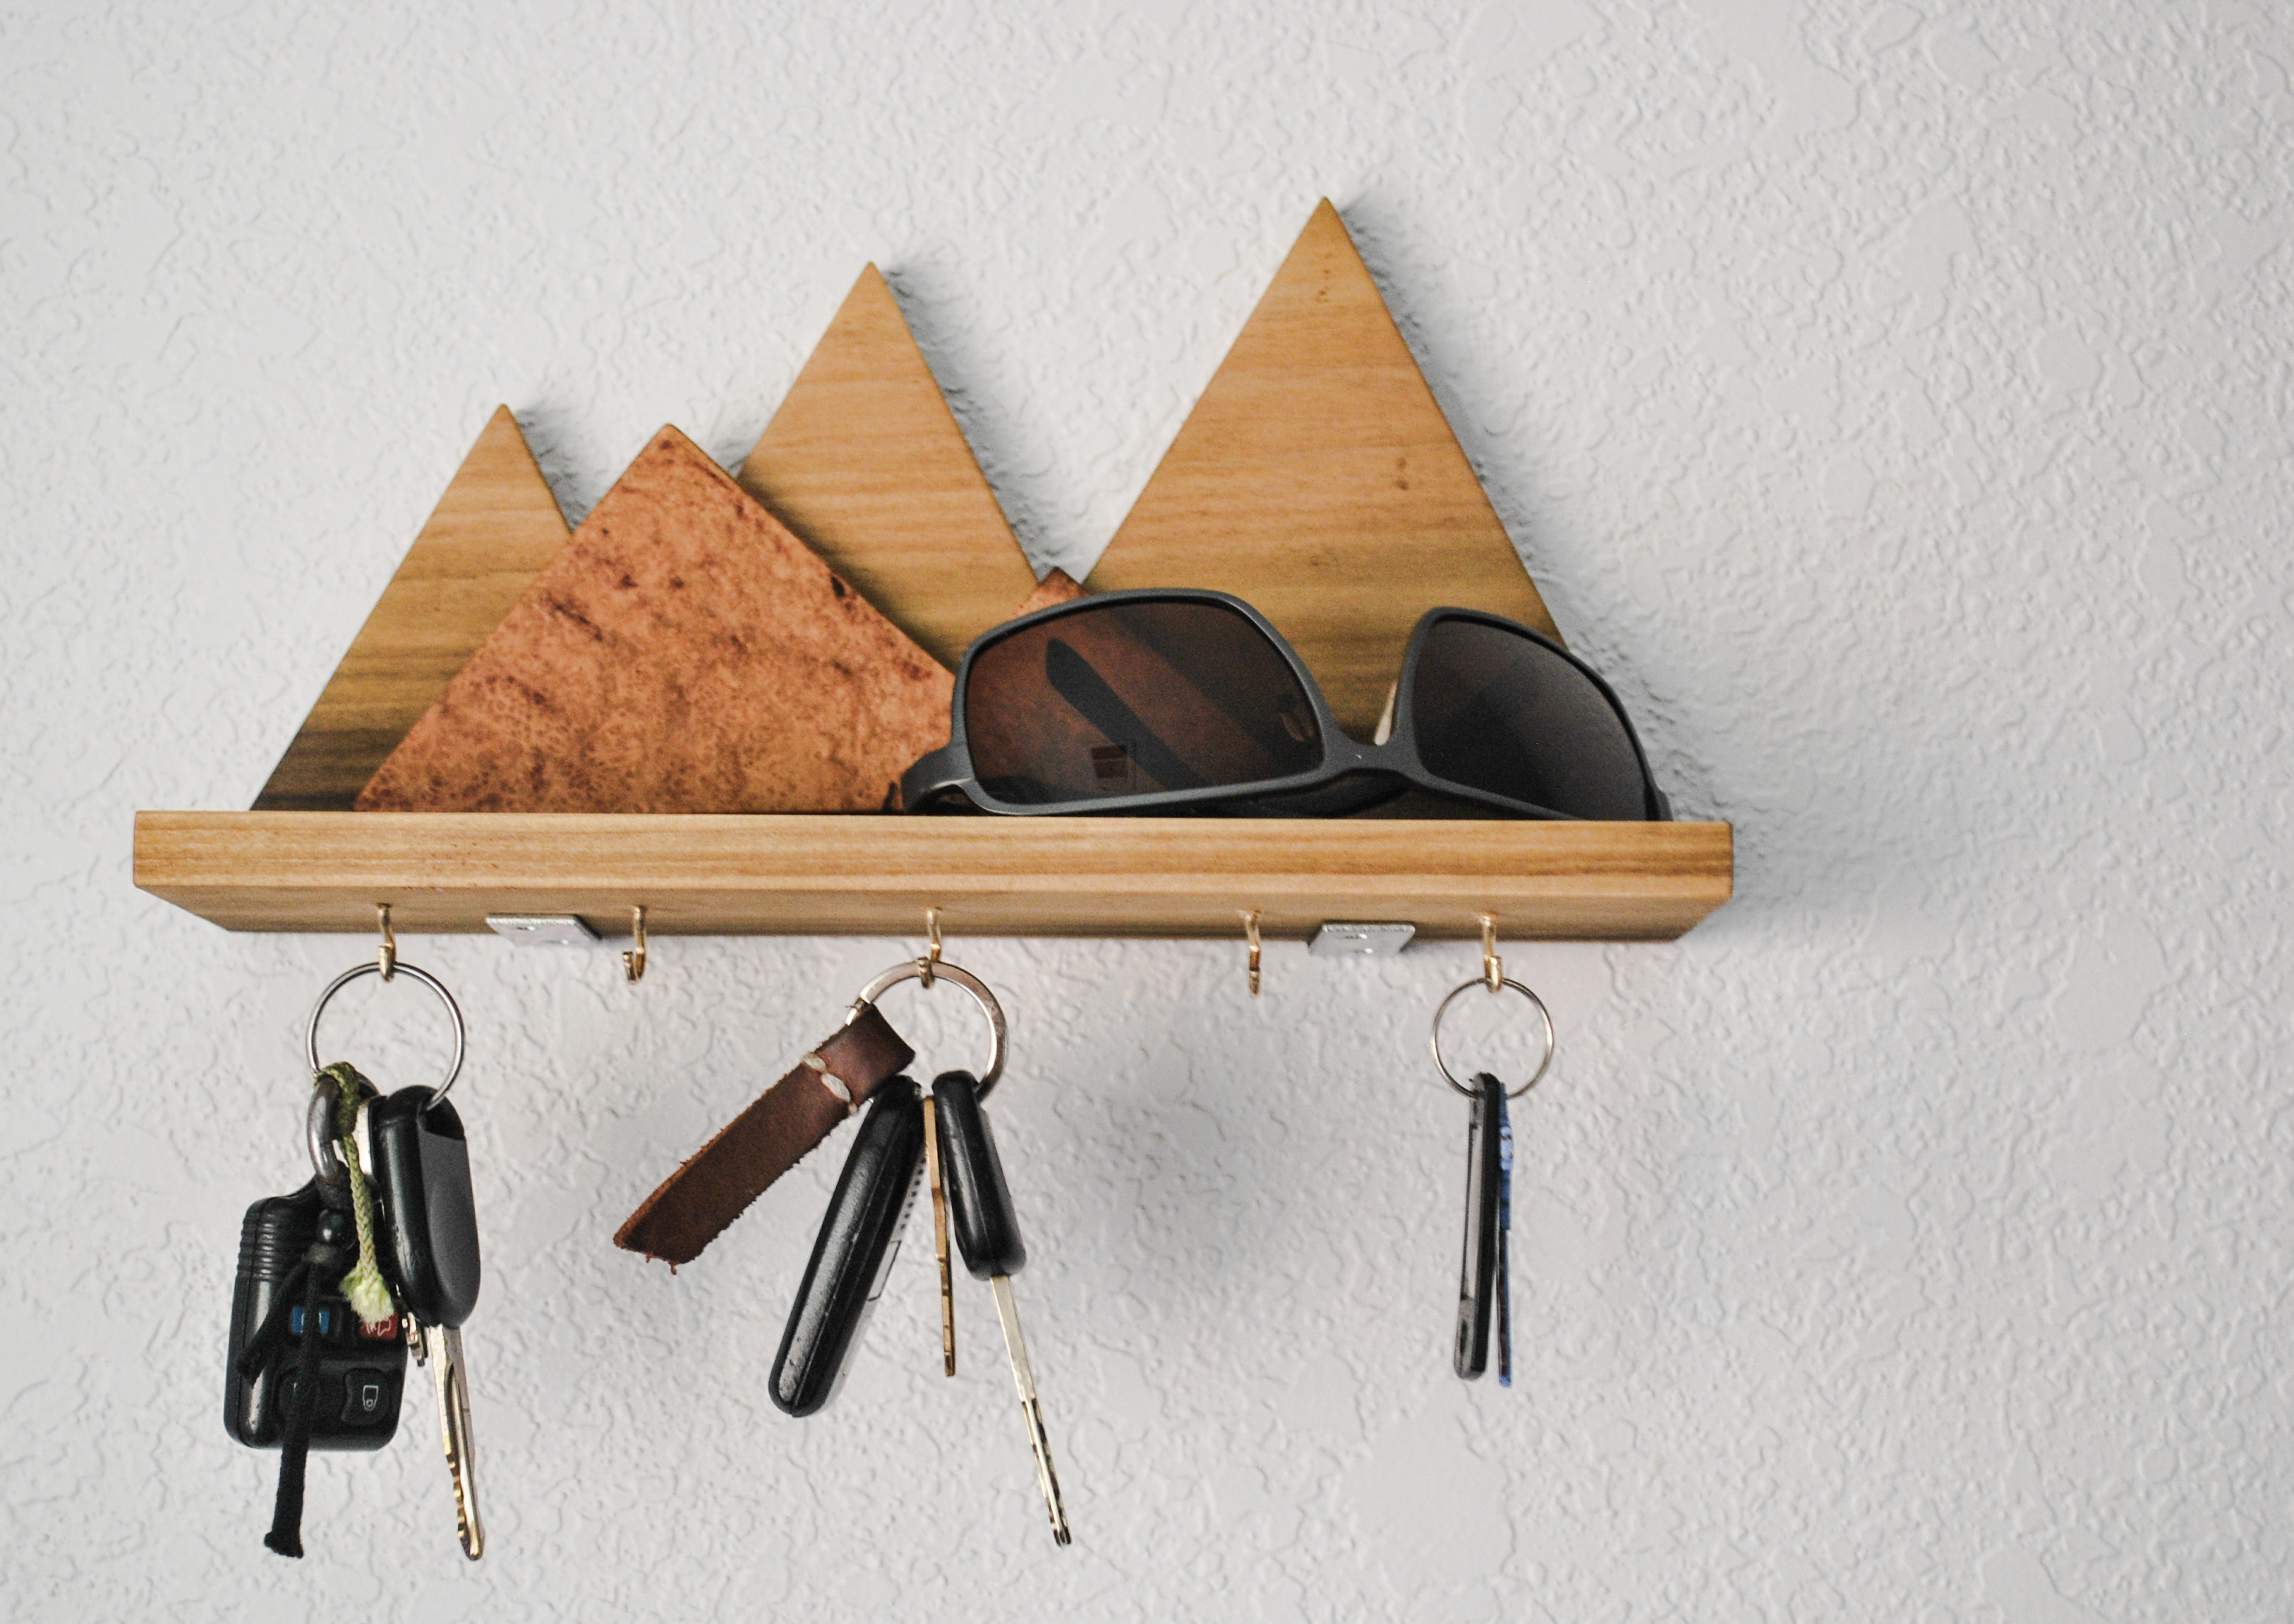
Anyone who has grown up near in the mountains knows what it means to see the ridgeline. Being tucked in nearby some exciting geological features has a comfort and appeal, and, of course, great views. It's safe, secure, constant. The mountains invite adventure, and simplicity. To honor my own local Cascade range, I built this simple key rack that takes a bit of that wild adventure and brings it home.
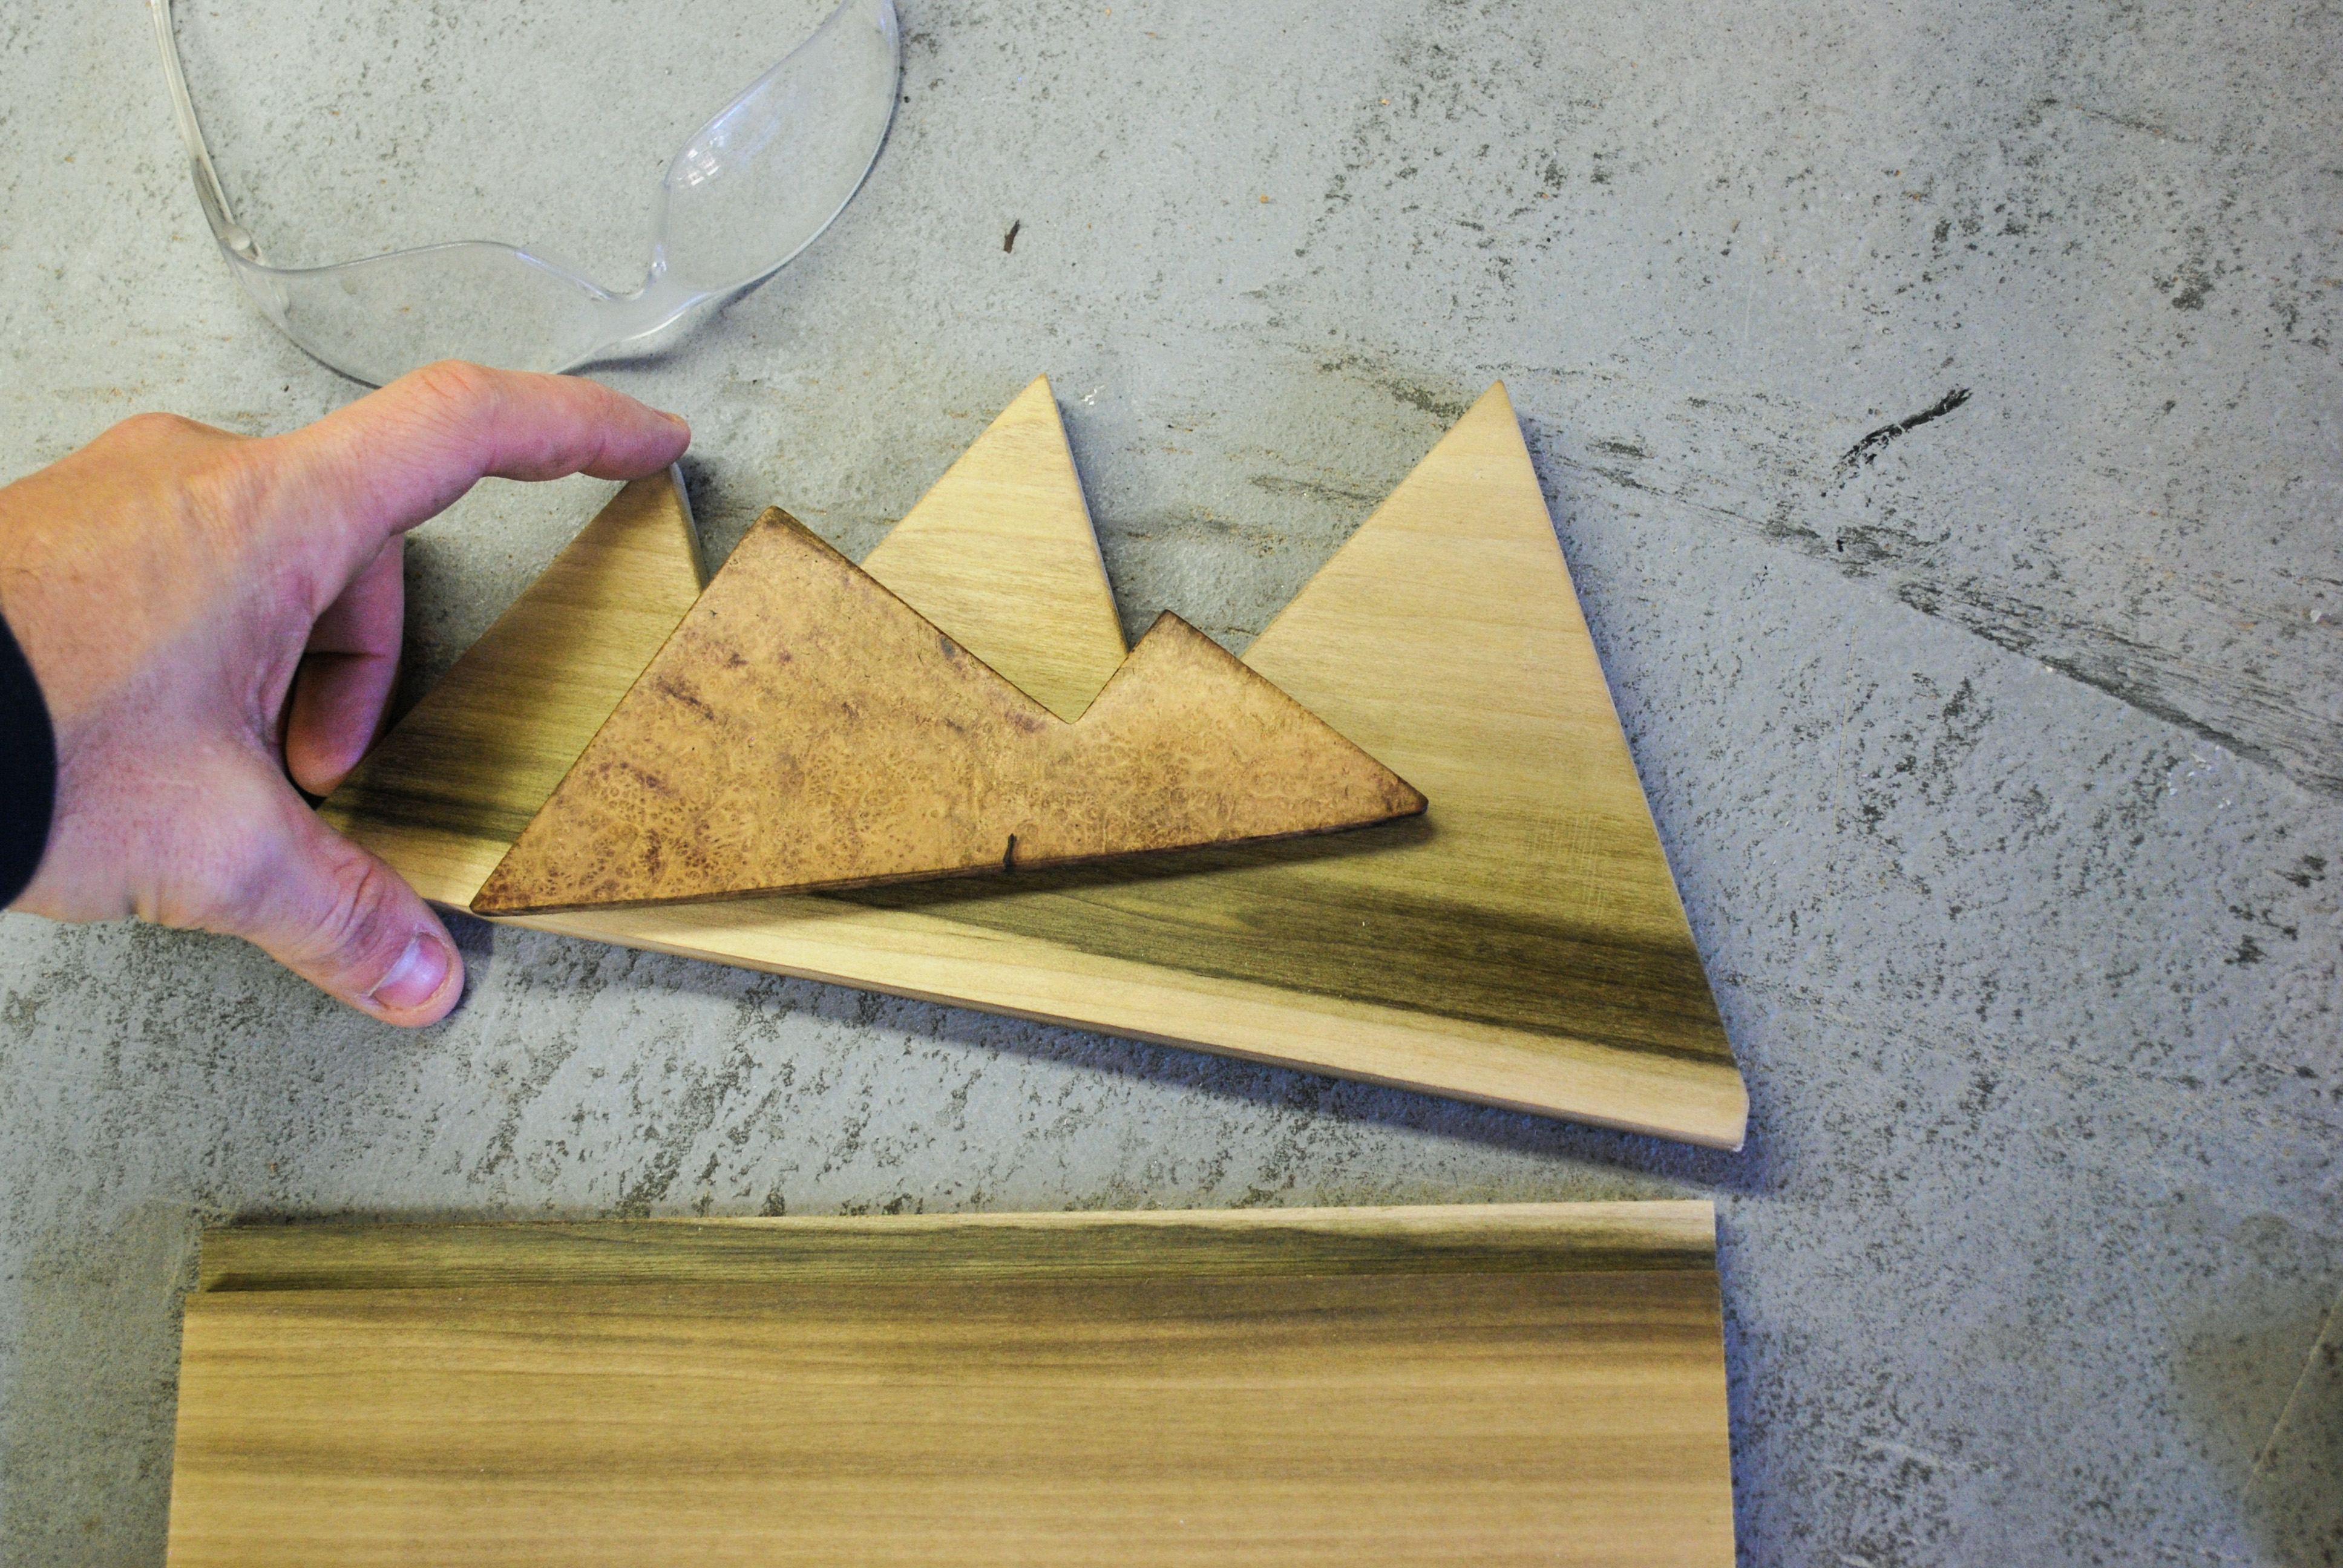
I used a few scrap boards from past projects for this piece: some poplar, and an amazingly figured accent piece that I added as an eye-catching contrast to the consistent grain.
Tools I Used:
- Table Saw
- Band Saw
- Belt Sander
- Sanding blocks or scrapers
But seriously, you could do this whole thing with a coping saw and sandpaper.
Materials:
- Two roughly 4″x6″x 1/2″ thick boards (poplar was used for this project)
- Contrasting Accent wood
- Wood Glue
- Mounting Brackets
- Cup hooks
The Steps:
1. Rough Cuts – I first cut the two boards to size, making sure they were both exactly the same length.
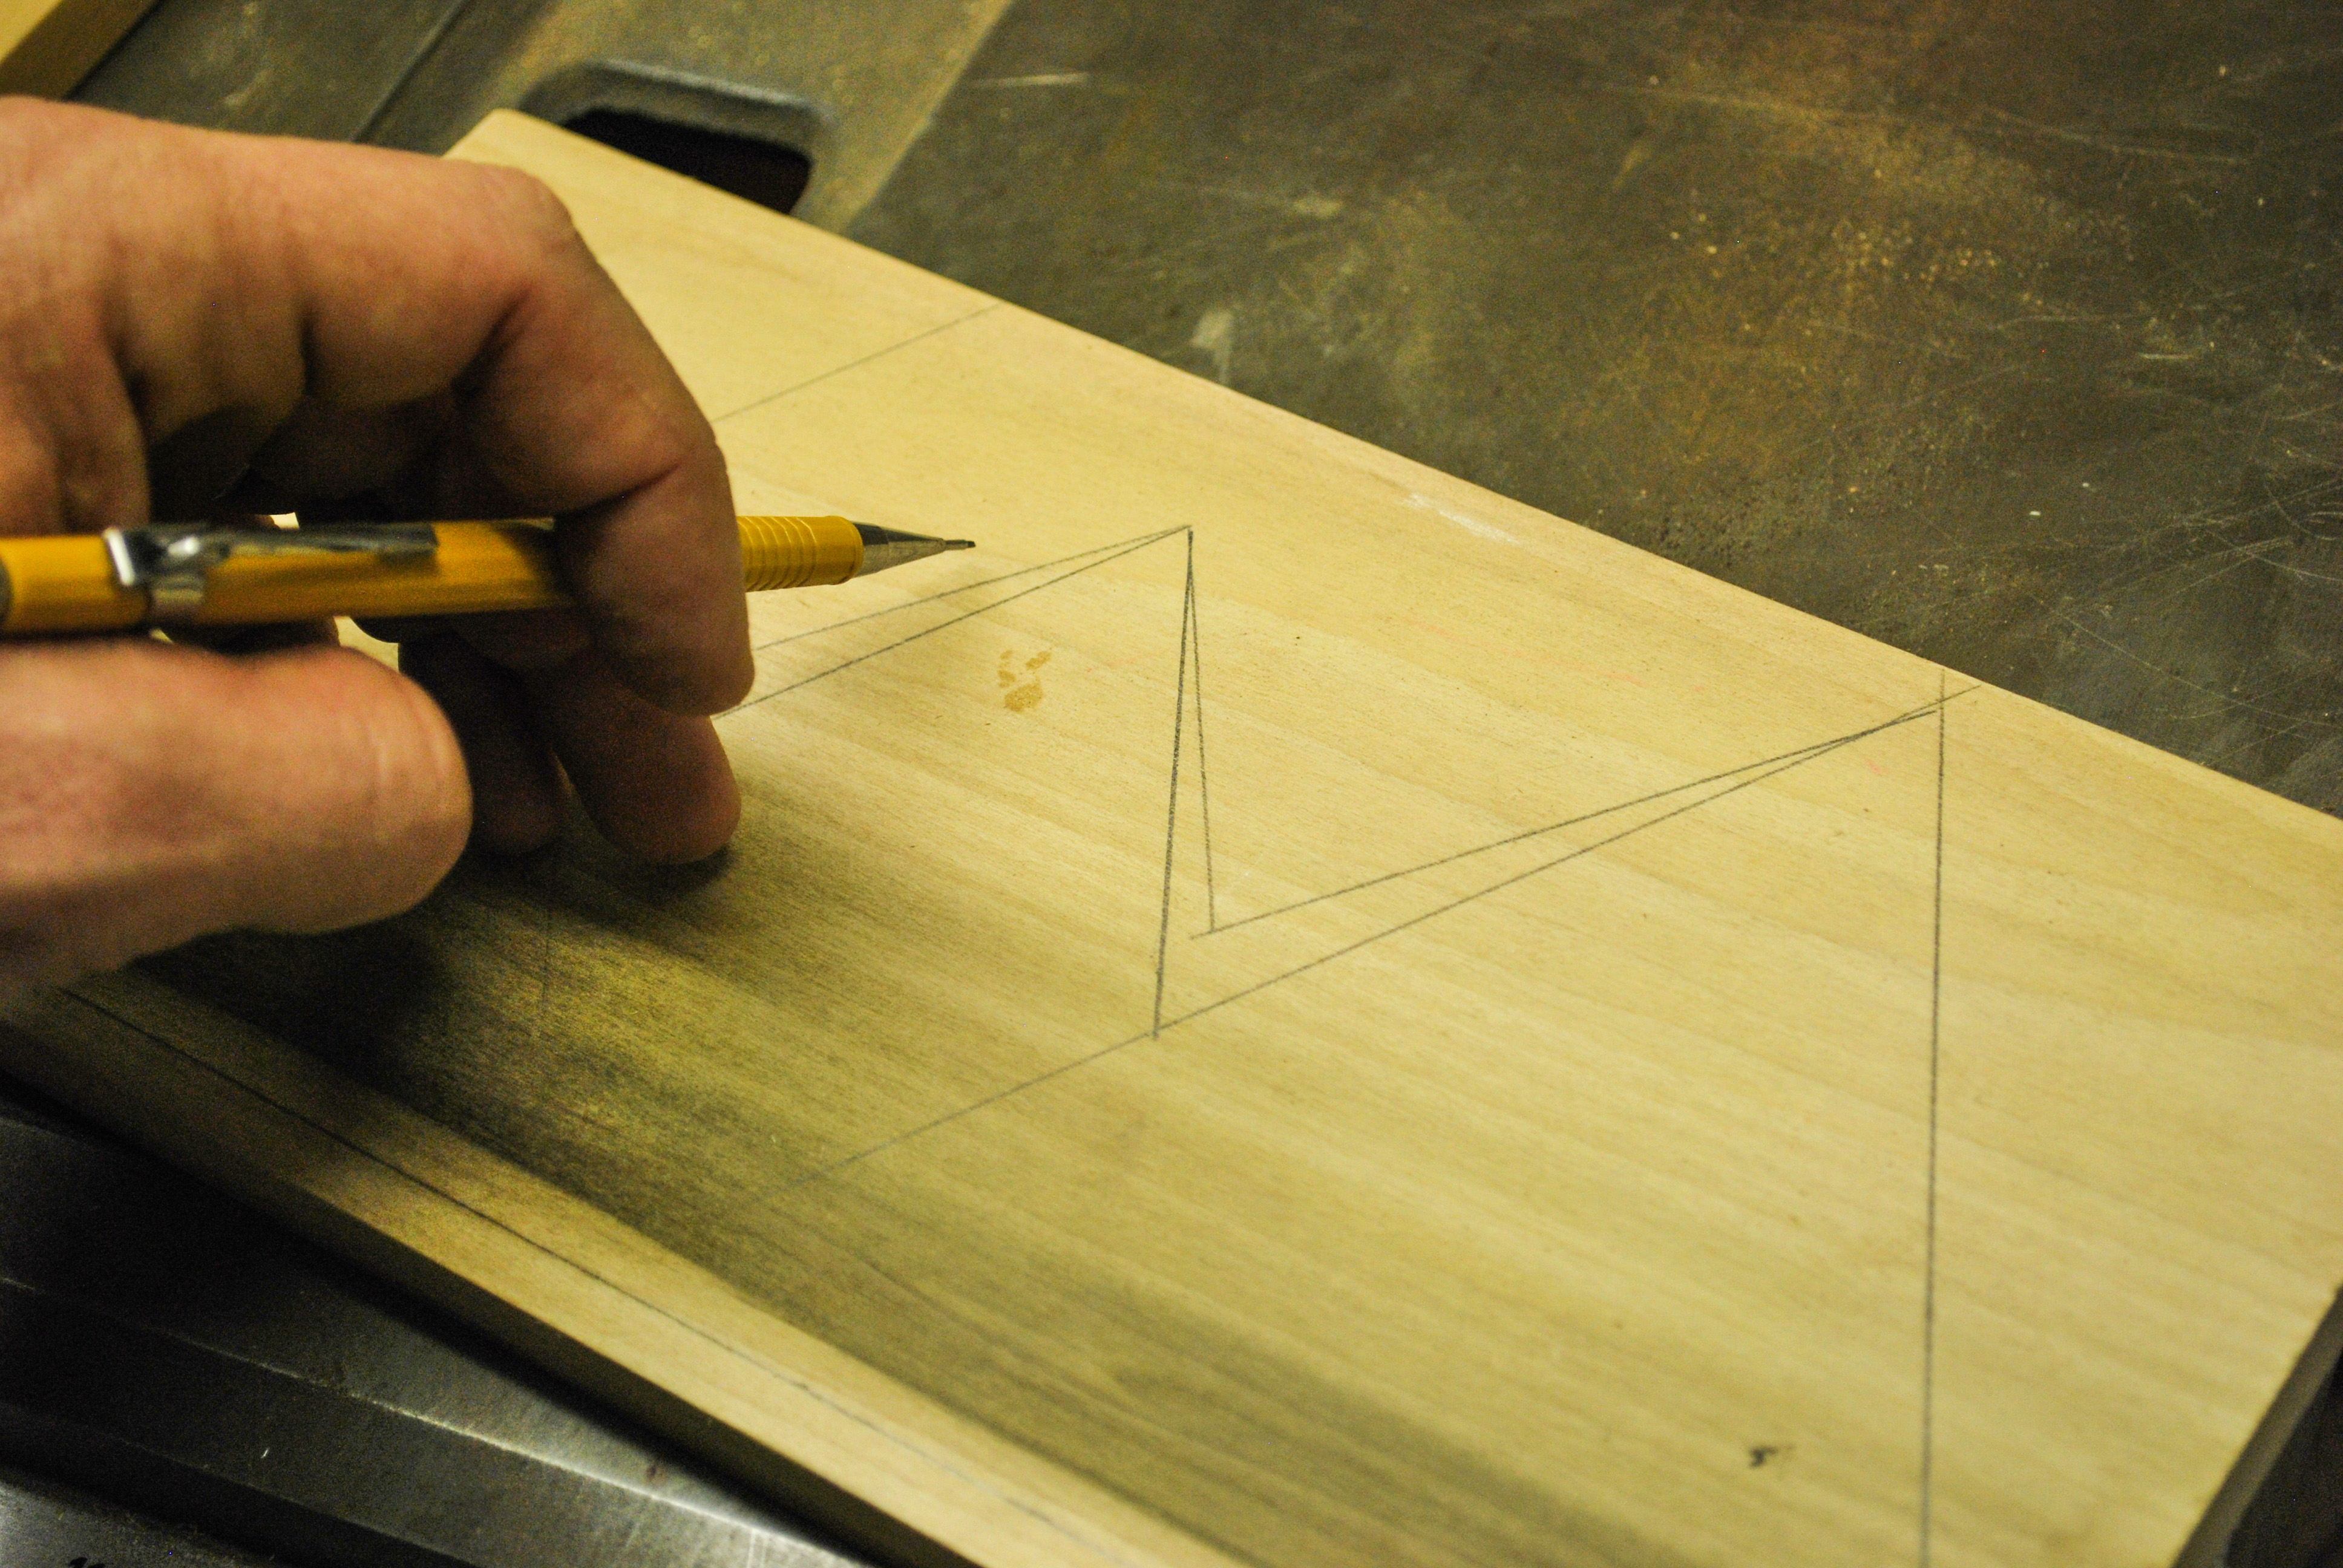
2. Layout The Outline – This is up to personal preference, but I kept the angles on the mountains the same for a more cohesive outline. This also meant I only had to set up my miter gauge once. I used a ruler and pencil to mark the cuts. The accent wood I used was a small piece, so I marked similar shapes, but had to adjust a bit to get the most out of the figured wood.
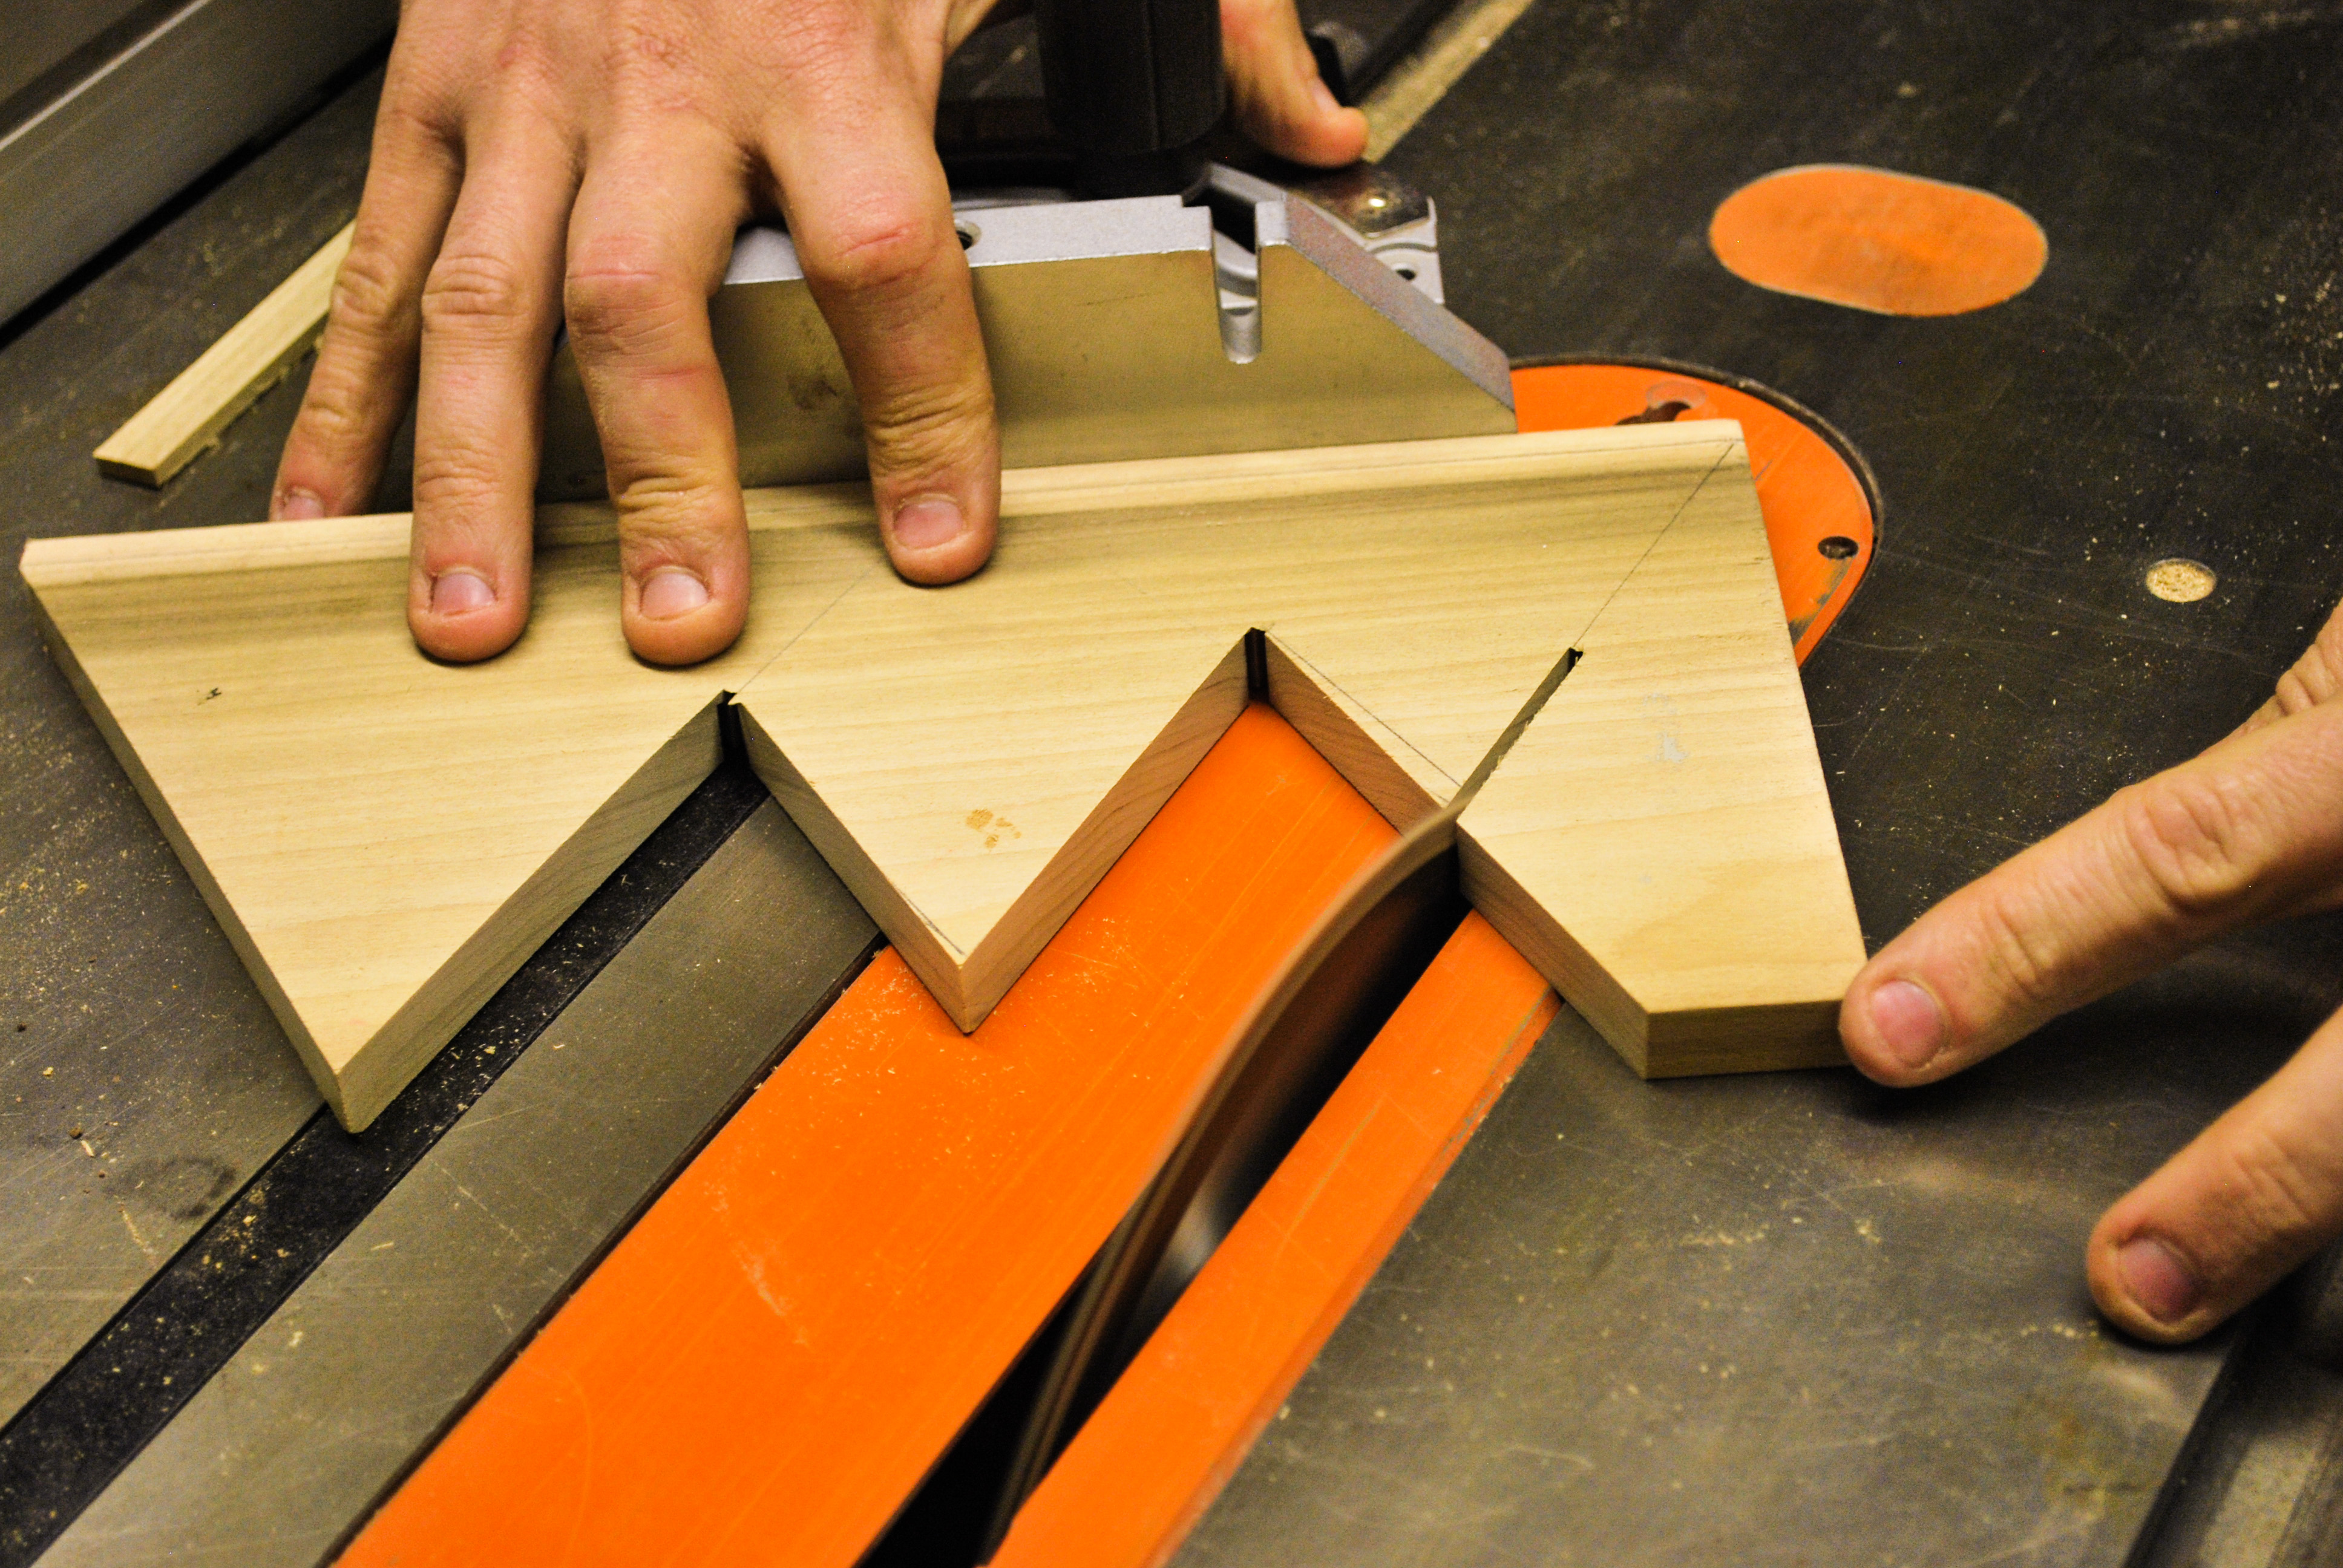
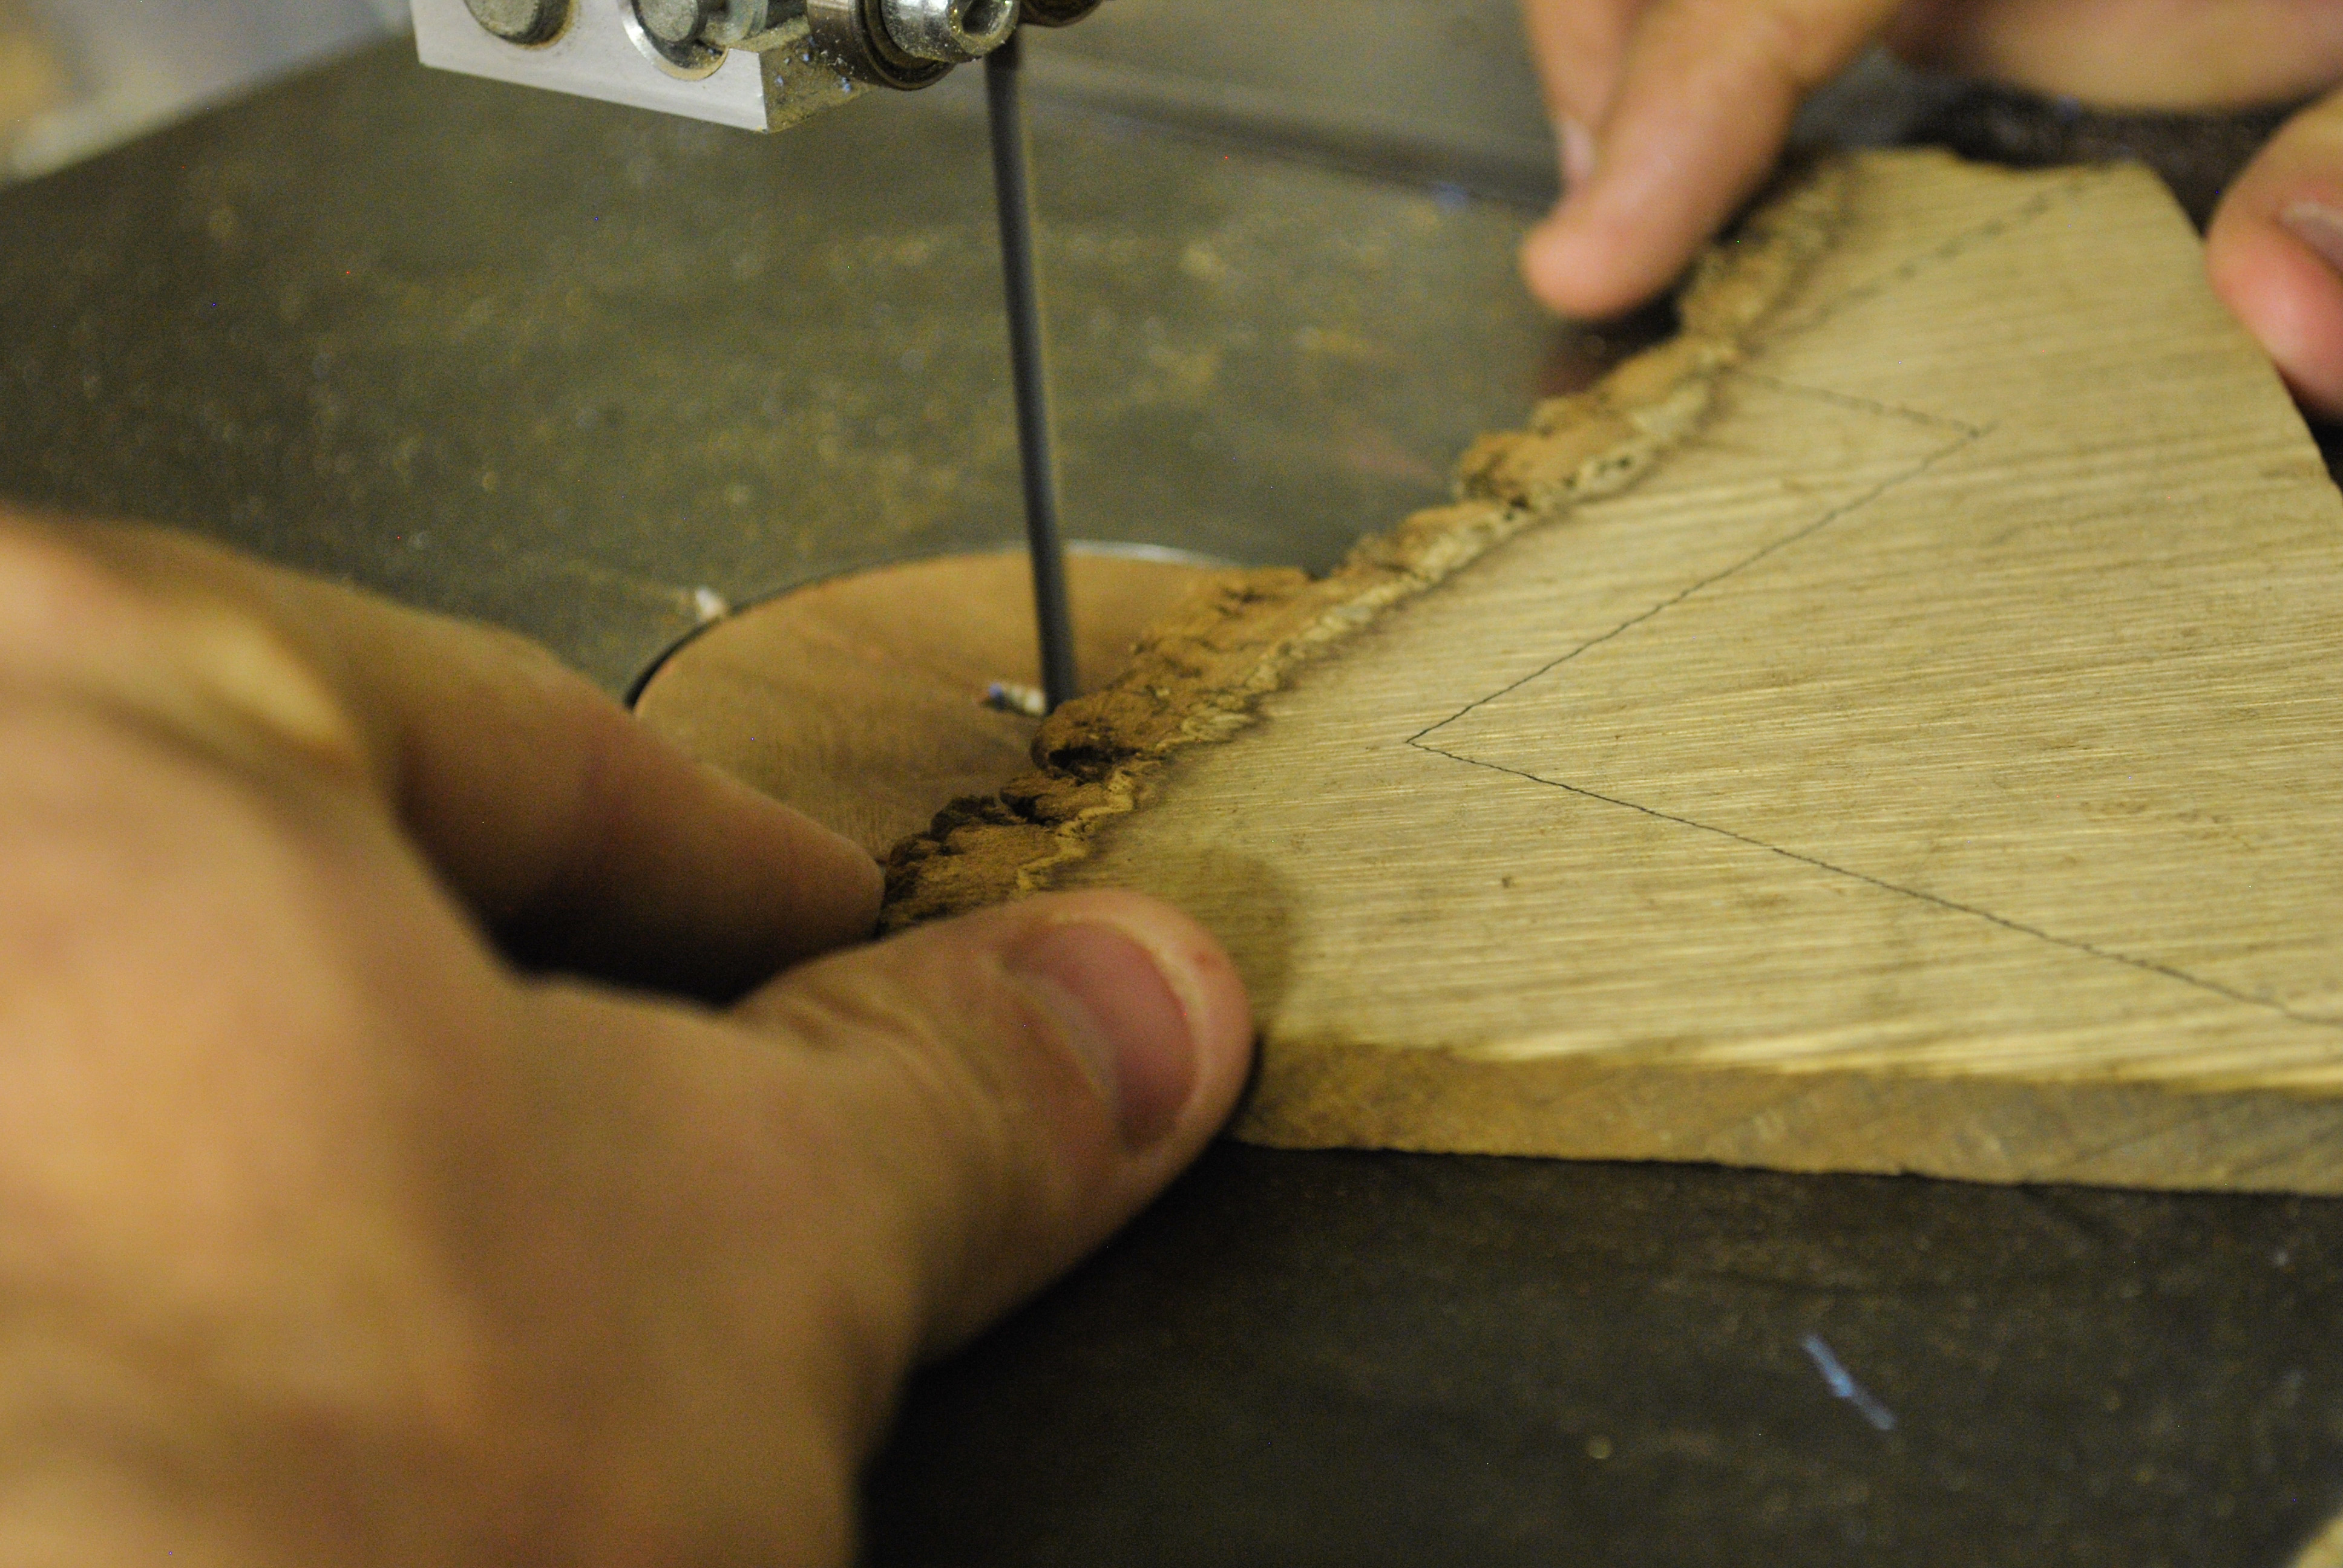
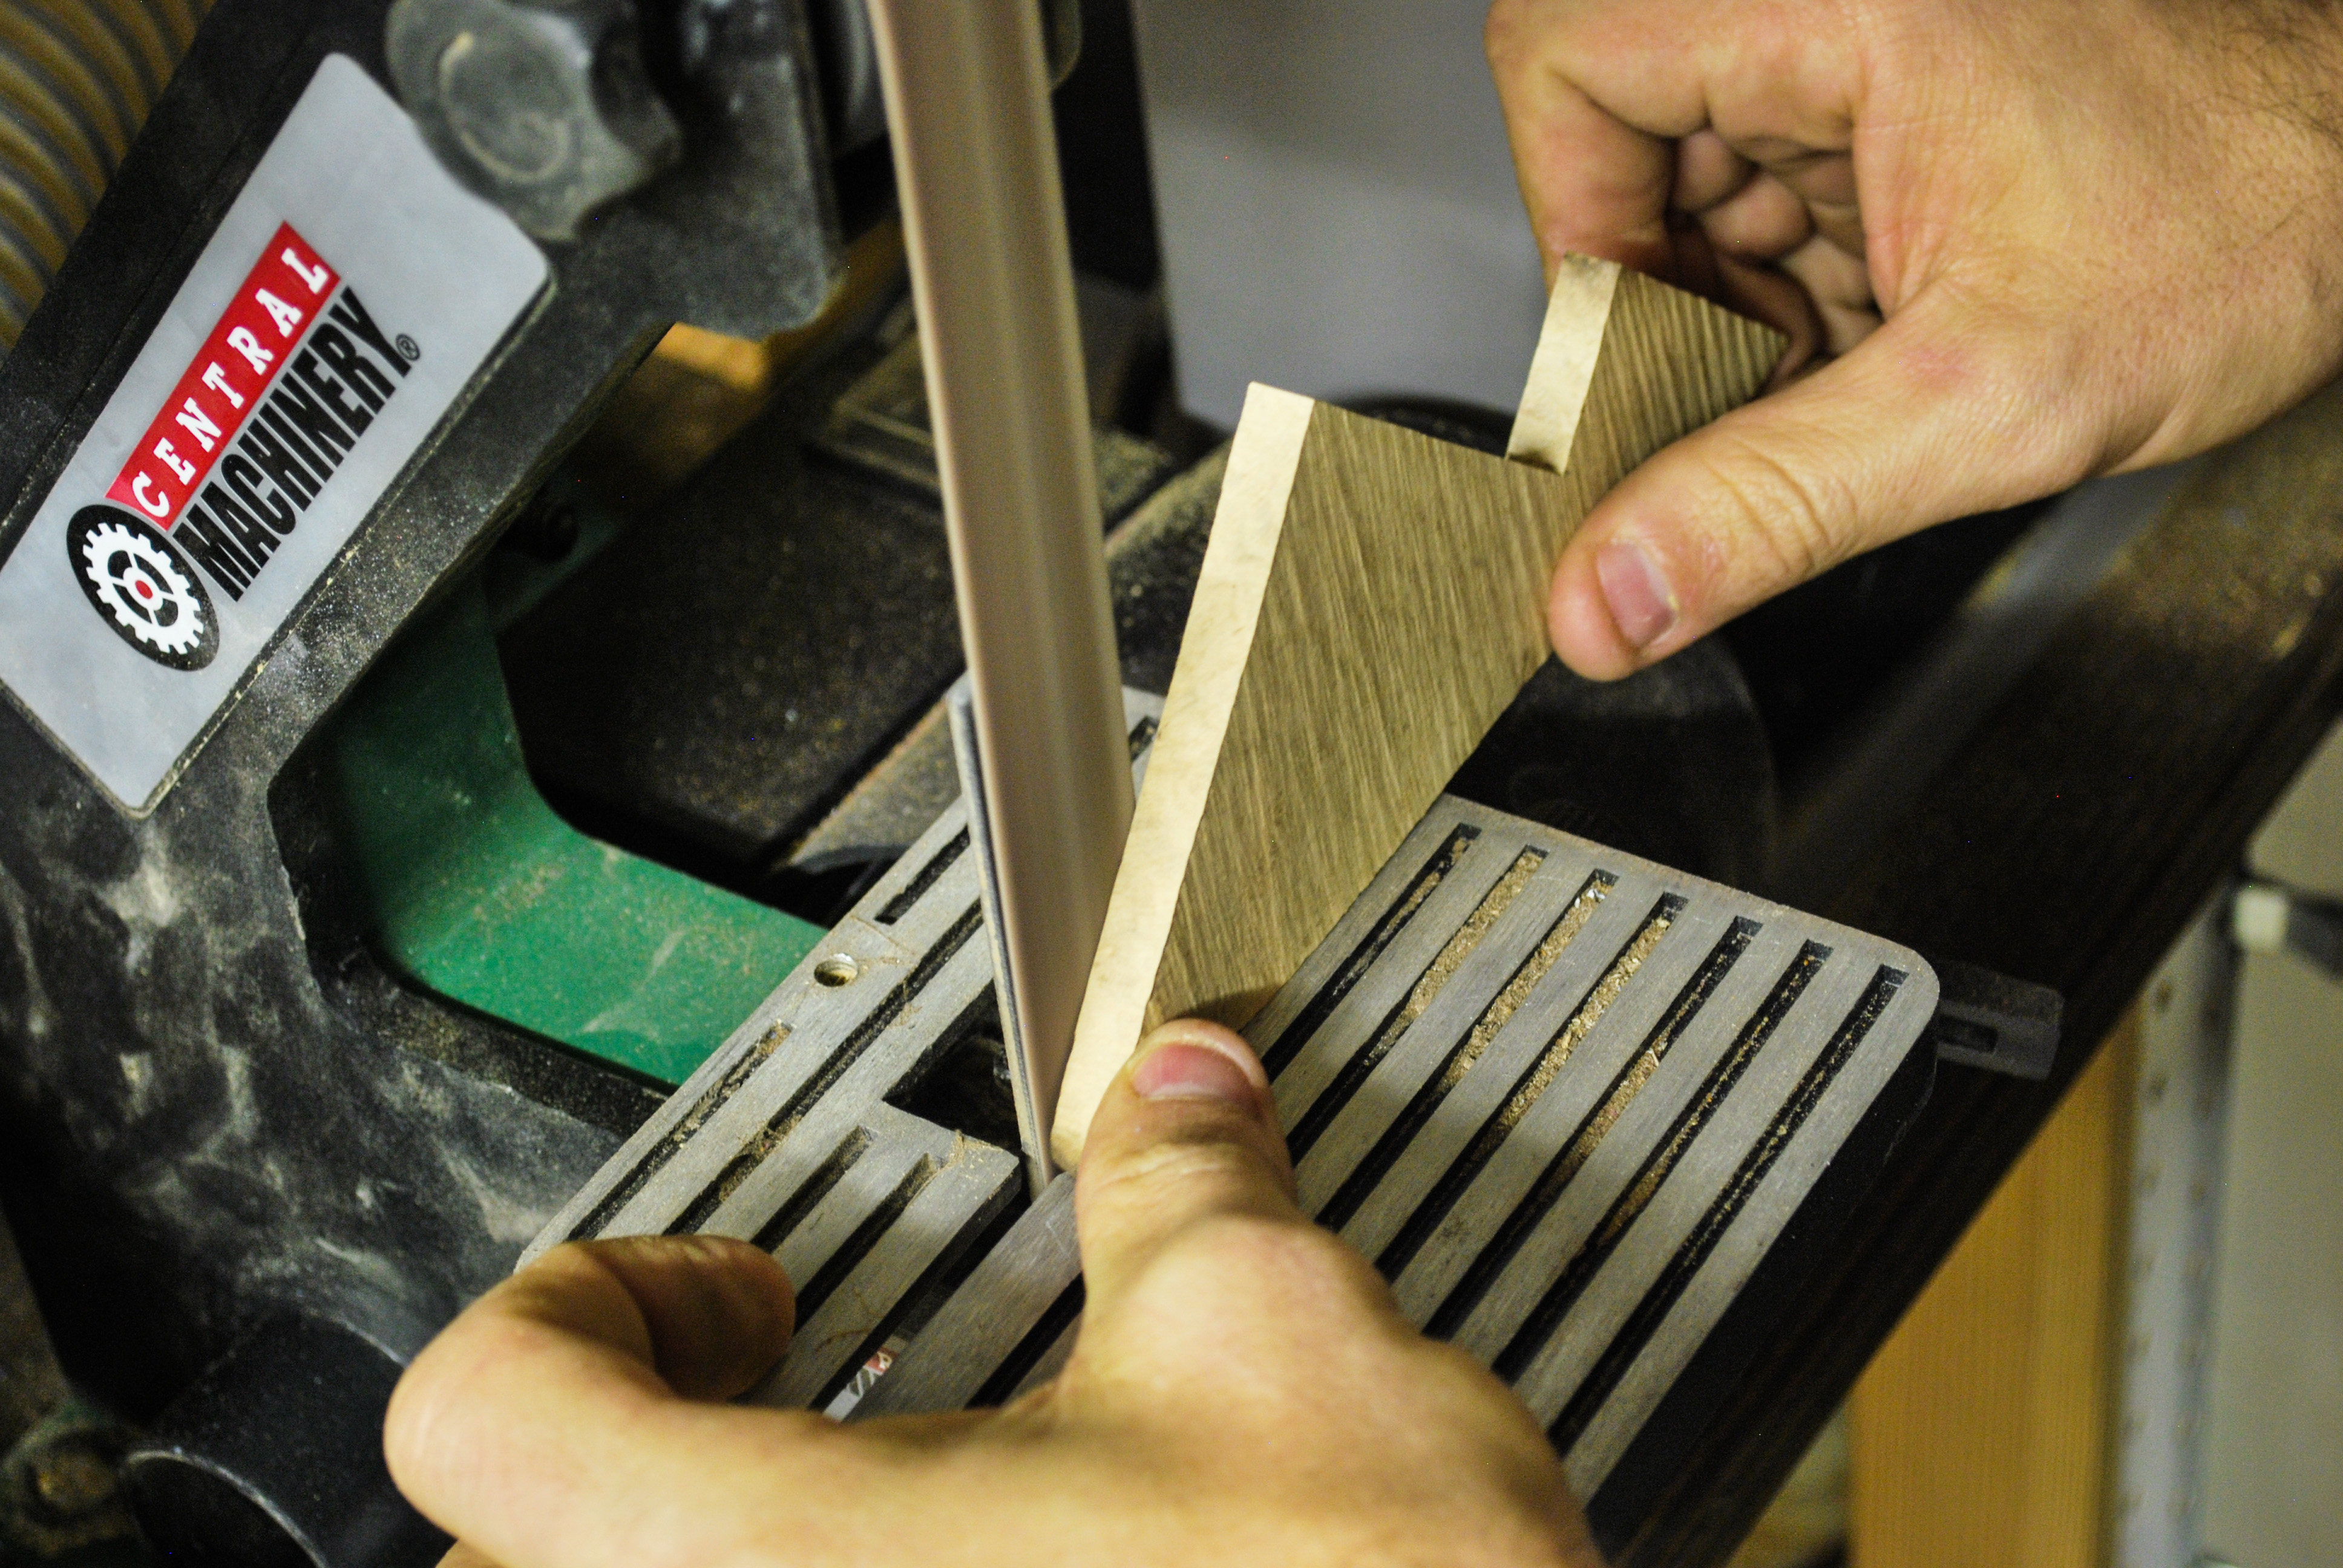
3. Make the cuts – Using the table saw or band saw, cut out the outline and then sand up to the line to get a nice clean look. I also cut a simple rabbet in the back of the shelf for some stability and added gluing surface.
4. Sand Everything – All the parts can be sanded well while they are separate. I sanded with 120 to 400 grit sandpaper with the grain for a smooth finish.
5. Assemble the Pieces – This small piece can be glued together with standard wood glue, but I used CA glue for a faster hold time. I glued and clamped for about an hour before getting back to finishing work.

6. Finish and add hooks – I finished the piece with a few good layers of mineral oil for a clean, natural look. I then added the hooks underneath for keys. Some final sanding with 400 grit sandpaper brought out the sheen and really made the grain stand out.
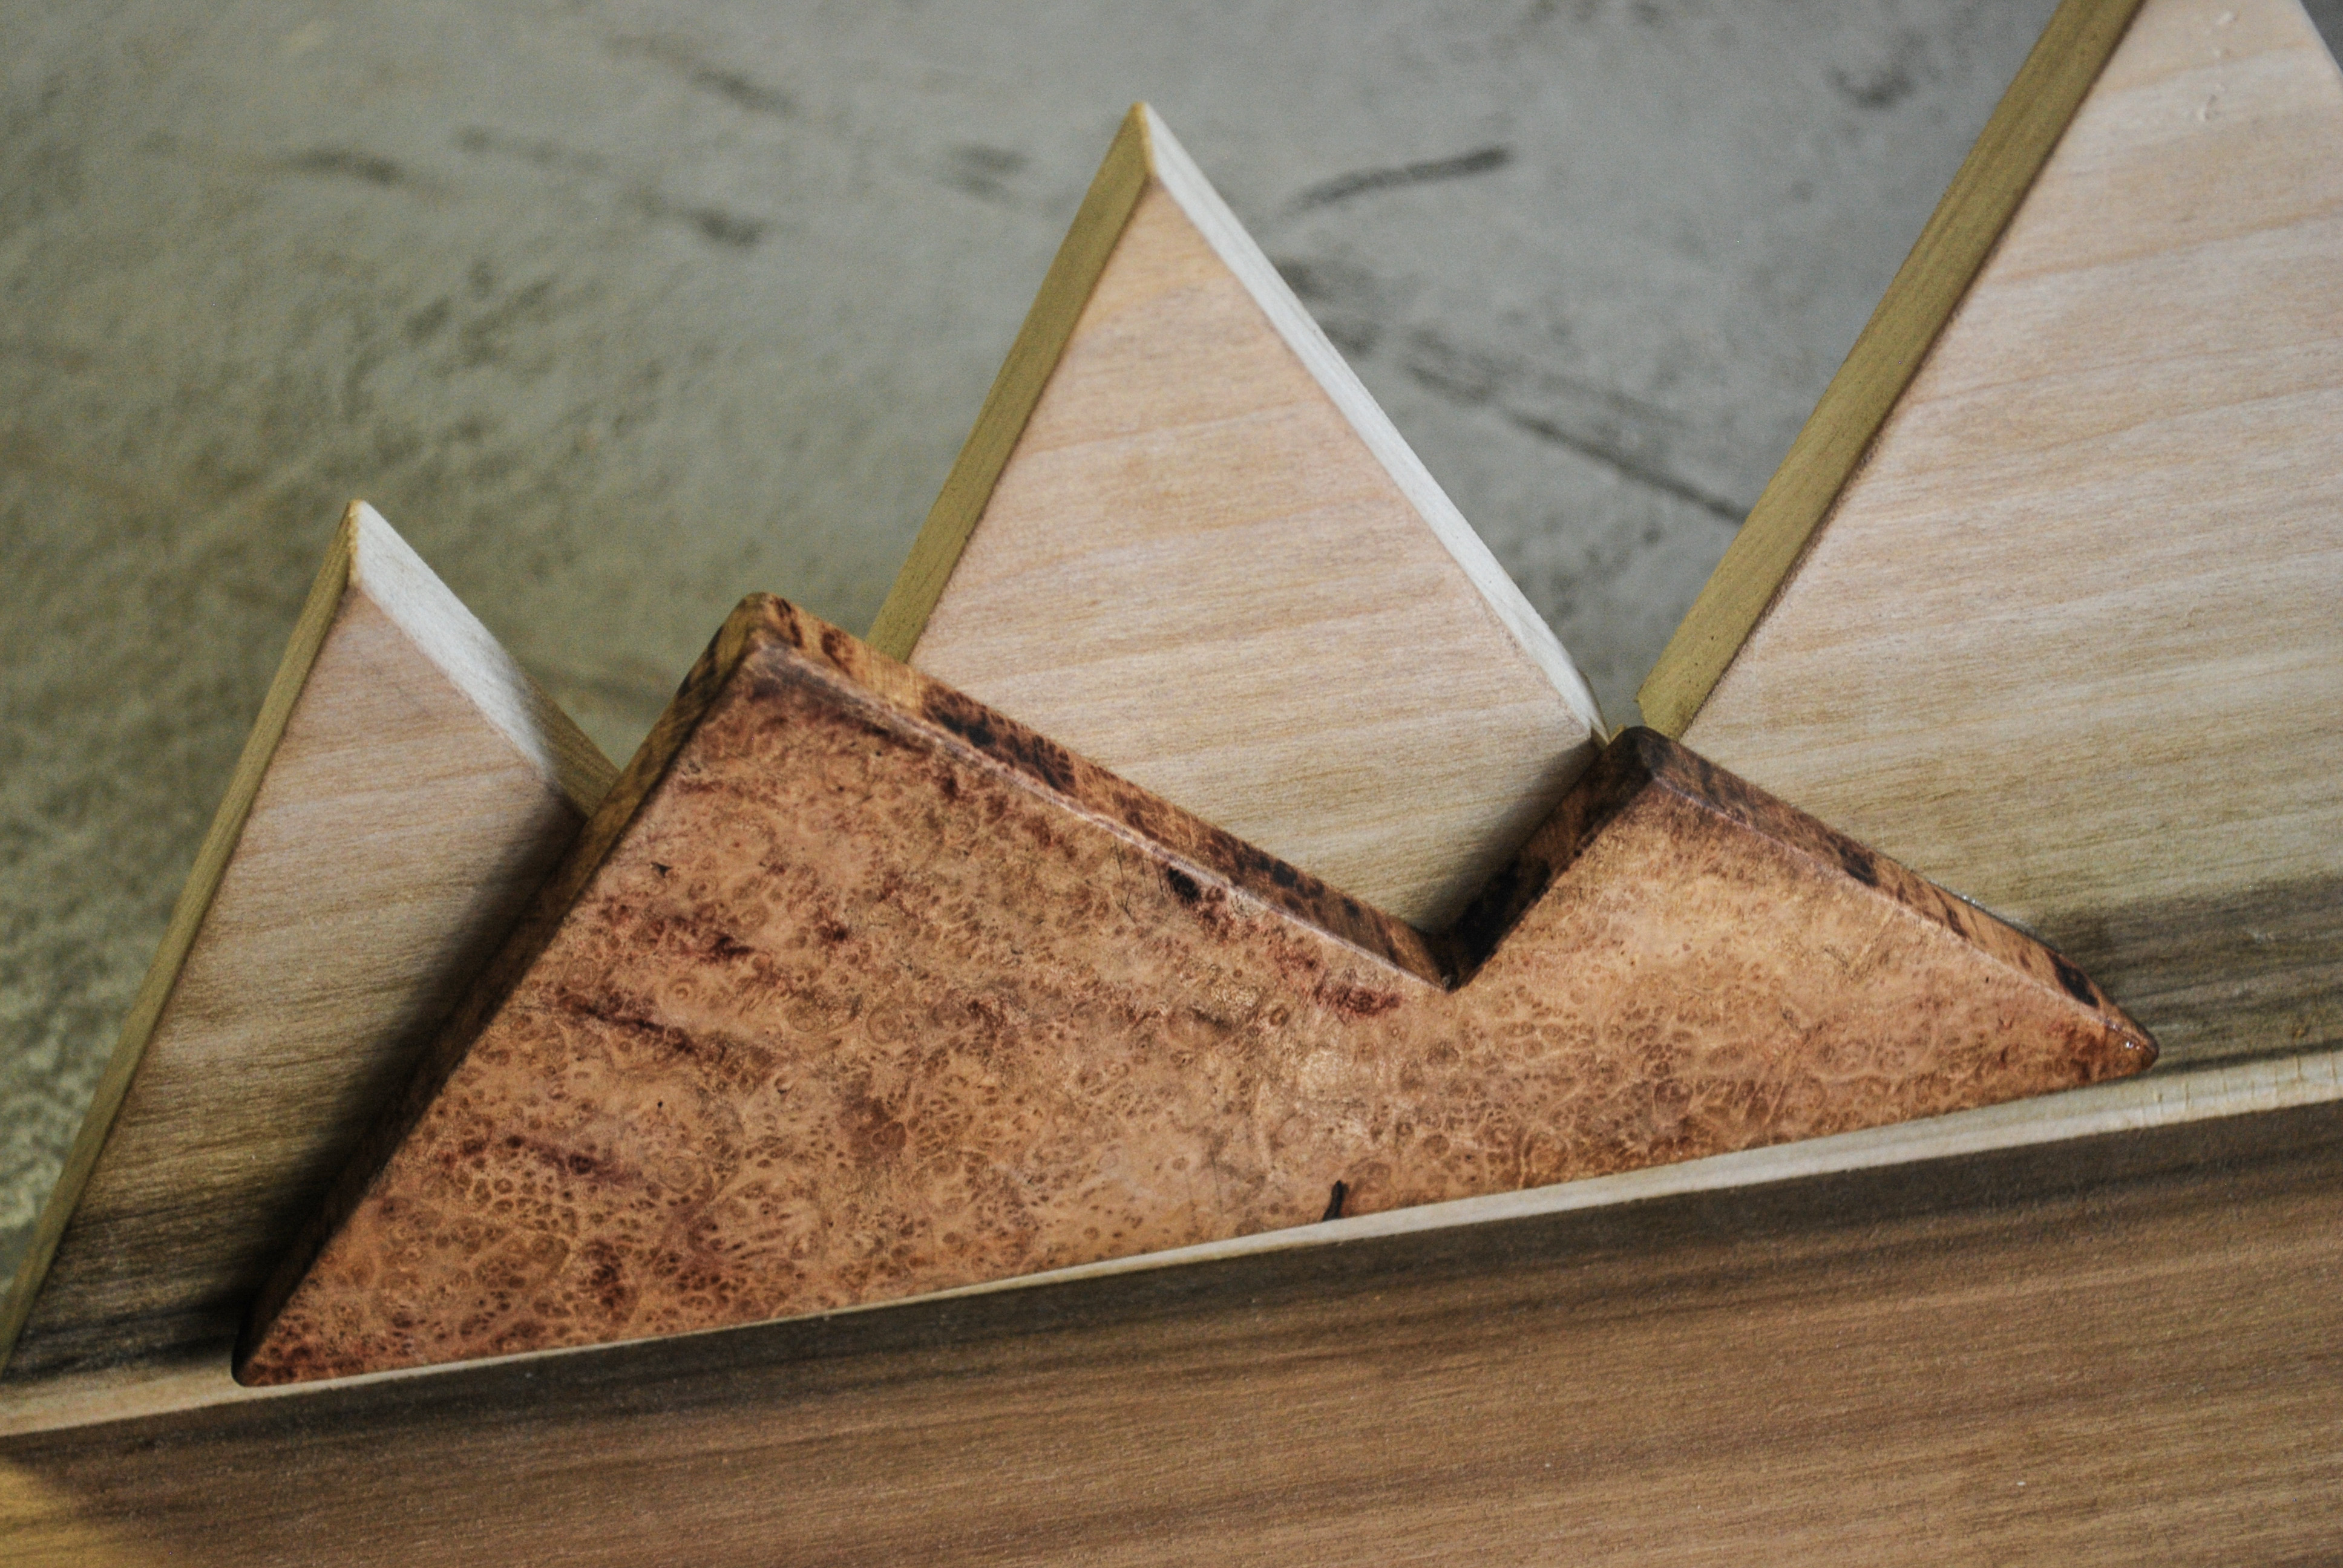
Now you can have a great reminder of the mountains every time you need to grab those keys for a day outside. It's simple, but still helps me to remember there's a big world out there, and plenty of places to explore.