A Dark Basement Becomes the New ManMade Workshop (+ Giveaway!)
This post was sponsored by KILZ, a brand that believes in makers and dream-shop builders everywhere. Thanks for supporting the brands that support ManMade.
A few years ago, if you'd asked me which tool I thought was the most important, I'd probably have punted, wavered a bit, and never decided on a single item. There are too many cool tools, and too many essential ones I use on every project. But if you'd asked me the same question last month, my answer would have been decidedly clear, and much more informed by a different kind of personal experience:
The most important tool for any project is a place to work on it. And I don't have one.
All of my adult life, I'd lived in rented spaces, most with basements and garages, and I made do with whatever more-or-less temporary solution was available to me. And then, last winter, we bought our first house. And while it had a great space in the basement that we'd earmarked for an eventual workshop, in practice, it had just became a storage room. Sure, my tools were in there, but so were dozens of other boxes of junk and holiday decorations and everything else that didn't really have a home. Of course, a shop was high on my list of priorities, but practically, the project required some serious work. Creating my work space required tearing down walls, some advanced electrical work, a bit of plumbing, and a whole lot of hours. Other spaces in the house had received the first round of attention, so the shop continued to gather piles.
When our friends at KILZ reached out and said, “We'd love to work with you on a whole room makeover project…” I had just the place in mind. Finally, I had a reason, and a little motivation, to step it up, do the research, bust out the sledgehammer, and build myself a workshop that was built to last.
Why KILZ?
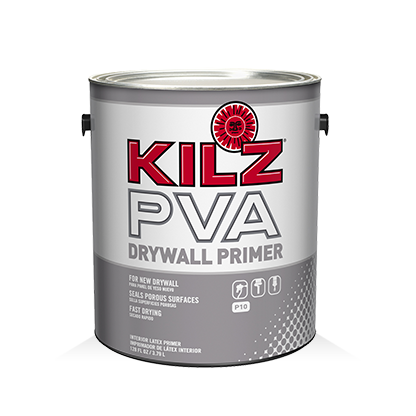
KILZ Drywall PVA Primer/Sealer is an ideal product for priming and sealing new, uncoated drywall like mine, so you can get a uniform, professional-quality finish every time.
- It's formulated with strong inter-coat adhesion, meaning your paint will adhere easily to the primer while achieving great coverage.
- Unlike similar products on the market, KILZ Drywall PVA Primer/Sealer offers low VOC levels and a low-odor application.
- One gallon of KILZ Drywall PVA Primer/Sealer can cover a large space –approximately 300 to 400 square feet – depending on the porosity of your surface.
We're giving away 5 gallons of the KILZ product of your choice to two lucky winners. Scroll down (or click here) to learn how to enter. Giveaway ends 12/16/16, 11:59 p.m., Central time.
Read the full makeover below, and check out the video to see the full transformation:
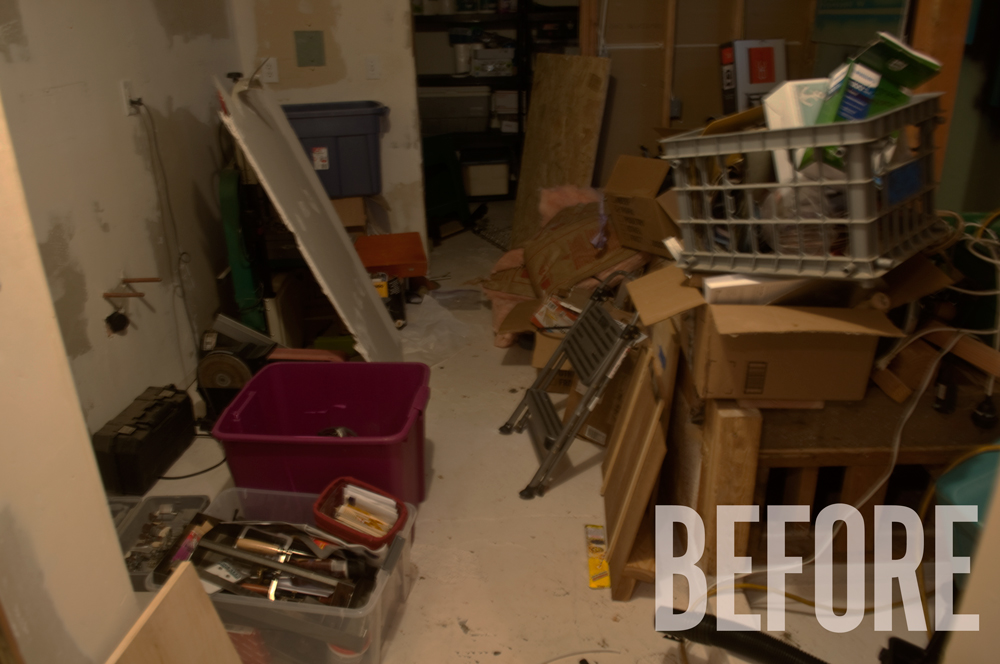
The Before
When we bought the house, the basement had been partially finished … that is, they started finishing it, but only got partway through. It's not clear why the work stopped, but all evidence indicates the project was started more than ten years ago, and had sat in the same state since 2006.

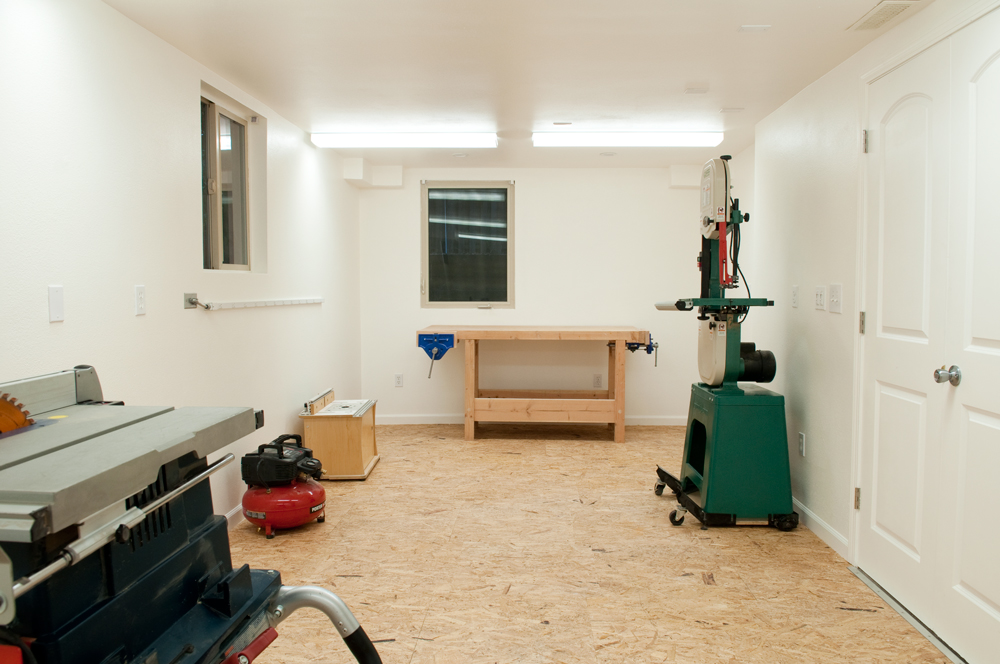
Naturally, it didn't make sense to “unfinish” the completed side of the basement to build a shop, so the semi-unfinished side was a natural fit. It was right next to the exterior door, allowing easy access to the materials outside. It also had large double doors for moving machinery and projects in and out of the space, and the plumbing was already in place for a shop sink. The open-stud structure allowed for access to do the electrical work needed, and while not huge – around 250 sq ft – it was nice and long, allowing for good infeed and outfeed access for milling lumber.
What the space lacked was light. I attempted to do some light ManMade projects down there in the summer and fall, and simply could NOT get the light I needed to take step-by-steps photos without serious blur. Oh… and half the space had no walls, and the entire thing was missing a ceiling.

The Demo
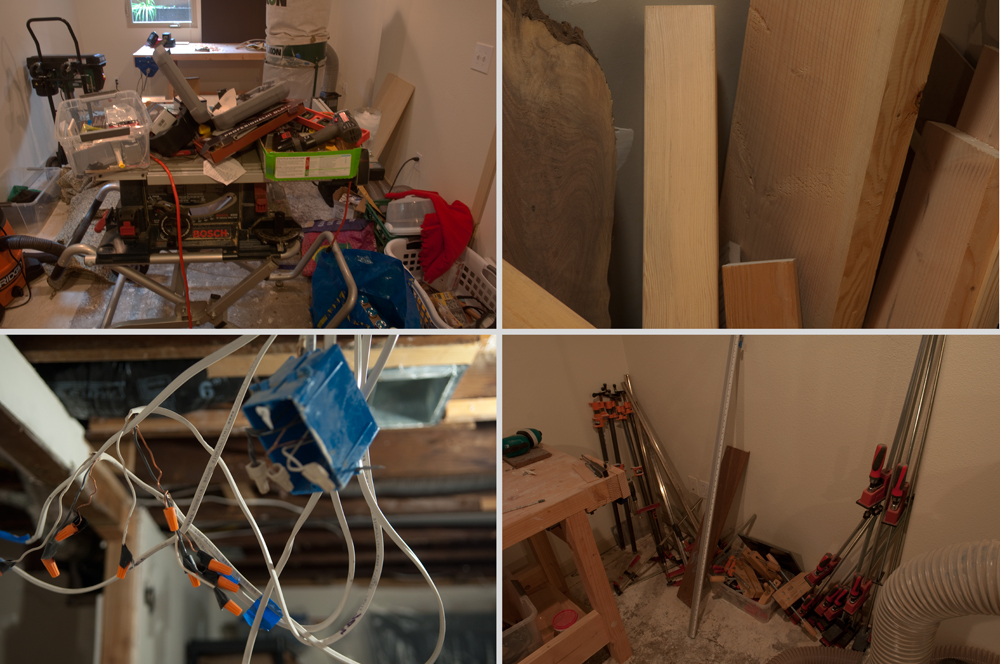
I removed the carpet in the “bedroom” months ago, so the project began in earnest with taking down a wall in between the intended bathroom and bedroom space. I'm lucky enough to know a structural engineer, so I was able to quickly check in with him and determine that the wall was not load-bearing. One evening and three podcasts later, the wall and accompanying pocket door were gone, and it was time to move on to the bathroom.
I banged down the shower support and seat, as well as the tub surround. There was so much complicated framing and fiddling that this part – though much physically smaller than the rest of the demo, ended up taking me three times (and twice as many reciprocating saw blades) as long as the rest of the work combined.
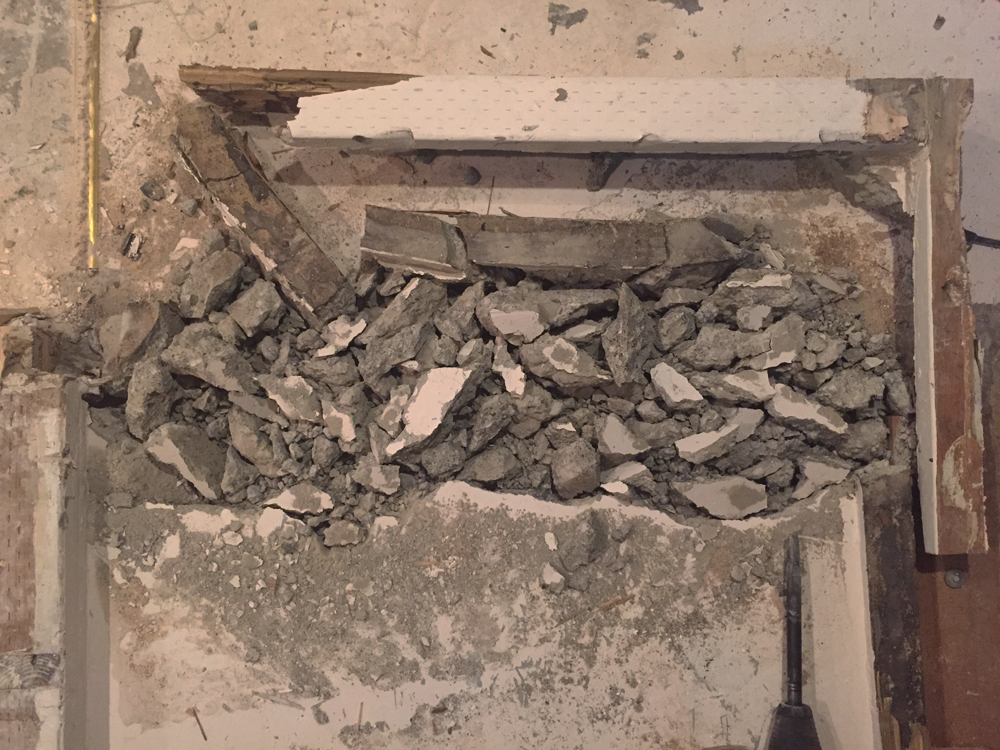
Once all the wood was gone, I rented a small jackhammer from a local supplier and busted up the concrete shower basin. This was my first time using one of these, and I gotta admit – it's really satisfying work. After consulting a plumber, I capped off the plumbing and vent stack, and it was time to move on to the electrical work.
Powering the Workshop
For five years, I worked out of a basement space with one outlet. One. Every tool and light was connected to a maze of multi-outlet strips and a braid of carefully snaked extension cords. So I knew I needed two key things in my “forever” workshop: lots and lots of outlets, and loads of light.
While I'm comfortable with basic home wiring tasks, I decided it was worth hiring an electrician for this project. It required some work at the breaker panel, as well as some creativity with accessing every circuit – and therefore the maximum number of amps – available to the space. The space needed some 220-volt circuits, as well as some creative wiring to make the commercial-style LED lights dimmable. Hiring it out also made the work quicker than I could have done myself. Pros are used to this kind of creative problem-solving, and can simply identify a solution and move on, whereas I had been scratching my head and Googling solutions for weeks on end.
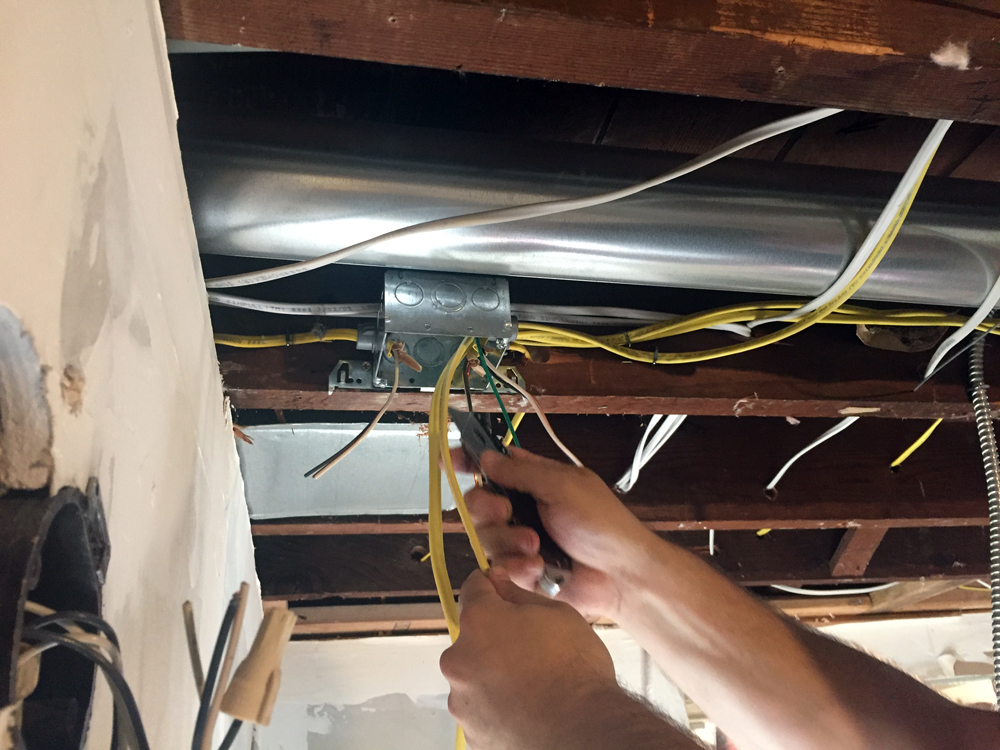
I was able to save lots of money by doing a full plan of what I wanted and marking the locations for fixtures with painter's tape, identifying all of my needs and writing down the amp requirement of every tool. I worked with an electrician – Cory – who allowed me to help with lots of the tasks (not the electrical stuff, obviously).
So, I would drill out the joists and help snake wire and create channels while he focused on the important stuff. We were able to get the wiring done in a day, and then one more half day after the drywall went up to finish everything. He let me watch him work and ask questions, so I was able to learn a ton.
I also saved money by purchasing the fixtures myself, and doing the research to get exactly what I needed. I decided to invest in LED shop lights. They're more expensive than fluorescent lights, initially, but last for 60,000 hours (something like 35-years), and cost about $2.00 a year to operate. Plus, they're dimmable, and I put them on three different switches, allowing me to sculpt exactly the kind of light I need.

Making It Feel Like an Actual Room
Okay, here's where the good stuff begins. As much as I like exploring in actual caves, I don't want to do woodworking in one. All the high-quality lighting in the world can't make a hundred-year-old basement feel like anything but, so it was time to add some walls and a ceiling.
Putting drywall in place, priming it, and painting it with a nice reflective white is just as important as light fixture specifications when it comes to creating a well-lit workplace. Plus, now that it's finished, it feels nothing like being underground. I never think “oh, I'm in a basement”. I just feel like I'm in a warm, well lit room that happens to be under my kitchen.

Thankfully, the majority of the framing and studwork had already been done, so once the drywall went up and was mudded, it was time to make the walls bright, white, and pristine. This is where working with KILZ really came in handy. Priming the drywall before painting is an essential step for a variety of reasons:
- When working with new drywall, primer helps seal the new surface, reducing the number of coats of paint required to achieve a high-quality look.
- Primer provides a mildew-resistant finish, essential for a basement project like this.
- KILZ primer helps block and seal odors. Basements are full of musty smells, and they can penetrate even the thickest paint job. The odor-sealing properties of KILZ help provide a barrier so odor molecules can't penetrate the new paint.
See? No brainer. Saves time, saves money, protects your walls, and produces the best surface possible. Thanks, primer!
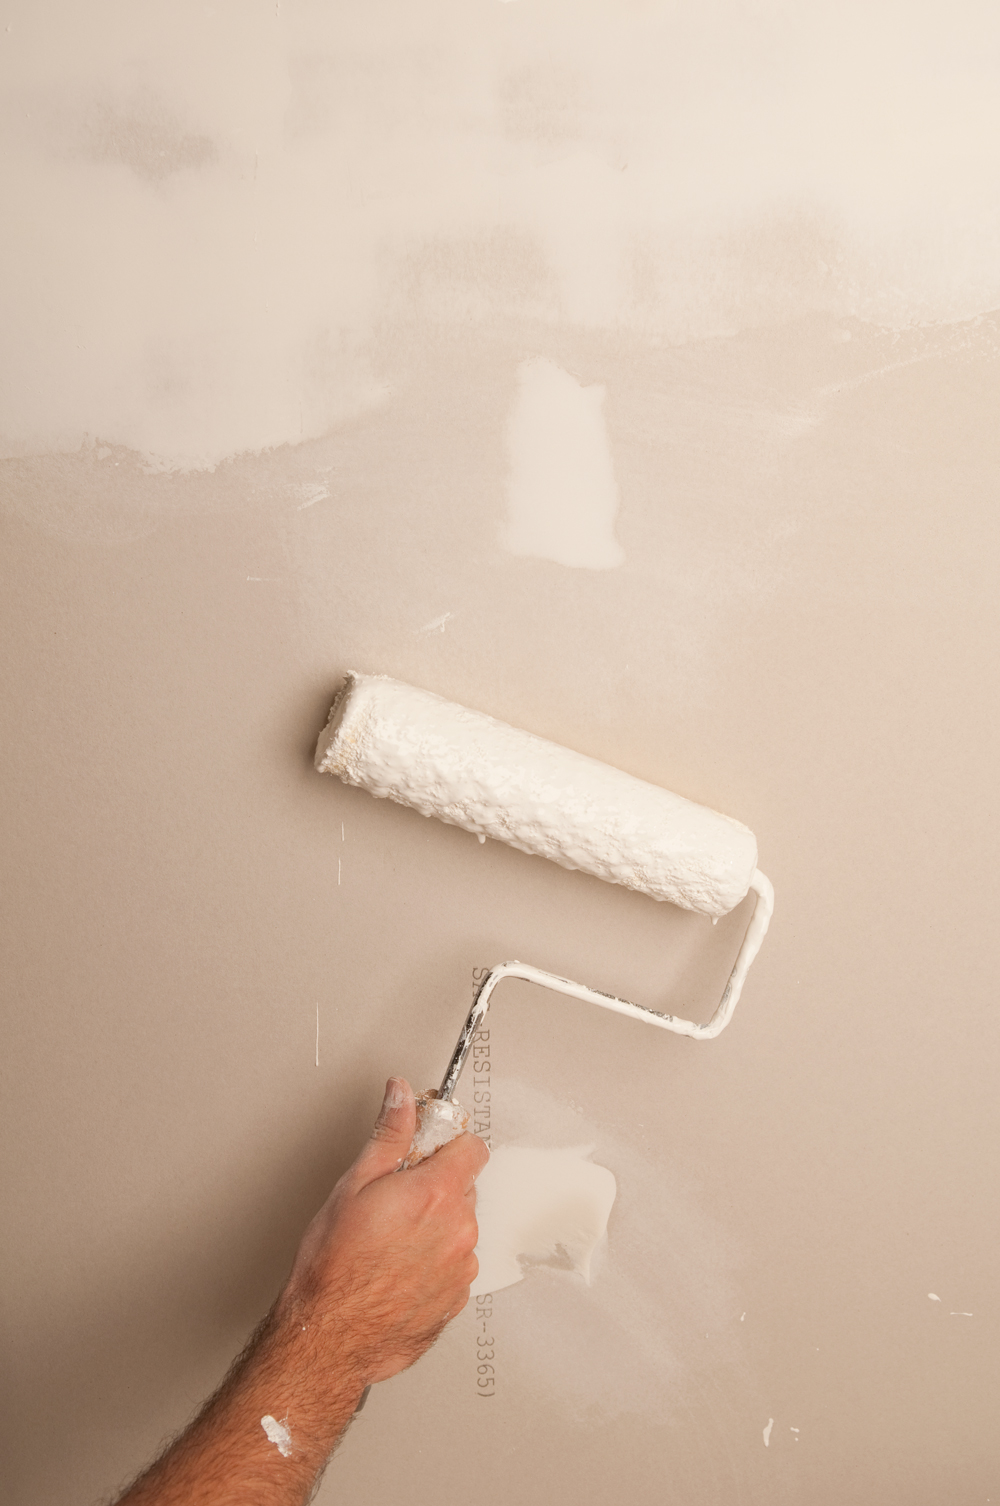
After the primer coat went on (only one necessary), I added two coats of BEHR Sleek White OR-W15 paint to the walls and ceiling in a satin sheen to best reflect light.
Anything is Better Than Concrete
While I can definitely feel the effects of standing on hard concrete all day, at this age, I can still handle it. But I'm building a workspace for the next 30+ years, and I know as my body ages, that concrete floor is going to get more and more uncomfortable.
So, I bit the bullet and installed a real floor instead of just painting and sealing the poured concrete slab. Practically, this not only protects my joints, but my tools as well. I don't have to worry as much about a chisel rolling off my bench and slamming into concrete, ruining the cutting edge.
 Of course, basement flooring is tricky. A concrete basement slab is porous, with water and moisture coming up through the slab. This might not hurt the flooring itself, but you need to make sure you're not creating a space that allows mold and mildew to grow underneath.
You can install plywood, but that requires laying down pressure-treated 2×4 “sleepers” to separate the plywood from the slab, and you lose another 2 1/2 inches of ceiling height. That might not sound like a lot in a living room, but when you're working with long lumber in a basement with low ceilings, every inch is critical.
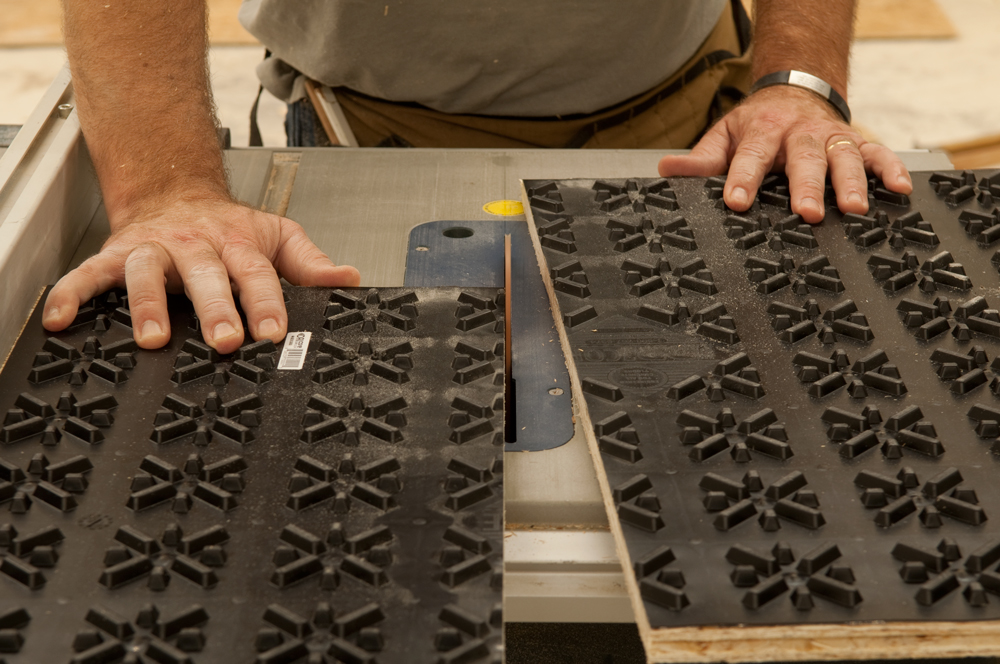
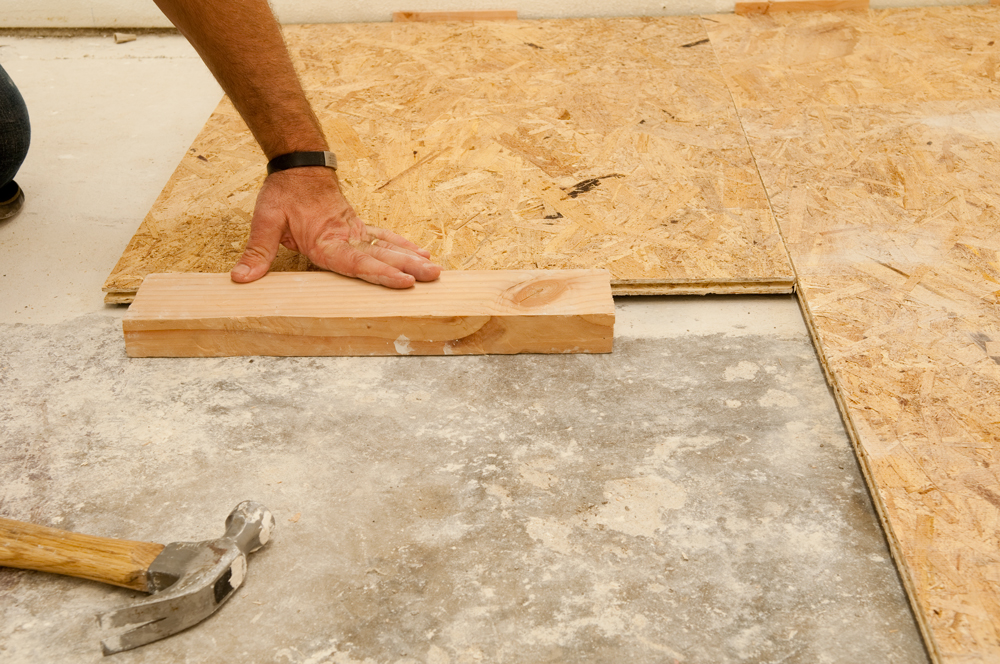
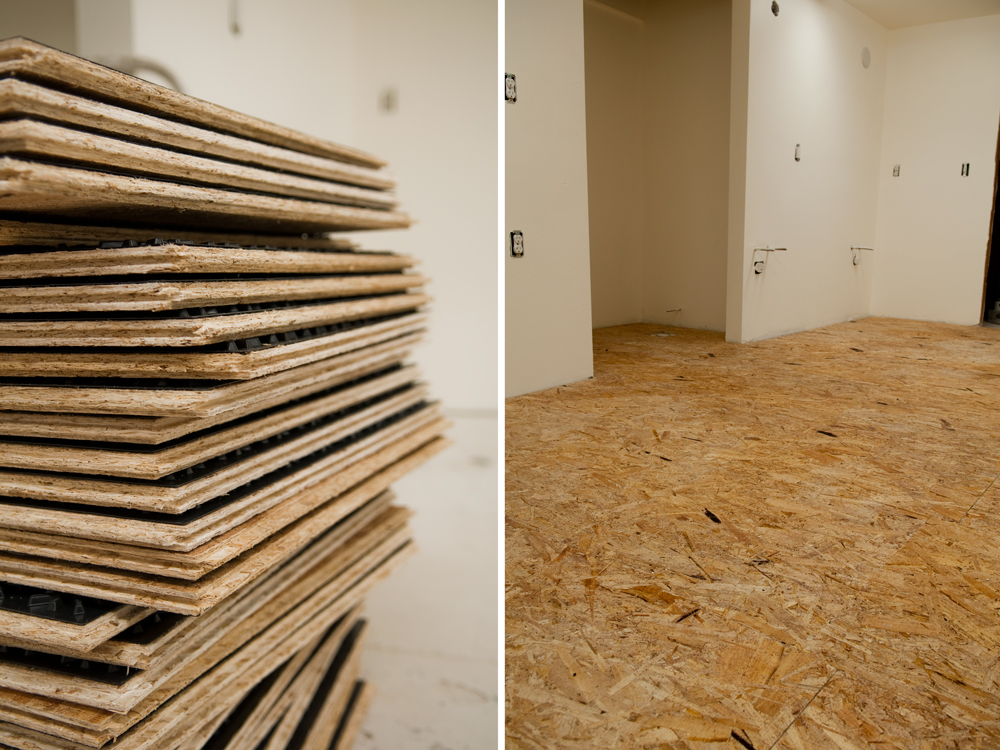 Luckily, I found the perfect product for me – Dricore flooring tiles. They're made for purposes exactly like these, and create a floating subfloor with only 7/8″ of added height. They're intended to have carpet or laminate flooring installed on top, but the exposed OSB-style surface is just fine for a workshop. I asked a friend to help me install the floor, and it came together quickly in an afternoon with the tongue-and-groove joinery and no glue required. The hardest part was getting them home from the home improvement store without a truck. (It took two trips).
Finish Him It!
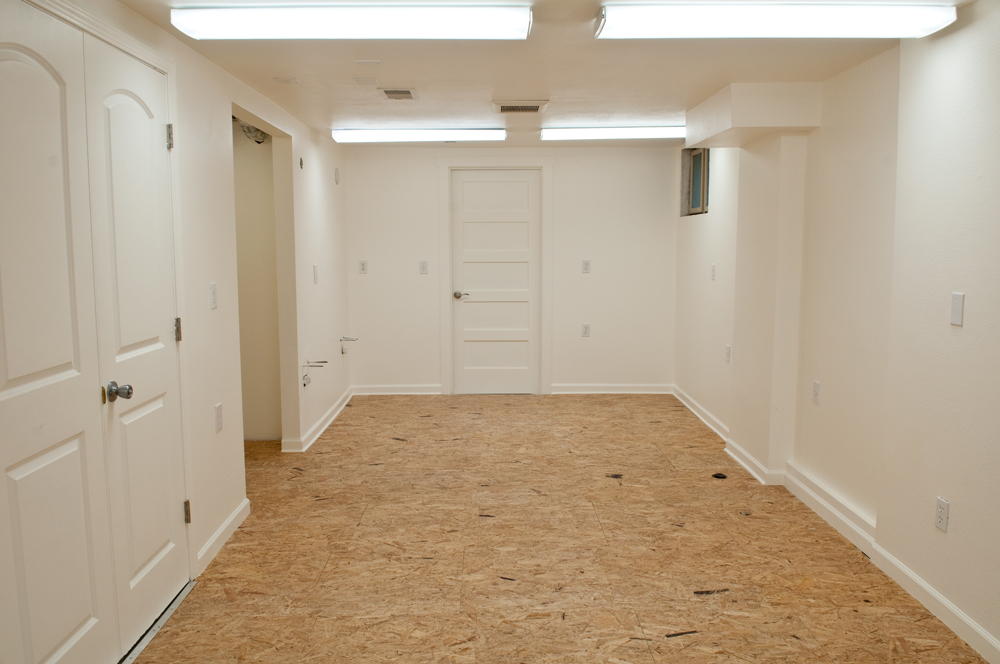
With the floor completed, it was time to finish off the space. I added some baseboard molding, installed and trimmed out a new door to protect the adjacent utility closet from saw dust, and completed that list of little tasks that bring a room together: new hinges, light switches, outlet covers, and the like. Once everything was sanded and dry, I brought in the tools.
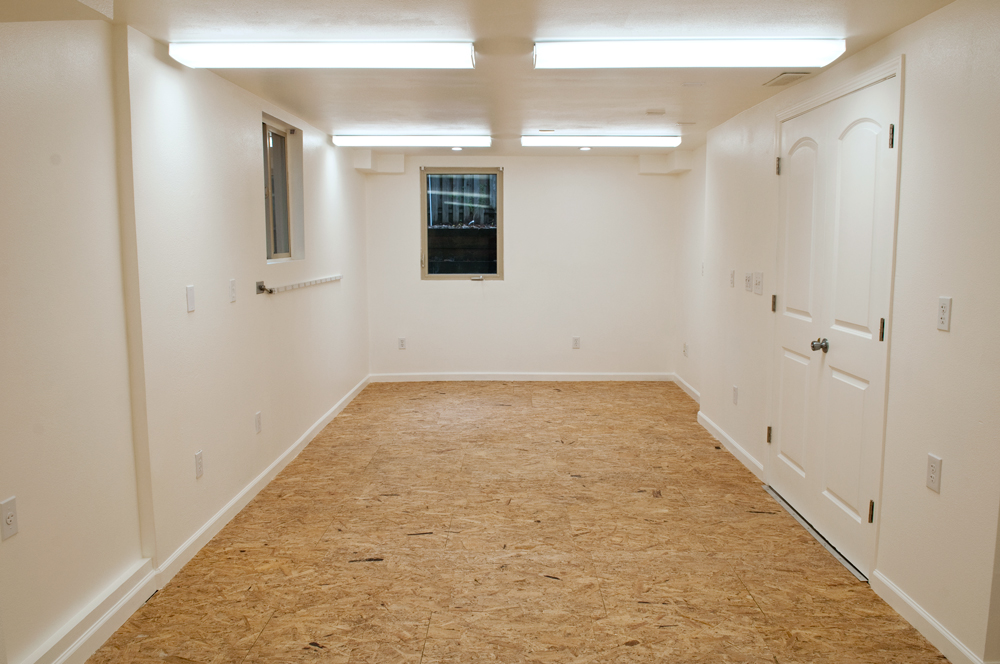
Now – clearly, there's still a lot of work to do. I need to finish that high window, install a utility sink, close off the plumbing that had been installed for the double sinks, put in some flooring transitions, etc. And most importantly, I need to actually set this place up for woodworking.
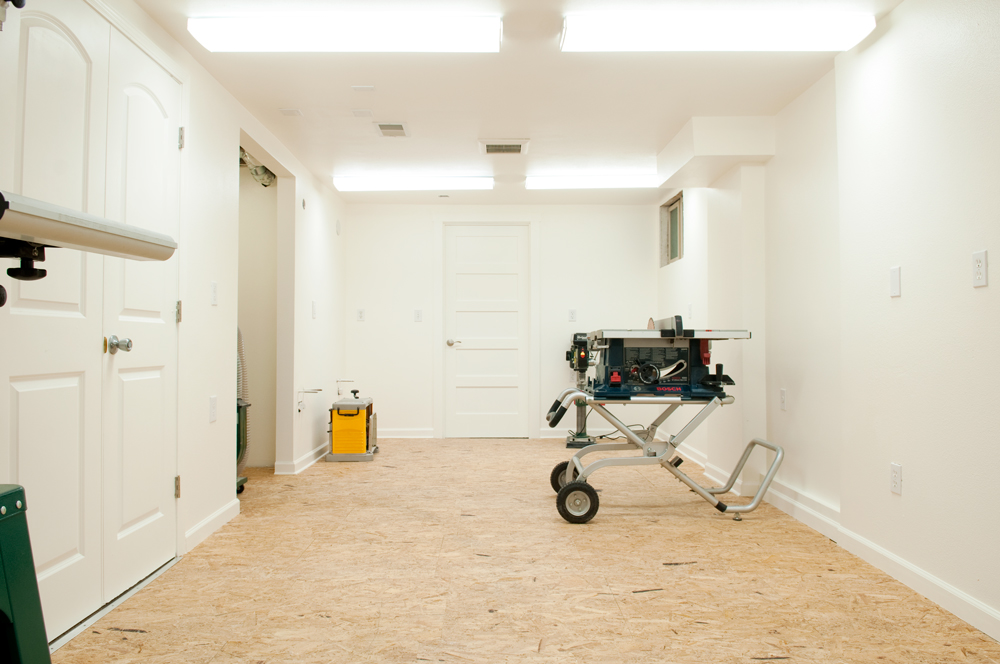
First on my list: building stands and work tables to get the tools off the floor, making racks for clamps and shelves, drawers for hand tools, and figuring out a lumber storage solution. That'll take me a few more months to dial in, but the important work is done. I now have a place to work on those things – a bright, well-lit, clean place with walls and doors and a floor. No more excuses, Chris. Time to build your dream shop.
The Giveaway!
Two lucky ManMakers will win 5 gallons of the KILZ product of their choice! Entering is super easy! Just leave a comment on this post telling us about your dream project (or if that's too much work, just say “I want to win!).
The giveaway is now closed. Thanks for entering.


