ManMade Essential Toolbox: If You Don’t Have a Proper Set of Marking and Layout Tools, Now’s the Time to Get One
 So you’ve figured out what you want to build, bought all the wood, and have a fresh cup of coffee in hand. Now it’s time to start marking lines and making some sawdust and shavings. When it comes to accurate fits and great looking pieces, it’s essential to have quality marking tools. When I first started out working with wood, I was using a wide, stocky carpenter’s pencil. That 1/8” lead line was easy to see, but really didn’t provide the accuracy to make a 1/32” precision cut. After a while I moved to mechanical pencils with the much thinner line, but it was prone to breaking and so I finally landed on knives for a clean, crisp line that could be relied upon for a tight fitting cut when it came time to put it all together. Knives are used to “strike” a line, which means making a very small surface score along the ruler or edge. This thin line doesn’t show up as a black mark on the surface, but still provides a very accurate cut reference. My first blade was an exacto-knife, but I’ve graduated to a bit heftier and dedicated marking tools. Here are a few of what I consider my essential tools for making my marks in the shop.
First, a word about marking tools that use blades (knives, awls, cutting gauges, etc) instead of ink or graphite. The slicing of the wood does two things: first, it creates a cut starting line in which you can rest a chisel, drill bit, etc, which helps to prevent to tool from wandering from your mark. Secondly, it severs the wood fiber at the point where it will be worked, like with a saw, which prevents grain tearout. Win/win.
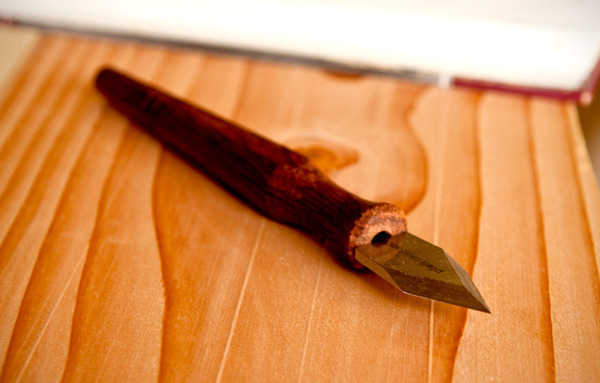
1. Marking Knife (Striking Knife) – This short thick blade is flat on one side to ride right against the ruler for a razor-sharp line that is accurate beyond 1/32”. The beveled sharp edge is thick enough that the grain of the wood doesn’t cause wander of the line, and holds a nice sharp edge well. I made one a few years ago, but there are plenty available online that look a lot prettier than mine. Grab one of these (or a few because they’re not too spendy), and you’ll never go back to that pencil again.
ManMade Recommended:
- Kaufhof Marking Knife $9
- iGaging Premium Marking Knife $10
- pfeil Swiss Made Marking Knife, Large $22.99

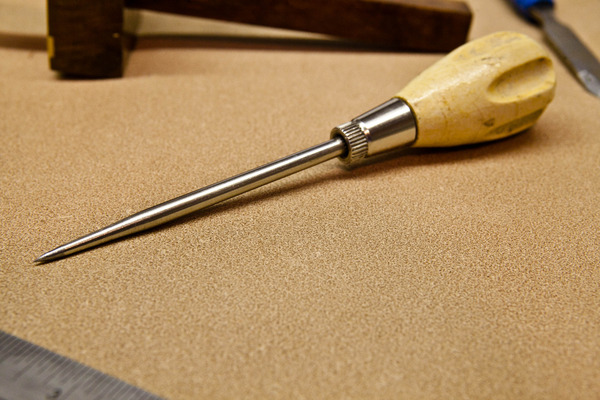
2. Scratch Awl (Ice Pick) – One of my favorite YouTube personalities is Jimmy Diresta. That guy uses his ice pick/ scratch awl for just about every job in a huge variety of ways. This versatile tool is small enough to be stashed in an apron, and still produces clean strike lines every time. The store-bought versions are a bit thicker than something you can make on your own, but it’s still a tool worth making room for in your workshop.
You might also consider a birdcage awl, which has a square shank and cutting point. This style actually slices the wood fibers, rather than just compressing them into a dent.
ManMade Recommended:
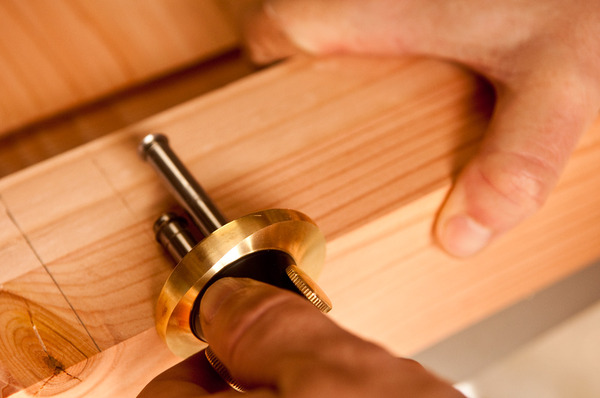
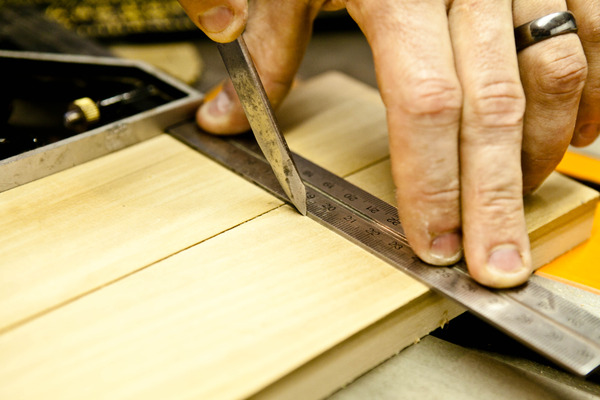
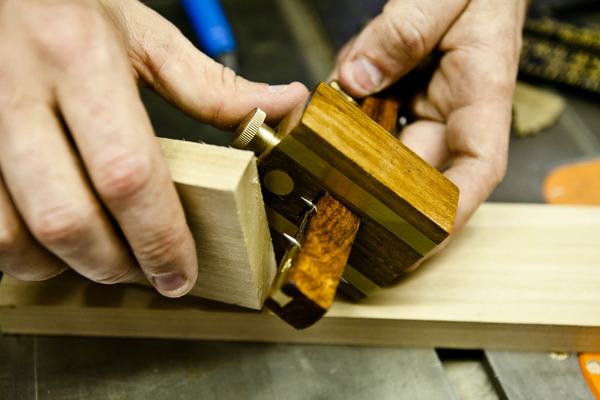
3. Marking Gauge – Reach for one of these guys any time you want to scribe a line parallel to an edge. Just butt the fence squarely along the side, and press down for an even depth. More complicated gauges, like the one pictured here, have two cutters that allow you to scribe mortise lines.
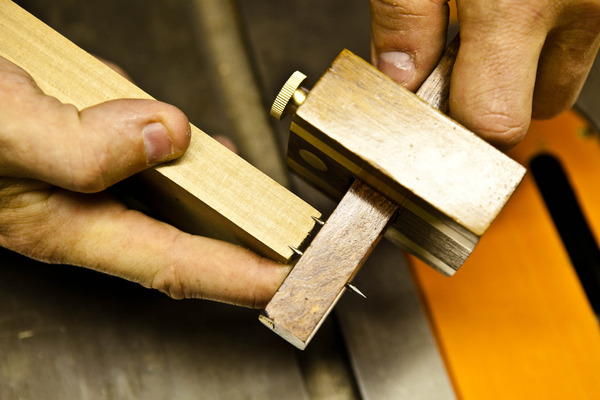
4. Mortising Gauge – This tool is used to transfer measurements onto a piece to lay out mortise holes for mortise and tenon joinery. This type of joint is extremely strong, durable, and once mastered can really be an exceptional accent on a nice piece of furniture. There are a few types of gauges, the traditional slide gauge that is made up on a center post with a marking pin, a sliding pin and a sliding edge guide. The guide is pushed up and locked on the edge of the piece, while the sliding pin references one edge of the inner tenon opposite the fixed pin. This can then be moved over to the mortise piece and a set of lines can be scribed for a match fit. A second type of mortise gauge uses a center rod with a rolling edge blade at one end, and a metal guide that moves along the center rod. This type is similar but more accurate in general because the rolling edge blade doesn’t catch on the grain of the wood. The down side is that you must scribe one side of the tenon, and then the other because there is a single blade instead of the two pins, but overall the accuracy is improved with the rod design.
ManMade Recommended:
The best marking tools in the world won’t help if you don’t use them correctly, so here are a few tips on making sure your measurements are accurate, easy to see, and turn out great: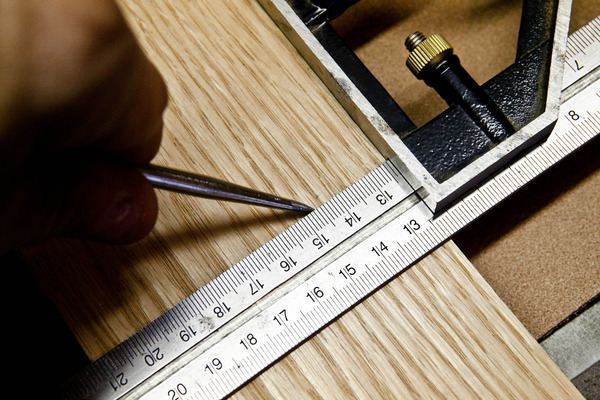
- Use the same tool for the whole project. While the tools may look alike, variations in measurement can exist between rulers, tapes due to age, construction, or just use. It’s best to stick with a single tape for the job to be sure all measurements match up.
- Scribe directly on the piece instead of transferring a measurement. That step between measurement and marking is where a lot of numbers get mixed up. It’s always best to directly transfer a line if possible.
- Measure twice, cut once. This is my motto, but not always my practice in the shop; and I regret it more often than I’d like to admit. When the wood gets expensive, there’s always time to double check that line before you start slicing.
- Sneak up on a cut. You can always take just a bit more off a cut, but once it’s too short there really isn’t much that can be done. When in doubt, cut a bit long and then sneak up with small cuts to the final measurements. One way to take just a feather width off on a miter saw, is to pull the blade down (without turning it on) and butt the piece up against it, slightly deflecting the blade as you do. Then return it to the upright position, turn on and make your cut. That slight deflection will equal about 1/32” or so. On the table saw, the fence is held down by a friction lock, raise the lock about ½ up so it is still locked down and a solid tap on either side will deflect it about 1/32” – 1/46” depending on how well it’s tuned. Be sure it stays squared up.
Most of the time, you won’t need to measure to the 1/64″ on a piece, but just for practice, try to get every cut to fit perfectly. That way, once you really need it to fit right you’ll have the skill to get it done.