David’s Shop Upgrade: Building a Custom Tool Island and (Finally!) Cleaning Up…
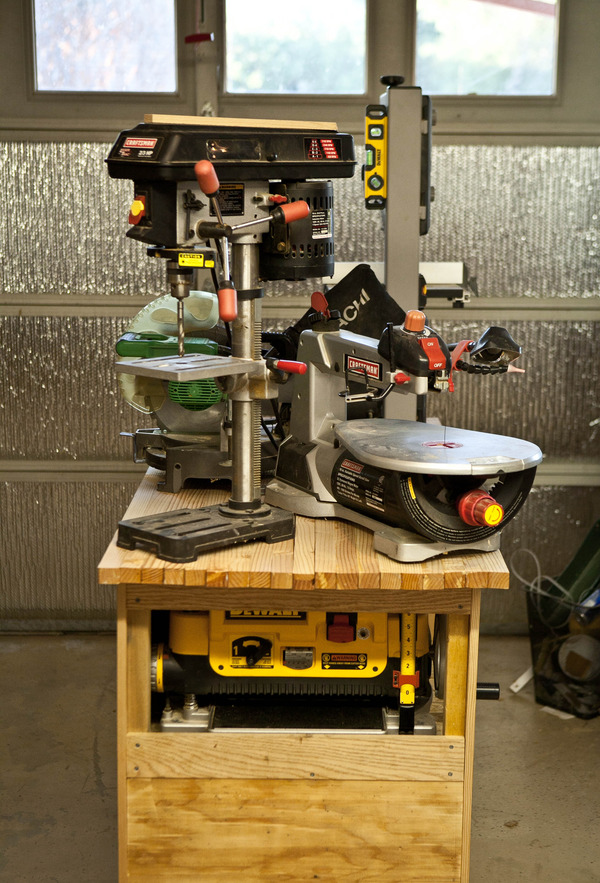 A few months ago, I completely destroyed my shop. I pulled everything off the wall, tools off the countertops, and it just . . . imploded. My workshop need an upgrade and it’s true – you need to break it before you can fix it. Immediately, I regretted my forward thinking because it was almost almost impossible to build wall cabinets in a destroyed shop. So, lesson one – break it slowly and have the replacement ready first. While I was able to pull the cabinets together and get them on the wall, it took way too long to get it done.Once that process was over, I stumbled all over the tools on the floor for the weekend building the tool island. The tool island is built to hold my planer, band saw, scroll saw, miter saw, and grinder, with wheels on the bottom to keep it mobile; and I made it primarily from pieces in the shop because I’ll be painting it white and covering most of it with peg board anyway. The top is one of my old counters that’s warped and dinged, so I cut it into strips, glued back and planed down for a fresh surface. It’s almost done, with one more glue-joint and doors which I’ll make during the next phase. Here’s a look:
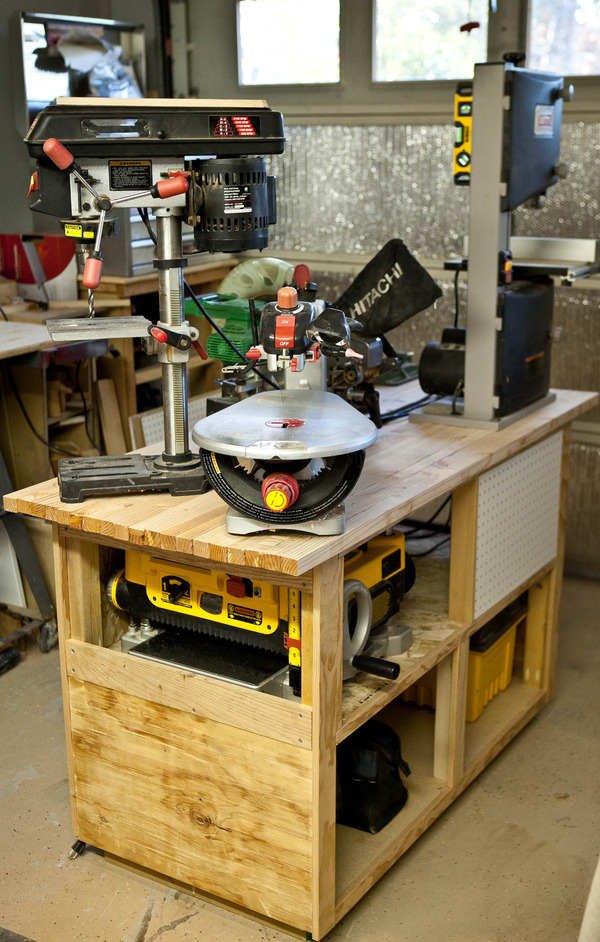
All the tools on the top of the island? I walked around them on the floor for way too long.
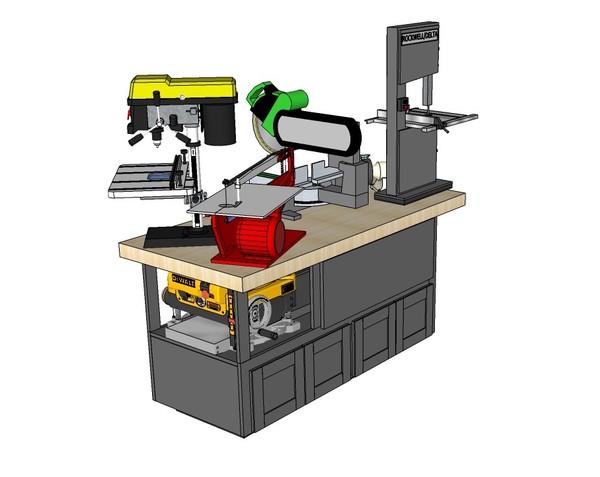 I originally started to design the project in SketchUp, which turned out pretty real at the time. I really wanted to work out a way to keep my planer off the counter top but still accessible. While it’s a bit hard to stoop when using, the convenience is excellent and I can still pull it out for extended use. Another perk – the extended out-feed support is built right in.
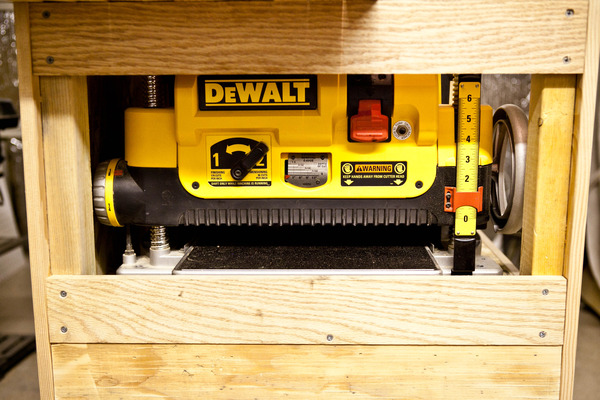
While my first design would have worked, I ended up going with a simpler box version supported by 2×3 studs because of my materials on hand, and the ability to keep it stable and still accessible for adjustments and storage.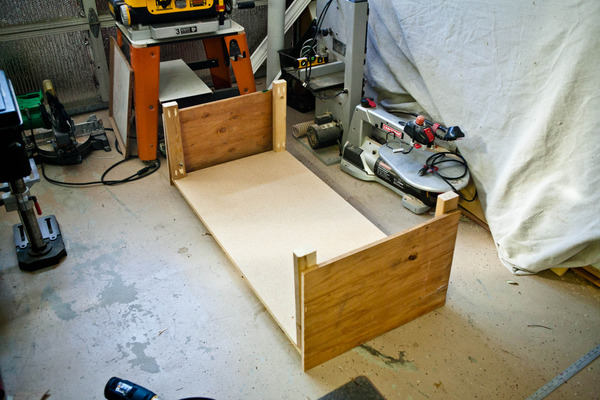
The base of the island is made from a 2×4 frame with a 2’x4′ Particle Board sheet on top. I cut 6 15″ long supports for the corners and edges of the storage space and secured them to the base with pockethole screws and glue.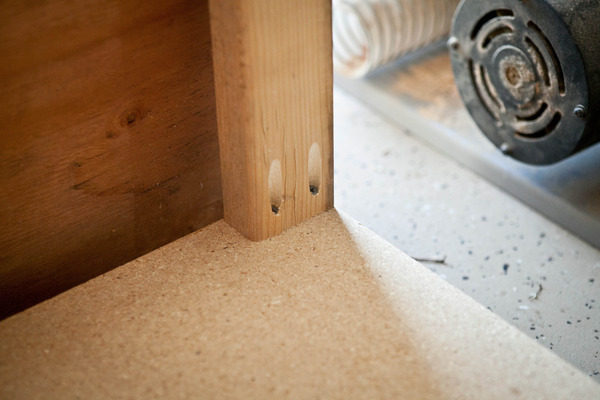
The sides and top of the storage space was boxed in with 1/2″ sheet goods, while the front will have a frame and doors attached. I’m not concerned about the mix of materials at this point, as most surfaces will have a peg-board attached for tool storage.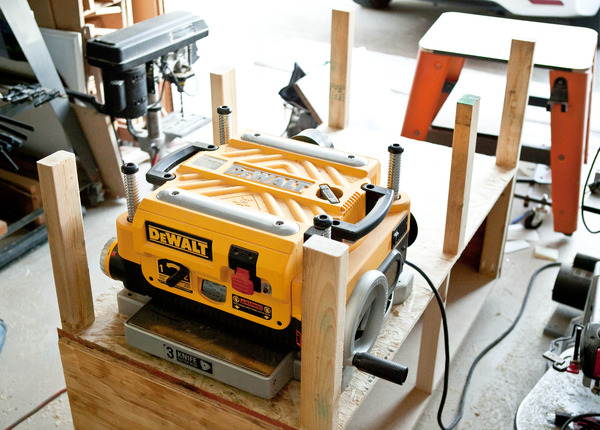
The Planer Space was created with 6 more 15″ supports for the corners and long edges, spaced so that the planer can still be adjusted and removed through the side opening. the back was secured with a 1/2″ sheet as well as half of the front. Supports for the top spanned each end and the center so the top would be fully secured.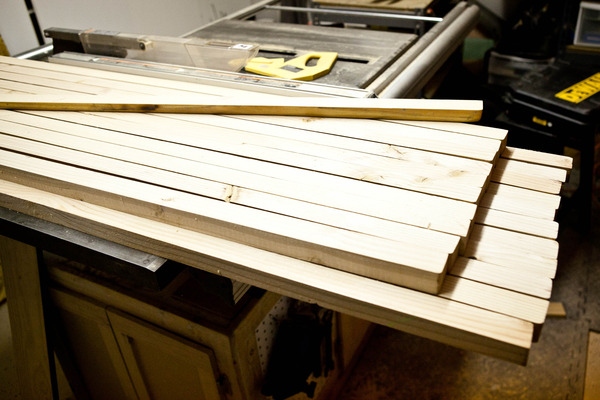
At this point, I trimmed the edges and added a peg-board in one section, then moved on to the top. The Fir top has been in the shop for a few years so it’s weathered and bowed. I cut it into 1.5″ strips and turned them on their cut edges for a new surface. I glued them into 13″ planks so they would fit into the planer, and smoothed them out with a few passes. (They’re still drying, so they will need a few more passes and a final glue-up/trimming for the total 26″ top).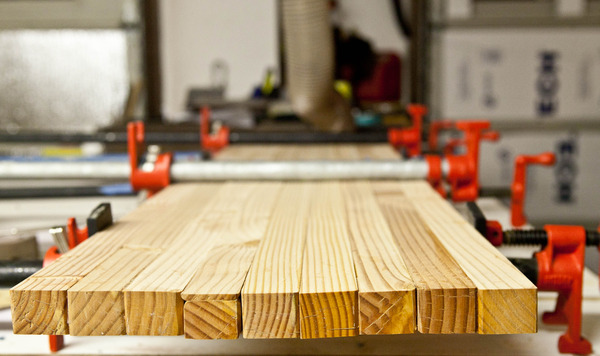
This island was sized for my space, so it’s more about the concept on this project than the measurements. Here are a few thoughts if you want to make your own:
1. Make It Mobile – This type of shop furniture needs to be able to move when more room is needed during large projects, or when it’s just in the way. Throw a good set of locking wheels under there to keep it convenient.
2. Get Creative – Putting the Planer down low was a great way to get a bulky tool out of sight but still within reach. I use it much more when it’s easy to use.
3. Think About The Future – when sizing the top, keep in mind you’ll be trading in some tools at some point for better, maybe larger versions. If I stick with bench top models, there’s still a bit of room on there for expanding.
4. Don’t Forget The Guts – Electrical and Dust Collection are a huge part of keeping tools running well. Make sure to plan for how you’ll handle that. I’ve got a heavy duty extension cord and fused power strip, along with a no-trip cable protector on the shelf and ready to install. I also have a flexible dust collection hose with adapters for each tool, just pull it over and hook it on.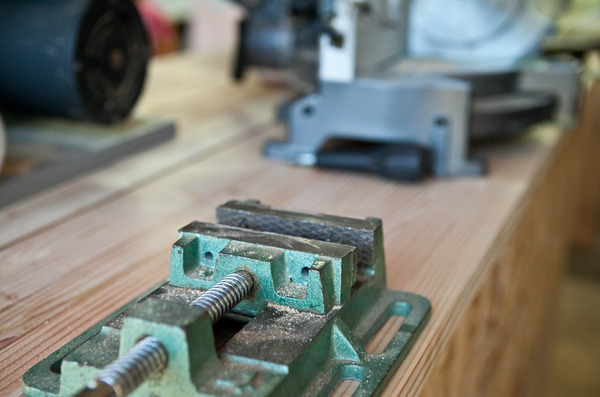
This project is still a few steps from completed, but I’m now moving on to the next phase where I’ll be building the bulk of my cabinet shells and the new counter tops to go with them. It will be a slow process with holidays on the way, but I’ll keep updating as it comes along!