Yes, You Need a Dust Collector in Your Workshop. Here’s How to Get Started.
 [https://www.flickr.com/photos/jypsygen/4076111409/in/photolist-7dc8UV-e7tSvz-4zJ9gh-4zJcdA-Wv93m-cbMbay-7buLWy-4QfKVp-3WWSHK-d9RSjo-3WWPG8-3X266y-bDyGi4-4zJa1L-fLAD4w-azcwWa-ehNXnK-39t3TR-4TpqDB-o6Q8dG-4TtCWN-o8THn4-9JAtNn-mtuDyT-h46Ae-eMh7bN-4zJbXU-4zDUP2-4zJ9Bf-otqSgz-4zJdWb-rokBb-6i9d32-6idnfh-5RzYVt-8j72ra-7qbbUK-8oFfzu-d9RRZL-d9RQVz-d9RReV-4ep5ue-cS3ySm-ozVaqJ-o6Q9gd-3wmor1-5kLce9-cuXMuQ-5cJ8f4-5cHB4P]")
You spend so much time in your shop, isn’t it about time to spend a little time on it? Here’s a solid upgrade that will get you breathing easier while out there making cuts. I’ve been upgrading plenty of items in my shop lately, starting with my cabinets and doors. But before I head on to another big project, it’s time to work on the bones of theshop a bit by installing my dust collection runs and a hard-lined compressor line (look for that next week). The benefit of a dust collection system simply cannot be overstated. 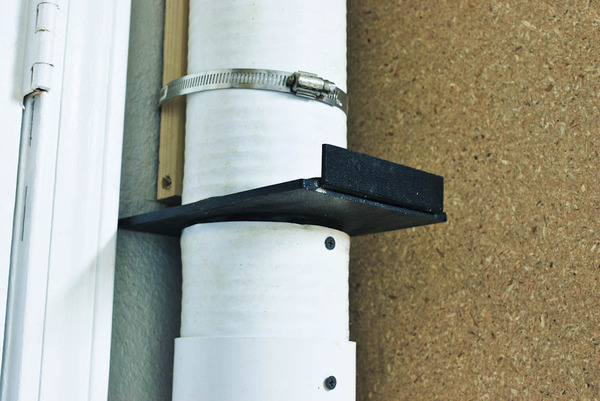 While it won’t collect every bit of the sawdust, the substantial reduction makes life so much easier. Once the system is lined in and working right, expect a cleaner shop, healthier lungs, and a happier family.
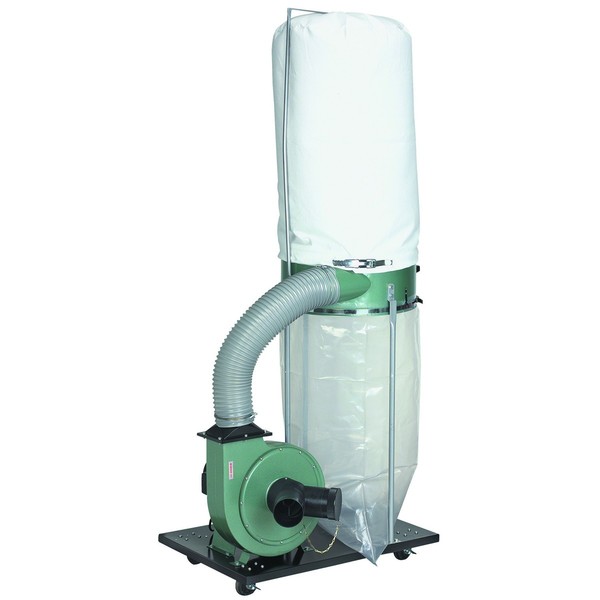
I started out my system with a simple 2 hp system from Harbor Freight. It may not be the best quality out there, and the filter bag is certainly not perfect; but for the price it’s an affordable system that works. I waited until a double sale with a coupon and picked it up for $149, so be sure to watch for the opportunity to pick it up priced right.
ManMade Recommended:
- 2 HP Dust Collection System from Harbor Freight $150-$200
- Rikon 60-100 1 HP Dust Collector – $265
- JET DC-650BK Dust Collector with Bag Filter Kit – $328.49
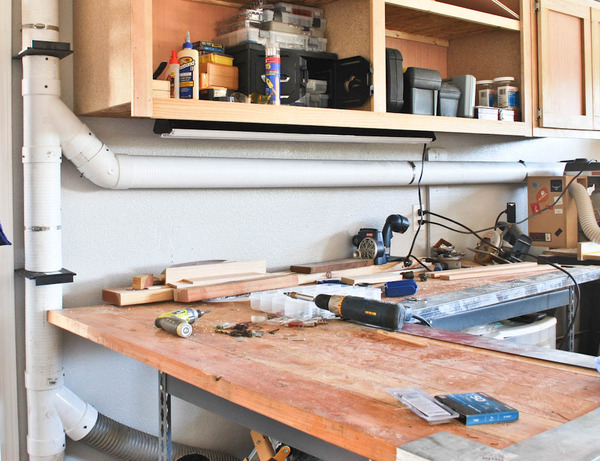
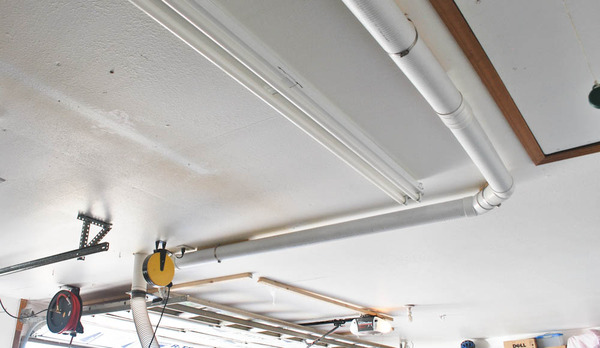
Because of the accessibility of my attic space, I was able to install the collector in the attic space above my shop and punch a hole in the ceiling to run the ducts. This kept the ducting out of the way, and helps to keep the noise of the collector to a minimum.
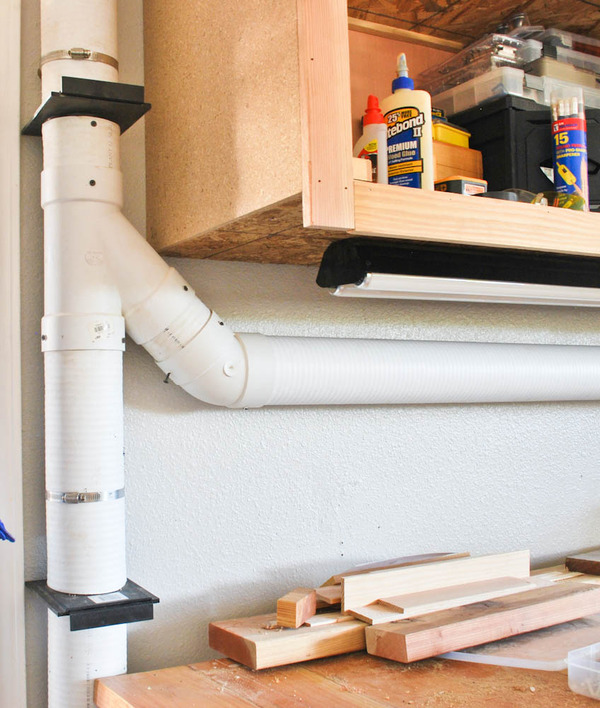
Gates
I used a splitter with blast gates to break the line into two runs, one currently going to my island (router table, Band Saw, Flexible Vacuum hose for floors), and the other going to the exterior wall (Radial Arm Saw and Table Saw). It’s important to install enough blast gates to isolate each tool for maximum suction of the tool. The plastic gates are prone to clogging, but still function well on the cheap, but if you have a bit more cash go for the more expensive Aluminum Gates which are more durable, seal better, and clog much less.
ManMade Recommended:
Plastic- Woodstock 4 in. Blast Gates $10 each
Aluminum- Woodstock 4 in. Blast Gates $15 each
 Ducting-
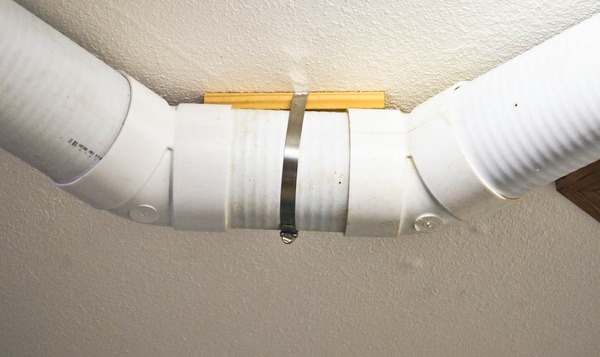
The next piece of the collection system is the ducting. There is plenty of debate on what type of ducting to use, and there are plenty of options. Metal, PVC and Flexible Plastic Spiral pipes are the most common types, and each has a benefit. Plan on 4″ ducting, with a few tools reduced to 2 1/2″ to match up to their dust ports. To connect the ducting to the walls, I used pipe straps secured to the walls with 2″ boards. This method is easy to adjust when the shop needs change in the future.
1. Metal Ducting – This is the most expensive option, and for good reason. The products snap together for a clean seal, and the smooth inner dimension lightens up the drag for better suction. A 5′ section is about $50 so the costs will add up fast.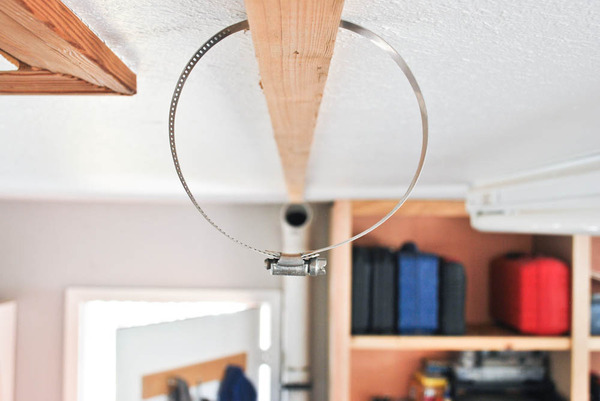
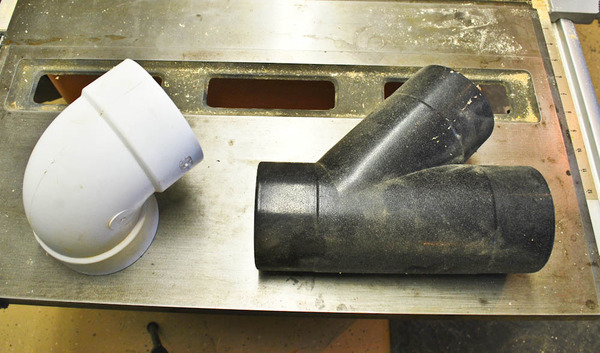
2. Plastic Corrugated Pipe – This is the cheap version that I ended up going with. The material is smooth, it’s easy to cut, and it’s light enough on my wallet to make the project affordable (only $10 for 10 ft.). Joints should be taped or glued to really seal it up, but slip fits seem to hold up well without leaking in my shop.
3. PVC Pipe – This pipe is strong with a very smooth interior, it’s easy to cut and joints are fast and easy. The price is just about in the middle ($27 for 10 ft.) between metal and corrugated, so it’s a good option as well.
4. Flexible Spiral Pipe – This type of pipe should only be used for short runs from hard pipe to the machines, as the interior is uneven and dramatically increases drag, but it’s great in hard to reach areas, or on machines that move around a bit. My favorite type is Rockler’s Flexible Hose ($30 for 10 ft.), but the Dust Right Expandable Hose ($50 for 15ft.) is also great for cleaning up around the shop.
ManMade Recommended:
1. Metal – Grizzly 4″ Industrial Ducting $100/10 ft.
2. Plastic – Hancor 4″ Corrugated Pipe $10/10 ft.
3. PVC – Charlotte 4″ Pipe $27/10 ft.
4. Flexible Spiral Pipe – Rockler Flexible Hose $30/10 ft.
 Connectors –
The last part of the dust collection system are the connections. Here’s a great article on dust collection design flaws to avoid. The main one is to avoid sharp turns, so use two 45 degree turns instead of a single 90; also, use y-connections instead of t-connections. I used PVC connections to connect my corrugated piping, they fit well, the joints are cheap, easy to find, and installation is clean and easy. An easy way to start is the Dust Right 4″ Dust Collection Starter Kit, or just pick and choose the pieces you need.
It’s important to plan out the project in detail to make sure it fits properly with the rest of the pieces. I had to route mine around the garage door, some lighting, and cabinets. I’m glad I took the time or it would have been a beast to adjust with pieces on the walls. With the dust collection system installed again, it’s time to get back to making sawdust in the shop!