David’s Shop Upgrade on a Budget: Step 2 – Breaking it into Phases
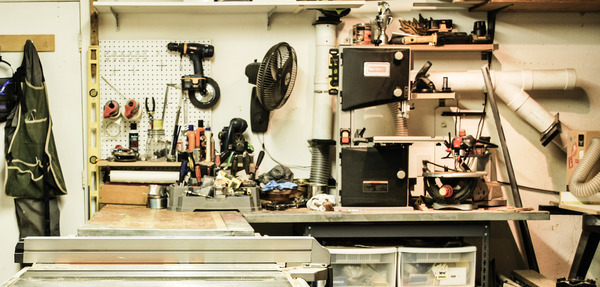 I’m finally re-vamping my cluttered, dark, dis-organized shop on a budget. Big projects need to be broken into manageable pieces. Here’s the process I’m going through to make sure my budget shop upgrade comes together right.
I’ve been thinking about my shop upgrades for a while now. I’ve sketched, measured, dreamed, and worried about it for years, and now that I’m actually starting the build it’s time to break it into pieces manageable enough to get done without going bonkers. My uncle told me a few months ago “make sure you design it for when you’re in the middle of a project, not for when everything is all neat and tidy.” That’s important, because it doesn’t matter if it looks good but can’t be functional. I’ve thought quite a bit about work flow, and design. Tools are spaced far enough apart to keep from overlapping, and all counters are the same height so materials can move from one place to the other easily.
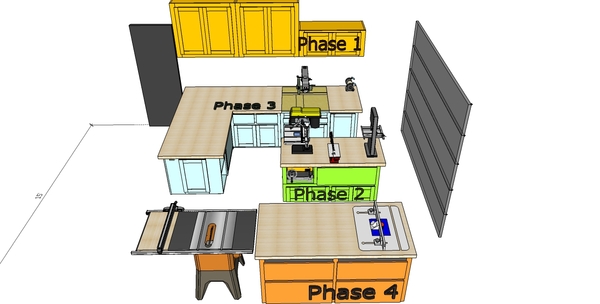
The key to a good plan is to start at the end and back into it, so I’ve taken some time to really get into the project with a detailed SketchUp model. Here’s a look at the finished (hopefully) project, complete with scale tools:
Now the key is that I’ve built each component to the point that I have a material list for each piece of the cabinet. I designed them separately and then imported into the model to be able to measure and plan each piece at a time. After that, I broke the project into 4 Phases to make sure I have the materials needed for each portion of the project. Here’s what that looks like:
Now the first step over the next week will be to completely destroy the shop. Everything will come off the wall, off the floors, and out of the shelves so I can deep clean all the dust out and only keep what I need. This is a huge and important first step that will allow me time to figure out what junk I’ve kept for way too long. After that, we’ll jump into the first phase:
Phase 1: I am planning on tackling the wall first to start the organizational process. By adding a huge amount of open space on the wall, I will be able to clear out the shelves and start to get things into their place. I will also be painting the walls, and re-routing the dust collection and air compressor line so this phase is where the momentum for the next few comes in. $130 in materials
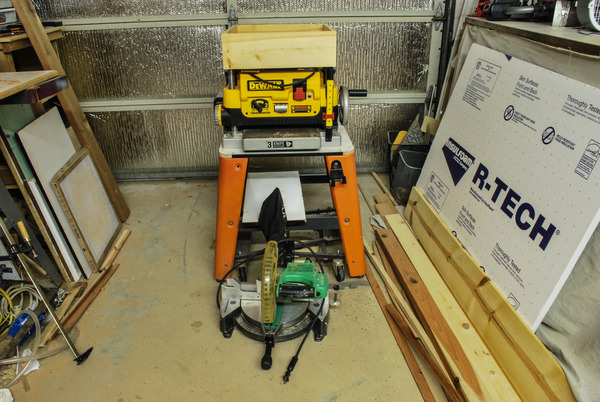
Phase 2: Building that tool island will be the next step, giving me a place to park the tools that crowd my countertop right now. Right now, the mobile base is a pain, and honestly it looks pretty sad. I especially like the place where I’ve put the planer, out of the way but still useful. By leaving a space open below the top counter, and installing casters on the island I can dimension and finish wood with full out-feed support. Not sure how well I will like the low position of the tool, but at over 100lbs, I know that I don’t like hefting onto my bench to plane a few boards. The challenge of this step will be to set up power and dust collection in a way that is accessible but not in the way. I’m tired of stepping around cords and hoses on the ground, so suspended from the ceiling is likely the way to go but I will need to keep clearance for the garage door. $120 in materials.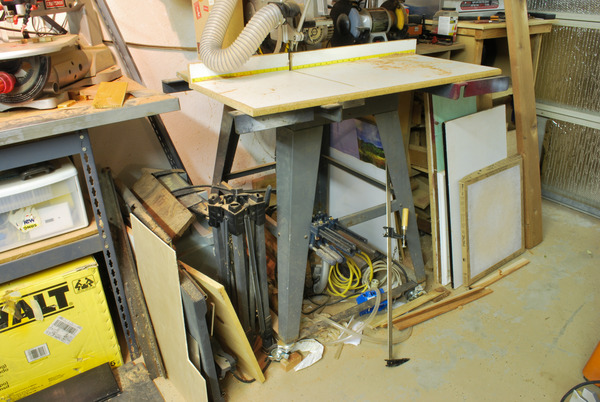
Phase 3: This is the largest phase of the project for sure, with a full tear out of existing shelves and a warped bench top. I will also be embedding my radial arm saw into the countertop for a large supported cutting surface. That sure beats the current set-up above with all that wasted space. I’ve designed the whole thing into modules 4 of which all have the same basic carcass with different face frames and doors. I’ll build 8 drawers, about 12 doors, wire up about 6 outlets, and then lay a huge countertop on the entire thing. $300 in materials
Phase 4: My last phase will be all of the wrap-up that comes with a project, clean-up, rearranging, and final touch-up. I will be cutting down and re-sizing my current 4×8 workspace to about a 4×5 space with the table saw on one end and the router table on the other. I’ll be working on some dust collection routing, and adding face frames and doors to the frame to stiffen it up and provide some dust-free storage space. $50 in materials
So my total budget for this project is about $600 and that’s pushing it. That’s another benefit of breaking the project up into smaller phases, you have the ability to work as the budget (and time) allows, but you don’t have to live with half-finished projects for too long.
Final thought:
After all the planning, I realized that I haven’t taken into consideration 2 important items: sheet good and clamp storage. Both items have the potential to take up some serious room, so I’ll be doing a bit of wrangling (or may just build a bit of protected storage outside). Take the time to sketch out detailed plans on the process and pieces to get a good idea of where the challenges are and also where things can be broken up into manageable pieces. I love SketchUp for this, it’s a free and very robust program that gives the ability to develop something in 3D detail that is great for planning and visualizing a space. I talked last week about learning some of the basics here, and look for our piece on advanced model development for woodworking next week.


![How To Find a Good Mechanic [6 Signs To Look Out For]](https://www.manmadediy.com/wp-content/uploads/2026/05/pexels-cottonbro-4489721-25704-scaled-1-23155.jpg?width=300&height=160)