David’s Shop Upgrade on a Budget: Step 1 – The Master Plan
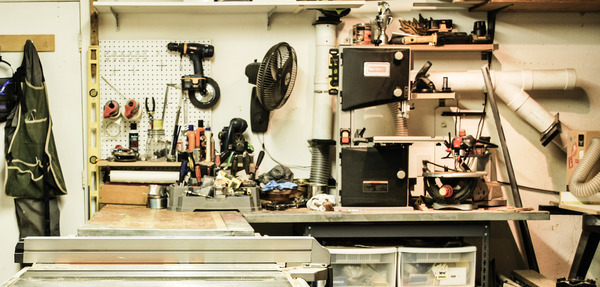 I’ve been working in my shop several days a week for a few years now, and it shows. When it’s polished up, it’s useable, but the whole thing seems to unravel into chaos within minutes of starting a project. The main problem, as in most things in life, is a lack of organization. I tell my kids daily that “every toy has to have a home”, but I have a lot of orphan tools in my shop that simply occupy the nearest shelf. Honestly, I love my shop. I’ve made it my own and isn’t that really what counts? Well not really. Today after tripping over a cord, wasting 20 minutes searching for a square and just about losing it when I spilled my iced tea all over the router table I decided it was time to begin my long awaited upgrade. My shop is dusty, disorganized, and work doesn’t flow well through it, and all efforts to bring in some upgrades have just turned it into a haphazard mess and at this point I’m ready to start from scratch. My goal with these projects is to show in detail the steps to some major upgrades in the shop, without the major cost. My budget on this project is minimal at best, and I’ll keep track so it will be easy to see how much each step takes. Here’s what I’ll be doing in the next few months to make my space into something more enjoyable and much easier to use:
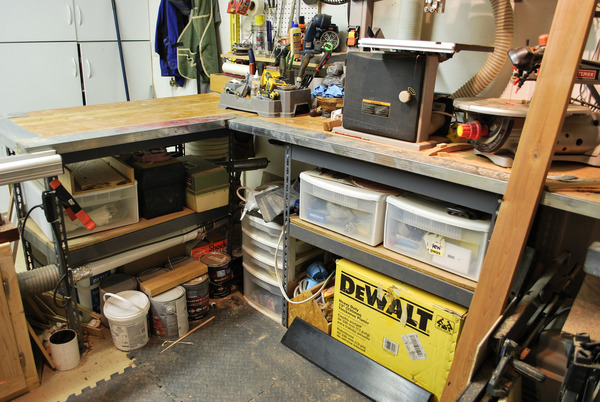
- More Cabinets and Drawers – I inherited two cheap metal shelves during a property flip a few years ago, and those rickity frames are fully of junk, and topped with a pine workbench. It’s flimsy, and I don’t have the ability to keep anything really organized on there. Replacing the shelves with built-in cabinets will add an upgraded look, but more importantly provide sturdy and dust-free spaces that I can dedicate to storing tools out of the way. Adding drawers will provide space to store small items close enough to get to, but off the countertop. On top, I’ll be taking down a few small shelves and adding a bank of cabinets above for even more space to store it all.
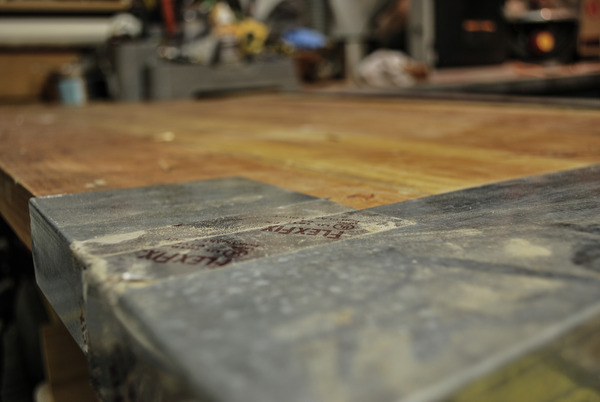
- New Workbench Top – I’m not sure what materials I will be using for the top yet, but I’m very sure it’s time to get rid of my current one. I originally glued three 2×6 pine boards together and within a few days they were warped. I added a metal cap to at least have a flat edge, but it’s just not something that I want to stand by and work on. It’s too narrow to use for projects so I find myself always on top of my tablesaw and that’s just a pain in the neck. I’ll be upgrading to a 36” wide, 2-3” thick top firmly installed to the wall and on top of a solid cabinet. This will give me plenty of solid assembly space and it’s going to look dynamite as well. I’ll also be building in my Radial Arm Saw to get rid of the mobile base and provide a long flat support area for large stock.

- New Power Tool Island – Turns out I have the space to put a few of my small tools on an island in the middle of the shop. I’ll be building a workbench area with a drill press, bandsaw, jigsaw, and planer all set in their own dedicated area.
- Lighting, Electrical Outlets, and Extras – I’m tired of tripping over extension cords, having to switch out charging cables, and sweating like mad out in the shop. I’m adding a few extras to make it somewhere I like to hang out even more.
Along the way, we’re going to go through a series of skill building tips I’ll use during construction of the project, including:
- Using Sketch-Up for planning, design, and layout
- Dovetail Jig Drawers
- Plywood Shop Doors
- Countertop Construction
- Air Compressor Upgrades
- Dust Collection System Design and Installation
So stay tuned and start thinking about projects in your shop that can help you stay organized, and more comfortable along the way.
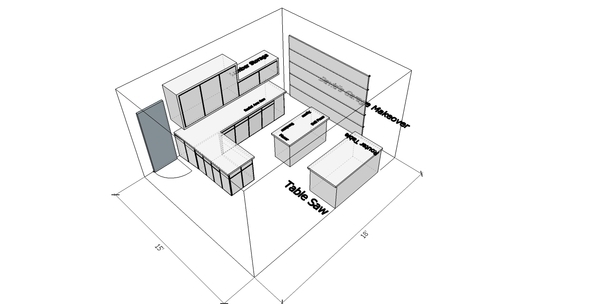
Here’s my SketchUp so far as I start to layout the general dimensions of the space, I’ll be adding tools in next to map out flow and cutting areas.