Old Fence, New Life: How to Upgrade that Ratty Fence
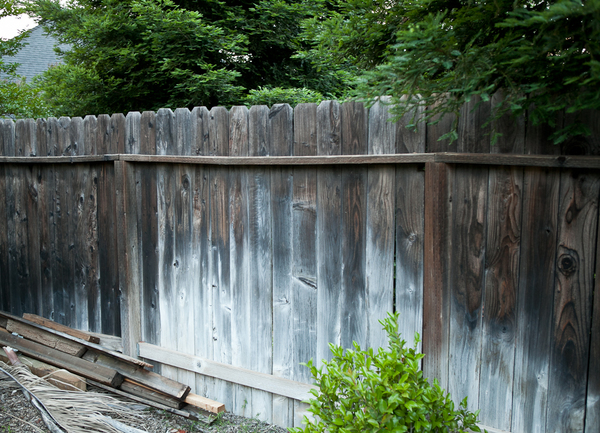 Fences are useful for many reasons, first, they keep the neighbor’s dog from leaving surprises on your patio, they also keep their unkempt backyard from being your primary view. While it’s generally a cheap, somewhat ugly row of dogeared wood, it doesn’t have to be. Here’s a simple way to upgrade that fence without breaking the bank. It’s an inevitable cycle when you own a home that the fence is going to need some TLC every few years. There’s also a pretty good chance you’ve put it off for a few years now. When a section of our fence blew down in a wind storm last month, we actually ignored it for a good three weeks before finally gearing up and replacing it.
The problem with replacing a portion of a fence, is that it looks way too new and polished compared to the older section. This means either springing for an entire new fence which takes plenty of time and money most of us don’t have lying around, or being content with a brand new section next to that weathered grey stuff.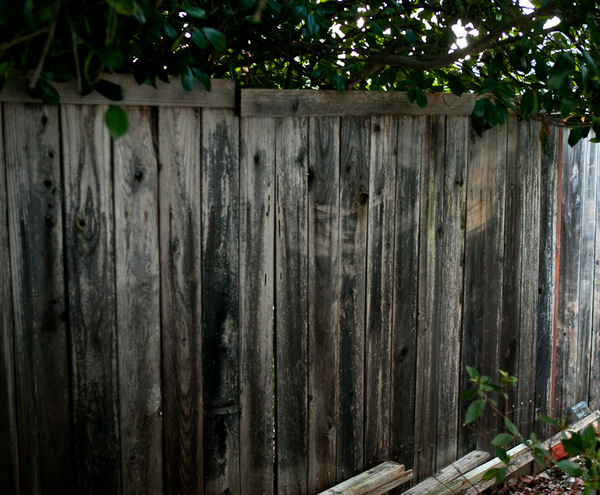
I didn’t like either of those options, so I sprung for something a bit more creative. Fashioning a new frame with treated posts and crossbeams, but using the original fence boards kept the overall look but polished it up well. And the total cost? About $30 per 8 foot section.
Here are the tools I used:
1. Makita 10 Inch Miter Saw $140
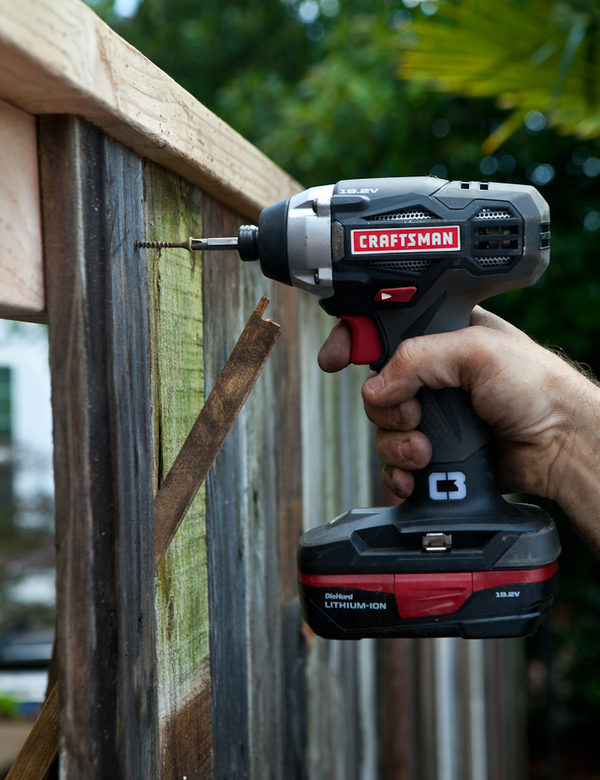
2. Craftsman 19.2 Volt Drill/Impact Driver Set $150
Materials (for each 8′ of fence):
1. Treated Wood 4×4 post (8′)
2. 1 #40lbs sack post hole concrete
3. 3 2×4 boards (8′)
Steps: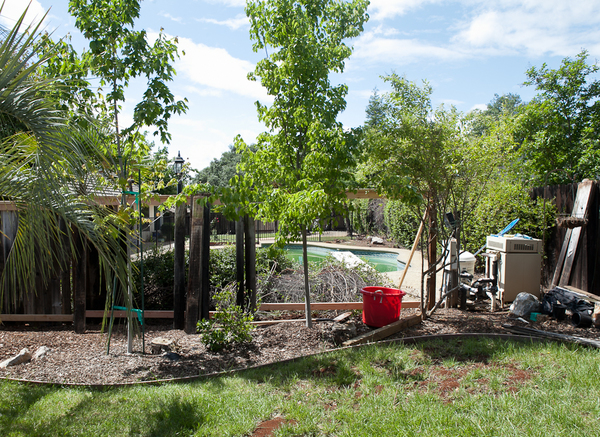
1. Remove Old Boards (Carefully) – The first step is to remove the old boards on the fence and stack them carefully for re-use. This is the time to remove all old nails or screws, and to separate any boards damaged beyond re-purposing. Because of the new design, there are a few extra boards, so don’t worry about losing a couple.
2. Cut-Off Old Posts – The old posts are likely rotted out and in the way. I cut them out with a chainsaw, but any saw and some patience will get them out. Cut them off at ground level and out of the way. Note: cutting treated wood is a hazard, use a mask and avoid prolonged contact with the sawdust.
3. Lay Out New Fence – The new fence layout is an important step. Using a string, stretch a tight line from one end to the other. This should be straight and level as a reference point for post installation. Once the string is in, measure out posts every 8 feet on center. This ensures all cross boards will fit tightly with just a bit of trimming.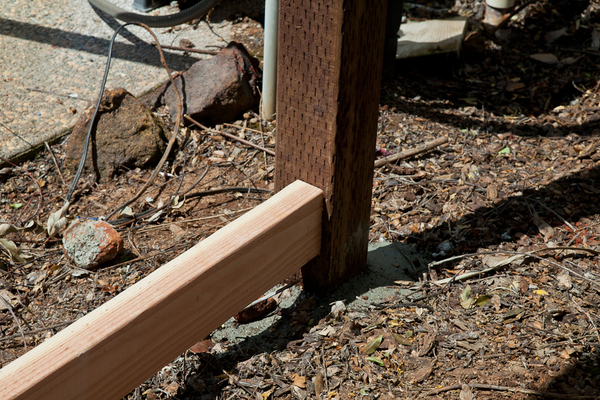
4. Dig Post Holes and Install – I dug all post holes 26in deep, adding 2in of gravel to the bottom to allow for drainage. The post won’t sit level in the hole without support, so I add two side supports as braces until it is level and plumb against the guide string. Mix the post hole concrete in a bucket and add to hole after placing the post, and double check that the post is still level and plumb.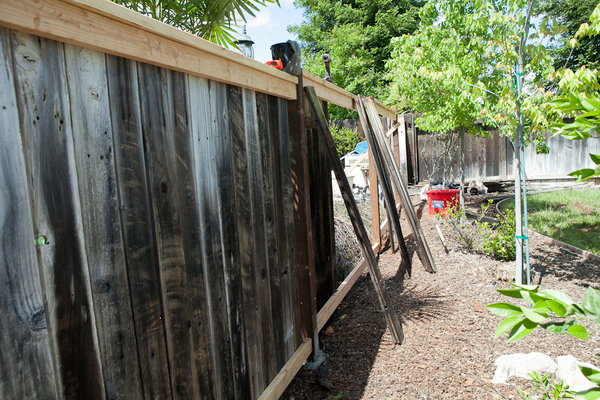
5. Add Support Boards – Cut the boards to length to tightly span the gap between posts. Then, using a pocket hole jig (or alternately metal support brackets), drill the boards and attach to the posts. Because of the slight slope, I stepped each section about 6in higher than the previous section.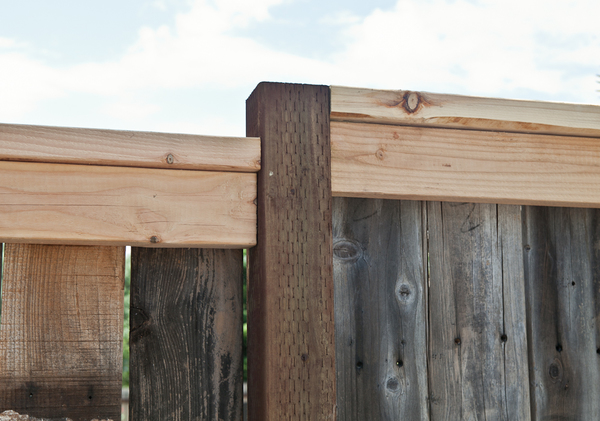
6. Add Finish To The Fence – This is a great time to add exterior finish to the fence. I used a red-tinted finish and protector I had left over from a redwood deck project last year. I didn’t do that first, and immediately regretted not taking the opportunity when I could before the boards were in the way.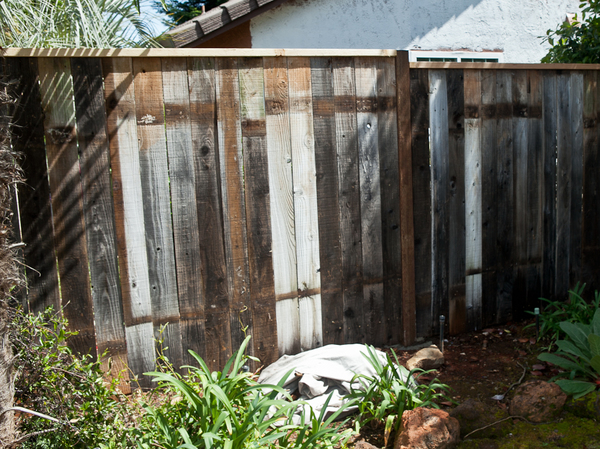
Above is one side of the fence, and below is the other, there really isn’t a bad side here.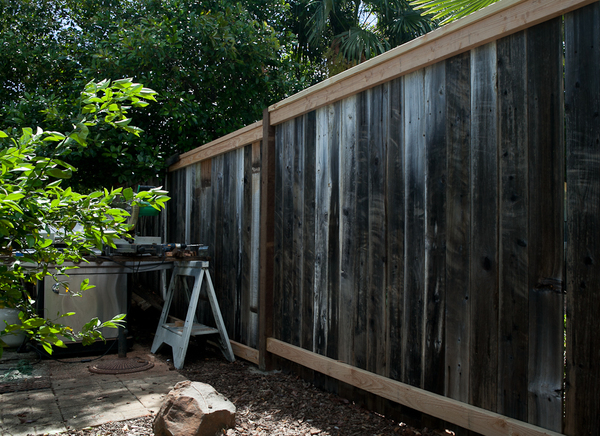
6. Finish With Old Fence Boards – This is where the new fence gets a set of old boards. I installed all of the boards with the dog-ears down, and trimmed off when I could. The key with re-claimed boards is to keep similar colors and weather marks close together or completely separate for a clean look.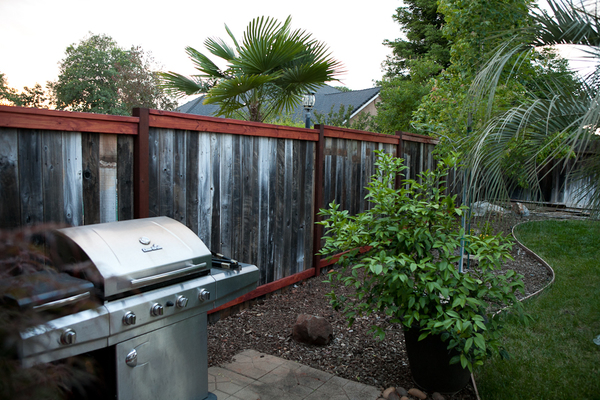
While the fence blends well with the rest of the surrounding original sections, it still turned out clean and a major upgrade to the yard.