How to Build a Floating Shelf for Less Than $10
DIY Floating Shelves Guide
Floating shelves can be built in a myriad of different ways and with any lumber you can get your hands on, but if you’re buying blind shelf supports for each shelf, the amount of money spent can add up quickly. Enter: this inexpensive and rustic option for building floating shelves will materials you likely have on hand in your shop. This is a relatively simple project and it can be completed in an afternoon for less than $10 in materials. There are three simple parts of the process to making these DIY floating shelves.
Tools and Materials
- 2 x 4 wood – most likely you have 2 x 4 scraps in your shop that will work
- 1 x 10 x 3’ lumber – my shelf was only 2 feet long, so I purchased three pieces but you can adjust accordingly
- Wood glue
- 2 ½” and 1 ¼” pocket hole screws or similar-sized deck screws
- Pin nails for nail gun
- Pocket Hole Kreg Jig
- Table Saw (could be replaced by circular saw)
- Miter Saw (could be replaced by circular saw)
- Cordless drill and driver
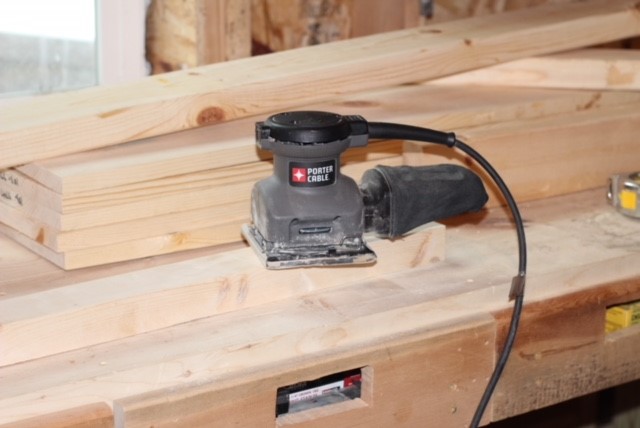
- Sander
- Nail gun and air compressor
- Level
- Clamps
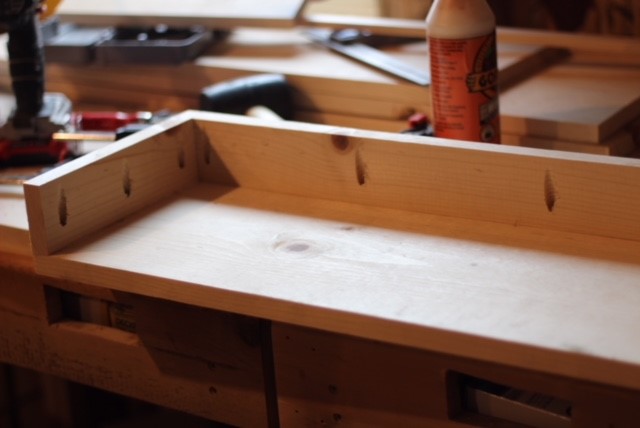
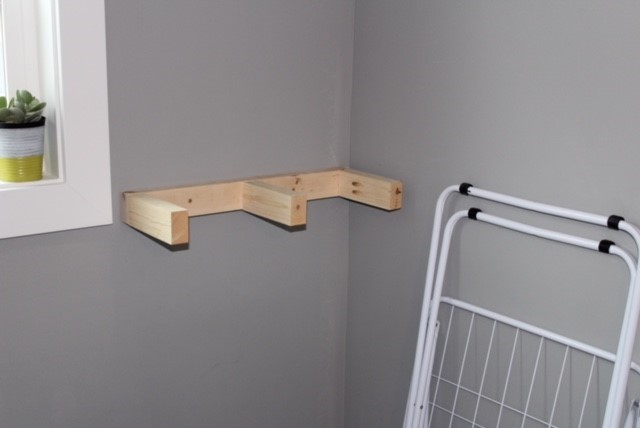
Part 1: Build a support frame for the floating shelves
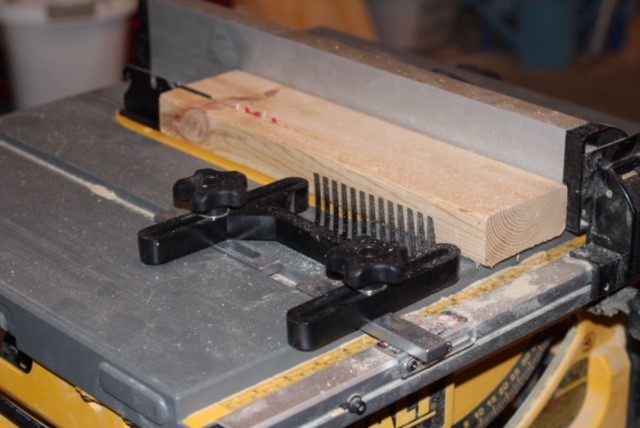
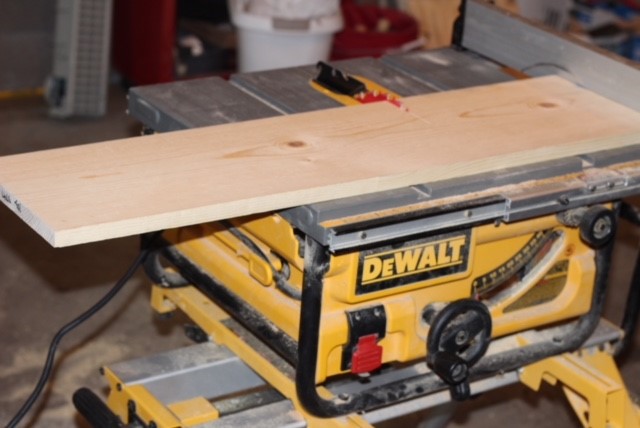
1. Rip a 2 x 4 down to be 2 ½ inches on the table saw. If you want a thinner shelf, you can rip the frame down more but I wanted a rustic and beefy shelf.
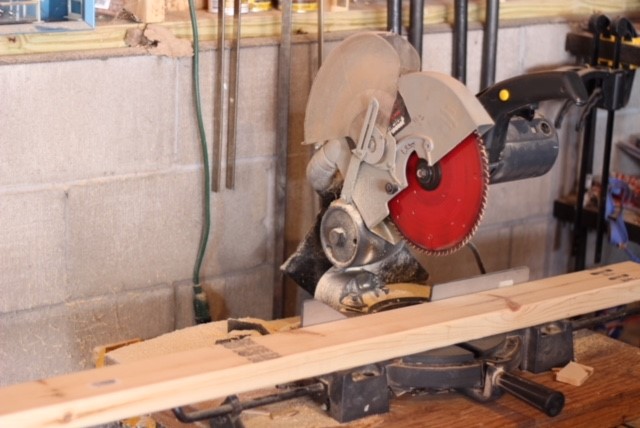
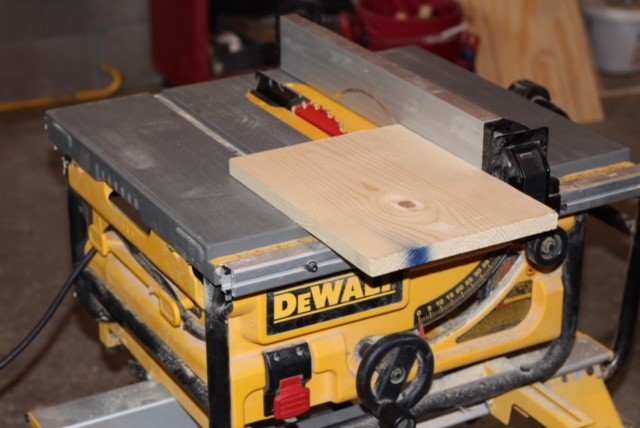
2. Use a miter saw to cut your ledger board. Your ledger board should be approximately ½ shorter than the inside length of your shelf so the shelf will easily fit into the shelf support frame. You can build the frame to fit more snuggly, but it makes it more difficult to slide the shelf on and I’ve found that it’s not necessary to have that tight of a fit.
3. Use a miter saw to cut the length for each arm of the support. Remember that the 1 x 10 shelf bottom and top are only 9 ¼ inches wide plus you will be attaching each support arm to a 2 x 4 that is actually 1 ½ inches wide. At most, you’ll want your support arm to be 7 ¾ inches but I cut mine at 7 ½ inches so I had a little bit of wiggle room (this does not mean your shelf will wiggle or move after it’s been hung).
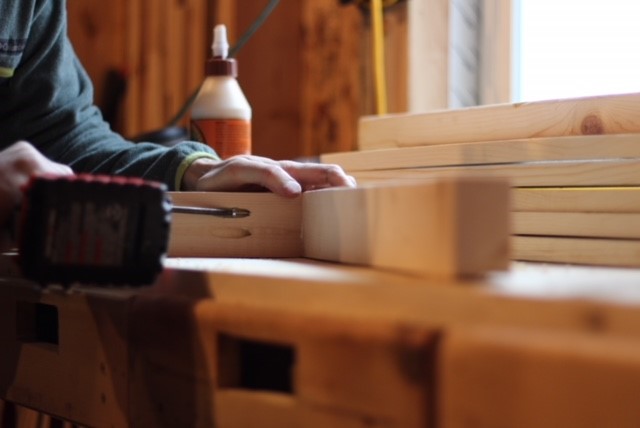
4. Attach the support arms to your ledger board. I used a pocket hole jig for this but you could easily use deck screws and attach the support arms by drilling through the back of the ledger board into the support arms.
5. After all the support arms are attached to the ledger board, sand down all the rough edges.
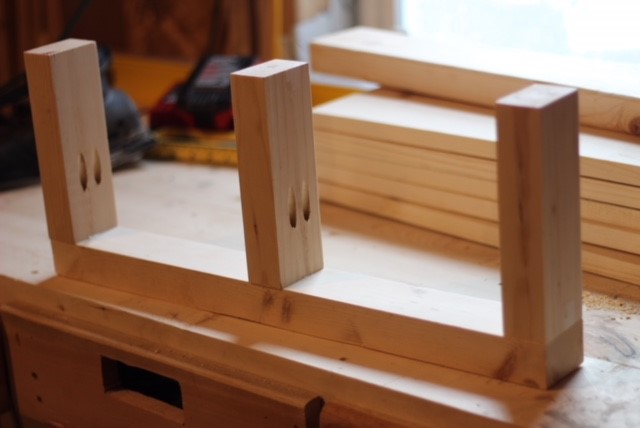
My finished shelf support frame looked like the above picture. There are several different variations that you can use, depending on the size the strength needed, but they will all resemble this basic support structure in some way, shape, or form.
Part 2: Build a Simple Box to Use as the Shelf
6. Cut the top and bottom of the shelf to the proper length in order to start building a simple box to be placed over the shelf support frame.
7. Rip the sides and front of the box to size.
8. Attach the front and sides of the shelf to the bottom of the shelf using wood glue and a pocket hole jig. You can also use glue and a pin nailer if you don’t have a pocket hole jig or if you’re looking to save some time. I like to use the pocket hole jig because it’s stronger and hides all nail/screw holes.
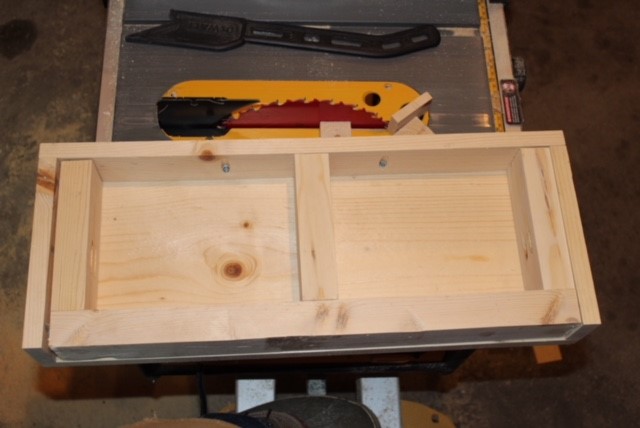
9. Make sure your shelf support frame fits inside the shelf. Obviously, a dry test run is a good idea so you know if everything fits before it’s mounted on the wall.
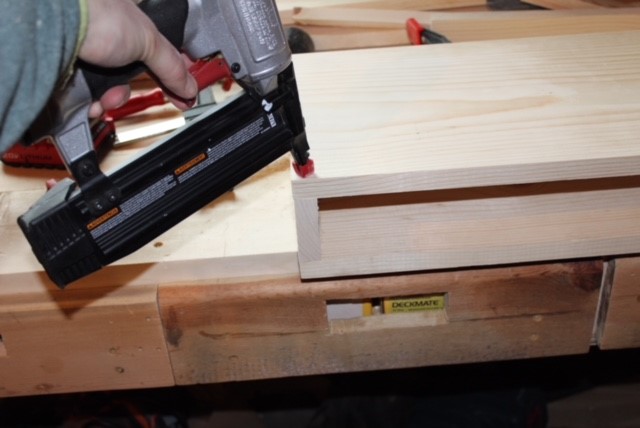
10. Attach the top of the shelf using wood glue and a pin nailer. Since using a pocket hole jig isn’t an option for the top, using wood glue and pin nailing the top is the best way to go.
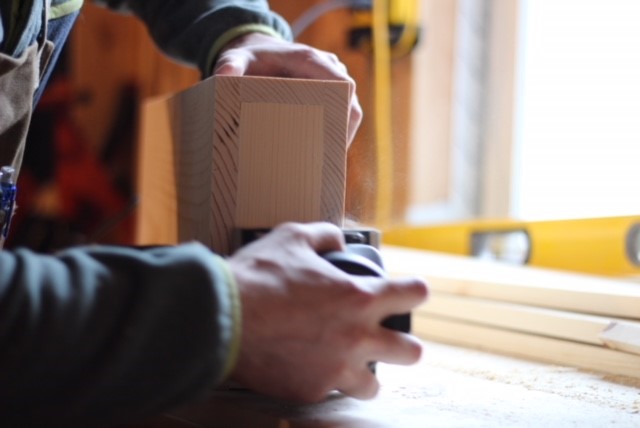
11. Sand the entire shelf with 120 grit until everything is flush and sand it to 220 grit for a smooth surface. You will not be running your hands over these shelves so anything beyond 220 grit is overkill in my opinion. Finish by using your air compressor to blow excess sawdust away.
12. Stain the shelf to match the décor in the appropriate room where your shelf will be hanging.
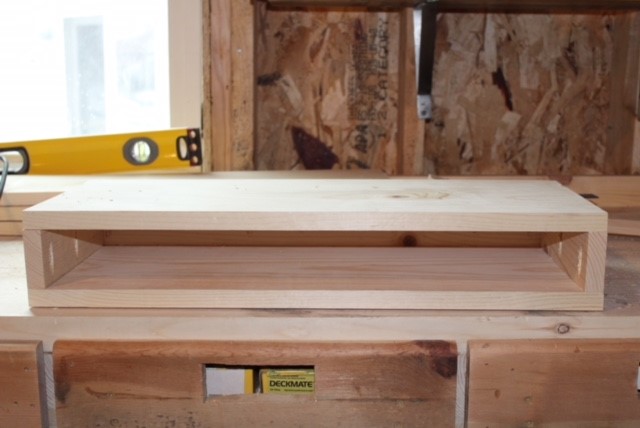
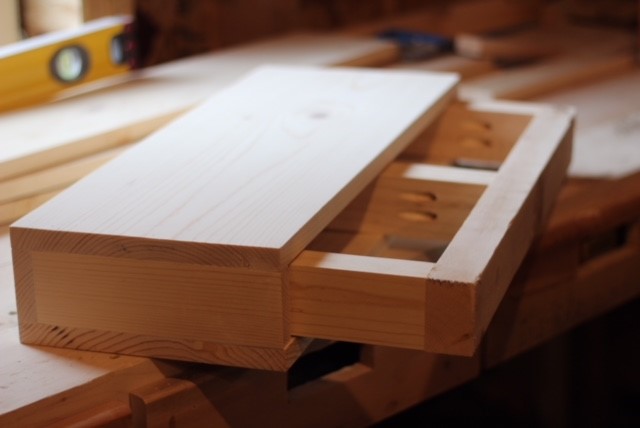
Your shelf should closely resemble the above picture. It’s a simple box that doesn’t require complex joinery so don’t overcomplicate it. I didn’t stain my shelf yet because I am in the process of redoing our mudroom (more to come on that later this year). I am waiting to see how the other areas of the mudroom end up so I can stain the floating shelves to fit the space. At this point, I am planning on using a Minwax dark walnut stain, but that could change as the project evolves. Also, I’m a little color blind, so making sure things match usually falls into my wife’s department of jobs to do and she has a great knack for making sure everything in the room ties together.
Part 3: Hang the Floating Shelf
13. Attach shelf support frame to the wall. I used a rare earth magnet to locate the studs behind the drywall so I knew I was screwing the shelf support frame into a stud (the magnet sticks to the wall when you find a drywall screw so you know that’s where your stud is). If you can’t find a stud or it’s not located where you want it, you can use a drywall anchor to help support the weight of the shelf.
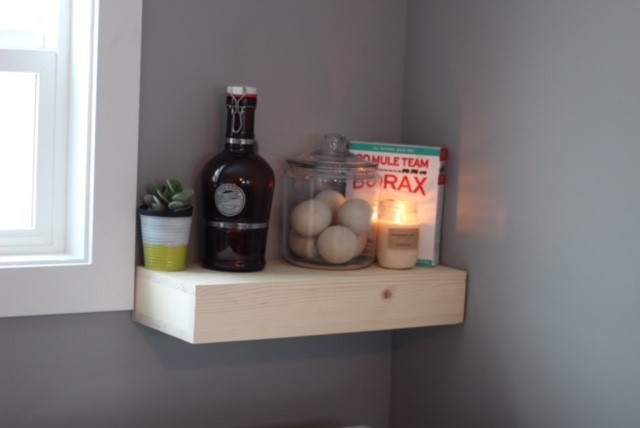
14. Slide on the shelf to the support frame. If needed, you can screw the top of the floating shelves to the support frame to ensure it won’t move.
That’s all it takes to make a floating shelf. Once it’s stained the grain and knots from the pine will really pop and stand out. These can work in any room in your house or garage and they can add much-needed storage without breaking your bank. Enjoy!


