How to: Make a Leather Strop to Help Sharpen Everything in Your Shop

My highschool workshop teacher had a saying that’s always stuck with me: Keep you edges sharp and your powder dry. While I don’t pay much attention to the dryness of my powder these days, I take a lot of interest in my tools. Sharp edges are safer, more precise, less frustrating, and just a lot more fun to work with. Here is one of my secrets to keeping them cutting at their best. You may have seen a strop in an old barber’s shop. It was that long, narrow piece of thick leather hanging on the wall. The barber would take his straight blade razor and slap it up and down the surface a few times before turning his attention to the lathered face of his customer. This simple movement was actually a critical part of keeping that blade honed, as it straightened out the microscopic curl of the metal edge.
Because that’s what happens when you’re tools get dull: the thin edge metal folds over or gets rounded off, and it needs to be dealt with before you ruin a cut, or push too hard and slice up one of your fragile fingers. I’ve had a simple piece of leather belt hanging in my shop for a while, and it works fine as a makeshift version of that barber’s strop. But this wooden strop project makes for a much easier way to keep my tools honed, and it looks better too.
The Materials

- Hardwood Backer Board – The main concern with the backer wood is that it will stay flat and level, so pick out a piece of hardwood like maple or walnut, and go with quarter-sawn if possible for stability. I sliced off a piece of walnut from a larger piece of stock on the band saw. MDF will also work.
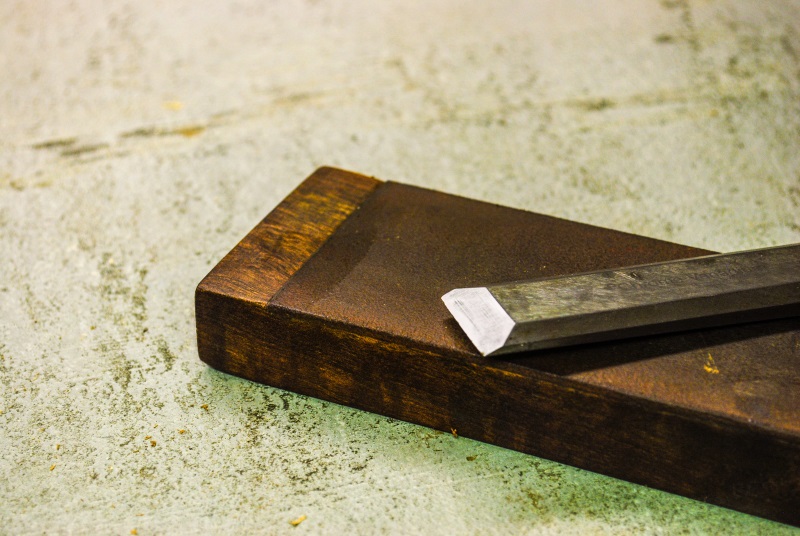
- Leather Strip – The leather for this project should be hard, untanned leather if possible. I picked up a piece from here ($15) that I have been using on a couple of projects for the past few months. The leather should be rough to hold on to a bit of honing compound, or you can sand smooth leather with a bit of 300-400 grit sandpaper to help it along.
- Glue – You can use standard yellow wood glue or 5-minute epoxy ($10) to secure the leather to the wood.
- Honing Compound – This gives the leather a bit of extra effectiveness. You can use either honing compound stick ($12), or a diamond paste ($8). Either way, it’s effective for months of normal use, so a little bit goes a long way.
The Steps
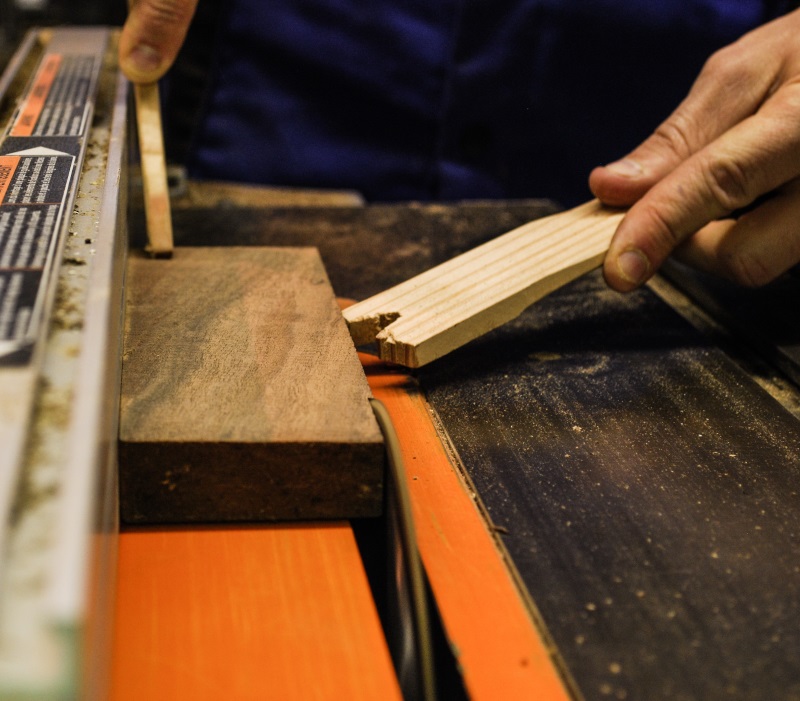
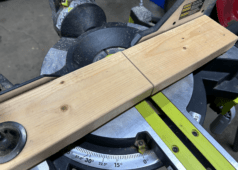
Cut and level the backing board – As I said earlier, it’s important that the backer board is stable and level. I sliced a 3/4″ thick slice of walnut off of a piece of stock wood, then squared it up on the table saw. To make sure it was level, I gave it a quick sanding on a sheet of 100 grit sandpaper tacked to my workbench.

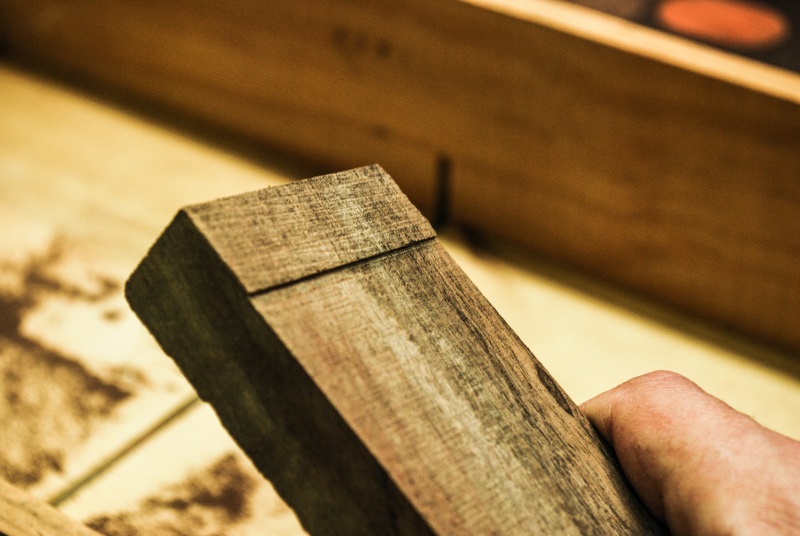
Make the notch – This is an optional step, as you can glue the leather directly to the backer board. But I wanted the piece to feel a bit more finished so I notched out the thickness of the leather from the board with a crosscut sled and stops on each side.
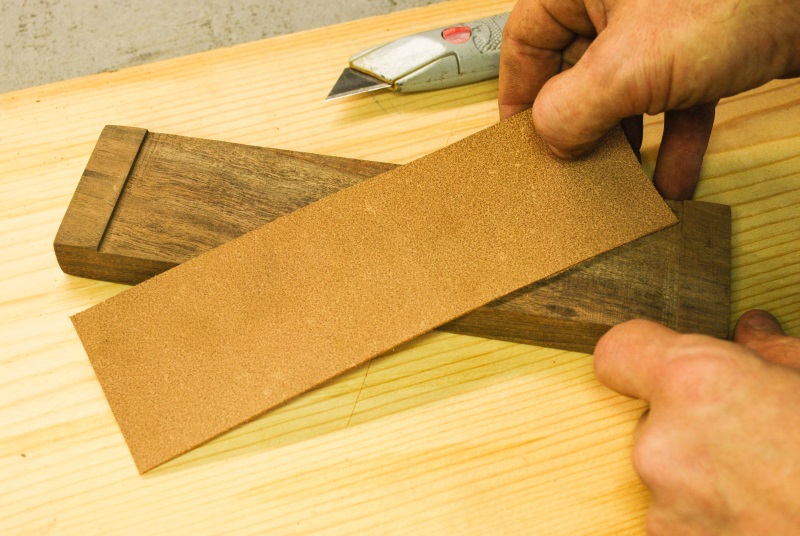
Cut the leather and secure – This is an important step, so use a fresh and very sharp knife blade for it. I cut the leather a bit larger than the finished dimensions and laid it in place to trim for a good fit. You’ll definitely know it if this piece is too small or crooked so take your time. Once I had the fit perfect, I used 5-minute epoxy (yellow wood glue works just as well) to secure the leather to the backer board.
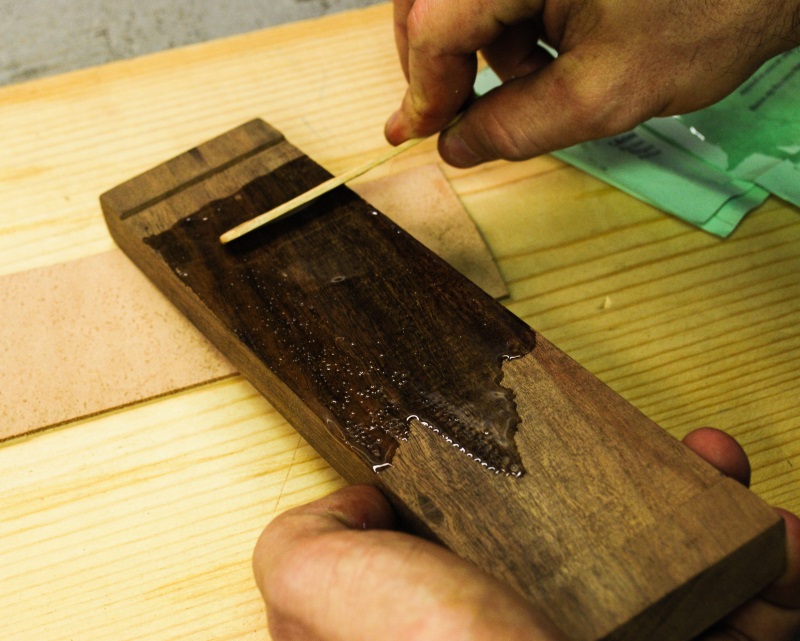
Finish with mineral oil – The entire piece, wood and leather should get a good coat of mineral oil to finish off the project. The mineral oil protects the wood and charges the leather so that the honing compound can stick and be effective. I hand rubbed the oil on the entire piece, then wiped it clean with a rag.
Add honing compound – The last step is a bit of honing compound or .5 micron diamond paste. If using a stick, rub the leather a few times from top to bottom. If using a paste, add a bit to the center of the strop and rub around the surface with a flat metal tool like a putty knife.
While a strop won’t replace the need for a good set of water or oil stones in the shop for routine sharpening, it will definitely extend the life of those edges during daily use. Once you find how effective they are, you may make a few extras so there’s always one in reach.