Zipper Repair: How to Fix a Broken Zipper
How to fix a zipper. An expert tailor guides us through this relatively simple repair.

There are two basic principles to the ManMade approach to style and dress: fit is everything, and buy high-quality, universal items that will last. In order to help you hold on to those investment items, and make sure they suit you as best they can, ManMade is happy to present our latest series: The DIY Tailor. This summer and fall, professional tailor and alteration specialist Danni Trester will teach us some basic sewing principles and easy DIY repairs that every guy should know.
Zippers are awesome inventions that make getting in and out of clothing easy and fast. However, when they break they often render the garment useless. But have no fear! Not all is lost when sliders or teeth go missing. A lot of times you can repair the zipper with a few simple replacement parts. Here are some of the most common instances where you can fix a zipper.
Three Common Broken Zipper Issues
- How to fix a Missing or Broken Zipper Tooth
- How to Fix a Broken Zipper Pull
- How to Fix a Zipper that Separates (Split Zipper)
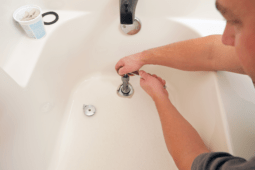
First, you’ll want to get some supplies. You’ll need a pair of pliers, a zipper repair kit/replacement parts, a small flathead screwdriver with a fine/narrow tip, a seam ripper, and a sewing machine or needle and thread.

How to Fix a Zipper with a Missing or Broken Tooth
1) One of the most common things to happen to jean zippers is teeth get pulled off the zipper tape. This usually happens at the bottom of a short zipper in low-rise jeans. There’s not much room to get the garment on and off, so it puts pressure on the zipper and eventually pops the teeth. But if the teeth come off the very bottom or very top of the zipper, they can be repaired. If teeth are missing in the middle of the zipper, they will need to be replaced. It should also be said though this is a temporary fix. The zipper broke because of improper fit or a cheap zipper. It’s likely it could break again, so if you’re intent on making it last, try to keep as much pressure off the zipper when you’re putting the garment on/off.

2) Move the slider to the bottom of the zipper.
3) Angle the slider and insert the opposite side of the zipper into the bottom of the slider.

4) Sometimes the edge of the zipper is a little thick to easily slide into the side of the slider. You can use a narrow screwdriver to push the edge in.

5) Once both sides of the zipper are in the slider, pull the tab to start the zipper. Sometimes it’s a little tricky to get it started, so wiggle the slider back and forth to get the teeth interlocking. Zip up the zipper further and push the tab down. This will lock the zipper and keep it from coming undone while closing the bottom.

7) Now we need to free up the backside of the zipper so we can close the bottom. On the inside of the garment, use a seam ripper or razor to cut the tack the holds together the placket layers.

8) To close the bottom, you’ll need a zipper bottom stop. If you get the zipper repair kit listed at the beginning, you should have a few of these in there. Most jeans use #5 zippers. (The number of the zipper refers to the width of the zipper teeth in millimeters. So a #5 zipper is 5mm across the teeth.) If you’re not sure what number you have, just measure across the teeth when the zipper is zipped and match that to the bottom stop.

9) Insert the prongs of the stop in the space at the bottom of the zipper between the teeth and the old zipper stop (aka the spot on the zipper that’s empty.)

10) Flip the garment over and make sure the prongs are entered correctly. The stop should be perpendicular to the zipper at a 90° angle.

11) Crimp the prongs with a pair of pliers to secure it.


12) Using either a sewing machine or by hand sewing, re-tack the stitching you took out in step 7.

13) You did it!

How to Fix a Zipper with a Broken Pull
Another common thing to happen is the stops at the top of the zipper fall or get pulled off, and then the slider comes free. In order to put the slider back on, you’ll have to open the bottom of the zipper. It’s not possible to put the zipper back on from the top. If you did, you would reverse the direction of the zipper and it would be useless.

2) Cut the thread tack on the inside like in step 7 of the first demo.

3) Using pliers, pull off the stop at the bottom of the zipper.


4) Slide one side of the zipper into each side of the slider. The slider should be upside down as you’re looking at it. If you do it with the zipper tab facing you, the zipper will function inside out.

5) Keeping even tension on both sides of the bottom of the zipper, gently pull the slider to start the zipper. Be careful not to pull too hard so that you don’t pull the slider off the top again.

6) Zip up the zipper most of the way and push the tab down to lock the zipper while you’re closing things up.

7) Like in the previous demo, close the bottom of the zipper using a prong stop. Butt the stop against the last tooth leaving no gap.

View from the inside:

After the crimp:

8) Because the top stops were originally missing, you’ll need to put some on to keep the slider from coming off again.

9) Place the stop over the edge of the zipper tape directly on top of the first tooth.
10) Crimp the stop with pliers. Make sure you get a good clamp on it and crimp it a couple of times if you have to.

Do the same to the other side.

11) Re-tack the inside as in step 12 of the first example.

You did it!
How to Fix a Zipper that Separates (Split Zipper)
You’re in a hurry to get to work and OH NO!, you’ve suddenly slammed the zipper of your favorite hoodie in your car door! Now the zipper splits when you zip it and you’re sad. Perk up! As long as the teeth or the tabs at the bottom aren’t damaged on the zipper, you can fix it with no problem. This process can also be used if the slider pulls off the top of the zipper, the pull tab falls off the slider, or teeth pull off near the top of the zipper.
***If either of the little tabs at the bottom of the zipper comes off the zipper tape, there is no way to repair this. They are put on the tape as part of the manufacturing process. If the tabs on the bottom of the zipper or teeth in the middle/bottom of the zipper come off, you will have to replace the zipper.***
1) Pull off the stops at the top of the zipper. Generally, you replace both so that the stops match one another. But if you only have one stop/don’t care about it matching, you only need to remove the stop on the side of the zipper that has the square tab at the bottom.


Square tab at the bottom:

2) Once the stop is off the top, take off the slider. If you look at it sideways, you’ll notice the gap in between the slider isn’t totally straight. This is why the zipper is separating when you zip it. It’s not properly engaging the teeth. It’s best to replace this slider as a new one will last longer. But if you’re in a bind and don’t have another slider (if you have a weird size zipper and can’t find a replacement), you can bend it back and see if it works. This would be a temporary solution as now that it’s been bent, it can bend back easily. It’s best to replace the slider if you can.

3) Generally, most zippers have a number on the back that tells you what size it is. Sometimes there are numbers but they’re not the usual zipper sizes (width in mm) but an arbitrary number the manufacturer made up. In this case, the zipper says 5, which is correct. Most jacket zippers are #5. Heavyweight zippers like in motorcycle jackets and leather coats can be #7, #8, or #10. Most jackets either have metal or molded plastic zippers, but some can also have coil zippers. So it can be tricky to get the right one. You may need to try out a few different sizes if the original slider doesn’t have any markings on the back. You could also take it to the fabric store and match it up to the zippers they have. If there’s a match, just take the slider off the new zipper and use it for your garment (after you’ve purchased it!)

3) On the side of the zipper with the square tab at the bottom, angle the slider so the edge of the zipper tape goes in the slot at the side of the slider. Again, sometimes the edge of the tape is thick, so if you need to push the tape with a screwdriver feel free. Wiggling also helps.

4) Once the edge is all the way through the slider, it should slide freely up and down. Try to zip it up as you normally would and check that the teeth are interlocking and it’s not splitting. If the zipper still splits, you need a different size slider. Or if you tried to re-bend the slider, it may still be slightly bent, and it needs to be bent more, or it is bent too far.
5) Once you’re sure the zipper is working properly, put stops on the top. Both sides should have a stop, but especially the side with the square tab at the bottom. This is the side that the slider is always on, so if you don’t have it zipped and there’s not stop at the top, the slider will come off easily, like in the laundry.

6) You did it!

Danni Trester is a tailor with over 11 years of experience. She is currently located in Rochester, MN. In addition to alterations, she is a designer and shoemaker.