Brewed, Part III: Brew Day – How to Make Beer at Home

This is the third part of our four part series on homebrewing beer. So, with everything collected and prepared, it’s time to get the fire going and begin the first batch. Here’s a peek at what I’m brewing. Vanilla Bourbon Barrel Porter
Ingredients:
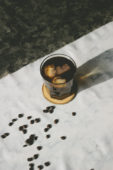
10# Pale Malt – 1# Black Malt – 4oz Crystal 30 – 2oz Honey Malt – 1.5oz Northern Brewer Hops – 1pkg British Ale – 1# Charred Oak Chips – 1 Bottle of Bourbon – 2 Vanilla Beans
In this recipe, we’re working in a few additives to the fermentation process which will give a bit more variety into the brew. The smoked bourbon barrel flavor is brought in with Charred Oak Chips soaked in Bourbon, and a few split vanilla beans add a clean vanilla finish. Adding items during the fermentation process brings up the risk of contamination, so don’t dive into this complexity for a bit until the process is a bit more familiar. Those come in near the end, so let’s rewind and begin there.

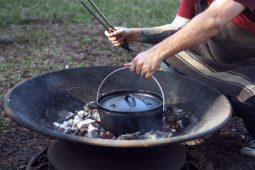
- Heat the Water – Fill the brew kettle up with bottled or filtered water to the pre-boil volume, which is usually quite a bit more than the final 5 gallons thanks to the copious amounts of steam that will be billowing off the boil. This huge kettle will take a while to heat up to approx. 160 degrees. It’s important to keep the temperature from spiking too much past the 160 mark because heat above 180 can alter or kill the enzyme activity in the boil. Once the water reaches a steady 160 degrees, it’s time to add the grains.

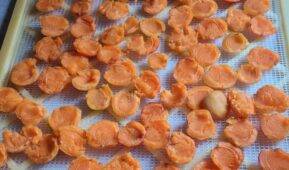
- Adding the Grains – While the water boils, all of the grains should be put into the steeping bag. Make sure the bag is tied off to avoid any loss of grains into the boil. Adding the bag to the kettle displaces quite a bit of water, so be sure to be careful when SLOWLY lowering it into the heated water. Steeping the grains will take 60-90 minutes depending on the recipe. As the boil rounds out, it will be time to lift out the incredibly heavy steeping bag and set it aside after rinsing (called saccharification). On a side note: Check out this recipe for turning spent grains into flour. At this point, bring it all to a boil.

- Bringing it To a Boil – Once the water reaches a boil, add hops to the kettle. Keep it boiling for about 60 minutes, being sure to avoid boil-over. If using dry yeast, this would be the time to re-hydrate it by mixing with a cup of warm water and giving it about 10 minutes to get settled in. Sometimes two hops are used in recipes; the second is usually added during the last 15 minutes of the boil. The second hop generally is where the aroma character is added to a beer.

- Cool Down and Transfer – After the 60 minute boil, the last step is to cool down the entire brew as quickly as possible to avoid contamination. Since the boil step is over, any bacteria or other funk that make it into the mix at this time can completely ruin the batch. Anything that touches the beer must be sterilized. An optional item to cool it down is a wort chiller, which is essentially a long copper coil that’s lowered into the pot that pumps water through the tubes and cools down the entire pot within about 15 minutes. If not using a chiller, keep it covered for an hour or so, then get ready to transfer once room temperature has been reached. After this is the time where the yeast will be “pitched”. Add the yeast and gently stir to incorporate. Grab a strainer and slowly pour the beer through it into a food safe fermenting bucket (or glass carboy). Another option is to siphon the beer over using a sterilized hose with siphon lock. Try to minimize the amount of froth involved as this can introduce too much oxygen to the fermentation process which can produce off-flavors in the finished product due to extended yeast activity (while oxygen is important to the primary yeast fermentation, there can be a complicated issue regarding the oxygen bonding with the materials and releasing far too late in the fermenting process). Once the transfer is made, seal the lid on tight and set on the airlock. The airlock is a seal that allows air to escape but doesn’t let it back in. Put a bit of vodka into the tube to provide a sterilized seal.
Be sure to store the fermenting beer in a dark area with stable temperatures around 60-65 degrees (a closet works well). With that, we’ll wrap up this part of the series and look ahead to the final article – Fermenting and Bottling your first homebrew.