How To Remove Popcorn Ceilings Easily and Safely

What are Popcorn Ceilings?
Popcorn ceilings, also known as stipple ceilings, cottage cheese ceilings, and acoustic ceilings, rose to prominence through the 1950s but had been around since at least the 1930s. To the modern aesthetic, they are eyesores but they were originally used because they offered a bright, white appearance, they could hide any imperfections in the ceiling’s design, and they also had acoustical dampening properties.
Health and environmental concerns
Not only do most of us consider popcorn ceilings unattractive today, but they also have a history of being unhealthy. The inclusion of asbestos created that popcorn texture all the way through the 1980s. Undisturbed asbestos laced on the popcorn ceiling is not dangerous. But, when you start removing it, the toxins begin to mix with the air you are inhaling, lodging in your lungs. Test the presence of asbestos in your popcorn ceiling with an EPA-approved testing kit from a home improvement store or contact a professional testing service.
Since the 1980s, the textured property has resulted from Styrofoam, but neither one of these is particularly good for the environment. For that reason, you may be tempted to get rid of your popcorn ceiling in favor of something a little more smooth and streamlined.
Steps to Remove a Popcorn Ceiling
If you’ve never done this before, it can seem like a daunting task. But as we’re about to see, this is actually a fairly easy job, and it doesn’t require a lot of expensive supplies or hard to master techniques.
1. Test for asbestos
The most important thing to do before taking on this DIY project is to find out if you are dealing with an asbestos popcorn ceiling or not. If there’s a chance someone installed the ceiling prior to the early 1980s that this is a serious health risk.
In order to find out for sure what you have, you need to get your ceiling tested. Any professional asbestos removal company should be able to come out and perform a test for you. If you Google asbestos removal in your area, as well as companies that deal with things like mold removal, they should be able to perform the service for you. If that’s not an option, you could purchase a kit to handle this on your own. You can buy asbestos test kits at local hardware stores or order one from Amazon.com.
This is a time-consuming step, to be sure, but it’s absolutely necessary if there’s a chance that you have asbestos in your ceiling. Asbestos is a serious health risk that can cause cancer, so you don’t want to be taking any chances.

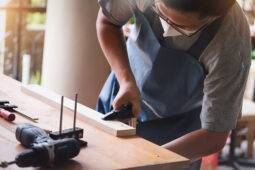
2. Gather supplies
You’re going to need a few tools to get this job done properly. Take the time beforehand to assemble the following:
- Putty knife or scraper
- A secure and steady ladder
- A file or a grinder
- PPE including goggles and a dust mask
- A tarp or a drop cloth for your floor
- Painter’s tape
- A dustpan
- A large spray bottle or garden sprayer with 2 tablespoons of dish soap and water

3. Tarp the area
There is simply no way to do this job without making a mess. You’re going to need a tarp or drop cloth that covers the entire floor that is going to be under you while you work. Make sure you use some painter’s tape to secure the tarp to the wall all the way around the room.
If the tarp isn’t secured with painter’s tape, then you can guarantee you’re going to end up with dust and debris from the ceiling underneath that tarp at some point in time. That means you’re essentially going to be cleaning up the floor two times. It’s best to avoid that by taping down the edges first.
The added bonus of using something like a cheap, disposable drop cloth from your local hardware store is that after you peel the tape off to remove it from all around the edges of the room, you can simply bundle up all the garbage and toss it out.

4. Test a small area
Once you’re sure that it’s safe to remove your popcorn ceiling, it’s a good idea to test a small area to see just how secure your popcorn is. Pick a corner of your ceiling and use your scraper to try to scrape off some of the textured parts. One of two things is going to happen. Either it’s going to come off easily and leave you a smooth ceiling underneath, or it’s not.
If the texture comes off easily, then you’re in luck and this should be a simple job. If it doesn’t come off easily, then you’re going to need to use your squirt bottle or sprayer to dampen the texture to help get it loose. It should absorb water quickly, after which it will be much easier to scrape off. The dish soap will help loosen it as well.

5. Work in small sections
You’re going to work in small sections. If you try to saturate the whole ceiling before you start scraping, you’d have to continually go over the dry parts to wet them again. Save yourself the time and frustration by working in small, easy-to-manage segments.

When you’re dealing with a scraper or putty knife, you need to be wary of gouging. The edges of putty knives and scrapers are notorious for digging into the ceiling underneath your popcorn. You can help avoid this by rounding off the edges of your scraper ahead of time. Use a file or a grinder to make them smooth and round.
If you do notice you’re taking chunks out of the ceiling, don’t worry about it too much. It can all be fixed at the end when the popcorn is removed and you’re ready to do some sanding.

6. Scrape the ceiling
Dampen your manageable area of the ceiling and use your rounded putty knife or scraper to scrape it off smoothly and evenly. With the floor properly tarped, it’s all going to fall harmlessly onto the ground where you can easily collect it later. If you feel steady enough, keep a dustpan in your free hand to collect the large chunks of debris and make the cleanup easier.
Make sure you have some PPE for this part. Even damp, you’ll be making a lot of dust and dislodging chunks. Looking up from a ladder means you’re in a prime position to get this stuff in your eyes, nose or mouth.
Even if we’re not dealing with asbestos, this isn’t the kind of stuff you need to breathe in or swallow. Keep a mask and goggles on the whole time you’re working.
Scraping tips:
- Think Long, Even Strokes. Trust us when we say, scraping wildly back and forth won’t get the job done faster.
- To remove a popcorn ceiling, glide your paint scraper along the surface. Use long, even strokes and move in one, continuous direction.
- Don’t Rush! Like any DIY job, it’s crucial not to power through. If you’re not careful, you’ll gouge or damage the drywall underneath.

7. Sand and prime the ceiling
Once you have removed the entire texture portion of the ceiling, you’re going to need to smooth things out. A good 220 grit sandpaper should get the job done for you pretty well. A simple hand sander will do, or a sanding pole.
Remember to look for gouges ahead of time, though. If your scraper dug into the ceiling or the corners and edges of your walls, use some drywall filler before you sand. That way everything will be smooth and even when you’re done.
You may need to get off the ladder and take a look from the floor at a different angle to tell for sure if you have any noticeably uneven spots.
8. Cleanup
Once you feel confident about how well sanded and smooth everything is, it’s time for some cleanup. Use a damp rag or even a sponge mop to clean off the entire ceiling. This is going to get rid of all the dust from your sanding and leave you with a clean surface for painting.
Popcorn Ceiling Replacements and Alternatives

So, you have cleaned and sanded your ceiling and now it’s a blank canvas. You do have a couple of options here depending on how you want to go about things. The plain, straightforward option is to simply paint the ceiling. This is what most people would do, and it’s likely the easiest choice as well.
There’s definitely nothing wrong with painting your ceiling at this point. It will look nice, clean, and professional. But if you’re in the market for something a little more artistic or exotic, you do have some choices as well.
- Beadboard. This is an option that many homeowners choose for either covering or replacing popcorn ceilings. Traditionally beadboard is used on the lower portion of walls, it was essentially a kind of wainscotting. In recent years and has become a trendy choice for ceilings.
When installed, beadboard looks like thin planks fixed side by side. The effect is like a pinstripe and adds sophistication without overpowering the rest of the room. It’s a fun mix of traditional and modern at the same time.
- Tin tiles. Another trendy option that mixes modern esthetics with a more traditional material is pressed tin tiles. You can either go with real metal tiles or some convincing alternatives that provide the same look.
If this sounds a little daunting, know that you can find faux tin tiles for just a few dollars per square foot. Also, if tin isn’t your cup of tea, you can get metallic tiles in copper, brass, brushed steel, chrome, and more.
- Wood. If you’re looking for something that’s a little more organic and warm, you can’t go wrong with wood. This treatment can be applied as-is or with the addition of some molding to set it off.
The best part about using wood for this job is the diversity. From pale, untreated pine to a rich red oak or a dark stained walnut, you can find a wood to match any decor or color scheme. Whether you want warmth, brightness, or something else, there’s wood that will work.
- Mineral Fiber Tiles. These can be used to mimic the style of plaster tiles, and sometimes even pressed tin. They install easily and can provide more of an elegant, old-school charm that many other ceiling treatments aren’t able to match.
- Drywall. For some homeowners, this is the best option when it comes to fixing a popcorn ceiling. In fact, many times this can be an alternative to actually taking off the popcorn ceiling. You can install drywall right over the popcorn and only lose a couple of inches at most.
If your popcorn ceiling contains asbestos and you’re worried about contamination, this may be a good alternative to the process of scraping and replacing it. It’s quick and easy and will leave you with essentially the exact same ceiling you would have had after a scraping.
Although scraping your popcorn ceiling is the best way to get any potential contamination from your house and leave you with the cleanest surface, you don’t always have to do it. You can apply any of these alternatives we just listed above over the top of the popcorn ceiling to simply cover it up without scraping.
The Bottom Line
Popcorn ceilings definitely had more than their fair share of time in the limelight. If you want to update your home for your own enjoyment or to get ready to sell, cleaning up those popcorn ceilings doesn’t have to be a hard job. The most important thing you need to remember is to be safe and find out if yours contains asbestos or not before you start any work.
With just a bit of preparation and some affordable materials, you can have that old popcorn ceiling removed in just a couple of hours and leave yourself with a clean and clear surface ready for any treatment you like. Show us your popcorn ceiling before and after photos by sharing them with ManMade on Facebook or Pinterest.